
There’s nothing quite as disheartening as taking the time to grow enough food for the winter, only to find that it decayed after just a short a while, and cannot be salvaged. From apples and pears to potatoes and squash, this guide will teach you exactly how and when to harvest and store your different crops, so that they’ll provide you with a steady supply of food throughout the dark days of winter.
Apples
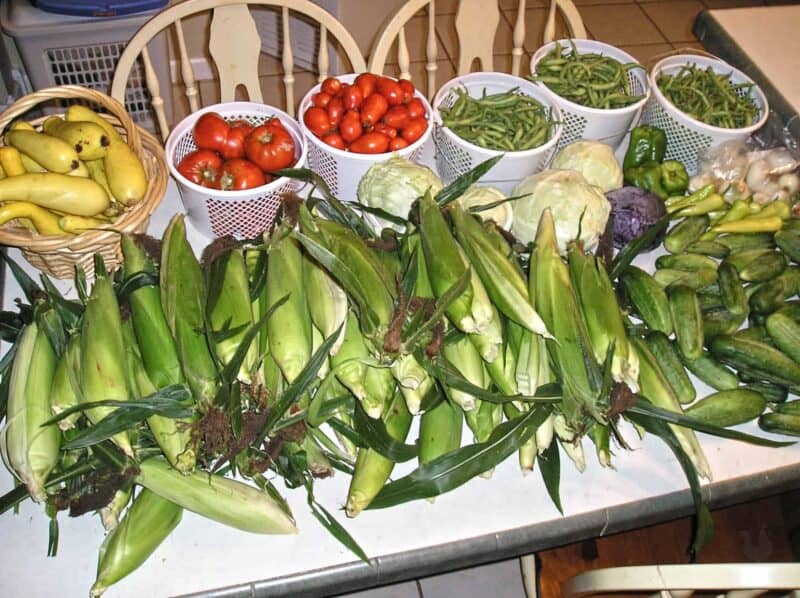
It’s usually quite easy to tell when apples are ready to be harvested, as their color deepens significantly, and they come away from the tree easily when picked. If you’re still not sure, a quick taste test will help you to decide whether or not your apples are ready to be harvested.
While you are harvesting, make sure that you handle the apples extremely carefully. Any bumps or bruises will prevent them from storing well…
You should also make sure that you label everything if you are growing more than one variety of apple, as different cultivars have different requirements when it comes to storage:
- Early Varieties – these should be consumed soon after picking, as they do not generally store very well
- Mid-Season Varieties – while these can be stored for a few weeks, they taste best when eaten soon after being picked
- Late Varieties – these tend to be the best for storing, and are usually picked later on in the year
Once you’ve harvested your apples, it’s time to inspect each of them for damage, as this will not only tell you which apples shouldn’t be stored, but will also help you to prevent these problems from happening in the future. You could also try dehydrating them, and using them to create a variety of fruit leathers.
When it comes to storing your healthy, whole apples, this is best done in trays that have been filled with either shredded newspaper or straw. You could also wrap individual apples in newspaper or tissue paper before placing them into trays. This will help them to keep for longer, but does make it harder to check them for damage.
The fruit should be stored in a single layer, and individual fruits should not be touching each other.
Place the trays somewhere cool, dry, frost-free, dark and well-ventilated, but make sure that they’re still easily accessible, as you will need to keep checking them for signs of rot. Whenever you see one apple showing signs of rot, remove this immediately before it affects the others.
In terms of an average shelf life, late varieties of apples can usually be stored for several months.
Beans
Let’s continue with green beans, which are the young, unripe fruit from a variety of bean plants. Once these have been harvested, they are best off being consumed quickly. In order to store them in your refrigerator for a few days, snap the stems off and then snap the beans into the size that you need them to be.
You also have the option of freezing them. You would need to blanch them first, and then place them into an air tight bag before freezing. When it comes to dry or dried beans, also known as shell beans, the process is slightly different…
These beans are usually harvested as late in the season as possible, after the plants have dried up and the beans rattle in their pods when shaken. While you are harvesting, make sure that you separate the plants that you want to save seeds from. These plants should be your best ones, and should have matured relatively early.
Once you have picked the plants, it is time for some threshing, which basically means getting the beans out of their pods. This is an easy job that can be done by hand, simply by squeezing the pods open.
After this is done, clean your beans of any debris, using a screen and a hairdryer to speed things along a bit.
Now, chances are, even if your beans look completely dry, they probably aren’t, which means that they will need to be dried further. To test them, bite down on one. If it is soft, it needs to continue drying, but if it feels firm to your bite, you can then move on to the storage stage.
If you need to further dry your beans, keep them in a shady spot that has a humidity of around 20% to 40%. This is extremely important. However, if you do not have access to the ideal drying conditions, you can mix your beans in with some dried rice, as this will help to absorb moisture, and therefore lower humidity levels.
To dry your rice, place it on a cookie sheet and put this into the oven until it is bone dry. Place it into an air-tight jar, before wrapping your beans in some pantyhose and placing this into the jar with the cold dried rice. You will need to leave it for at least two weeks.
Once your beans have fully dried, you can then store them in an air-tight container, away from sunlight.
In terms of shelf life, dried beans are best eaten within their first year, but some studies have found that dried beans can be stored for up to 30 years. If you do end up storing them for a few years, keep in mind that they will continue to dry out over time, meaning that, the older they are, the longer they will take to soak and cook.

Berries
For many homesteaders, fresh berries are one of the highlights of the summer months.
Sadly, berries rot very easily, and can only really be refrigerated for a few days. To ensure that they last for as long as possible, refrigerate them as soon as you can, and do not wash them until just before you plan on eating them, as this can cause them to break down. You should also be as gentle as you can when handling them, as they bruise so quickly.
While berries are best enjoyed fresh, they do freeze quite well, and this means that you will have a taste of summer on even the darkest days of winter. In the freezer, berries will last for up to 12 months.
If you do not want to freeze your berries, you could try preserving them by turning them into a jam or a pie filling. Or you can check out some of our jam recipes:
Broccoli
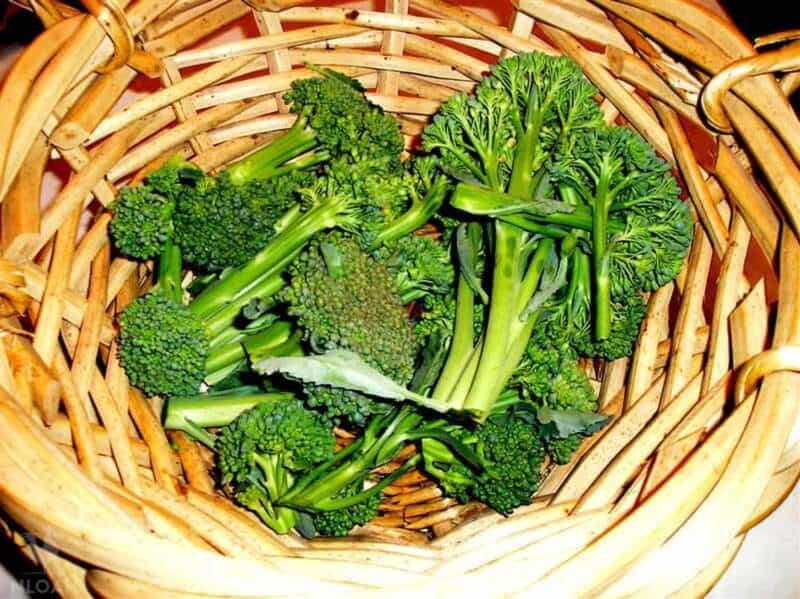
If you want to harvest your broccoli at its peak, then you only have a window of opportunity of around three to four days. After this, the buds will begin to separate and produce yellow flowers. The best time to harvest broccoli is early in the morning, while the temperature is still cool, as this helps to improve its flavor.
As you likely already know if you have grown broccoli before, the little spaces in between each floret make for the perfect hiding spot for everything from caterpillars to aphids. To clean these out, mix a couple of drops of white vinegar in with some warm water, and then place the broccoli into this for a few minutes, until any bugs have floated to the surface.
The best way to store broccoli is in the refrigerator, and it will last for about two weeks this way. However, keep in mind that the longer you store broccoli, the tougher the stems become, and the more nutrients it loses, making it worthwhile eating it as soon as you can.
Of course, blanching and freezing your broccoli is another option, and this will enable you to store your broccoli for up to six months.
Brussel Sprouts
Brussel sprouts take several weeks to fully form, with the sprouts appearing at the bottom of the plant before the top. Once the sprout heads are firm and green, as well as a couple of inches in diameter, they are ready to be harvested.
However, don’t forget that with Brussel sprouts, you also have the option of leaving the plant as is. Not only are these plants extremely cold-hardy, but mature sprouts will keep on the plant for quite a few months. In very cold climates, gardeners will often bury their plants in hay or leaves in the fall, pulling off sprouts as and when they need them throughout the winter.
If you do want to pick them all, they will still store for several weeks in the refrigerator, as long as you prepare them correctly. Pick each sprout off the stalk, but make sure that you leave the outer leaves intact.
Place them into a bowl, or any container that does not have a lid, before refrigerating. While the outer leaves may wilt quite quickly, the inner part of the sprout will stay protected, and the outer leaves can easily be removed before cooking.
Storing sprouts in the fridge for several weeks is a great way to make your harvest last, but do remember that their flavor and texture will diminish as time passes. You do also have the option of freezing them…
Cabbage
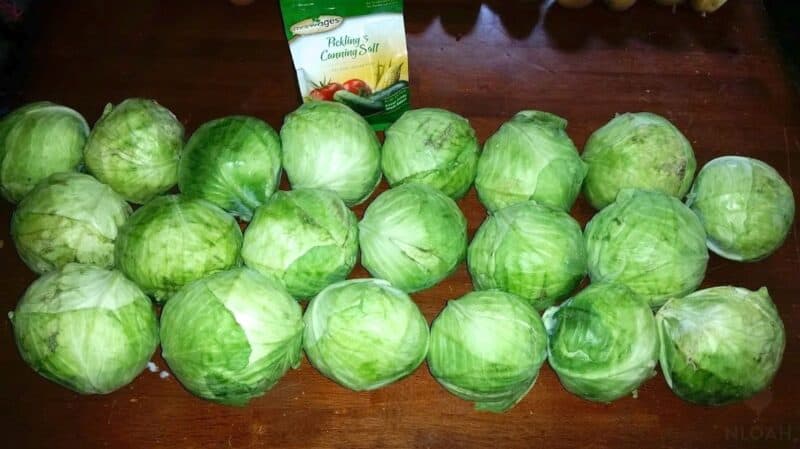
There are so many cabbage varieties out there that it is difficult to say when a cabbage is ready to be harvested, as this all depends on the specific variety that you are growing. While some continue maturing for weeks in the garden, others must be harvested much quicker, so it would be worth doing a bit of research on the variety that you have chosen.
Cabbages are quite cold-hardy, meaning that you can leave them in the garden through the winter months. However, if you are expecting a particularly deep freeze, cover them over with some straw, or a light fleece, to give them some extra protection.
When you do harvest your cabbages, you can either pull up the entire root, or cut off the head, leaving the rest of the stalk to produce new, smaller heads. Make sure that you do not wash the cabbages, and you will also need to leave the outer leaves on any of the plants you are going to be storing.
Make sure that you only store the cabbages that have outer wrapping leaves, as this will help to protect it. If any heads are missing these leaves, or have been bruised and damaged in some other way, set these aside for later.
When it comes to storage, cabbages need somewhere that is cold but moist – requirements that can sometimes be difficult to meet. While a refrigerator is great for providing the cold temperature, this also dries the cabbage out.
A better solution would be a root cellar, although you will still need to pay attention to humidity. You can either place the heads in rows, on shelves, leaving a few inches of space in between each one, or use a string to hang the heads from the ceiling. If you need to keep them on the floor, make sure that you wrap the heads in several layers of newspaper.
Another storage option would be a garden pit, which does not take long to make.
Here are the quick steps to follow:
- Dig a hole about two and a half feet deep
- Line the hole with straw, as this will provide some insulation
- Place the cabbages in the hole, with their roots facing upwards and their heads downwards, and then cover them with more straw
- Place a tarp over the top of your pit, as this will allow for easy access during a heavy snowfall, or a deep freeze when the ground has frozen over
- Each time you need some cabbage over the winter, open the tarp, take a head out, pack in some more straw, and then cover it all back up again
When stored in the right environment, your cabbages should keep for about four months. Make sure that you check on them regularly, and always remove any heads that have started rotting, or turning yellow, as soon as you spot this.
Now that you have safely stored your cabbages for the winter, it is time to do something with all of the cabbages that were not fit for storage.
Preserving cabbage is extremely common, so you have quite a few tried-and-tested options available to you:
- Make sauerkraut, which is a fermented food that requires nothing more than cabbage and salt
- Shred and then blanch the cabbage, before freezing
- Shred and grate the cabbage, and then dehydrate it. Use as a healthy snack, or add to soups and stews
- Make kimchi, which is, in a way, the Korean version of sauerkraut, with lots more spices and flavors
Cauliflowers
Just like with broccoli, cauliflower needs to be harvested when its head is full, but before the florets begin to separate and produce flowers. Use a sharp knife to cut the cauliflower at its stalk, but make sure that you leave it with some leaves around it, as this will protect it and prolong its lifespan. You should also be careful when handling it, as cauliflowers bruise so easily.
Once the cauliflowers have been harvested, many folks choose to soak them for about 20 minutes in some salt water. This helps to clear the heads of any cabbageworms and other bugs that may be hiding inside, meaning that you will be able to store the cauliflower for longer.
In terms of actual storage, cauliflowers do not have the longest shelf life.
You can hang your cauliflower upside down in a cool place, spraying them with mist every day, if you want to store them for about a month. You could also freeze, can, or preserve your cauliflower harvest in some other way.
Celeriac
Also known as celery root, celeriac is a great vegetable to grow, as it is easy to store and will keep for around four months.
If you have an area of your garden that does not freeze over in the winter months, you have the option of transplanting your celeriac to this spot, and keeping it in the ground over the season.
Once the roots are about three to four inches across, they are ready to be harvested, and should be cut at the stem, close to the root, with a sharp knife. You will probably need to use a garden fork to lift the roots out.
However, pay attention to the weather when harvesting celeriac. The flavor hugely increases after it has been exposed to a light frost, but you need to make sure that you harvest it before a proper freeze.
After harvesting your celeriac, lightly brush off any dirt that is clinging to the roots, but do not wash it. The small bits of dirt that remain will actually help the root to stay fresher for longer. Store it in a cool, moist place for up to four months.
Celery
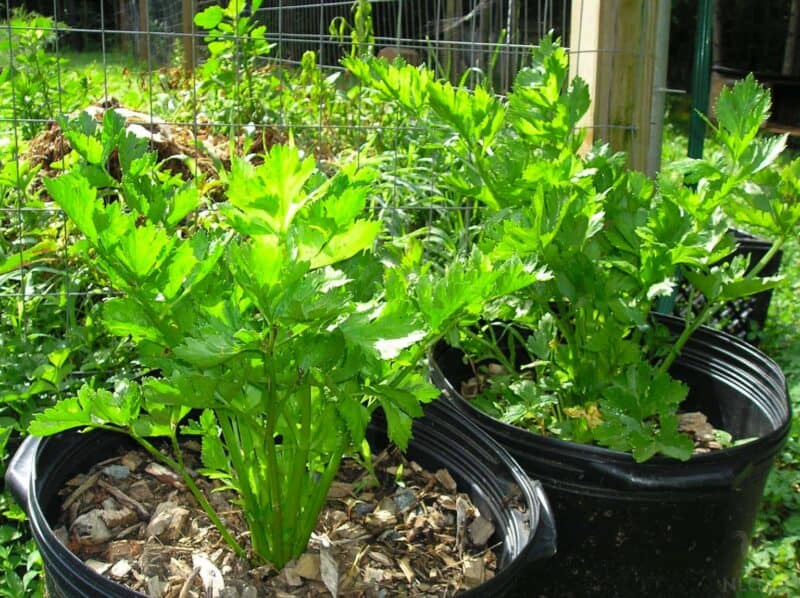
You will have likely been harvesting individual stalks of celery throughout the summer months, and, in the fall, before it becomes too cold, you will need to harvest the whole plants.
Of course, in the short term, celery can be stored in the refrigerator. If you leave the leaves on, celery will last for a few days, but, if you remove the leaves, it will last for a couple of weeks.
However, long term storage is always much more beneficial to the homesteader, and, with celery, you have a few options available.
The first method involves creating a trench, about a foot wide and two feet deep. Then, pull the celery up from its roots, trying to keep the root structure as intact as possible. Place these into the trench so that they are standing upright and close together. Water the roots, and then place a board over the trench, covering this with soil and straw. If you keep the roots moist, but the stalks and leaves dry, the celery should last for up to two months.
Alternatively, you can also store celery in a root cellar. Use a similar method to the one mentioned above, in which you keep the roots moist but the rest of the plant dry. This celery will keep for about a month.
Here are a few other options when it comes to preserving celery:
- Dehydrate both the stalks and leaves – the leaves can be crumbled into a powder and used as a spice
- Freeze it, but be aware that this makes the stalks extremely limp, and should only be used for cooking rather than eating raw
- Make a mirepoix, which is a mix of carrots, onions and celery. This can be frozen and then used as an easy base for soups and stews
- Pickle them
Cucumbers
Cucumbers tend to mature at quite different times, and you need to harvest each one as it does, rather than waiting to harvest them all together. If you leave your cucumbers on the vine too long, they will end up turning bitter, and will be full of seeds.
However, do not forget to identify a couple of your finest cucumber specimens to save some seeds from, and leave these to continue maturing on the vine.
For the rest of your cucumbers, cut the fruit off from the vine using a sharp knife, taking care not to pull and tug at the vine itself. Some homesteaders believe that soaking the cucumbers in a tub of cold water for 20 minutes, immediately after harvesting, will help to extend their shelf life and preserve their sweetness.
Cucumbers need to be stored in a cool spot, or in the vegetable crisper in your fridge. They will last for about a week this way. Make sure that you do not store your cucumbers near apples or tomatoes, as these fruits will release a hormone gas that will causes the cucumbers to turn yellow.
Of course, cucumbers can be preserved in the long term through pickling, which, if you have grown pickling cucumbers, is likely the reason you have chosen that variety. There are so many different pickling recipes out there, and it is worth experimenting with a few until you find one that you really love. If you want to try something more exotic, this Asian-Style Pickled Cucumber recipe is simple and tasty:
Eggs
Homesteaders will often end up with so many more eggs than they know what to do with in the summer months, but then be hit with an egg drought through the winter.
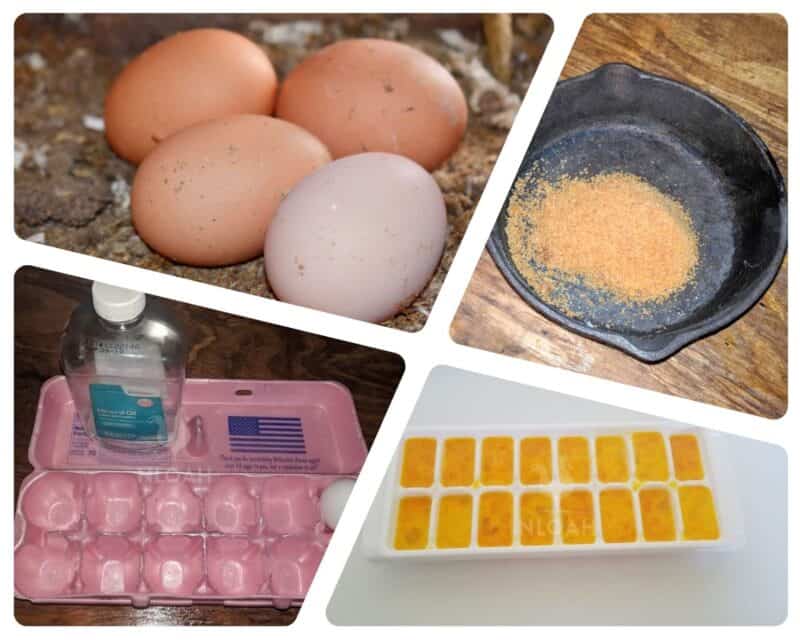
In terms of storing eggs as they are, you can do this for about two or three months, keeping them at temperatures below 55 degrees Fahrenheit. However, keep in mind that the humidity level needs to be around 75%. If it is too high, the eggs will rot and go moldy, but, if it’s too low, the eggs will dry out.
You should also never wash your eggs if you are going to be storing them as they are. They are covered with a protective coating to protect the porous shell, and, if you wash them and remove this, bacteria will enter the egg much more easily.
Here are a few other ways in which you could preserve your eggs for storing:
- Crack them open, stir them gently to incorporate, and then freeze in an air-tight container. You could also freeze in ice cube trays to make it easier to access small portions
- Coat them with mineral oil
- Freeze them
- Bake eggs in muffin tins, wrap in plastic and then freeze
- Pickle them – these are best eaten within four months
- Dehydrate them
Another method that was traditionally used to preserve eggs is soaking them in a waterglass solution. Waterglass is sodium silicate, and the food-grade version needs to be purchased. It works by preventing bacteria from entering the egg and causing spoilage, and enables you to keep the eggs relatively fresh for up to nine months.

Garlic
Garlic is usually ready to be harvested sometime around mid-summer, although this does depend on when you have planted it. Once the tops turn yellow/brown, and begin to die back and fall over, then that is a sign that your garlic is ready to be harvested and preserved. Make sure that you do not delay the harvest for too long, as this will cause the bulbs to open up, and they will not store for as long.
Once harvested, lay the garlic out and give them a quick spray with a hose, as this will help to clear them of any clumps of mud.
It’s then time to cure your garlic, meaning that you need to place them in a warm and dry spot, with good ventilation. The curing process takes several weeks, and you will know that they have been cured when the stems are completely dry all the way through.
The next step is cleaning, but this is optional. While it is quite time-consuming, cleaning the bulbs enables you to inspect them for any bugs or signs of damage. If you decide to do it, the process varies depending on whether you have grown a hardneck or a softneck variety:
- Hardneck – cut off the stem, leaving around 1 to 2 inches at the top of the bulb, and then trim off the roots as close to the base as you can get. Then, remove just the first outer layer of skin.
- Softneck – leave the stem on, and peel the outer layer off, all the way up the stem. This will make it easier to braid later on.
After cleaning your bulbs, it is time to sort through them, so that you can decide which ones you want to store, which ones you want to save for seed, and which ones you want to further process.
When it comes to saving garlic for seed, choose the largest bulbs with the most uniform cloves, and make sure they don’t have any damage at all. Place these in a warm, dry place for a few weeks, until you are ready to get planting.
With the remaining bulbs, separate out the bulbs that are undamaged. It does not matter if they are small or misshapen, as they will still taste incredible. If they are a hardneck variety, store these in a dark and dry place, or, if they are a softneck variety, braid them and hang them up, somewhere dark and well-ventilated.
Check out this video to learn how to braid softneck garlic:
It is important that you do not allow your garlic to be exposed to too much light and warmth, as this will cause the bulbs to begin sprouting in the winter.
You will now be left with all of the bulbs that are damaged in some way, whether this may be due to rotting or insects. These can be further separated into three piles:
- Bulbs that are too damaged to salvage – the only place for these is the compost bin
- Bulbs that only have a small amount of damage – these can be used in the kitchen, as long as you use them soon
- Bulbs that no longer have their protective paper coating – these will need to be preserved in some way, whether you mince and freeze them or dehydrate them and turn them into garlic salt.
Herbs
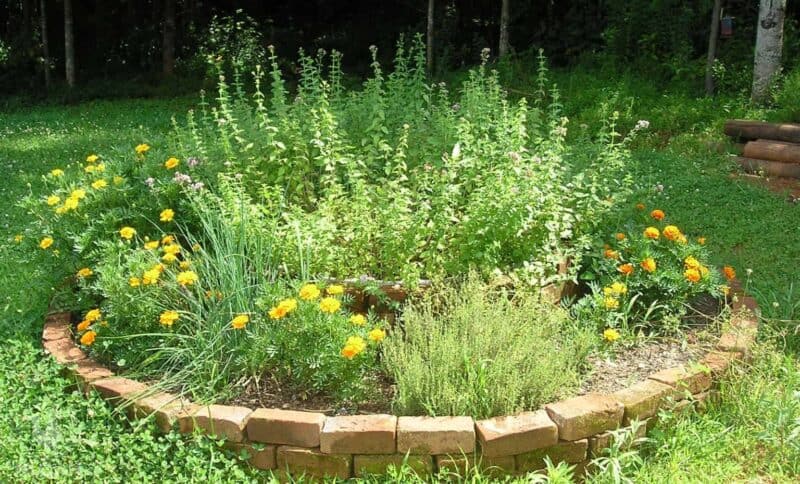
There are so many different herbs out there, and, no matter which ones you may be growing, it is unlikely that you will be able to harvest them all at the same time. However, it is important that you do some research into how to harvest the specific herbs that you are growing.
For example, annual herbs can be cut back to around 75% and still recover, whereas with perennial herbs, you should only remove around one third of the growth at any time.
In terms of storing your harvested herbs, you have a few choices:
- Dry them, either by hanging them in a well-ventilated area or in a dehydrator, before crushing them into a powder and storing in an air-tight container
- Add herbs to oil or butter to preserve them, while flavoring the oil and butter. Make sure the herbs are completely dry before adding them, so as to prevent bacterial contamination
- Preserve them in vinegar, pairing powerful herbs with milder vinegars
- Chop them up, mix with oil to form a paste, and then freeze. Alternatively, chop them up, place into ice cube trays, fill with water, and then freeze
- In a jar, alternate layers of herb leaves and salt, pressing firmly in between each layer until the jar is full. You could also mix 6 tablespoons of herbs with one cup of ground salt in a blender, and then store in an air-tight container

Jerusalem Artichokes
Also known as sunchokes, Jerusalem artichokes can be quite an invasive plant, so it does not take long for homesteaders to end up with more than they can eat, or give away.
While these tubers can be harvested from late summer onwards, they do tend to get quite a bit sweeter after a few frosts, making it worth delaying harvesting until then. But, do not wait until the ground freezes.
Once the first few frosts arrive, the tops of the sunchokes will die back. This is the time to harvest them, by loosening the soil and lifting the tubers with a fork. This is much easier to do when the soil is dry.
Once you have lifted some tubers, you will need to separate them from their roots and their stems. This can be quite a lengthy process, as everything will be extremely intertwined, and you need to be careful as the skins of the sunchokes cut really easily.
Jerusalem artichokes need to be put into cold storage, such as a root cellar, within three to four hours after harvesting, so do not harvest more than you can handle in one go.
Before putting them into storage, remove the tops, but leave about half an inch of crown.
To help prolong their shelf life, place the tubers into plastic bags, or containers that you have filled with damp sand. They need a humidity of around 85-95%, as well as a temperature of around 32 degrees Fahrenheit.
If you can provide them with these ideal conditions, your sunchokes should keep for up to five months.
Leafy Greens
Leafy greens do not keep for very long, which is why many homesteaders tend to stagger their sowings of these seeds, so that they have a constant supply to take them to the colder days of winter.
In terms of greens such as lettuce, these are best eaten within a couple of days of harvesting.
However, there are some greens that do freeze quite well, such as spinach and chard, but these will need to be wilted or cooked before being frozen.
You could also try dehydrating your greens, choosing the most nutritious varieties to do this with. You can then mix these powders together to create your very own homegrown green powder, adding this to meals that could do with a nutritional boost.
Leeks
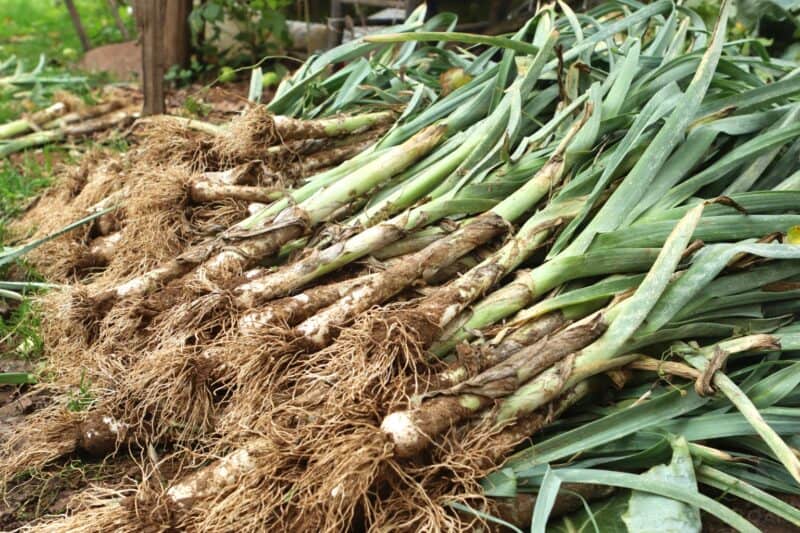
Your leeks are ready to be harvested when the white stem is at least three inches long. In terms of the thickness of your leeks, this can vary greatly depending on the varieties you have planted, but make sure you harvest them before the base begins to bulb out.
Leeks are a crop that can be overwintered quite well, and this is the best way to ensure a steady winter supply, even during heavy snow. Right before the cold weather arrives, hill up the soil around each leak, and then cover them with a layer of mulch. If this would work well for you, it would be worth growing certain specific varieties of leeks next season, which have been bred to be overwintered.
If you decide you want to harvest all of your leeks, use a garden fork to reach underneath the roots and dig them up, rather than pulling them up with your hands. Shake the plants, and use your hands to brush off as much soil as you can.
You then have a couple of options:
- Dig a shallow trench and place your leeks in this, keeping them close together. Pack them in with soil, firming this down well. The leeks will end up re-rooting, and will stay fresh for several weeks
- Place some soil into a box and then stand your leeks up in this. Store the box in a dark, cool place, and your leeks will keep for just over a month
Another alternative is to freeze your leeks, as these make for a great addition to soups and stews. Simply wash them thoroughly before drying them, slicing them, and placing them into air-tight containers or bags in the freezer.

Onions
If you want your onions to keep for as long as possible, then knowing when to harvest them is key. While onions can be harvested as soon as they reach a good size, you need to wait until the leaves begin to turn brown at the edges and flop over before harvesting them for storage.
Once the leaves have begun to look like this, wait for a week before digging them up from the ground carefully with a fork.
After harvesting your onions, it is time for the curing process. This is important as it dries the onions’ outer skin out, meaning that the bulb will be less prone to mold and rot.
To cure your onions, simply spread them out, in a single layer, on a clean and dry surface. Take care when handling them, as you do not want to bruise any of them. As the onions cure, their necks and skins will wither and tighten around the bulbs, with the whole process taking between two to four weeks. You should be able to easily tell when the necks are completely tight, and there is no more moisture left in the stems.
Once your onions have cured, it is time to sort through them.
Set aside any onions that have bolted or flowered, as well as those that show signs of decay or rot, or have any soft spots. Bulbs that have especially thick necks may also contain moisture, and are best set aside at this stage. These bulbs are not suitable for storing whole, so will need to be processed in some way. Whether you turn them into a caramelized onion jam or chop them up and freeze them, there are plenty of options.
With the onions you have left, use a pair of scissors to trim the roots off at the bottom of each bulb. You should also trim down the leaves, so that there is just an inch or so of them left. However, if you are going to braid your onions into an onion string, leave two to three inches of stem behind.
Onions need to be stored in a cool, dry and well-ventilated area, away from any direct sunlight.
The easiest way to store them is by placing them in net bags, wire baskets or plastic crates, which should then be placed up off the ground. It does not matter if they are touching each other, so long as there is plenty of room for good air flow.
Alternatively, you could braid onion strings, which is actually quite a practical, as well as an attractive, way to store them. This video will show you exactly how to do this:
When it comes to the shelf life of your stored onions, this all depends on the variety that you have grown. Mild onion varieties will only keep for a couple of months, whereas pungent varieties will keep for up to a year. In fact, the more pungent an onion is, the longer it will keep for.

Pears
Many people do not realize that pears do not actually ripen very well on the tree, as this just results in a soft and mushy texture. Instead, you need to pick your pears while they are still green and relatively firm. You will know that they are ready to be harvested when they come away easily from the tree.
Once you have harvested your pears, they need to spend some time in cold storage, even before you ripen them. This needs to be no warmer than 30 degrees Fahrenheit, and should have a humidity of around 85-90%.
If you have grown Bartlett pears, you can keep them in these conditions for two to three months. If you have grown winter pears, they will keep in cold storage for up to five months.
When you are ready to ripen a pear, take it out and leave it to sit at room temperature. The ripening process takes between four to ten days, depending on the variety that you have grown. This video will explain how to perfectly ripen a pear:
Alternatively, you also have the options of freezing them, or turning them into a pear jam, pear sauce or pear butter.
Peas
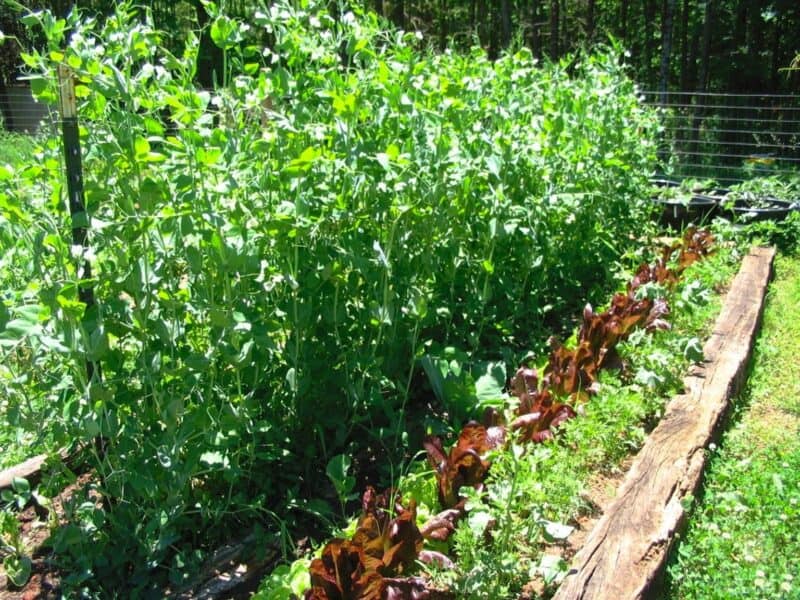
There’s nothing quite like the taste of freshly picked peas, which is why they are always best off consumed soon after being harvested.
However, if you would like to preserve some of your pea harvest so that you can enjoy it throughout the winter months, here are a few ideas:
- Blanch them and then freeze them
- Shell them, blanch them and dehydrate them
- Can them
Peppers
Peppers, whether they are sweet or spicy, cannot be stored in their fresh form for very long, so it is up to you whether you harvest them when they are still mild and green, or red and fiery.
If you store your freshly-harvested peppers in the fridge, at temperatures of around 40-45 degrees Fahrenheit, they should last for around three weeks.
Alternatively, you could try preserving your pepper harvest in other ways:
- Slice them and freeze them
- Dehydrate them, or string them together and dry them in a warm room for 3 weeks
- Cook them into salsas, chutneys and jams
- Pickle them
Potatoes
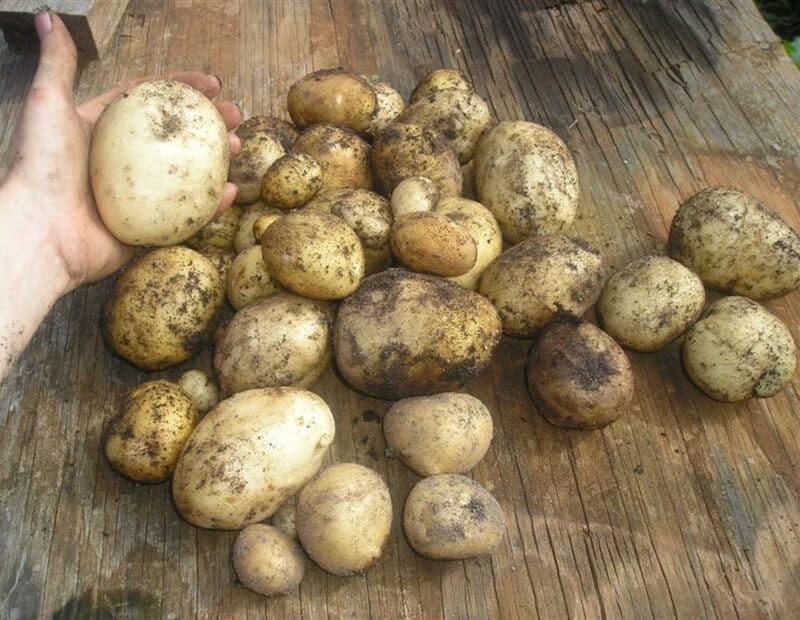
There are three main varieties of potato out there; early, second early, and maincrop. Early varieties do not tend to store well, and should be eaten soon after harvesting. Second earlies can store for a short while, but, again, are best consumed soon after harvesting. If you want to store your potatoes through the winter months, you are best off growing maincrop potatoes.
You will know that your potatoes are ready to be harvested when the plants begin to die back, meaning that they become brown and withered, and look as though they may actually die.
After your plants have died back, wait for two to four weeks before harvesting them, as this gives them a chance to mature, and for the skins to toughen up a bit. During this time, you should also stop watering them completely, as this helps to prevent rot, as well as your potatoes re-sprouting.
When it is time to harvest, use a garden fork to dig your potatoes out, being as careful as possible. Sadly, some damage is inevitable, and these potatoes will not be able to be stored.
Once you have dug all of your potatoes up, it is time to cure them. The reason that they are cured is to help them develop an even thicker skin, which means that you will be able to store them for longer. While you can lightly rinse your potatoes in cool running water to remove any clumps of dirt, do not scrub or properly wash your potatoes before curing them.
To cure them, make sure that your potatoes are dry, and then lay them out in a cool, dark area, covering them with towels to completely block out the light. The curing process takes between seven to ten days, depending on the variety you have grown, and, during this time, the potato skins will dry, wounds will heal over, and new layers of skin will form in any vulnerable areas. Generally, if you are growing thinner-skinned potatoes, these will cure slightly faster than those with thicker skins.
After your potatoes have been cured, it is time to sort through them.
Remove any that have obvious signs of damage, as well as any that have soft spots. These can then be turned into everything from chips to mash, before being frozen.
Potatoes need to be stored in a cool and dry environment, at temperatures of around 40 degrees Fahrenheit. A garage or unheated basement usually works perfectly for this. However, make sure you do not store your potatoes anywhere where they might freeze, as this will cause them to crack open. On the other hand, if they get too warm, they will turn sweet, and will not last for very long.
Make sure that you do not allow your potatoes to be exposed to light, as this will cause them to turn green. Keeping them in dark storage bags is a great idea to give them some extra protection.
Your stored potatoes need to be inspected regularly, with any deteriorating ones taken away. This will prevent the others from also deteriorating.
When stored in optimum conditions, your potatoes should keep for around six to eight months, although this does depend on the variety that you have grown.
Of course, potatoes can also be frozen or canned, which this link will explain more about:
Rhubarb
Rhubarb is a perennial plant, and is usually one of the first crops of the year. Stems that are harvested in the early spring will be much more tender and flavorful than those harvested later on in the year, which is why it is always a good idea to do a harvest of all of your rhubarb in the spring.
When cut stems are stored in the refrigerator, they will keep for about two to four weeks.
However, if you would like to enjoy the tart taste of rhubarb in the cold winter months, it would be worth chopping up the stems and freezing a few bags of them. You could also stew them or cook them up in some other way before freezing.
Root Veggies
Root vegetables are great to grow as a winter food source, as they will keep for months in the right conditions. Whether you are growing carrots, beets, turnips or parsnips, root vegetables all share similar requirements when it comes to harvesting and storing.
If you have planted your root vegetables in an area of your garden that does not freeze over, then you will likely be able to leave these to overwinter. Here is a quick guide to how hardy each root vegetable is:
- Carrots – can be left in the ground, but, if extreme cold is to be experienced, indoor storage is best
- Beets – roots can be damaged by hard frosts, so either cover and protect with straw or mulch, or make use of indoor storage
- Parsnips – extremely cold hardy and will improve in flavor with frost, as this turns the starch into sugar. Can be left in the ground until the spring
- Salsify – another hardy root, salsify can be left in the ground until the spring
- Swedes – cover ground with straw to make lifting in cold temperatures easier. Will need indoor storage in extreme cold
- Turnips – roots can be damaged by hard frosts. Turnips are best used up before winter, unless you store them indoors
- Winter radishes – roots are damaged by hard frost, so will need lifted in November
Of course, overwintering root vegetables in the ground is always the easiest way to do things, but, if the winter temperatures in your region do not allow for this, you will need to harvest them.
The best time to do this is when you have had two or three dry days, as this means that the roots and vegetables themselves will be dry too. Gently dig up your root vegetables and shake off any excess dirt. Cut the tops off, and then leave them in the sun for a few hours, as this will kill the root hairs and make the plant dormant, extending its shelf life.
Don’t forget, the green tops that you have cut off are also edible in the case of the majority of root vegetables out there. You can do so much with these, from cooking them to juicing them, and they really are extremely nutritious. For more ideas, check out the Leafy Greens section above.
After your root vegetables have sat in the sun for a while, it is time to sort through them. You only want to save your very best crops for storage. Separate out any vegetables that have signs of rot or damage. If you have accidentally clipped off the bottom of a root, then this needs to be set aside too, as storing this will only leave the root, as well as all those around it, susceptible to rot.
Your root vegetables are now ready for storage, and should be kept in cool, dark, but moist surroundings, with an ideal temperature of around 34 degrees Fahrenheit. The floor of your root cellar will usually be the coldest part, making this perfect for root vegetables, but make sure that you raise them up off the ground slightly.
Another option for root cellars is to put your vegetables in a plastic bag with some holes in it. Tie the top of the bag up and then store this in your cellar.
If you do not have a root cellar but have a basement or a garage, you can store your root vegetables in boxes or crates. However, it is important that you insulate this first, with something like sawdust, sand or peat moss, the latter of which is extremely beneficial as it will help to regulate humidity inside the container.
After you have insulated your box, place a layer of vegetables inside, and cover this lightly with half an inch of more insulation. Keep repeating this process until the box has been filled, adding in a few inches of insulation to the top. It is fine for your vegetables to be touching each other, but there still does need to be enough space for good air flow.
Each time you need to take some vegetables out in the winter months, simply take what you need from the box and then fill in any gaps with more insulation.
Again, just like with any crops that you store, you need to inspect your root vegetables regularly, removing any that are going bad.
When it comes to shelf life, your root vegetables should last until the early spring when stored in these conditions. After a few months, they will likely start to soften a bit, but they are still usable in cooked dishes.
Spring Onions
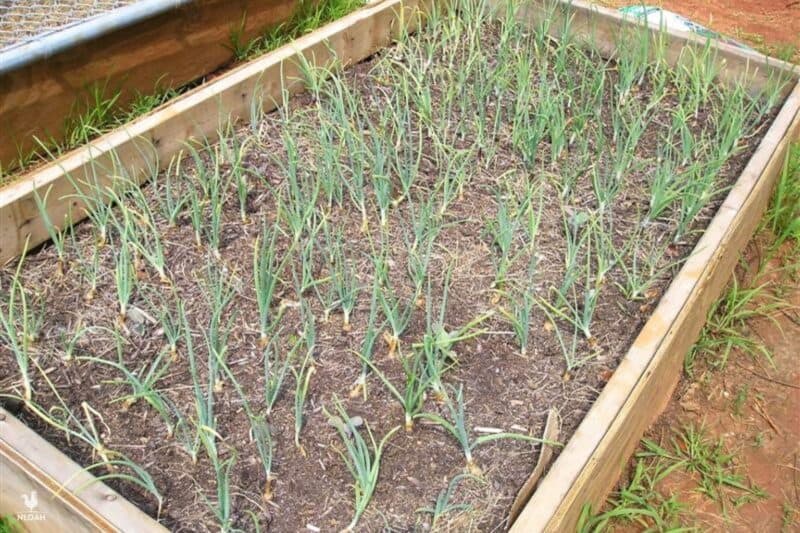
Spring onions are quite an easy crop to grow, and are usually ready to be harvested about eight weeks after sowing. While you can leave some varieties in the ground for quite a while, make sure that they don’t end up bolting.
Unfortunately, spring onions do not store well in their whole form, and need to be eaten a few days after picking. The best place to keep them is in your refrigerator, as leaving them at room temperature can cause mold, since they contain more moisture than regular onions.
However, if you need your spring onions to stay fresh for a week or two, you could try placing them in a jar of water, in the same way that you would treat cut flowers. Change the water regularly, and you will notice that not only will your spring onions keep for much longer, but they will also continue to grow.
Alternatively, you could try slicing up your spring onions and then freezing them, or even pickling them for a tangy addition to salads and sandwiches. You could even turn them into a spring onion kimchi!
Squash
There are so many different varieties of squash out there, and, if they are stored correctly, you will have a supply to last you through the cold months of winter. Keep in mind, though, that there are important differences between winter squash and summer squash.
Summer squash, such as zucchini and pattypan, is best eaten soon after picking, while their skin is still soft, and they do not store well in their whole, fresh form for very long.
If you do want to store your summer squash, you would be best off chopping it up, or even shredding it, before freezing it.
In terms of winter squash (pictured above), whether this may be pumpkins or butternut squash, these need to be harvested at the right time if you are hoping to store them.
Here are a few ways to tell when your winter squash is ready to be harvested:
- The stem will have died off and turned hard
- The color will have changed in vibrancy, and will have dulled quite a bit
- The fruit should sound hollow when hit (gently!)
- If you push your nail into the skin, it should dent the fruit without puncturing it
When harvesting, cut the fruit off at the stem, but make sure that you leave around four inches of stem intact, as this provides the fruit with a protective seal. Handle your squash carefully, holding them in your hands rather than dangling them by their stems.
Once you have harvested your squash, it is time to cure them. This allows the natural sugars to concentrate, resulting in a sweeter squash, while reducing chances of rot and preparing the fruit for long term storage. The skin of the squash will harden up during the curing process, providing a protective layer that will enhance the quality of the fruit.
The curing process takes about a month in total, but you should flip your squash over after two weeks so that it cures evenly on all sides.
After the curing process is over, there is an optional step that you can take to extend the shelf life of your stored squash. Dip a cloth into some olive oil, and then use this to polish the fruit. This creates a moisture-tight finish that prevents anything else from entering the fruit and causing it to go bad.
Just like with many other crops, squash needs a dry and well-ventilated area for storage. However, it does not require the same cool temperatures that other crops do, and will happily store at temperatures up to 68 degrees F.
This gives you much more choice when it comes to deciding where to store them, as they would even do well in a spare room in your house. However, you will need to keep an eye on humidity, because if this gets too high, your squash may end up rotting.
Wherever you choose to keep them, they need to be kept up off the ground, preferably on racks or wire mesh. Cushion this with some straw or shredded newspaper, and ensure that there is enough space between the fruits for air to properly circulate.
Make sure that you do not store your winter squash near other tree fruits, as these will release a gas that will cause your squash to age much faster.
In terms of shelf life, this all depends on the variety that you have grown, but here are some basic guidelines:
- Acorn squash – does not require curing, and will only keep for about a month
- Spaghetti squash – stores for 4-5 weeks
- Buttercup squash – stores for around 13 weeks
- Butternut squash – stores for up to 6 months A
- Blue Hubbard squash – stores for 6-7 months

Sweet Potatoes
While sweet potatoes are always tasty as soon as they have been harvested, this is one vegetable that actually improves in flavor as it cures, meaning that your stored sweet potatoes will have a deeper, more intense taste than your freshly-harvested ones.
But first, you need to harvest them. Deciding when to harvest is up to you. Some homesteaders harvest their sweet potatoes as soon as the leaves start yellowing, but not only does the quality of the vegetable improve with colder weather, this also gives it a higher vitamin content.
So, while you can wait until the frost has started to blacken the leaves, you will need to lift them as soon as you can after this has happened, because it will not be long before the tubers start rotting.
Use a spade or a fork to dig the potatoes out of the ground, preferably when the soil is dry. Then, leave them in the sun to sun-dry for several hours.
While this is happening, go through your sweet potato harvest, and set aside any that are damaged, disease, or show signs of mold, as these are not fit for storing. Rather than throwing these out, these sweet potatoes can be frozen or canned, so that you can still enjoy them through the winter.
In order to properly cure, your sweet potatoes need a temperature of between 80 to 85 degrees Fahrenheit, meaning that you will need to keep them in a warm room, or even in a greenhouse.
Place them in a box lined with newspaper for the curing process, covering this with a cloth to maintain humidity, which needs to be around 80%. Depending on the environment you have them in, your sweet potatoes will need to cure for around 10-14 days.
After the curing process has taken place, it is time to store your sweet potatoes. They need to be kept in a cool and dark place at a temperature of around 60 degrees Fahrenheit, and this should never drop to below 50 degrees Fahrenheit. Wrap each potato in newspaper, and store in single layers.
Another storage option that was traditionally used is called banking. This involves creating circular beds with high walls, and filling this with straw before piling the sweet potatoes in. Boards are placed over the top, followed by more straw, then some earth, and then more boards. However, not only is this far more time-consuming, it also does not allow for good ventilation, resulting in a higher rate of rot and decay.
If they have the ideal environment, your sweet potatoes should store for between four and six months.

Tomatoes
Bumper tomato crops are common, but, unfortunately, this is a fruit that cannot be stored in its fresh, whole form for very long.
Tomatoes should be picked when they have ripened, and these can be kept at room temperature in a bowl for up to a week. Resist the urge to refrigerate them, as this will only reduce their flavor and cause them to soften.
If you are looking for long-term storage, here are a few options:
- Canning – tomatoes will keep for over a year
- Freezing – tomatoes will keep for up to eight months
- Drying – tomatoes will keep for over a year
Of course, towards the end of the season, you are likely to be left with a number of green tomatoes that have not yet ripened. These can still be picked, and then placed on a sunny windowsill to allow them to continue ripening. You could also just cut the whole vine off and hang these upside down in a dark room, where they will continue ripening for a few weeks.
Alternatively, you could cook your green tomatoes and turn them into anything from chutneys and pickles to pie fillings.
Final Key Points to Remember
Many of the crops mentioned above require a root cellar for optimum storage. If you do not have a root cellar, but do have an unheated basement, you can, in a way, easily create a simplified root cellar.
All you need to do is partition off a section of your basement, and then put in some insulation, as well as a solid door. This will basically act as a refrigeration unit for all of your crops that require a cool and dark environment.
It is also important to have easy access to wherever you have decided to store your harvest. You really do need to regularly check on all of your crops, immediately removing any that show signs of deterioration.
Of course, homesteaders from around the world will have their own unique ways of harvesting and storing different crops. If you know of any secrets that we haven’t mentioned here, do let us know in the comments section below!

Get your gift and learn things like:
- how to make this really quick pest spray
- how to prevent egg waste
- two cheap automation devices that will make your life easier
I’ve taken over this blog from Kendra Lynne around 2018, and turned it into one of the best an most comprehensive homesteading website out there. I was raised partly in the countryside living a very frugal life ever since I can remember.