It is the time of the year that the race is on to beat the birds and the blistering sun. It is blackberry season. There are lots of things to do with all of them blackberries, from eating fresh, to cobblers, smoothies, and blackberry jam.
My family likes to divide into teams and see who can pick the most berries. This is all fun and allowing for a little competitiveness amongst my crew. It usually comes down to my husband and I winning by just a cup or so but that is because the kids can’t refrain from sampling their pickings. Go team mom and dad!
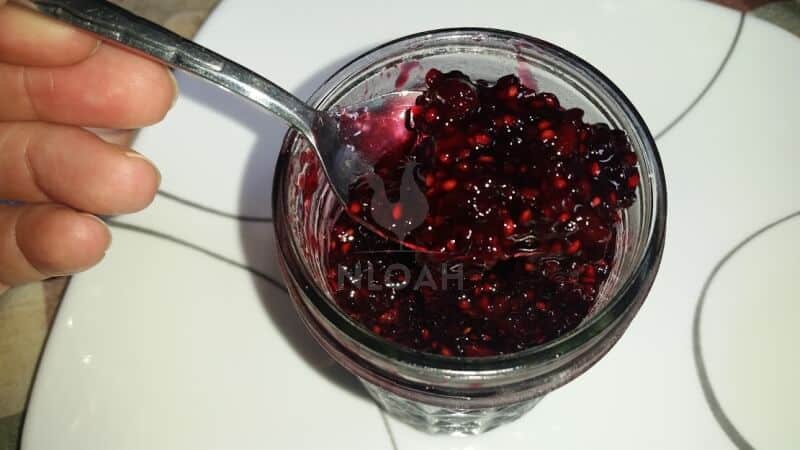
Back to the subject at hand: blackberry jam. We love to can as much as possible. There is nothing quite like being able to provide for your family through hands-on work and self sufficiency. My family loves to eat the jam on toast and we also gift some to family during the holidays.
It doesn’t matter where you get your fresh blackberries. You can purchase them from a farmer’s market, pick from your own thornless patch (oh the dream of that), or from traipsing through the brush and briars to forage for wild ones.
We currently do the last one, but I have started a patch to grow my own. Only problem is my goats thought they should get dibs on it first.
Blackberries are a food that is high in acid. High acid foods can be processed in a boiling water canner. Using a boiling water canner to process your jam is quite easy to do. Water in a boiling canner must maintain a temperature of 212 degrees fahrenheit with a constant boil the whole time allotted for processing.
Blackberry jam requires a processing time of 15 minutes for pint jars. A boiling water canner is usually made of stainless steel, enamel, or aluminum.
The pan needs a tight fitting lid and a wire rack to fit in the bottom of it. You can purchase a boiling water canner or use any pan that you may have on hand that meets these standards.
You don’t need to use pectin in this recipe because the berries are a fruit and have natural pectin in them. You can use it if you like but some say it alters the freshness of the fruit flavor in the jam. Also, with the butter. You can use a skim of butter to help eliminate foaming. I didn’t have much issue with excess foam so I didn’t use any.
When it comes to canning you need to be able to multitask and to have a clean kitchen or canning area to make work go smoothly.

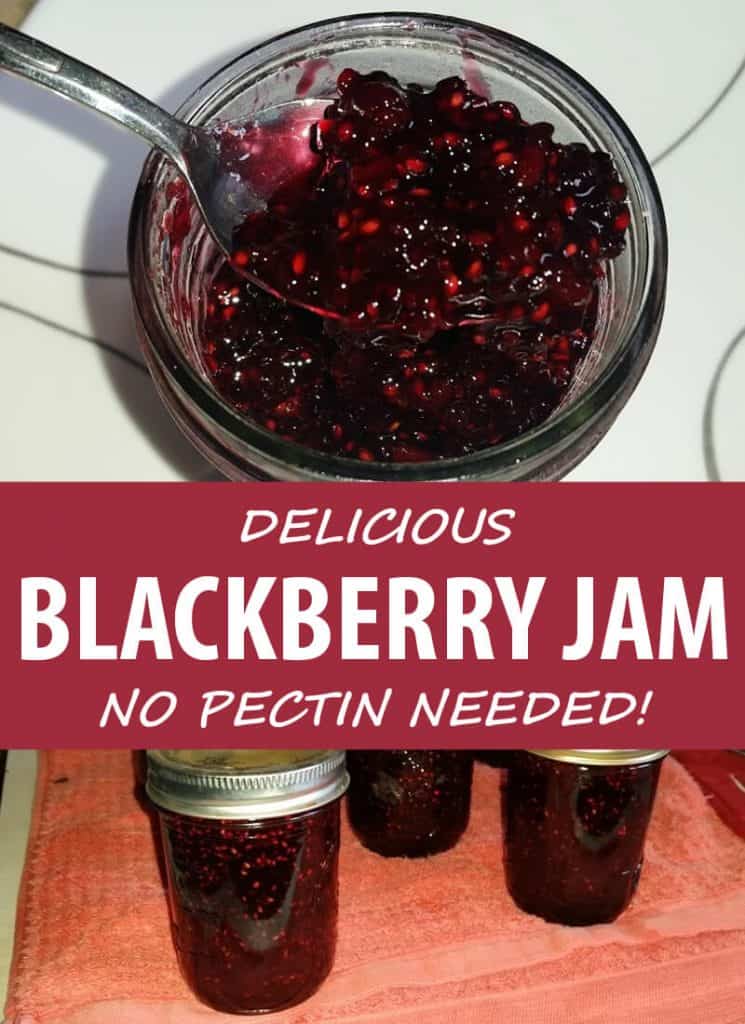
Blackberry Jam Recipe
Equipment
- jars
- lids
- bands
- boiling water canner
- measuring cups
- non-reactive pot to make jam in
- masher and spoon for mixing
Ingredients
- 9 cups blackberries
- 6 cups sugar
Instructions
- Wash and dry your berries. Once you have picked or obtained your berries you will want to wash them with clean water to be sure to get rid of any bugs that may be lurking on them. Pat dry the berries or allow them time to dry before starting to cook down.
- Gather materials. This job calls for a boiling water canner, plus a pot to mix the jam in and another to heat the jars before filling. You will also need a potato masher, stirring spoon, a one cup measuring cup, jars, lids, bands, jar lifter, and a towel.
- Fill the boiling canner. Put at least half as much as what you will need with water and turn it on so it is heating up. It is hard to say how much water you actually need because the water level rises with the weight from the jars being added.
- Place the jars in a pot with water to boil and heat for packing.
- Put the nine cups of berries and the six cups sugar in the pot to start to cook. Bring it slowly to a boil and be sure the sugar is completely dissolved. As the mixture boils to a thickening point be sure to stir constantly to prevent it from sticking.
- Remove the jars from the hot water to fill. Remove the mixture from the heat and skim off any foam if needed. Ladle the hot jam into the hot jars leaving ¼ inch headspace in the top. Wipe the rims clean and place the lid and band on the jar. Tighten the band to finger tight. Careful as the jars are hot.
- Place jars on rack and lower into water.
- Finish filling canner with water- The water needs to be about one inch above the lids of the jars.
- Place lid on canner and turn heat to medium-high.
- Time once a full rolling boil is reached. The jars need to be processed for 10 minutes at a full rolling boil.
- Turn off heat and remove lid.
- Wait 5 minutes before removing jars- Allow the jars to set in the pan of water before removing.
- Place on a dry towel or cutting board to cool. With the jar lifter remove the jars from the water and set them on a dry towel. Be sure to leave one inch of space between the jars to allow cooling.
- Let jars to cool naturally. Do not mess with the jars for 12 to 24 hours before checking the seal.
- Check the seal and store. Move sealed jars to storage in a cool dark location.
Headspace
When the directions call for you to leave headspace in the jar this is the amount of air that is to be left between the contents and the rim of the jar. Headspace is needed for a good seal when canning. High acid foods such as jam only needs to have ¼ inch headspace:
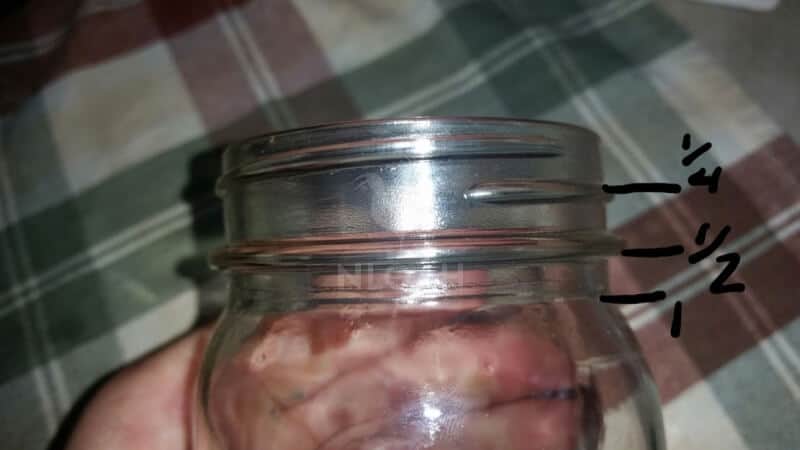
The marks on the rim also indicate measurement for headspace. Be certain to fill the jar to the proper amount of space as required.
Checking The Seal
To check your seal you can hear it ping as it is cooling. This is the best sound ever when you are canning. To be sure you simply press on the center of the lid.
If the lid is concave in the center. If the lid is concave then another test to be certain is to remove your band and try to lift the lid with your fingers.
If the lid does not lift then it is sealed and ready to be stored. If the lid makes a popping sound and you can press it then it did not seal. If you have unsealed jars put them in the fridge and use them first.
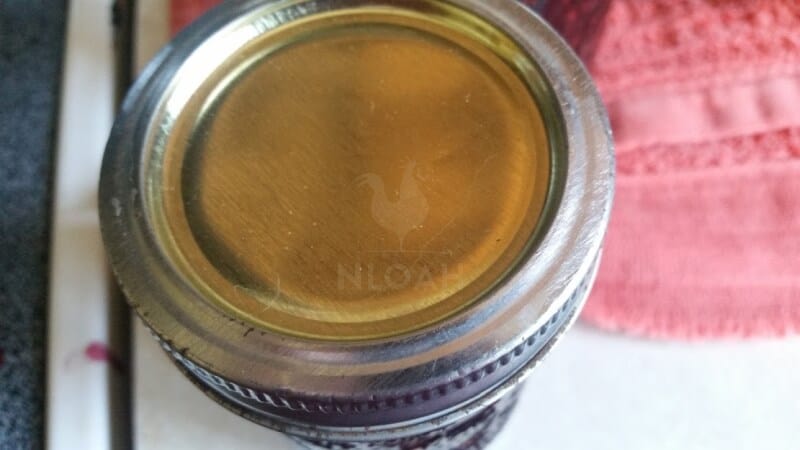
This is the lid of a sealed jar. It is hard to see in a photo but the center in concave and can’t be pushed like a button proving that it is sealed.
This recipe can be used with any type of berries to make jam. If you want a jam with fewer seeds you can heat the berries and then press the berries through a sieve or food mill to help remove the seeds. Then measure out your berry mash to nine cups and proceed with the same directions.
It is difficult to tell the difference between raspberries and blackberries. With this recipe it doesn’t matter which type of berry you use. Anyhow, to tell the difference the raspberries usually ripen first and when you pick them look at the center of the berry where you removed it from the stem. A raspberry will be hollow where a blackberry will have a core in the center.
Have fun picking those berries and making memories. Maybe you will even have some family or little ones who want to learn to can with you. It is always good to teach the ways of homesteading. Happy picking and canning!

Sarah Rodriguez is a homesteading wife and mother of five living in Appalachia. She grew up in a homesteading and logging family.
She and her husband Arnie work their 10-acre homestead together alongside their growing family. Sarah honed her self-reliance skills through 4-H and FFA at an early age and is now teaching her children to live off the land, raise livestock, and the importance of both sustainability and frugality.