Tomatoes are one of the most popular garden plants, and for good reason. They taste delicious, are healthy, and are a common ingredient in recipes. The rich flavor of ripe tomatoes is simply hard to beat.
Growing tomato plants is not hard, but you have to start them at the right time to make sure the plants are ready for transplant in the late spring. Maintaining tomato plants is where the real work comes in.
Not only do you need to stake and re-stake them or adjust their tomato cages as they grow, you also must ward off insects and fungus that can kill your otherwise bountiful harvest.
We hope by the end of this guide you will have your shovels and gloves on and begin your own tomato-growing project.
WHAT GROWING ZONE ARE YOU IN?
It is important to establish what tomato-growing zone that you are attempting to grow them in. It is advisable to use a resource from the department of agriculture to determine this. This information along with the techniques and recommendations in this guide will help guide you.
This link is the US plant hardiness guide. It can help you choose varieties of tomato to grow as well as determine when the best time to plant is.
WHERE SHOULD I GROW MY TOMATOES?
Never, ever, under any circumstances grow tomatoes within 100 feet of a walnut tree, especially a black walnut tree. The trees host a fungus that is deadly to tomato plants.
Even an old walnut tree stump can cause issues; it takes a minimum of 2 months for the roots to dry up and die and stop releasing the substance that will kill your tomato crop.
It is also recommended that you not plant the same variety of crop in the same location year after year. Not only can this deplete the soil of the nutrients a specific plant needs in order to thrive, it also makes the plants far more vulnerable to garden pests.
Pests do not just return to the same spot during the growing season to scarf down another meal at your expense; they also often lay their larvae and eggs in the dirt along the garden row so their offspring have food readily available when they hatch.
If you plant the same crops in the same row each year the risk of a soil-borne illness, like a bacteria or blight, increases.
Place your tomato plants far enough apart so that they will have room for air to circulate between them once they mature.
Tomato plants must have at least 10 hours of sunlight per day to reach their full potential.
Before you set out to grow your tomatoes, it is important to know exactly where to grow them. You can grow tomatoes either indoors or outdoors.
Take into account how much space you have at your disposal. To know more about how much you should expect in terms of yield see the subtitle “yield” later on in the article.
Soil
Well drained soil is essential for the growing of tomatoes. This is your ideal type of soil, and can be identified by its loose particles that allows for the easy absorption of water and minerals. It does not form a hard crust on the top when dry, and when wet will cling together. A good variety of well-drained soil is loam soil.
Soil of this type will allow the plant to easily uptake water, minerals and allow for roots to grow well. Other soil types will cause a variety of problems, such as diseases and poor growth or yield.
Common among these are tomato splitting and blossom end rot as well as loss of flowers. These are explained further in detail in the section on diseases.
There are several techniques that one can use to improve soil yield
- Applying humus, which is essentially green organic matter like leaves.
- Planting a crop (like beans) the previous season
- Buying soil which is already well drained. This is only financially practical if planting in pots like potting soil and peat moss.
Ensure Proper Growing Conditions
Plant in late spring or early summer to ensure that it is warm enough for your plants. Tomatoes thrive in warm weather. If nights remain below 70F and days below 80F you should be fine.
Pick out a part of your garden where it enjoys a good amount of sunshine per day. Too much shade will cause stunted growth for your plants.
Extremely vital to remember is to always try and plant in the afternoon or evening as this will help your tomato plants recover from the shock of being transferred from a nursery or container to the soil.
Spacing
For your plants to get maximum benefit from the nutrients in the soil as well as allowing you enough space to maneuver place your tomato plants about 2 to 3 feet apart.
Knowing how many tomatoes you eat on average is important in calculating the amount of space you need. Since you need about 3 feet distance between each tomato plant a 12 to 14 square foot patch should be able to give you a yield of between 120 to 180 pounds of fresh tomatoes.
This will equate to about 40 to 60 pounds of canned tomatoes. Not bad for such a small garden!
More info on spacing can be found at the back of your seed packet. Follow the instructions that are specific to your variety. Sometimes this information will conflict with guides like this one. In this case, the best solution is to consult your local agriculturalist and seek advice.
Light Requirements
Light is crucial for tomato growth. Light creates the energy for the plant to change nutrients into food to fuel growth. Tomatoes require about 8 hours of sunlight a day.
If you cannot guarantee 8 hours of light a day, then you may want to reconsider growing tomatoes. You can barely get by on 6 to 7 hours of light a day, but the more light you have the better.
If you have conditions of cool temperatures and few hours of light, the result is a plant that produces very little fruit and most of it does not mature.
YIELD
As rule of the thumb, tomatoes should yield between 8 to 12 pounds of fruit per season.
A quart of canned tomatoes can be made from about 3 pounds of fresh tomatoes. Estimating your family’s consumption of tomatoes per month will help you calculate how many plants you need.
For a family of 4 it is recommended to plant anywhere between 2 to 4 plants per person. This will yield about 16 to 48 pounds of fresh tomato, which should suffice for the family’s annual supply.
If you have enough space and time, growing even more tomato plants is highly advisable. If you only grow a few plants and a disease or bug infestation stunts their growth or kills them, you could be left without any tomatoes.
INDOOR GROWING
While tomatoes generally perform better in an outdoor environment, it is not impossible to achieve similarly high yields when you grow them indoors. The main factor that should be considered when growing tomatoes indoors is sunlight.
Before you actually embark on the project, ensure that you have sufficient light in the area that you will grow your plants. They require 8 hours of light a day to grow well. Light requirements are discussed in more detail later on in the guide.
Wind helps tomatoes to achieve stronger roots. This can be simulated indoors by turning a fan on your tomatoes for about 20 minutes twice a day. This will simulate natural breeze and achieve the desired strong roots. The low to medium setting should do the trick.
Transplanting Young Tomato Plants
If you do not grow your own tomato plants from seed, you will have to go shopping for tomato plants. When you walk down the row at your local nursery, you might be shocked by the vast array of breeds to choose from.
Different types of tomato plants are cultivated to address different needs. Sure, you can use any plant to put a tomato in your salad, on your cheeseburger, or to make sauce, but growing the right tomato for the recipe will almost always yield premium results.
Most gardeners and homesteaders who grow tomatoes plant a variety of different breeds.
Buying Tips
- When you buy any tomato plant, always carefully inspect the color of the young plant. Those with lush green leaves might catch your eye and look the healthiest, but looks can be deceiving. Generally, started seeds and plants with lush greenery often have poor quality roots systems and never reach full maturity or produce in abundance.
- Purchase only plants that are recommended for the growth habit in your agriculture z
- Choose plants that are known to be disease resistant in your growing z Read the sticker on the plant to find out if the tomato variety is resistant to fusarium wilt and/or verticillium. These are two extremely common types of soil-borne illnesses that frequently afflict tomato crops. Typically, if a tomato seed or plant is resistant to these two types of illnesses an F or a V will be noted of the name of the seed or plant. If late blight is a problem in your region, find out if the types of tomatoes you want to grow are also resistant to that condition. Several other routine illnesses that can impact a tomato crop include Alternaria root knot nematode, and the Tobacco Mosaic virus.
- Be mindful of the stated time it takes a tomato plant to mature. Even if the tomato plant variety is generally recommended for your growing zone, seasonal weather abnormalities before the start of spring or predicted for the summer and early fall, could shorten the typical season or cause sun scorching, etc. This is especially important to remember if your agriculture growing zone is at the beginning or the end of the recommended cultivation area.
- The flavor, size, and texture of tomatoes can vary from mildly to greatly among the readily available plant varieties. Consider what you will be using your tomatoes for after they are harvested and plan your purchases accordingly. Experimenting with a new variety is fun, but don’t bank your entire harvest on a type of plant you have never eaten or grown before to avoid potential disappointment, and a waste of your time and money.
TOMATO VARIETIES
Something interesting to note here is that the first tomatoes that were farmed where a yellowish orange color. While we are accustomed to bright, red tomatoes, this is not the only color of tomatoes available.
Factors when choosing tomatoes:
- Price- If you are picking out a variety that is inexpensive then you may want to go with hybrid seeds as these are cheap and common.
- Flavor- If you are more interested in flavor over price then an heirloom variety would suit you best.
- Disease resistance. You may want to pick out a variety that will resist diseases.
Other factors like weather condition and disease resistance should be taken into account.
Listed below are some of the top tomato varieties:
- Beef Steak – This type is one of the most popular due to both the large and flavorful crop it produces. The large, bright red tomatoes of the Beef Steak plant typically weigh approximately one pound each. Beef Steak is one of the most common types of tomatoes.
- Brandywine – This heirloom tomato plant has a delicious flavor and lovely texture. It can grow to reach up to four feet tall and produces large tomatoes.
- Bush 506 – This plant boasts thick and sturdy stems that are prone to supporting a heavy tomato yield. It is a hybrid plant and is known to produce both large and flavorful fruit. The Bush 506 plant typically grows up to two feet tall and shows signs of maturing at just eight weeks.
- Delicious – These tomatoes are the type you likely see most in groceries stores and in images of garden harvests. They are a deep red and almost perfectly round. They usually weigh between one and two pounds each.
- Amish Paste – This heirloom variety of tomato is substantially heat tolerant and is a wonderful choice to use fresh.
- Better Boy – This is an extremely old variety of heirloom tomato plant. They grow very large and are known to be the best producer of any tomato plant.
- Juliet – These two inch long oval tomatoes are great for canning, dehydrating, and then using in salsas, soups, and sauces. They also taste wonderful when cut up fresh and put on a salad. The plants produce a fruit that is both dense and firm, and do so in great abundance.
- Early Girl – This tomato plant variety is great for small garden because of the height and width of mature plants and due to its early and abundant producing Early Girl tomatoes are great eaten raw and canned to be used in various recipes in the future.
- Super Sweet 100 – This cherry tomato boasts a deliciously sweet taste and is known to produce an abundant yield.
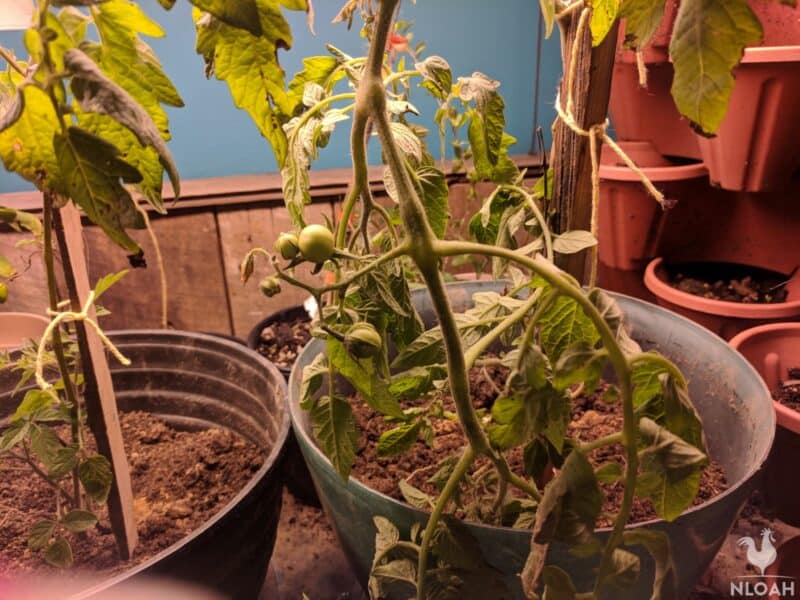
PLANTING TOMATOES IN POTS
Flowerpots and similar containers can be used to plant tomatoes. The main factor to consider here is how big your tomato will grow.
Smaller varieties that don’t grow too big can be grown on a windowsill, while larger varieties will require a 5-gallon pot to allow growth. A pot that is generally about 12 to 14 inches deep and a similar circumference is ideal for this.
Best Tomato Varieties for Growing In Pots
- Choosing a bush variety of tomato plant is highly recommended when growing the crop in containers. They plants are far more compact but can still grow to heights of 10 feet tall – sometimes more!
- Dwarf, miniature, or patio varieties of tomato plants are also of the bush variety but do not grow as tall as their larger cousins. Always choose a plant breed that has a mature height no greater than the stakes or cage which will be used to prop up the vines. Container plants become more top heavy than ground plants and can collapse under their own weight or tip over.
- Do not assume simply because a tomato plant is a cherry or grape variety that it will not grow to wide or too tall for a garden container pot. The fruit produced by the plant will be smaller, but not necessarily the plant itself.
- Take the time to prune the vines of the plant as needed. This may not only reduce the upper bulk of the plant, but increase its yield as well.
- Choose a soil which is recommended for container plants and drains well to avoid the dirt from becoming too moist and causing root rot.
The video here shows how to do it:
The most common varieties that are grown in pots are Big Boy, Pixie, Patio, Tiny Tim, Toy Boy, Micro Tom, Flora Gold, Stakeless and Early Girl.
Your tomatoes need to be supported by a cage, trellis or stake to remain upright. This is discussed in detail later on in the guide under the ”Support” section. Ensure you get your stakes or cage in at the planting stage so that you do not run the risk of causing damage to your plant when installing.
The same principals of planting in soil apply to planting in pots. Ensure that you have well drained soil. A good combination is an equal mix between, potting soil, perlite, compost and peat moss.
SEEDS
Hybrid seeds
Hybrid seeds are produced by commercial seed companies through meticulous and closely monitored processes, in a controlled environment, typically for commercial sale. This is done by the pollination of two varieties of plants to make one hybrid plant.
This is done so the resulting plant have the strengths from both of the parent varieties. These can be in the form of high yield, disease resistance, sizeable fruit and optimized growing period. A good variety of hybrid seed known as “Big Boy” can be purchased here.
Non-hybrid seeds
Normally referred to as heirloom breeds, these are what are often termed as “open pollinated” varieties. They are more natural or wild varieties and normally the seeds of the subsequent plants will be the same as those of the parent plant.
This is not true in hybrid varieties as it is rarely possibly to actually grow further plants from hybrid tomato seeds. A good variety of heirloom seeds can be purchased here.
Hybrid or not?
This is an issue between tomato growers. While hybrid varieties are more suitable to commercial growers, heirloom varieties are better for specialized growers who want a specific flavor, color or size of fruit. The chart below will help you identify some of the key features, advantages and disadvantages of both.
| HYBRID | |
| ADVANTAGES | DISADVANTAGES |
|
Hybrid seeds normally are easier to grow and have certain generic advantages like high yield, disease resistance and limited size of plant. Normally provides higher return both for individual and commercial growers. | Hybrid seeds are normally more expensive than non-hybrid varieties.
It is not possible to use the seeds from your fruit in the next season. |
| NON HYBRID | |
| ADVANTAGES | DISADVANTAGES |
| These plants provide more variety in terms of flavor and taste.
The ability to use seeds to continue planting in the next season | Susceptible to disease and do not produce as much fruit as hybrid varieties. |
The choice is really a personal one and experimenting with both hybrid and non-hybrid varieties will give you a good feel for what is best suited for your desired outcome.
Indeterminate vs. Determinate Varieties of Tomatoes
An important think to keep in mind when you are ordering tomato seeds for the year and trying to figure out when your fruits will be ready is whether you have chosen determinate or indeterminate tomatoes.
This can have a major impact on figuring out when your tomatoes are ready to go and whether your fruits are ripe or need a bit more time still.
Determinate tomatoes, also known as bush tomatoes, are those that grow to a compact height – usually no taller than four feet. They stop growing when fruit sets on the very top bud.
All of the tomatoes ripen at the same time, usually over a week or two. They require minimal staking and are commonly selected for container growing. They’re also perfect for people who like to can and want to do all of their canning at once.
Indeterminate tomatoes, on the other hand, will produce tomatoes until they are killed off by the frost. They can reach up to 12 feet in height, although those statuesque heights aren’t typical.
These plants will bloom, set new fruit, and ripen fruit all at the same time, and they require staking for support.
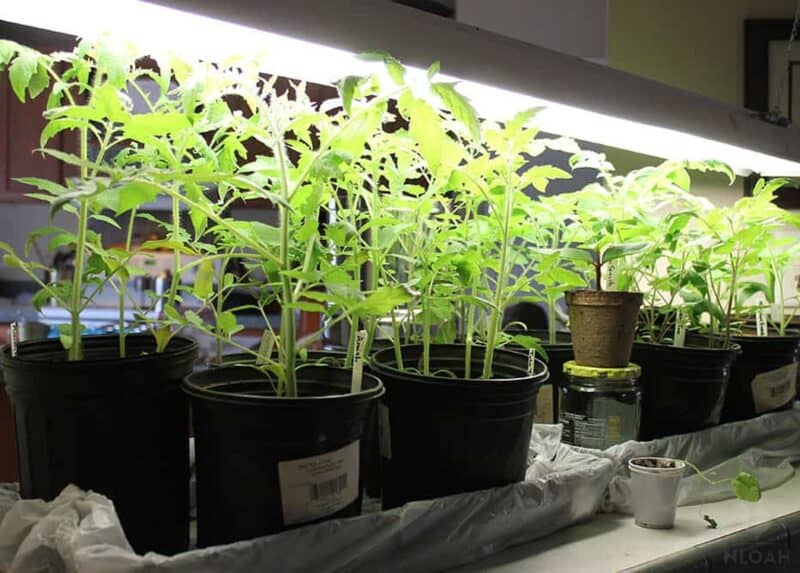
SOWING FROM SEEDS
As a general rule you would do well if you sow 6 to 8 weeks before your last frost date. This will help you get maximum growing time. Sprinkle your tomato seed on moist, good quality compost and cover with 1.5mm of soil.
Making sure that your soil is not compacted after sowing is important as compacted soil will result in poor germination. Keeping your soil moist is also a good technique to ensure perfect germination.
When sowing in pots, sow two seeds per pot and get rid of the weaker plant when they have germinated. The weaker plant will be the one that is visibly smaller and has less vigor. Ensure your soil is moist before pulling out the weaker plant so as not to cause damage to the one remaining plant.
Apply a small amount of fertilizer. Applying too much fertilizer at planting will give you over grown plants with lots of foliage very little fruit.
Restrict the main application of fertilizer to the flowering stage of the plant described in a later section under “Fertilization”. Two tablespoons of balanced fertilizer at planting will suffice. Use two to three inches of compost to provide minor nutrients.
Mix this into your soil as planting straight into compost could potentially damage your plants because it would be too nutrient rich.
In areas with a long season, like most southern states, you can grow tomatoes from seed 5 to 6 weeks before the last spring frost. The video below will give you good practical instruction to planting your tomatoes from seeds.
PICKING OUT SEEDLINGS
Ideal for people that don’t want to go through the hustle of planting seeds and want to get right to tending their plants. It is also perfect for areas with a short growing season, as this will give you the extra-required head start.
Seedlings can be purchased from your local nursery. Take note of the following tips:
- Remove side shoots that are more than an inch long from your plant
- Ensure the plant is a nice healthy looking dark green color. Don’t necessarily look for the biggest plants but rather the healthier looking ones.
- Turn the plant over to observe for chew marks or a pest called aphids. If any of these are present, do not buy the plant. Always aim to buy the best plants in the crop this will ensure greater success.
- It is advisable to wait at least two full weeks from the last frost date before you plant.
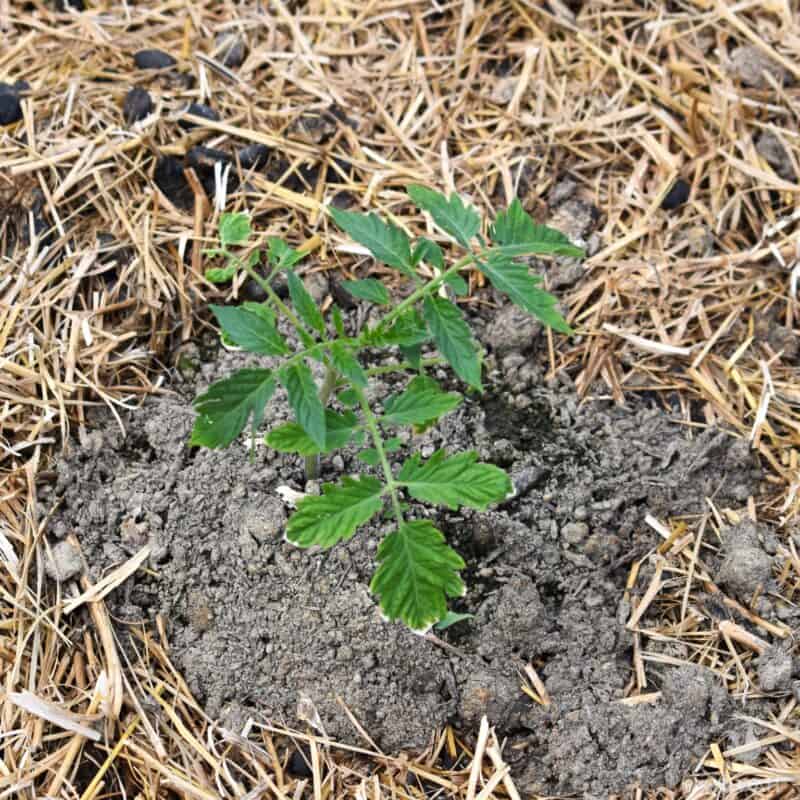
You will want to use something known as the “lying down” technique when planting your tomato plants. This has several advantages over planting vertically.
- The longer submerged stem will grow more roots as it is submerged in the soil
- Since the stem will develop a strong root system is will therefore give the plant the much-needed support that it needs.
- The more roots the better; this will increase nutrient uptake from the soil.
PLANTING ROWS
Single Row
It is recommended to plant to tomatoes in a single row rather than in a block row format. Single rows will give you access to the plant and be able to perform the necessary growing functions like checking for diseases, fertilizing, and picking of fruit ripe.
Wide rows or block planting is more suited to plants that do not require much room between each other to grow. While it can save space, it is very difficult to grow tomatoes this way, as their growth will be stunted and yield lowered.
Raised Beds
A raised bed is simply an elevated planting surface above your normal garden soil. You may want to plant on raised beds for the following reasons.
- If you have poor draining soil like clay soil, you may want to raise your beds to improve the drainage.
- In cooler temperatures the soil in a raised bed is warmer than that of the normal garden soil by about 8 degrees. This will aid your tomatoes benefit from the warmer growing temperature
- Raised beds allow roots to easily grow and benefit more from the nutrients in the soil. The various layers of garden soil are normally compacted and do not allow a plant to easily grow and develop a good root system.
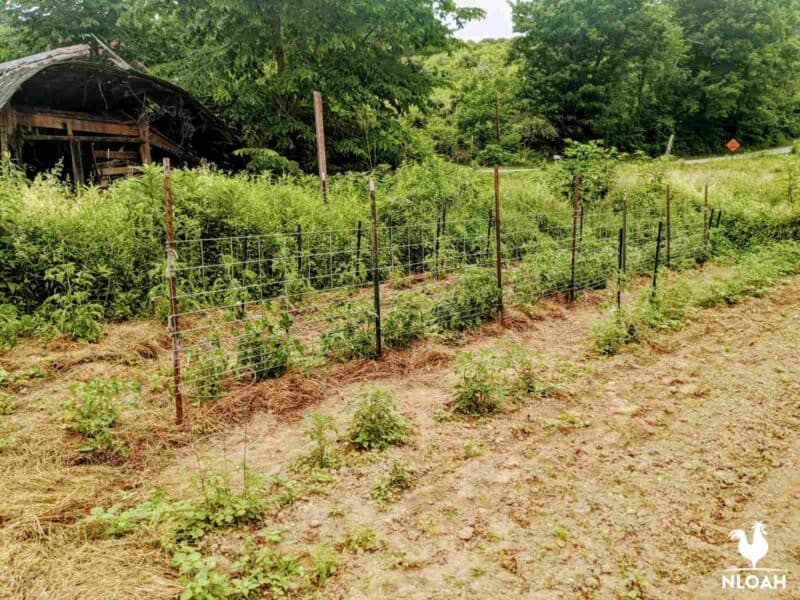
A raised bed can be made inexpensively by nailing timber boards together to form a rectangular container and then filling it with about a foot of soil. Like its name, old wooden beds can also be used for raised beds as demonstrated in the photo below. Simply remove the middle support and legs and place this in the garden.
Some people opt to make raised beds without wooden board and this works fine though you have to keep maintain it throughout the season otherwise it will disintegrate.
Other materials, like concrete blocks, can also be used in place of wood as demonstrated in the photo below. Simply place them in a shallow trench and pack them tightly together then fill with soil.
TAKING CARE OF TOMATOES
WATERING
If the top inch of the soil is dry then it is definitely time to water. There are two main principles that you should consider when developing a watering plan for your tomato plants:
- Never water overhead. The reason for this is your plant is very brittle and you cause undue stress to it. The weight of the water could easily break your plants stems and new shoots. It could also cause heavy loss of flowers during the flowering stage.
- Always try to keep the plants as dry as possible without getting water on the leaves. This is achieved by watering as close to the base as possible without allowing any water to splash on the plant. The drier you keep the plant the less susceptible it will be to disease organisms in the soil.
- Allow time between waterings. It is better to keep the soil moist rather than drenched.
MULCHING
Mulching is the process of using a foreign material to cover up your soil by laying it at the base of your plant. An important consideration when mulching is to ensure you only do this when the soil warms up and you are experiencing daily warm temperatures.
Black plastic mulch can be used earlier on in the growing season because it will hold more heat and radiate it into the soil, warming it up.
If you decide to take off your plastic mulch, you need to ensure that the soil will stay warm. It cannot be overstated how important it is to allow the soil to stay warm! While you will benefit from mulching, putting down mulch too early will cool the soil, and may harm your plants.
PRUNING YOUR TOMATO PLANTS
Pruning your tomatoes will ensure more nutrients for the fewer remaining fruits. Getting the right balance between quantity and size of the fruit is ideal. This will result in well-developed and larger fruit.
It is common to be over enthusiastic when one first starts to prune. While having large fruit is something to write home about, no matter how much you prune a tomato can only grow up to a certain size, so don’t overdo it!
Ensuring that you have just the right balance of nutrition and fruit population per plant will give you a great harvest!
It is important to, before the first frost date, prune or cut of the top of your stems right above the last fruits. This helps the plant in directing the remaining nutrients and energy into ripening your tomatoes and giving them that last boost of growth.
TOMATO TRAINING
Training is a process by which tomatoes are directed or controlled in terms of how they grow. To benefit from training one has to start as early as four weeks after the plants have been transplanted.
Multiple stems develop when the original stem begins to produce what are known as suckers. These are side stems that grow between the main stem and the leaf. It is important to let the first few suckers grow out while all other subsequent suckers are pruned by hand. This will prevent you from having too many side stems.
There are two approaches when training your plants that can be followed.
- The multi stem method
This is better suited to using cages as it gives you a 360 degree angle on the plant. As multiple side stems develop around the plant it is easier to provide a supporting structure for it.
- Single stem method
This method is suitable for the single string trellis method and stake method. Ensure that you prune all suckers as they emerge to use the single stem method. This will ensure that no further stems grow.
It is important to decide what method you will use before planting your tomatoes so that you can ensure that the correct procedure is followed. Ultimately it is a matter of preference.
Pruning is something that is done effectively by hand. Scissors and other pruning tools are very likely to carry disease organisms on their metallic surfaces. Clean hands are the preferred tools for this. Gently snap the sucker off just above where it joins the stems.
TOMATO SUPPORT
Plant support is accomplished with use of stakes, cages or other devices to hold the stem of the tomato plant. The stem of a tomato plant is normally not strong enough to keep the tomato upright and eventually because of the weight of the branches and fruit, it will fall over.
Fallen plants will be exposed to the soil and its related organisms, as well as moisture. Keeping tomatoes dry and off the ground is essential to disease prevention, and hence the need for staking. The key to proper staking is knowing what type of tomatoes you have planted.
This will affect its growing pattern and therefore determine the types of staking you will use. Determinate varieties are bred to ensure that the stems of the plant only grow to a certain length. Determinate varieties come from hybrid seeds and are the much more common planting choice due to availability of such seed.
The indeterminate varieties fall under heirloom or non-hybrid species. They normally grow like a wild vine. This variety will keep growing until the weather is too cold, and can continue growing for several successive seasons.
It is easy to see that these two varieties will have different support needs. It is also advisable to have this support installed early on to ensure that you do not damage your stems.
TYPES OF TOMATO SUPPORT
Stakes
Stakes are wooden poles or supports that normally have a sharp edge to allow them to be easily driven into the soil. They come in different sizes and lengths.
The following rules should be followed when choosing stakes for you tomato varieties.
- For determinate or controlled growing varieties choose a 1x1inch four foot long wooden stake and drive it into the ground about 7 inches deep.
- For indeterminate varieties that will grow much taller and in an relatively uncontrolled manner, choose a 2×2 inch 6 to 7 foot long wooden stake and drive it about 15 inches into the ground. Ensure that you pick out stakes that have a pointed edge to be able to drive the stake into the ground more easily. You can buy some nice bamboo stakes here.
Trellises
One can make a simple trellis for their tomato project. Insert a number of stakes in the center of your tomato bed and then run twine across the stakes.
Determinate
For determinate staking, use 1×1 inch x four foot stakes driven 7 inches into the ground and space them about 4 to six feet apart from each other and space the twine in rows of about 6 inches apart.
Indeterminate
Use 2x2x7 foot long stakes driven 15inches into the ground and spaced every 8 feet apart. Run lines of twine between and space them in rows of 12 inches.
Trellises can also be purchased and easily assembled from your local garden supply store made from various materials.
DIY Wire Cage
This will work well for indeterminate varieties, and will generally accommodate a more uncontrolled growth and will give your tomato a 360 degree support structure.
- Cut out a section of 6×6 or 5×5 foot section of fencing wire or construction reinforcing concrete wire. The wire should generally have openings of not more than four to five inches wide
- Roll this into a cylinder and tie together with tying wire.
- Set this over your tomato plant and use stakes as anchors to ensure it remains in position.
Wire cage (shop bought)
It should be noted here that these cages are really only suitable for determinate variety of tomatoes as the indeterminate will outgrow the cage. These can be bought here.
TYING MATERIAL
Tying your plant every 6 inches to your stakes or plant support frame will ensure that your plants grow healthily, it is recommended to use the following material to stake your plants.
- Plant tape: Plastic plant tape is excellent to use on tomatoes.
- Fabric: Here you can tear up old pieces of fabric and use this to tie your plants. As well as being inexpensive it is a good way to dispose of old used clothes.
- Garden or Baling Twine: Garden twine is also suitable for tying tomato plants.
FERTILIZER
Tomatoes will do better with fertilizers to give them those extra, much-needed nutrients.
However, this is one of the most misunderstood areas of tomato growing as for some reason most amateur gardeners believe that the more the better!
The issue with that approach is that tomatoes, like humans, require different nutrients to grow…
The key is to supplement what is lacking in the soil rather than simply giving the plant fertilizer for the sake of it.
It is important to get fertilizer ratios right because it is expensive, and while it is a powerful tool improper use could easily see you lose both money and crop.
Key to proper use of fertilizer is understanding the key components that are contained in fertilizer.
- Nitrogen, depicted by the letter N, important in the growth of leaves and foliage.
- Phosphorus, depicted by the letter P, instrumental in flowering and therefore producing fruits.
- Potassium, depicted by the letter K, useful in the growth of fruit.
The combination of these elements is normally depicted by the letters NPK found on fertilizer packaging. The amounts that the particular packet contains are normally depicted by ratios, for example, a high phosphorus fertilizer will be N5 P10 K10, while a fertilizer high in nitrogen will be N10 P5 K 10.
Knowing when to fertilize your tomatoes is helpful as this will allow maximum benefit. Fertilizer should be applied at the following stages.
- Planting
- When fruition begins.
- A light application every two weeks till your first frost, when the tomatoes will stop growing.
Disclosure: if you visit an external link in this post and make a purchase, I may earn a commission. Read my full earnings disclosure here.
The only real way of knowing what fertilizer your tomatoes need is by carrying out a soil test. A simple homemade kit can be purchased from Amazon cheaply.
If your soil is balanced or high in nitrogen, then a fertilizer that is high in phosphorus will work well. A 5-10-5 fertilizer or a 5-10-10 should work well in this case. Soil lacking in nitrogen will benefit from a balanced fertilizer such as 10-10-10 or an 8-8-8.
If you decide to skip doing a soil test, you are better of going with a balanced fertilizer like 8-8-8 or 10-10-10 that has equal nutrients.
If in the previous season you experienced lush and quick growing plants but lack of fruits then you may want to consider using a fertilizer with less nitrogen than phosphorus like the 5-10-5 or 5-10-10.
APPLICATION
Correct application of fertilizer is critical, as improper application can lead to your plants being chemically burned.
You should never let the fertilizer come in direct contact with you plant. When fertilizing at planting apply the required amount into the trench, cover with about an inch on unfertilized soil, and then plant.
For plants that are already grown at fruition, ensure that you water your plants well and then spread the fertilizer about 6 inches from the stem of the plant. This will ensure that it doesn’t take up nutrients too quickly and causing irregular growth and burning of the stem.
ALTERNATIVE FERTILIZER
Just as controversial as hybrid or non-hybrid seeds is whether tomato growers should employ the use of inorganic or organic fertilizers. The good news is that once these have been broken down in the soil and the nutrients taken up by the plant the key elements remain the same and don’t change whether administered in organic or inorganic form.
So what are the pros and cons of these fertilizers?
Organic
- Natural state organic fertilizer releases nutrients to the soil gradually and slowly meaning it has a longer effect on the plant and soil.
- It not only contains the key macro elements, but also other essential nutrients that will give you overall soil improvement.
- Buying organic fertilizer is usually more expensive than purchasing the chemical variety most often sold in store by biotech manufacturers like Monsanto (Roundup Ready) DuPont, and others. The neonicotinoids many chemical fertilizers contain could play a contributing roll in killing the bees that provide the necessary pollination for our plants to grow.
- Making your own organic fertilizers is both cheap and easy. A plethora of recipes detailing how to make a vast array of organic soups, pesticides, and fertilizers are readily available online.
- Nitrogen Based: Bone meal, Alfalfa Meal
- Phosphorus based: Cotton seed meal
- Potassium Based: Feather meal
COMMON DISEASES & PREVENTION
Crop rotation with other unrelated crops like corn will help reduce diseases.
Cat Facing
This is the irregular formation of lines and what seem like craters in the tomato fruit. This is caused by the change of temperature, and can be prevented by ensuring that you plant at the right time. It does not affect the quality or the taste of the tomatoes but simply disfigures the fruit.
Blossom-End Rot
This is a disease caused by irregular watering patterns as well as too much fertilizer. The key to preventing this disease is having a regular deep watering pattern and not fertilizing too heavily. Sticking to the recommended amount of fertilizer, especially nitrogen, is important.
Irregular watering patterns and too much nitrogen cause a calcium deficiency in the plant and this results in blossom-end rot.
To stop the disease from spreading one needs to remove the diseased fruit. There is no need of disposing of the whole plant in this case.
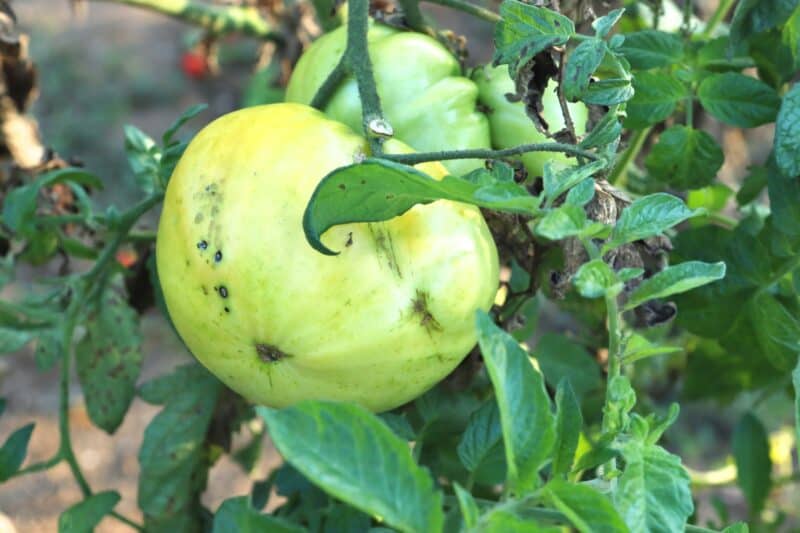
You can spot blossom end rot by looking out for brown or black spots on the blossom end of the fruit. These spots will get bigger as the fruit grows.
Put simply, blossom end rot is caused by lack of water in the plants, and is easily remedied by watering regularly and never allowing the soil to completely dry out.
Early Blight
This is a soil borne fungus that is transmitted to the plant in wet weather. It normally affects the stems and the leaves, and can also be picked up during transplanting.
Early Blight can be noticed by dark spots on the leaves surrounded by a yellow color. This will eventually lead the leaves to fall off and will expose your tomato fruits to the sun and hence sunscald disease. The best way to prevent early blight is by ensuring that all plant residues from the previous season is properly disposed off. This video on identifying early blight will be helpful to you.
Late blight
This is a rapid-spreading fungus that affects both the stems and the leaves of tomatoes. It is a disease that is sometimes hard to spot and is recommended that you contact an agriculturalist or expert to assist you in identification of the disease.
The disease can remain dormant over the winter in both residues of tomato and potato plants so ensuring that you dispose of them properly before new planting is important. The best cure is spotting it early and getting rid of the diseased plants as the disease spreads quite rapidly.
Copper sprays like Serenade should be applied to prevent this disease from starting, especially after prolonged wet conditions. After the disease has started there is almost nothing that one can do to stop the spread.
Sunscald
Sunscald is when the plants are exposed to the direct rays of the sun during hot seasons. Remember it is not necessarily heat that makes tomatoes grow but rather light.
Warmth plays an important role in development but the direct rays of the sun should be blocked out by foliage on the plant. Take extra care to ensure that while you prune, especially in hot areas, that you do not take off too much foliage.
Grey Leaf
A disease caused by moist conditions, it only affects the leaves of the plant. Small dark spots emerge on the leaves of the plant and it turns a grayish brown color before the leaf turns yellow and eventually falls off. It results in very low yields.
It can be prevented by choosing a variety that is resistant to this disease and also making sure that all plant residue from your fall garden is disposed of.
Wilt
This disease reduces the plants ability to take in nutrients and water, which will eventually kill it. The symptoms are mostly a discolored stem and wilting of the leaves in the hottest part of the day and recovery at night.
The leaf veins will begin to yellow and then eventually turn brown and fall off stating with the leaves in the lower part of the plant and working its way up.
Removal of diseased plants will stop Wilt spreading to others, and a resistant variety of tomatoes would be a good choice here as well.
DISEASE PREVENTION
Homemade Remedies
In an age where organic food is considered healthier than others, the use of organic sprays and homemade solutions is encouraged. The adverse effects of chemicals on food has been attributed to many diseases, like cancer. For the environmentally aware, homemade sprays can be made that are chemical free.
While these are not as effective as chemical alternatives, they offer some prevention against diseases and pests.
They do require more vigilance in taking care of the plants to ensure that you can benefit from them compared to commercial chemical products. Here are a few homemade remedies:
Rhubarb leaves mixed with detergent
Used in the control of aphids this spray is an alternative to chemical aphid control sprays. A great video on how to make this can be found below.
Onion, garlic and cayenne pepper blend:
DISEASE-RESISTANT PLANTS
Selecting a variety that is disease resistant is a good way to ensure your growing season is pestilence free. It may take a few rounds of planting tomatoes to know which threats are the most troublesome in your area. Consulting an agriculturalist is a good idea, here. The wealth of knowledge that an expert in your particular area possesses should not be neglected, as this could either make or break your season.
SOLARIZING METHOD
This is effective in the prevention of nematodes and weeds. It is quite a simple method and is simply conducted by placing a plastic tarp over your soil for at least 4 weeks during the hottest days of your summer season. Moisten the area where you want to plant your tomatoes and then place the tarp over it and leave it on for about 4 weeks.
DISPOSING OF DISEASED PLANTS
One mistake commonly made by novice gardeners and farmers is taking diseased plants that they want to dispose of and adding them to their compost heap. The heat produced from compost does not necessarily kill diseases, and these can spread to your crop when you do decide to apply the compost to the soil.
CROP ROTATION
Soil borne diseases become more prevalent when similar crops are planted consecutively, over successive seasons. Using a method known as crop rotation will help. Crop rotation is the planting of unrelated plants each season. A good regime to follow is planting tomatoes only once every three years and planting an unrelated crop like corn or beans, in the second and third years respectively.
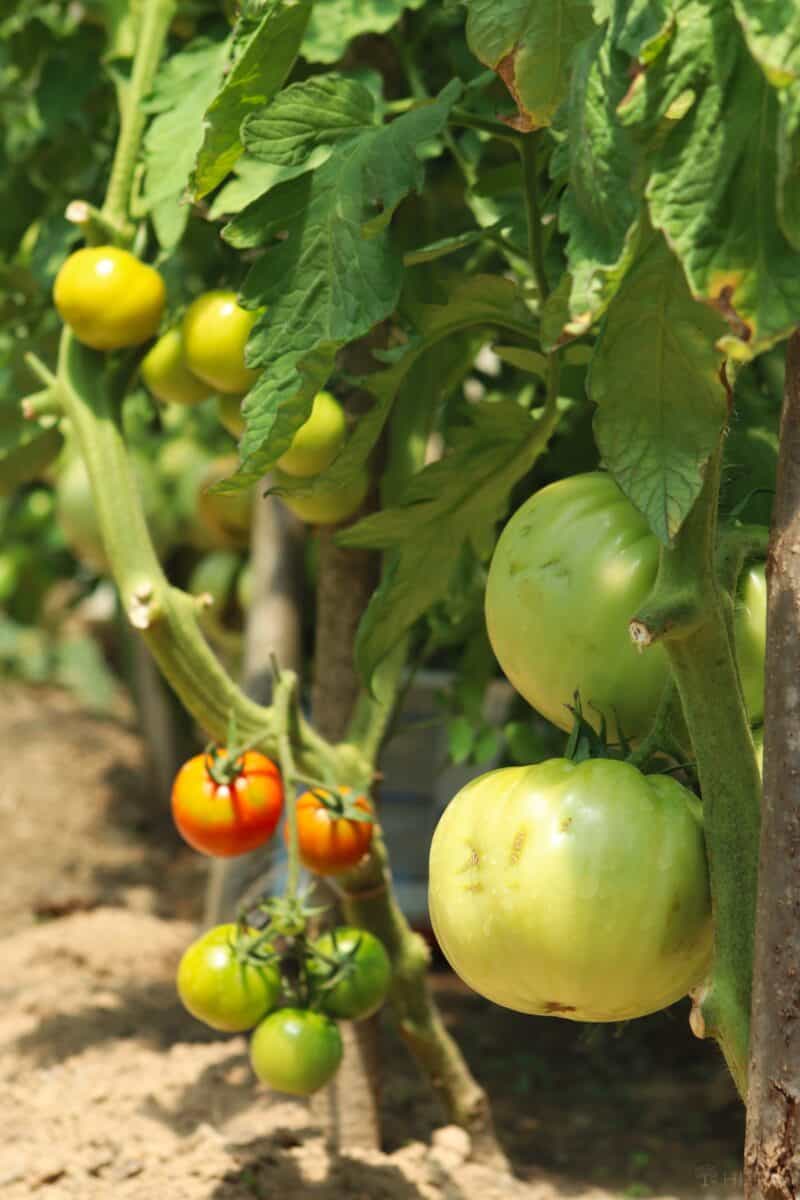
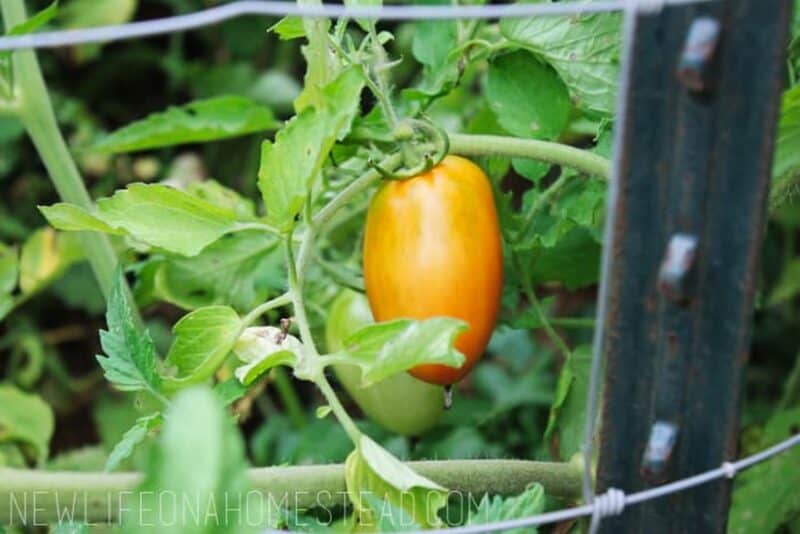
HARVESTING TOMATOES
There is nothing more rewarding than seeing those first few fruits ripen, bringing to an end weeks of hard labor and diligent care. Harvesting tomatoes is a very simple task, but here are a few tips on how you can get most of your harvest.
- Prune the roots
Using a large carving knife cut a semi-circle into the soil 8 inches deep and about 2 inches from the stem. The plant will then go into shock and use the remaining energy and nutrients to try to ripen the tomatoes. Trying this out on a few plants could help in getting the hang of it for the faint hearted. Watch the following video for some tips on pruning your tomato plant.
- Ripen tomatoes indoors
One needs to keep in mind that it is not necessarily light that ripens tomatoes, but heat. Moderate heat is the best temperature for tomatoes to ripen. Storing your tomatoes in a dark warm room and placing a sheet of newspaper over them will enable you get perfectly juicy and ripe tomatoes.
There is another great article on this website about harvesting tomatoes that will give you some vital information too.
STORING TOMATOES
Canning
Tomatoes can easily be canned by a simple process of peeling their skins and storing them in a can with lemon juice.
- Boil your tomatoes for about one minute.
- Immerse then in ice cold water for them to cool and using a knife peel of their skins
- Placing your jars in a canning rack bring water to the boil and boil your jars for 10 minutes to sterilize them. Ensure your lids are also immersed for 10 minutes to soften the sealant.
- Boil an extra pot of water and while this is happening, put two tablespoons of lemon juice into the jars. Fill your jars with as much tomatoes with some of them emitting juice so they are totally covered in liquid.
- Cover the tomatoes with the boiled water leaving about half an inch of space between the water and the lid.
- Close the lids of the jars, set them in the canning rack and place the jars in boiling water for about 45 minutes.
- Remove the jars from boiling water and set them on the counter to cool. Store in a cool dry place until ready to use.
Freezing Tomatoes
This really is the simplest preservation method as all it requires is for you to put your tomatoes in a container and place them in the freezer until ready to use.
Oven-dried tomatoes
Great for pasta and other dishes, oven dried tomatoes can be made by;
- Preheating your oven to 200°
- Cut your tomatoes into quarters.
- Spread them in a pan over a baking sheet.
- Bake until their edges begin to shrink and they lose about 1/3 of their size. This should be achieved in 2 to 3 hours depending on the variety.
Remember the drier the tomatoes the longer they will keep. You can freeze them or place them in a jar and submerge in olive oil to keep them longer.
WRAP-UP
All in all, a tomato growing project can be a rewarding experience. The whole process from growing and maintenance to storage could be an entertaining and fulfilling homestead project if done right.
Getting optimal results is something that is not achieved over one season. It should be noted that tomato farmers spend years understanding and perfecting their technique to yield the juicy, shining ruby fruits we all adore!
Don’t be too hard on yourself if it takes a few tries to perfect your tomato preservation efforts. The process is not difficult but it does require precise timing and paying attention to each step – especially washing off the rim of the Mason jar before sealing it with a lid. Any tiny debris can prevent the lid from sealing properly and cause your tomatoes to spoil in a matter of weeks.
After a few seasons, you’ll be a veritable expert at growing tomatoes that will be the envy of your neighbors, and the secret ingredient in countless meals!
I’ve taken over this blog from Kendra Lynne around 2018, and turned it into one of the best an most comprehensive homesteading website out there. I was raised partly in the countryside living a very frugal life ever since I can remember.
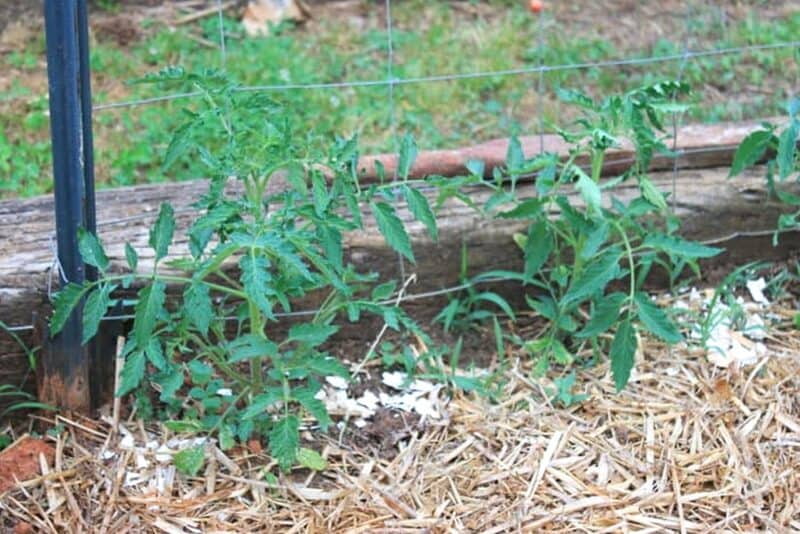
Good article. I have gardened for over 55 years and about 15 years ago I watched a PBS program about Thomas Jefferson’s gardens. They showed how he grew tomatoes then. I switched to that way and ever since my production has more than doubled. They are grown on wire tables about a foot or so off the ground. Now will get anywhere from 50-70 pounds of eating tomato’s per plant. Even growing with stakes if I could not get 20 pounds or more per eating plant that was never grown again. Now for BER ,Since I talked to a old gardener and he told me how to stop BER I have not had it. We use straw and we put under plants and to this date we have not had it again and we also never water plants once in the ground a week. You should try the table way if you have room as tomato’s like to go out not up. Had one 2 years ago get 24 foot wide from center out- over all end to end was just a little over 40 feet wide.
Tigeroak,
Thank yo uso much for your comment! It sent me on an hour of online browsing to learn more about how Thomas Jefferson grew tomatoes. He is my favorite president. I wound up on the Monticello website and the online shop actually sells his heirloom seeds!
You have to read each seed listing carefully to determine if it is from a plant President Jefferson planted, or one that was added later. Their prices were not bad at all, $2.95 to $3.95 depending upon the type of seed, for 100 to 150 heirloom seeds. The proceeds benefit keeping Monticello open and tours operating for the public. I wound up ordering tomato, Thyme, and spearmint seeds. I am going to grow half of the seeds the way our Founding Father did and the other half split between cages and stakes to compare the difference.
My hubby prefers cages and I prefer stakes – stakes are less work and cages likely produce closer to the same bush type growth pattern Jefferson found so successful, but my first gardening task was following my Papaw around his massive garden staking tomato plants so out of nostalgia more than anything, I like to still do it that way.
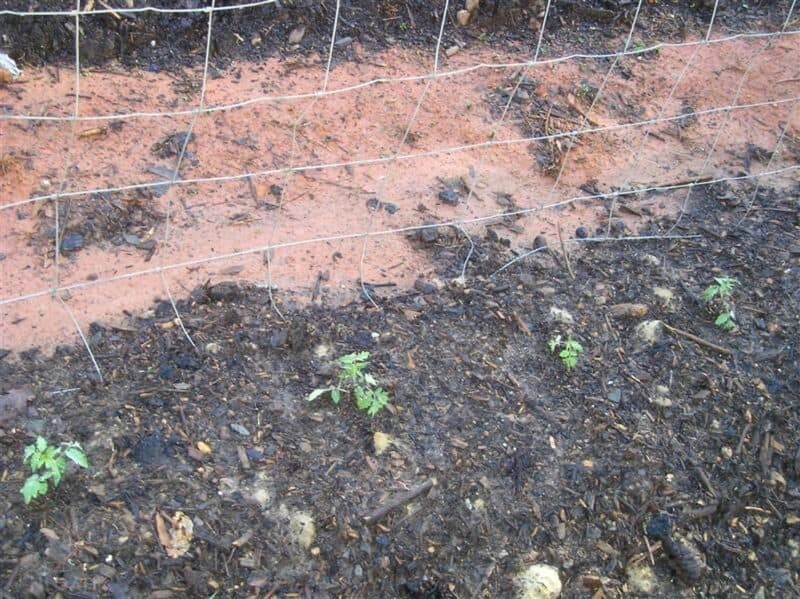
update: my Thomas Jefferson tomato seeds that were planted 3 weeks ago:
Great article!
Cindy 3539,
Tbank you. I hope the information helps you get a bumper tomato yield this year!