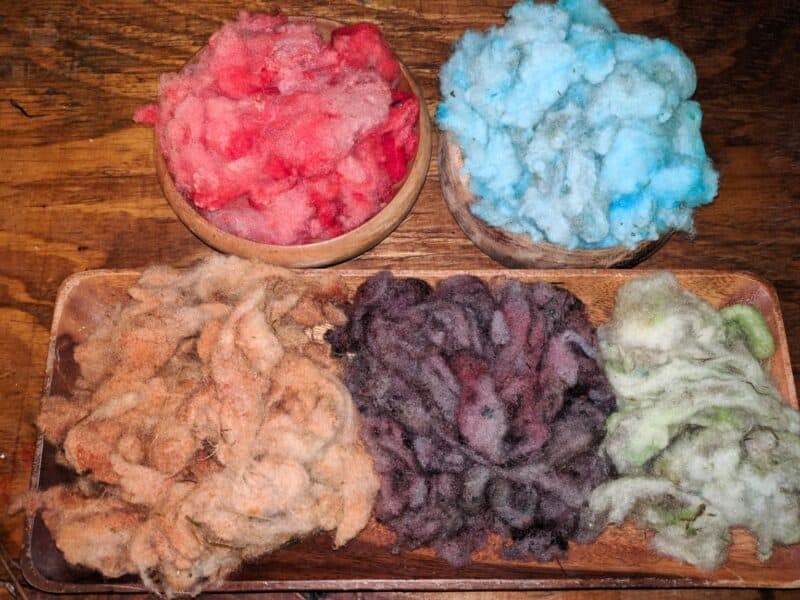
Dyeing raw wool is a fun and simple project the whole homesteading family can enjoy doing together. You can probably dye the wool sheared from your sheep with ingredients you already have stockpiled in your kitchen.
As already noted, dry wool takes either natural or artificial dye really poorly. If you plan on drying the wool it is best to take it straight from the scouring bath into the dying process.
You can wet dry wool for dying, but the more wool is exposed to warm water and heat, the better the chance that it will welt felt and mat together so it is unusable for manipulation by fiber artists.
Wool Dying Basics
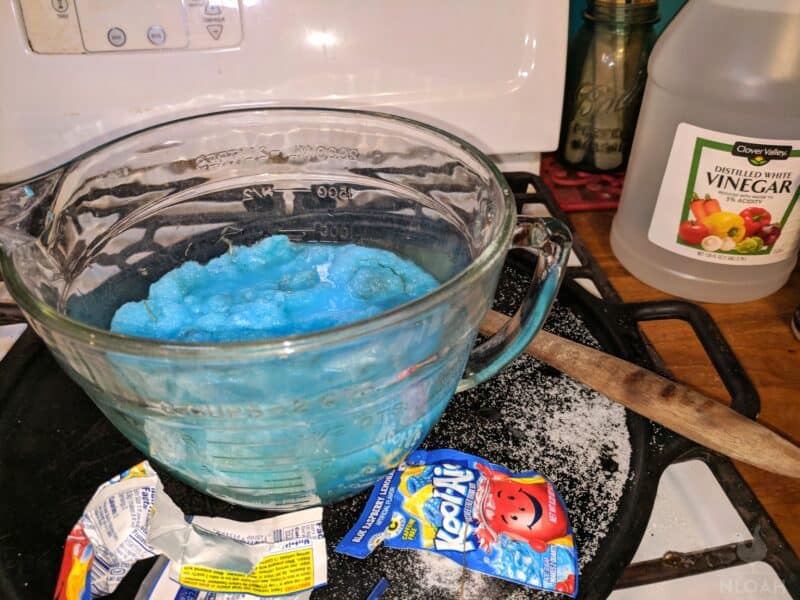
There are a myriad of ingredients you can use to dye wool. I often use unsweetened Kool-Aid, food coloring, various spices, and even vegetables, to mix colors. No matter what type of dying agent you choose to use, a mordant will always be necessary.
A mordant, or fixative, prepares the wool to accept the dye. The mordant does not fix the dye. The mixture of wool and the coloring agent must go through a heating process to actually fix the dye permanently onto the sheep fleece.
Salt is often used as a mordant when using berries for wool dye. Distilled white vinegar is typically used as a mordant when working with spices, flowers, vegetables, food coloring, and non-sweetened Kool-Aid as dyes.
I often place a teaspoon of salt in with my vinegar mordant mixture to cover all my bases and help ensure the dye is set firmly into the raw wool.
How much of the fixative is needed depends upon how much wool is being dyed, and how the mixture of wool and dye will be heated. Generally, if you are simmering the mixture on the stove, more mordant is necessary.
I had intended to demonstrate the simmering process in this wool dyeing tutorial, but the process is far more time consuming than simply using a microwave – especially when dying a large batch of wool in multiple colors, as I was doing.
Heating a wool dye mixture takes only about 5 minutes when using a microwave but takes a minimum of one hour (usually two if you want a deep, dark, or vibrant color) when heating the wool dye on a stove.
The end result whether you use a microwave or stovetop is the same, in my opinion. But, I did detail the stovetop method of heating for homesteading folks who prefer not to use microwaves.
Why You Shouldn’t Use Acids to Dye Wool
Wool is an animal hair fiber that is sensitive to high pHs, so it needs special treatment when being dyed.
Using acids such as acetic acid, white vinegar, or citric acid in the recipe is one way to dye wool, but it’s not the best method since it can cause the wool to weaken and break apart.
Though things like citric acid and even soda ash work well for cotton and linen, which both belong to a family of fibers known as cellulose fibers, these are not great for what are known as “protein” fibers like wool or often, even silk.
Instead of using acid in your dye recipes, follow the ones outlined below. A little bit of vinegar, as you’ll see in the recipes, is okay to use, but make sure you follow the instructions and don’t go overboard with it.
These alternative methods have been proven to yield great color without compromising on quality or causing damage as much as acidic substances do. There are all sorts of different dyes you can use instead that won’t harm these natural fibers (which we’ll tell you about in this post – things like food dyes and Kool Aid).
As a general rule of thumb, you should avoid any caustic chemicals or acids like citric acid for delicate animal fibers like wool, along with those like alpaca hair and mohair. These acids are often used in laboratory settings but under highly controlled settings that are difficult to mimic at home.
How to Dye Wool With Unsweetened Kool-Aid
Supplies
- 4 packets of unsweetened Kool-Aid for each standard paper plate amount of wool being dyed – about four cups of wool
- 2 tablespoons of distilled white vinegar per small color batch.
- 1 teaspoon of standard table salt per small color batch.
- Large glass measuring cup or microwave safe bowl.
- Stirring spoon – if you use wood spoons or a rubber ended spoon the dye will likely adhere to it permanently.
- Latex gloves – optional. Kool-Aid does not stain as badly or for as long as other natural or synthetic dyes, but it will discolor your hands at least slightly.
- Lukewarm water
- Sink or plastic tub
- Strainer – the dye could temporarily or permanently discolor the strainer.
Directions
Step 1: Pour the distilled white vinegar and the salt in the glass measuring cup or microwave safe bowl.
Step 2: Stir to combine.
Step 3: Open the Kool-Aid packets, and pour them into the measuring cup or bowl.
Step 4: Stir to combine thoroughly.
Step 5: Place the still damp wool into the mixture. Tap it down slowly to saturate. You have to be very careful not to handle the now fully saturated wool too much, or wet felting will occur. It is not uncommon for more small debris particles to work their way out of the wool during the dying process. Simply pick them out with your fingers and throw them away.
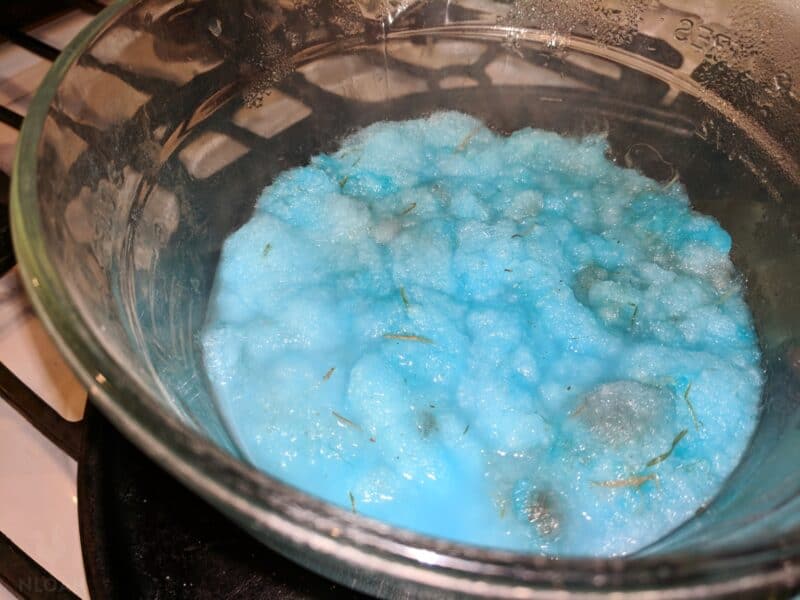
Step 6: Now, flip the wool over – handling it carefully and gently, and make sure the top side is soaked fully into the Kool-Aid dye, as well.
Step 7: Place the measuring cup or bowl into the microwave for 5 to 6 minutes. You can also set the timer for 2 minute increments to check the progress, and gently and carefully (wool will be incredibly hot) flip the wool over to soak on the other side – optional.
Step 8: Remove the wool from the microwave and pour it gently into the strainer you have placed in the sink to drain away the dye mixture.
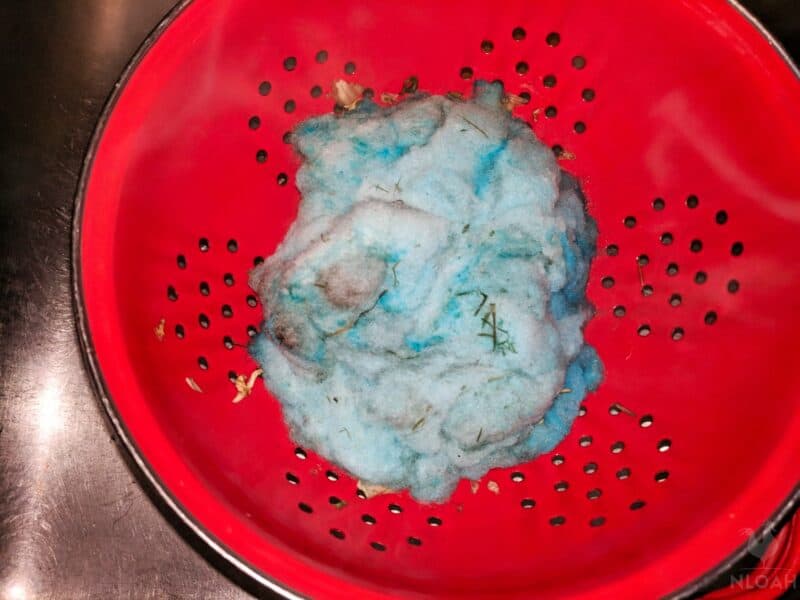
Step 9: Allow the wool to drain and cool for at least two minutes.
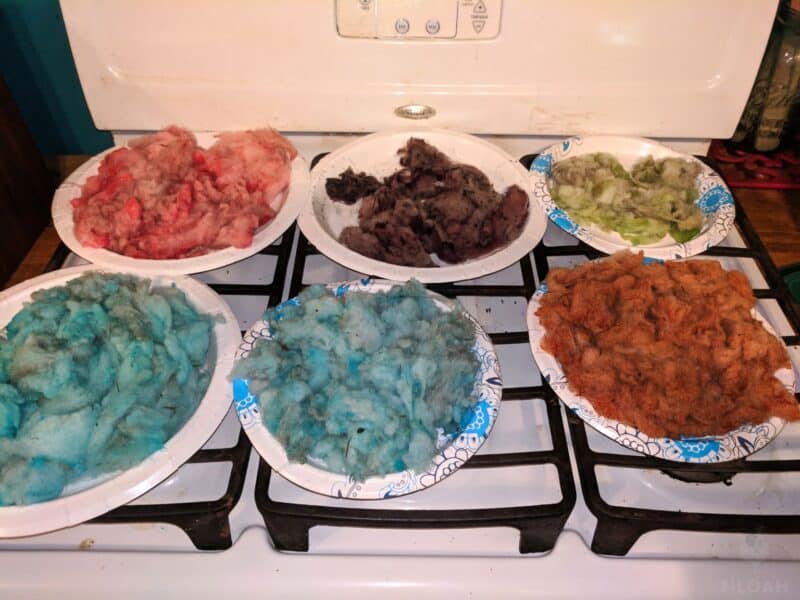
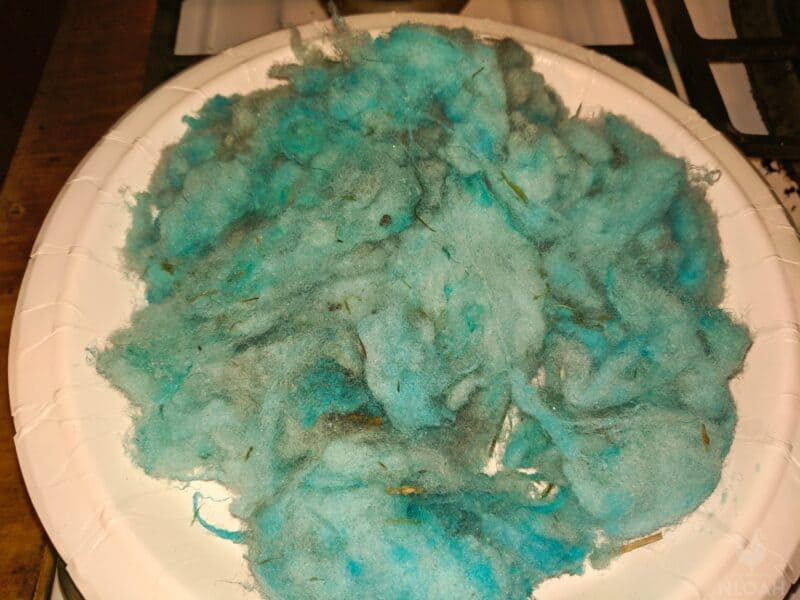
Step 10: Place the dyed wool onto a towel, baking rack, or paper plate, and allow it to air dry completely. Unless you are using a baking rack, you will need to turn the wool over multiple times to ensure both sides are drying evenly, and to pour away any excess dye that will work its way out of the dense wool.
How to Dye Wool With Fruits and Vegetables
There are a plethora of different types of vegetables you can use to dye wool – or basically any natural fabric.
Best Fruits and Veggies for Wool Dying:
| Red Cabbage – no mordant needed | Black Raspberries |
| Red Onions | Beets |
| Carrots | Celery |
| Lemons | Blueberries |
| Grapes | Strawberries |
| Raspberries | Spinach |
Directions
- Finely chop up the chosen produce and place it in a cook pot. It is best to use either stainless steel or dedicate a cook pot just for dying, because it will become permanently stained.
- Place the chopped produce in the dye pot.
- Pour twice as much water as the fruits or vegetables you will be using as a natural dye.
- Bring the water to a rolling boil.
- Turn down the heat to a simmer, and let the mixture steep for at least one hour.
- Remove the pot from the stove, and pour the mixture through a strainer you have placed in your sink with another pot beneath it to capture your dye.
- Now it is time to add a mordant to the dye. If using salt (which works best with berries) dissolve ½ cup of salt for every 8 cups of water used in the dye. If using distilled white vinegar, use one part for every parts of water used in the dye mixture.
- Once the mordant has been added to the dye mixture and stirred thoroughly to combine, immerse your raw wool into the pot, as well. Do not place so much wool into the pot that it cannot move about freely, or leave any part unsubmerged once you gently push it down (wearing gloves) into the mixture.
- Simmer the dye mixture with the wool immersed in it for at least 60 minutes. If you want a bold, dark, or vibrant color, simmer for up to two hours.
- Once you are satisfied with the color the wool has taken one, pour the pot through the strainer once again.
- Remove the wool once it has cooled enough to touch and place on a paper plate, towel, or drying rack. It will typically take between 1 to 3 days for the dyed wool to thoroughly dry, as noted above. Remember, if the wool is drying on a towel or paper plate, it will need to be flipped over periodically, and any dripping dye poured away the next day.
- To dye wool naturally with fruits and vegetables in a microwave to speed up the process, follow the heating instructions in the Kool-Aid dying section.
Wool Dyeing With Flowers Herbs, Flower, Roots, and Bark
You can dye wool with either fresh or dried flowers and herbs. Some fans of natural homemade dyes contend that using fresh flowers and herbs brings a more vibrant color to the dye – and I tend to agree.
To make a dye using flowers, herbs, roots, or bark, simply chop the items finely, and follow the dye preparation steps noted above in the fruits and vegetables section to create your coloring mixture.
Once you choose a heat source (microwave or stovetop) follow those already outlined directions, process your raw wool in the dye and lay it out to thoroughly dry before use.
The color of the natural item does not necessarily dictate the hue it will create when processed into a dye. Typically, the more of the natural dying agent you use, the darker or more vibrant the shade will be on the wool.
Review the list below to discover some popular and commonly available naturally growing dye ingredients, and the shades they create in a dye mixture.
| Red | Madder Root – powdered, Dandelion Root, St. John’s Wort |
| Pink | Birch Bark, Rose Hips, Lavender Flowers, Beet Root – powdered |
| Brown | Juniper Berries, Black Walnut Hulls – powdered |
| Orange | Paprika, Bloodroot, Cayenne, Annatto Seed – powdered, Barberry |
| Yellow | Turmeric, Catnip, Calendula Flowers, Chamomile |
| Green | Plantain Leaves, Stinging Nettles Leaves, Hyssop Leaves, Comfrey Leaves |
| Purple – Blue | Hibiscus Flowers, Cornflowers, Elderberries |
How to Dye Wool with Food Coloring
Supplies
- Food Coloring – 4 tablespoons per every quart of water used
- Standard Table Salt – 1 cup per ever gallon of water used
- Water
- Stainless steel cook pot or a cook pot that has been dedicated for dying
- Spoon that will not stain or has been dedicated for dying projects
- Latex gloves
Directions
- Fill the pot up with enough water to cover the amount of raw wool you are going to dye. Don’t forget to measure the amount of water used so you can determine how much salt and food coloring you need.
- Squeeze in the food coloring. If mixing several colors together to create a specific shade, you must count each drop of every color used towards your total per quart allotment.
- Pour in the salt.
- Heat the mixture on the stovetop over low to medium heat – just to a simmer – or put the mixture into a microwave safe bowl and heat it for about 2 minutes.
- Put the wool into the dye bath and carefully submerge.
- Allow the wool to sit in the dye mixture for about 20 minutes while it is still simmering on the stovetop or put it into the microwave for about 5 minutes.
- Once the mixture is removed from the heat source, strain it in the sink.
- Gently rinse the dyed wool in water, and lay it out to dry as noted in above instructions.
Tips and Hints
- It can take 1-3 days for the wool to dry completely before it can be stored or used in needle felting projects.
- If the color of the dye bath is not pale, the wool has not soaked up enough of the dye to create an even color throughout or to be a bold color when dried. If the dye bath mixture is still dark after about 5 to 6 minutes in the microwave, put it back in for another 2 minutes.
- If the dye bath is still not pale after the additional two minutes in the microwave, consider using a little more vinegar and salt in the next batch, or heating the vinegar so it is warm – not hot, when using it as a mordant before adding the Kool-Aid dye (or any dying agent except berries) into the bowl.
- To use the stovetop to dye the wool with Kool-Aid instead of the microwave, follow the heating instructions in the produce dying section below.
How to Dye Wool With Dye Powders
Dyeing wool with a dye powder is another option you can consider. Be sure to wear a dust mask when handling dye powder and follow the instructions on the bottle or box of dye powder carefully, as these vary depending on the manufacturer.
Do some research when buying dye powders, too, as some can be quite caustic to breathe in. Look for one that is specified as being safe to use with wool.
Supplies
- Wool yarn or roving
- Dye powder
- Dish soap
- Gloves, goggles, and a mask for safety
- Hot water
Directions
- Soak the wool in hot water and a few drops of liquid dish soap for fifteen minutes.
- Prepare the dye powder according to the label instructions (you’ll usually need to mix these in a mason jar or other glass container with some water – typically the ratio is one teaspoon of dye powder per pint of water, but it can vary, so read the instructions).
- Rinse the wool thoroughly with cold water.
- Add dye powder to the wool, wearing gloves to protect your hands from staining. Sprinkle the dye powder into a bowl with hot water, mixing until it has been dissolved completely.
- Add the wet wool to the mixture, letting it soak for 15 minutes.
- Rinse out extra color with a bit of cold water until the water runs clear.
- Lay the dyed wool out on a towel and let it dry completely before using or storing it.
A Little Bit of History
All wool and fabric used to be hand-dyed naturally. It was not until the mid-1800s when a very young chemist, 18 year old William Henry Perkin, accidentally created the first synthetic dye. Perkin was working to create artificial quinine to treat people stricken with malaria when he wound up with a beautiful dark dye instead.
Perkin named the dye, mauveine – which eventually became known as mauve. This accidental invention provoked an entirely new industry….virtually killing an old cottage one in the process. Thousands of natural hand dyers across the globe were soon forced to find another way to make a living.
Thanks to the burgeoning homesteading and living naturally movements, this nearly forgotten “business” is springing back to life in kitchens around the world.
Are You Ready to Dye Your Own Wool?
Cleaning raw wool and then dyeing it, are great family projects…
If you are homeschooling children on your homestead, you can use the project to teach them about using all parts of the animals you are raising, measuring skills, sink or float lessons for kids, learning their colors, telling time lessons, teaching fiber handicrafts, and entrepreneurial skill building if the wool will be marketed for sale.

Tara lives on a 56 acres farm in the Appalachian Mountains, where she faces homesteading and farming challenges every single day, raising chickens, goats, horses, and tons of vegetables. She’s an expert in all sorts of homesteading skills such as hide tanning, doll making, tree tapping, and many more.
To help your wool dry faster, you can use just the spin cycle on your washing machine to spin the water out of your wool. I place my wool in an undergarment bag used for bras, etc., place it in the washer, set the dial to spin, and spin the water out. As long as there’s no agitation, the wool will not felt. I then put my wool onto a drying rack, turn on the space heater and the wool is typically dry within an hour to two hours.
During the summer, I often spin the wool out and then put the drying rack in the hot sun where the wool dries rapidly. Natural dyes might be more prone to fading if placed in the sun which would be something to take into consideration.
Just what I have been looking for! Microwave dyeing. Did I miss the instructions in how to do it with spices? How much do I put in? When?
Also, will it hurt or help if I let the wool sit in the dye overnight? Brighter colors?
Thanks!
I think it’s wonderful that young people like you are doing all these natural things. I learned to spin and dye yarn in the early 1970’s and we did all the things you are learning about now. My friends and I had a little trouble finding someone who knew how to spin to teach us as there was no internet then and most of the women who knew how to spin had passed away. It was truly a dying (no pun intended) art then. We didn’t know about kool-aid and food coloring so we did all our dyeing with natural materials or chemical dyes.