Making natural dyes from plants, weeds, vegetables, and fruit is a fun way to repurpose harvested garden plants and make all natural non-toxic dyes for a myriad of sewing and fiber arts projects.
Some homesteaders cultivate a “dye garden” just to have enough beautiful plants, herbs, and weeds on hand to dye the wool they sheer from their sheep.
Natural plant dyes are easy to make – they only require both copious amounts of petals, stalks, or leaves … and patience. The patience quote is two-fold. You must wait for your plants to grow in the garden or are ready to be foraged in the wild, and be willing to allow the natural matter to simmer long enough to process out the color.
You can break the rules a little bit, and microwave the natural dye matter, but this would prevent you from making a large enough batch to dye a whole dress, one sheep’s worth of wool, or a quilt.
It takes about five cups of flowers to create enough natural dye to color a toddler size shirt. If the material you are working with is thick, like wool, it will soak up the coloring far more than a thin cotton T-shirt.
I cannot recommend highly enough to only use natural fabric like cotton, wool, or silk when coloring using a homemade non-toxic dye. I have tried using blended fabric and always end up with an epic failure. It takes far too long to grow, harvest, and process natural plant dyes to waste all that work on a fabric that is simply unwilling to accept the coloring.
Table of Contents:
History of Natural Dyes
Long before human beings started recording history, plant pigments, herbs, weeds, nuts, and bark were used to make dyes. Not only were natural dyes used to color clothing (yes, including animal skins) they were also used to temporarily paint the skin and hair.
Blue and indigo are the two most difficult colors to produce naturally. Master dyers spend years perfecting their growing, gathering, and processing techniques to achieve true blue and indigo.
Natural Plant Dye Materials
Typically, plants will provide a muted or soft color when being turned into natural fabric dyes. But, when you are working with vibrantly colored plants, some nuts, and fall leaves, the colors you can achieve tend to be bolder in hue.
Never expect your dye to match the color of the flower petals or buds you are working with, and you will never be disappointed. For example, many shrubs will produce an orange or red natural dye color.
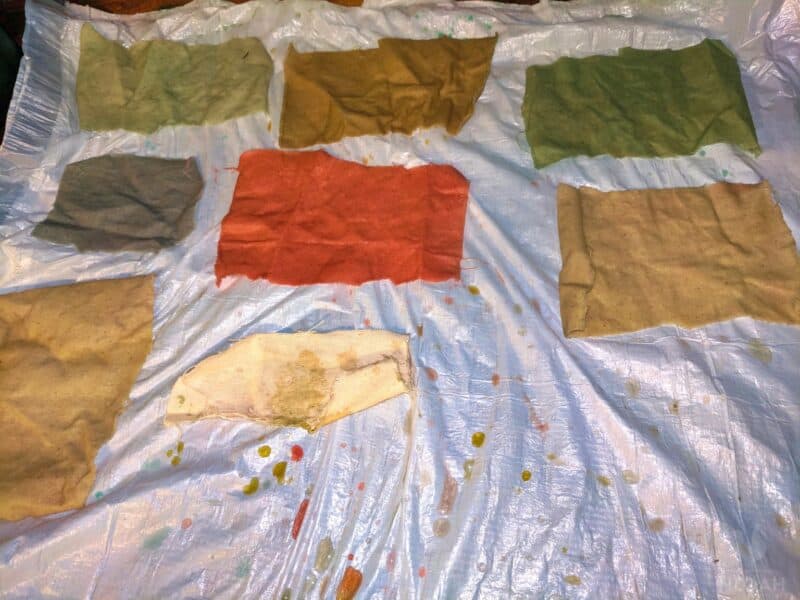
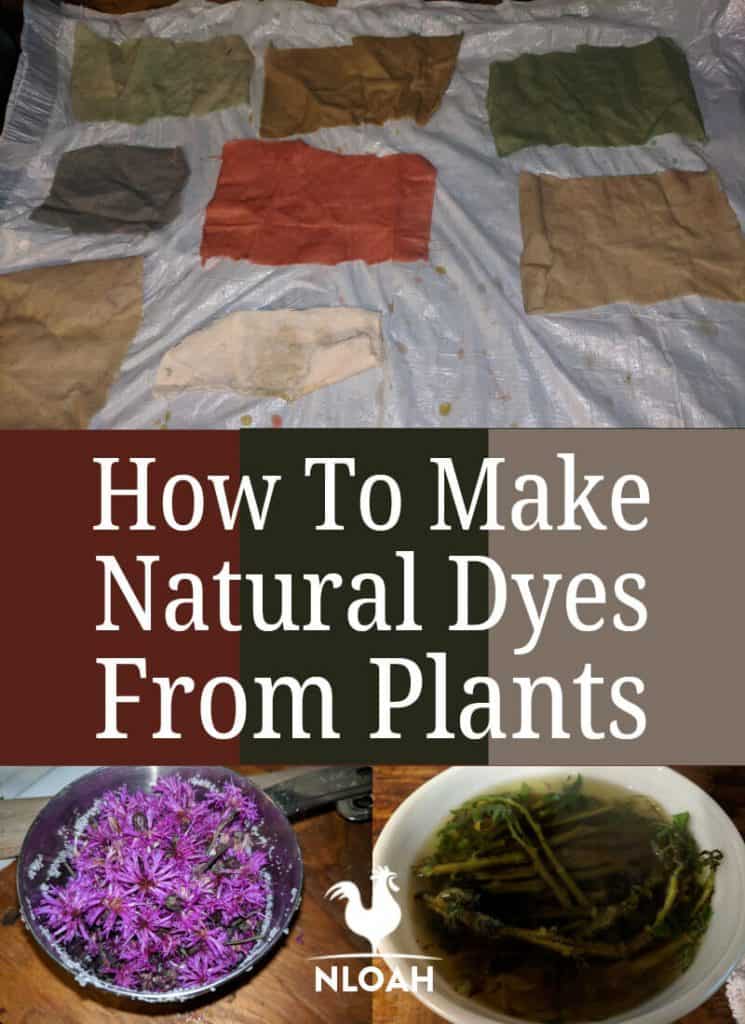
I look at natural plant dying as a grand adventure with a gloriously unpredictable result. Our color chart located below will help guide you on what color to expect from bark, nuts, berries, herbs, and plants commonly used by fiber artists in natural dyes. This is merely a guide, so your results may vary.
Feel free to get extra creative and combine several different plants in one pot to experiment with different color shades once you have successfully created single-source dye batches.
Almost every plant can be used to make a dye, but some will surely not provide an attractive color.
Mordants
A mordant, or fixative, is always used when making a natural dye, and in most manufactured dyes.
The mordant is simply a water-soluble ingredient that helps make the dye color fast, and facilitates the formation of a bond between the dye and the fabric will be applied to.
If you try to make a natural dye without using a mordant, expect the color to fade a whole lot faster than it would otherwise – like during its first time being washed.
Although some types of mordants are specifically recommended for dying with different types of plants, fruits, and vegetables, playing around with mordants can adjust the color of the dye – sometimes dramatically.
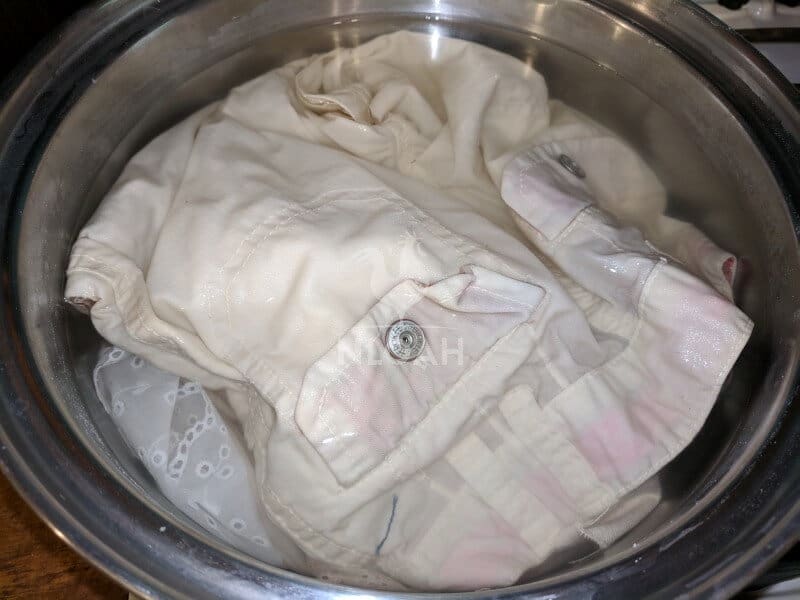
Before starting a pot of water on the stove to begin making the dye, the fabric being used must be placed in a mordant bath for at least an hour. Some fiber artists merely let the fabric soak in hot water with the mordant, but most put the mordant in a pot of water and simmer the fabric in the pot.
Historically, alum (aluminum sulfate) copper, tin, chrome, and iron were used as mordants in natural dyes. Some fiber artists still go this route to play around with color – or simply prefer using alum as a color-fast agent.
If you opt to use old pennies, tin, or iron as a mordant, wearing gloves, a mask, eye protection, and ensuring proper ventilation are highly recommended.
Many novice or hobby natural dyers, like myself, opt to use distilled white vinegar or salt – depending upon the natural dying material being used because it is cheap, always on hand, and works quite well.
What You Can Use as Mordant
Protein Based Fibers
Wool and silk, as well as other protein-based fibers, require the use of a mineral mordant. If you are dying wool, embroidery floss, thread, or yarn that will be washed frequently as part of a garment, soak (preferably simmer) the material being dyed in a mineral mordant for at least one hour – or overnight if not using a heat source.
Alum
Alum is commonly available on the spice rack in the baking section of the local grocery store or as part of a seasonal display of canning items. One of the benefits of using alum as a mordant is that you can almost always successfully make the natural dye and process the fabric being used at the same time.
Simply put, the mordant in the dye bath and then place you fabric in it and simmer. The one alum caution I would share it to not overdo it when dying yarn.
Natural fiber yarns tend to become sticky when exposed to too much alum. The common natural dying ratio used is 1 ounce of cream of tartar and one-fourth of a pound of alum for every pound of yarn or wool being colored.
Iron
Ferrous sulphate is generally used as a mordant when creating a dark natural dye on yarn of fibers. The common ratio used is one-half of an ounce of iron for ever 500 grams of natural fiber. Fiber artists who adhere strictly to the old ways of natural dying sometimes boil old rusty nails in water to make an iron mordant.
Tin
This old-fashioned mordant is typically used to bring out beautiful green shades in plants, herbs, and vegetables. Tin really is not recommended to use as a mordant to process yarn, thread, embroidery floss, or wool because it is a harsh substance that can make these materials extremely brittle.
When used in the right manner, tin can create one of the most vibrantly clear and colorfast manner of natural dyes. Tin is usually used either in addition to another mordant or placed in an after dying bath the fabric is soaked in. Due to its potentially highly toxic nature, tin has largely fallen out of favor with most natural dyers.
Chrome
I am not going to offer any tips on how to use chrome as a mordant. It just seems far too risky from a health perspective to me, and truly negates the whole point of making dyes naturally instead of just soaking your project in a commercially manufactured dye.
Copper
If you have pennies old enough that they were actually still made of copper, they can be tossed into the cook pot, and used as a mordant. Don’t have any cool old pennies lying around the house?
Copper sulfate is available to use for mordant making and other projects. The ratio mixing results are the same as those recommended for iron. Like iron and to a larger degree chrome, copper exposure could pose health risks.
When dying using fruit, salt is recommended. When dying with vegetables, plants, or herbs, distilled white vinegar is commonly recommended.
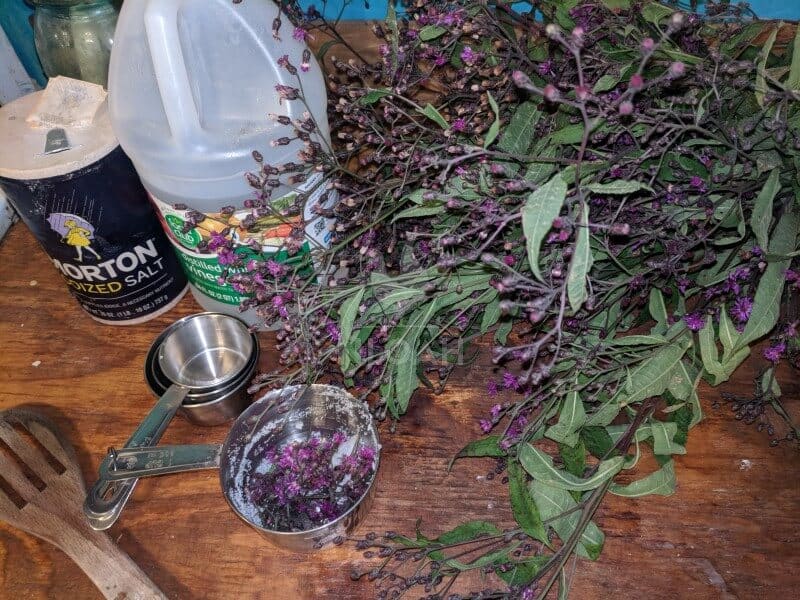
Table Salt
This is perhaps the simplest and cheapest route to go when searching for a fixative for natural dye making. This is an excellent fixative for yarn, embroidery floss, thread, and 100% cotton fabric.
The mixing ratio is 8 parts water to 1 part salt. Put the ingredients in a large cook pot, and simmer after adding the fabric for about 60 minutes.
Always squeeze out the excess water thoroughly when removing the fabric from the mordant bath – but do so as gently as you can. The fabric can go straight into the natural dye bath after being rung out.
Distilled White Vinegar
Mix four parts water to 1 part vinegar and process the material being used just as described in the salt section above.
Baking Soda
Mix ½ of a cup of baking soda for every gallon of water being used in a mordant bath.
Tara Powder
This is another traditional natural dye fixative. It is not easy to find at the corner store and is a lot more pricey than salt, distilled white vinegar, or baking soda. It is extracted from Tara pods for it natural tannins properties. Mixing instructions are detailed on the packet labels.
Best Fabrics and Fibers for Natural Plant Dyes
The type and thickness of the fabric being used will have an impact on how the dye is both absorbed and retained. Using the same successful bach of dye on a silk fabric will almost always create a different hue than it will appear on yarn or even wool.
| Felt – sheep’s wool | Silk |
| Angora – rabbit wool | Mohair and Cashmere – goat wool |
| Llama Wool | Alpaca Wool |
| 100% Cotton | Canvas |
| Bamboo | Muslin |
| Reeds | Wood |
For the best and longest lasting results, allow the fabric to sit in the mordant and dye bath overnight after simmering for one hour.
Steps to Making Natural Dye
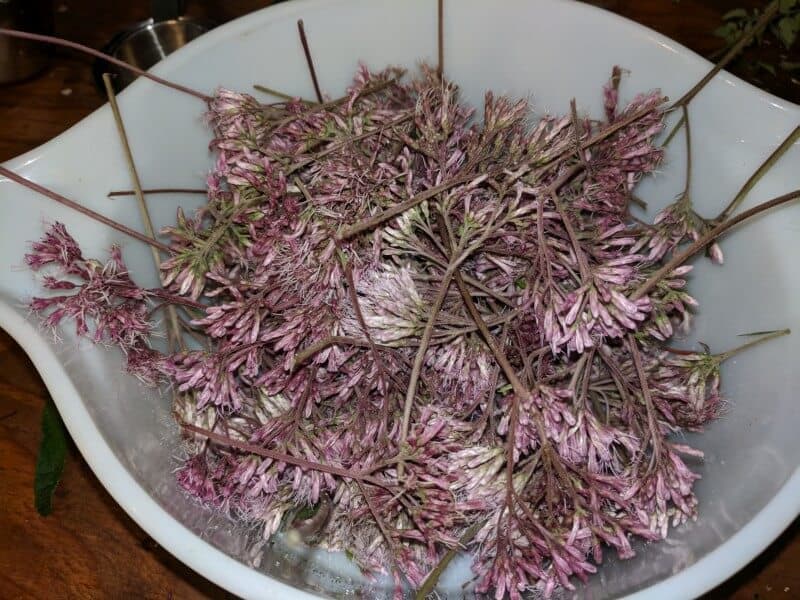
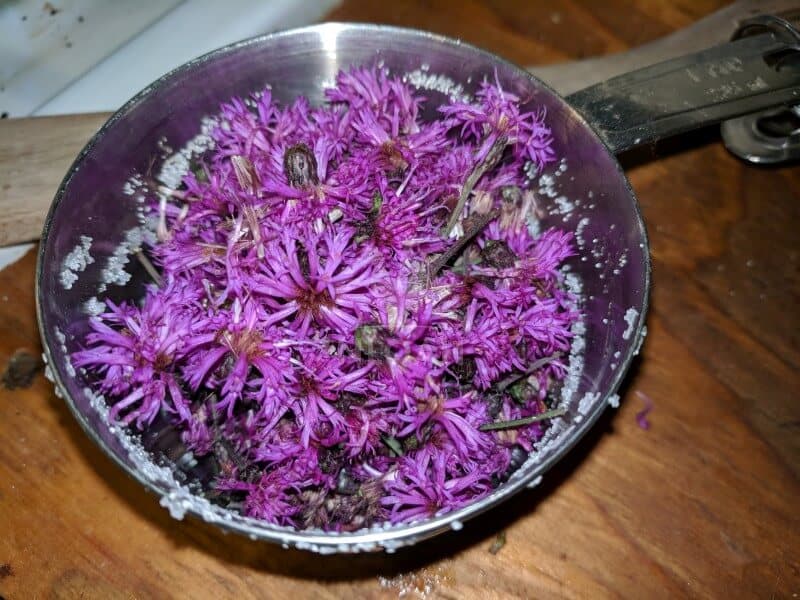
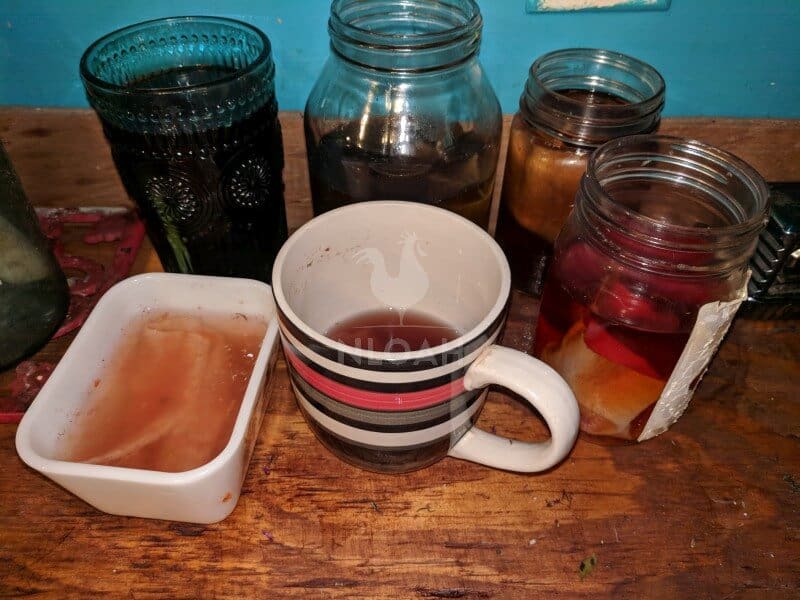
1. Chop up the natural dying material you are using finely, unless dealing with small flowers. They can be tossed into the cookpot whole.
2. Put all of the natural matter in a large cookpot.
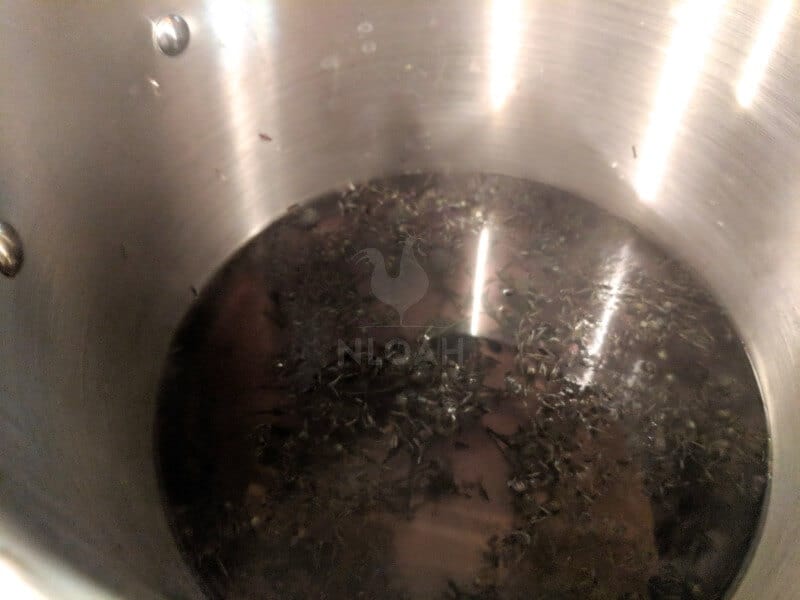
3. Cover the natural dying material with twice as much water as the amount of material. You can measure this out, 1 cup of flower petals would require 2 cups of water, or simply eyeball it and make sure that the water stands twice as tall in the pot as the natural matter on the bottom.
4. Turn on medium heat under the cookpot, and simmer the natural dye mixture for one hour. If making the dye and dying at the same time, put the fabric in the cookpot for one hour, as well.
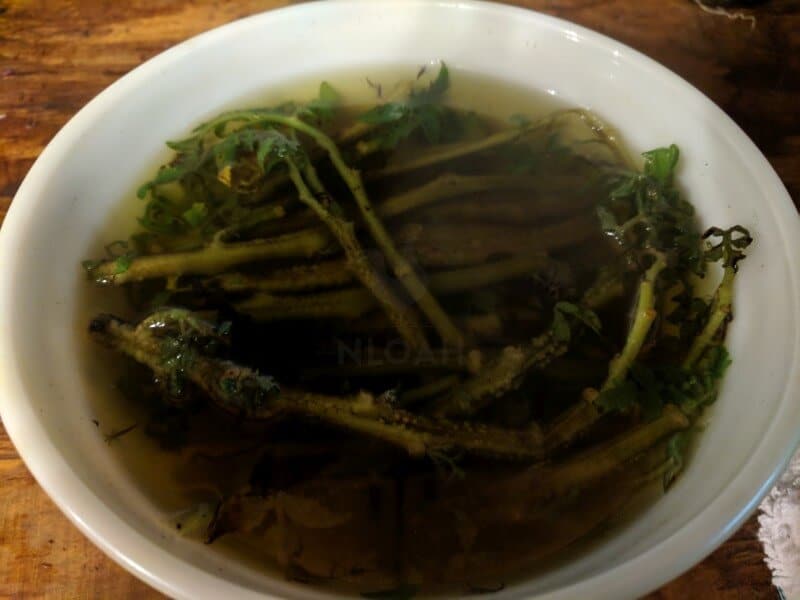
5. If not dying as the same time as making the natural dye mixture, strain away the natural matter – keeping the liquid.
6. Pour the dye into a storage container with a firm fitting lid after it has cooled to room temperature if keeping it for future projects. If using immediately to dye fabric, make sure the fabric has been exposed to a mordant bath before soaking it in the natural plant dye overnight.
You can choose to heat the fabric through in the dye before soaking overnight even if you are using stored dye. Some fiber artists experience better results using a warm dye as opposed to a cold one.
Hints and Tips
- Always use a non-reactive pot, bowl, or storage container when making, mixing, or storing dyes made from natural ingredients.
- If you’d like to change/alter the color of the dye, you can add something acidic – like lemon juice.
- Resist the urge to stir when the fabric is in the mordant bath or the dye. Just make sure the fabric has freedom of movement and can float about nicely in the mordant bath and/or dye bath. You may need to place a brick or coffee cup or the like on top of the fabric, to make sure it does not float to the top.
- Although not as potent as manufactured dye, food coloring, or even Kool-Aid used in DIY home dying projects, the natural dye can often leave a stain on your hands and countertops – cover them accordingly.
- You can use natural dyes to tie dye and make multi-colored yarn. Use the natural dyes and strings or rubber bands to tie-dye as you normally would to tie-dye. Dip small portions of yarn, string, embroidery floss, or thread into the desired color, and allow it to dry completely before dipping subsequent sections in another color.
There you have it folks, the natural dying process is simple – just time consuming. The hardest part of the entire project for me is leaving the fabric in the dye bath overnight without constantly lifting it up with tongs to see how it is progressing.
I usually have the best luck (especially with wool) when making the natural dye and dying the fabric all at the same time. Maybe it is the constant heat that makes the dye set better, or just the fact that dying this way requires substantially less patience.
The Process of Extracting Color
Extracting the color from a plant is easy; you boil it. There are suggested ratios of plant to water in order to get a nice color. Simply put, the more plant material you have, the stronger the color.
Most natural dye recipes instruct you to chop or slightly crush the material to help release the color. Once you add the plant material to a pot with water, bring it to a light boil for an hour. Once you see the color in the water, remove the plant debris and add the pre-mordanted fiber.
The fiber will continue to steep in the hot dye bath for at least an hour if not longer. The fiber can sit in the dye bath until it cools, then it can be rinsed in water or another mordant after bath. Natural fibers take on the color of plant dyes better than synthetic ones.
Animal fibers work better than cotton, especially wool. I have used natural dyes on cotton with satisfactory results, but the color is light and not colorfast. I prefer to use wool yarn. It soaks up color beautifully and lasts.
Silk is another natural fiber that takes on color very well. Pre-mordanting any of the fibers before dyeing will ensure the color lasts.
Some Other Popular Plant Sources for Natural Dyeing
Butternut (Juglans cinerea): The Confederate army’s gray coats were made from a dye made with butternuts. The tree’s bark, nuts and roots will yield colors ranging from brown, to black and gray.
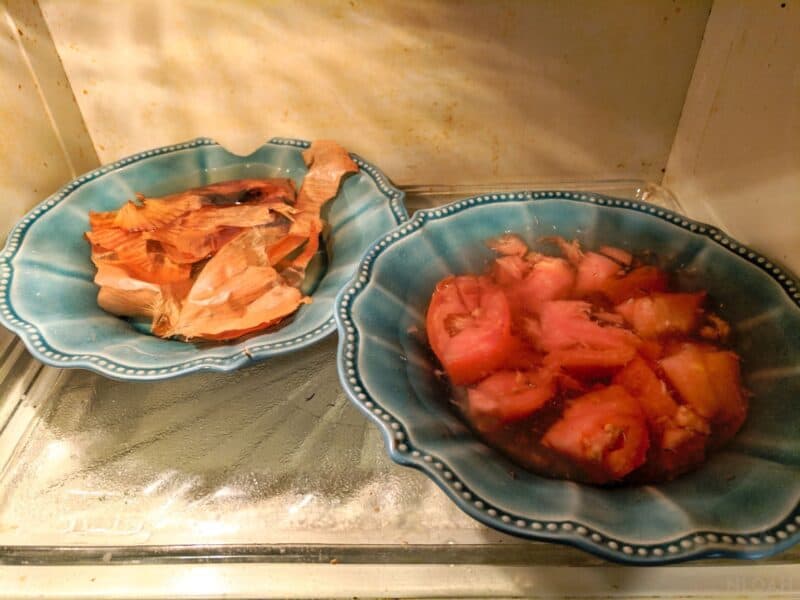
Bloodroot (Sanguinaria canadensis): This herbaceous flowering plant native to eastern North America, speckles heavily wooded areas in the spring. They are dainty white, crocus-like flowers that produce a vibrant orange sap. This plant produces red and orange dyes. The color fades fast, so a mordant is suggested.
Rose Madder (Rubia tinctorum): This evergreen perennial has been used for centuries as a source for red dye. A stronger dye is obtained from the roots, but the leaves will give some color as well.
Marigold (Tagetes patula): This common garden companion flower will produce colors ranging from bright yellow to khaki green. A stronger color will result if the flowers are allowed to soak or ferment for a few weeks.
Woad (Isatis tinctoria): A flowering plant native to central Asia. It’s one of two plants that will yield the color blue, the other being indigo. It has been cultivated for centuries for dye.
The same values that motivate the local food movement have also led crafters to look into the origins of their materials and try to find healthier, more local sources. One of the most exciting and accessible of these local materials, especially for gardeners, is natural dye.
Once I started looking at the world with a dyer’s eyes, I began to see the boundless potential of plants to make glorious, beautiful color. Some natural sources originate from plants but can be found in your kitchen, including spices like turmeric and paprika and beverages like coffee and tea.
Some can be spotted in the woods or on roadsides, like black walnut and pokeberry (yes, that was me clipping the sumac berries on the side of the highway). Still more natural dyes can be found in the flower or vegetable garden, including zinnias, red cabbage and beets.
The two main concerns about natural color that I hear are: (1) the colors are too muted and (2) the colors won’t last. While there’s validity in these claims, there are also exceptions and workarounds.
If you’re concerned about brightness, your mind will be changed by turmeric, which produces a yellow so vivid and rich that friends will think your fabric came directly from India.
It is true, though, that some colors are brighter than others, and steadfastness is a concern. But preparing your fabric with a mordant before dyeing helps you get a more saturated, long-lasting color.
While there are several options for natural mordants, the most often used is alum, a nontoxic, naturally occurring mineral also known as potassium aluminum sulfate. (Vegetable gardeners and preservers may be familiar with alum as an ingredient in pickling.)
After yarns or fabrics are prepared in an alum bath, the cooled alum water can be used around acid-loving garden plants.
The color outcome depends on your textile origin, too. A plant-based textile like cotton or linen will dye differently from an animal-based fabric like wool or silk. This is especially true when using vegetable dyes such as beet or red cabbage, which work well on animal-based textiles, but not on plant-based ones.
No matter the dye source, the process of making the natural dye is similar and involves boiling the solids in a vat of water, then simmer for an hour or more before removing the solids.
You then reheat the dye bath and simmer fabrics in the dye for at least an hour. I typically let mine sit in the cooling bath for several more hours or overnight to let the color really set in.
BONUS – Natural Dye Plant Color Table
| Natural Dye Ingredient | Expected Color |
|---|---|
| Turmeric Powdered Spice or Root | Yellow to Orange |
| Mint – fresh or powdered | Yellow |
| Celery Leaves | Yellow |
| Thyme | Yellow |
| Tomatoes | Pink |
| Strawberries | Pink |
| Cherries | Pink |
| Cranberries | Pink |
| Raspberries | Pink |
| Black Raspberries | Blue to Purple |
| Blackberries | Blue to Purple |
| Plum – skins only | Blue to Purple |
| Blueberries | Blue to Purple |
| Mulberries | Blue to Purple |
| Black Currants | Blue to Purple |
| Oak Bark | Beige to Plumb |
| Elderberries | Lavender to Mauve |
| Hollyhock | Orange to Maroon |
| Acorns | Brown |
| Walnuts | Dark Brown |
| Onions | Yellow to Orange |
| Goldenrod | Yellow to Gold |
| Yarrow | Yellow |
| Jewelweed | Yellow |
| Dandelions | Yellow |
| Calendula | Lemon-Yellow |
| Ironweed | Blue to Green |
| Willow Bark | Light Gray |
| Elderberry Leaves | Gray to Tan |
| Beets | Light Pink |
| Oak Leaf | Mustard to Red-Brown |
| Black Beans | Blue to Purple |
| St. Johnswort | Yellow to Green, but sometimes red |
| Carrots | Orange |
| Paprika | Brown |
| Parsley | Kelly Green |
| Chamomile | Bright Yellow |
| Fennel | Yellow |
| Coreopsis | Yellow and Red |
| Red Cabbage | Greenish Blue to Purple |
| Bachelor’s Buttons | Light Blue |
| Spinach | Green |
| Bloodroot | Green |
| Mountain Alder | Reddish Brown to Greens |
| Butternuts | Browns |
| Honey Locust | Yellow |
| Pecans | Yellow |
| Sassafras | Orange |
| Eastern Cottonwood | Orange |
| Smooth Sumac | Red |
| Chokecherry | Red |
| Indian Blanket | Bluish-Purple |
| Milkweed | Green |
| Texas Paintbrush | Green |
| Stinging Nettles | Green |
| Iris Blossoms | Deep Blue/Indigo |
| Phlox | Brown |
| May Apple | Black |
| Lily of the Valley | Light Green |
| Evening Primrose | Black |
| Russian Sage | Blue to Periwinkle |

Tara lives on a 56 acres farm in the Appalachian Mountains, where she faces homesteading and farming challenges every single day, raising chickens, goats, horses, and tons of vegetables. She’s an expert in all sorts of homesteading skills such as hide tanning, doll making, tree tapping, and many more.
Hello,
The article is good but i have a quick question how could you preserve the extracted dyes for longer time as you are using all plant products.
Thanks
This article has made this old hobbit heart very happy!
I noticed you didn’t mention linen so I’ll use the cotton formula.
Thank you for this information!
John, thank you. Yes, the cotton forumula does work fine for linen. Please share pics of anything you create with your natural dyes on our social media pages, I would love to see it!