Do you love crafting in your free time? Looking for a creative outlet that will provide hours of fun and relaxation? Needle felting can offer just that!
This craft may seem daunting at first, but with the right tools and instructions it can become an easy, enjoyable activity, for making things such as needle felt animals and dolls…
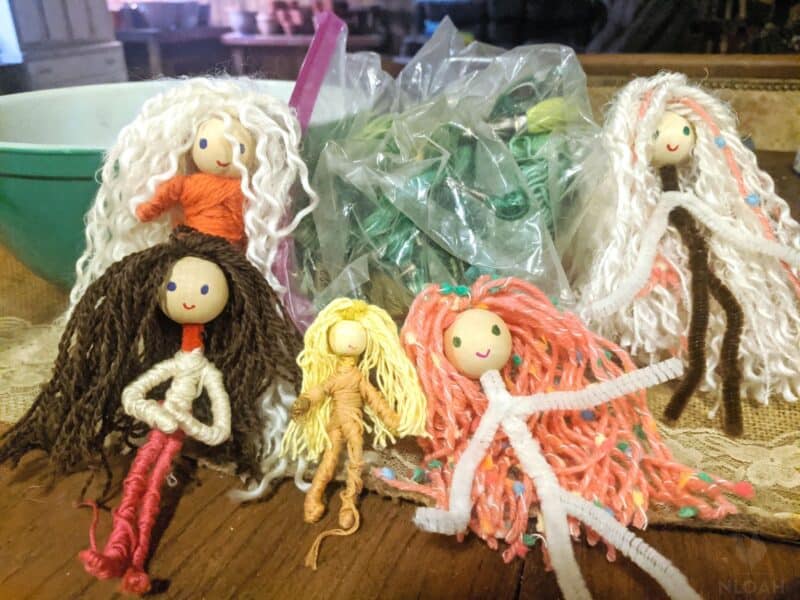
In this blog post, we’ll show you how to create beautiful needle felt dolls out of wool – step by step! From sculpting the basic shape of your doll to adding details such as eyes, noses and hair; plus ideas for decoration and customization, we’ve got it all covered here.
So grab some supplies and get ready to design fantastic little creatures from the comfort of your own home.
What Is Needle Felting?
Needle felting is a unique art form that utilizes barbed needles to sculpt wool into 3D objects.
The process requires a steady hand, as felters manipulate the wool by repeatedly stabbing it with sharp needles in order to mat, compress, and shape the fibers.
Needle Felting Tips
Start small, and focus on creating a basic shape to get the hang of working with the needles. I started with a simple round ball shape to make a rock that could be used to adorn a Waldorf playscape (plat mat) I was going to wet felt – more about how to wet felt in another post.

After pricking my fingers a few times, I got the hang of using the barbed needles. Nothing like a little blood to remind you to pay attention to how you are holding a sharp object!
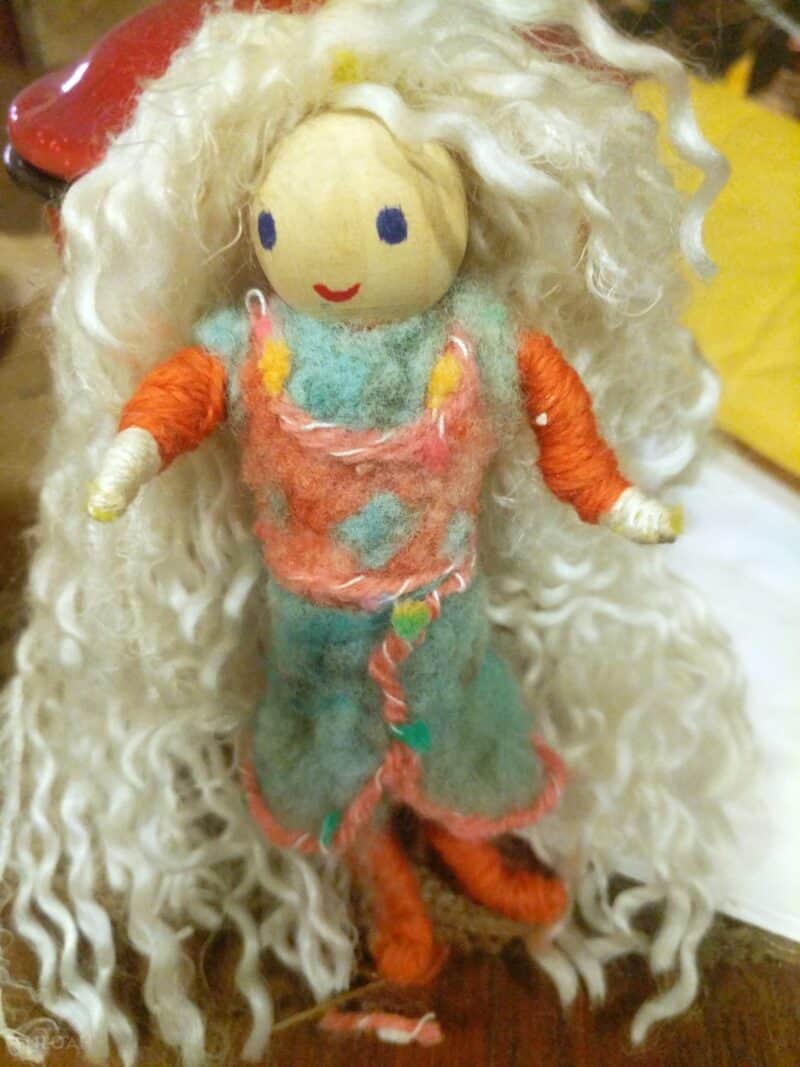
Needle felting the ball was not tedious at all, like I had feared it would be. I enjoyed poking that needle around so much my beloved Bobby was worried my next project was going to be a voodoo doll. Although I did end up starting a doll, it was a sweet little bendable princess doll for one of our granddaughters.
After being so proud of my perfect little ball, I decided to turn the sphere into a little teddy bear. The bear in the feature photo was my first needle felting project.
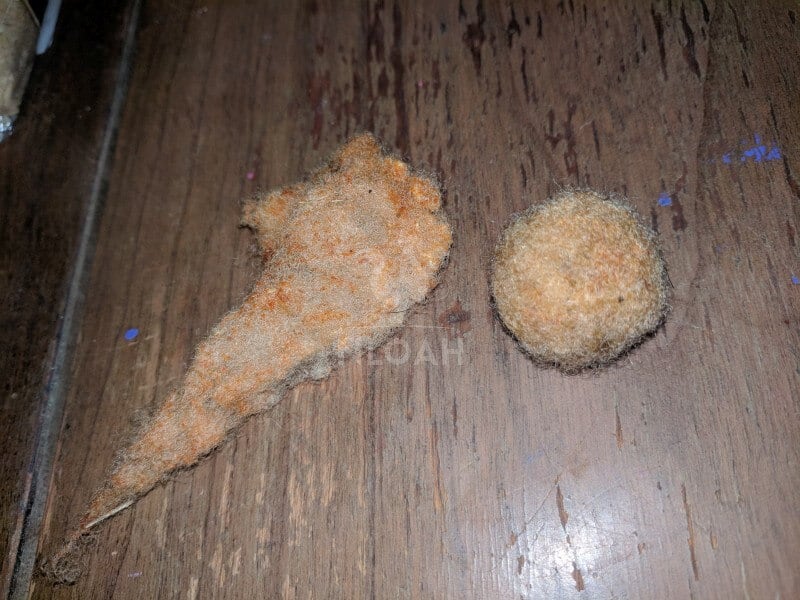
I recommend starting with a simple shape, be it a ball, star, heart, square or triangle. There is no pressure to create something ornate or lifelike when you tell yourself all you are needle felting is a practice shape. If it eventually turns into something else, that is just an added bonus.
There are a few extremely important things you must remember when needle felting:
- The needles are very sharp – no watching a movie on your phone while poking it towards your hand with nothing more than a tiny bit of fluffy fleece between it and your skin.
- Do not needle felt with wet wool. It will take a lot longer for the fibers to forge together when poked with the needle and the needle will likely rust and break from being exposed to the moisture repeatedly.
- The needles will break when poked directly into the wool object. If the broken tip does not fall out or stick out the side of the project, you will have to pull it all apart to find it or just pitch your work. Since making a little doll can take three hours of poking, you so do not want this to happen.
- The wool must be made of a natural fleece to be felted. You can scoop up some of the hair your dog is shedding and give it a whirl, but you cannot use the synthetic felt sold at the local Walmart to either needle or wet felt.
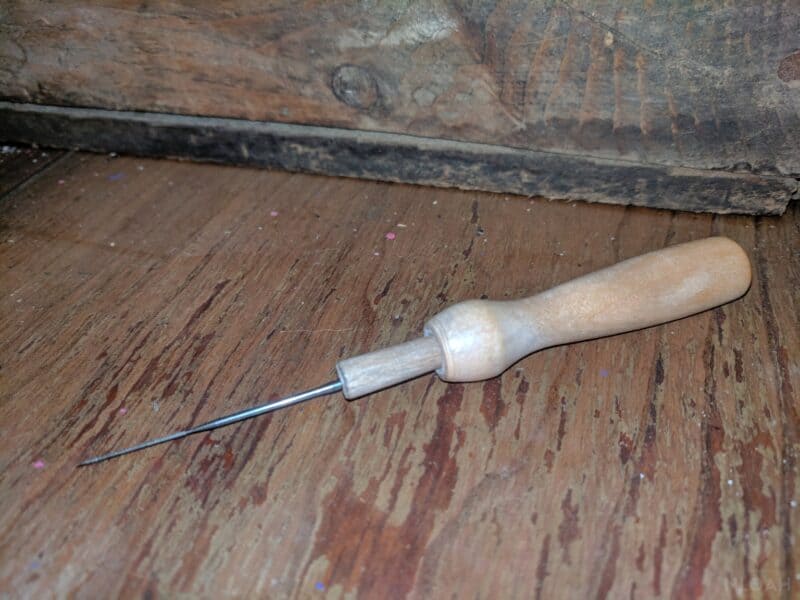
- A regular sewing needle will not work for needle felting because it is smooth from eye to tip and does not possess the barbs required to agitate the fibers in the wool. I have heard of folks using a broken hair pin to needle felt, but I cannot attest to the successful nature of this potential crafting legend method.
- Wool does not have to be carded to be needle felted.
- You can felt the base of your project with clean, undyed wool and save your colored pieces for only the outer covering. Some crafters feel carded wool is easier to work with and binds together more quickly, but I have noticed no distinct difference when working with either carded wool or raw fleece.
How to Needle Felt Dolls: Step by Step Guide
Here’s a guide to making your own wool felt dolls at home!
Gather Your Materials
There are a few things you’ll need to grab, like a foam pad, felting needles, some wool roving (or fiber), scissors, and an optional pipe cleaner or wire for making arms and legs. You can find these materials at your local craft store or online.
Forming the Base of Your Doll
Using your foam pad, start poking the wool with your needles until it forms into a ball shape. This will be the base of your doll. Keep poking until it forms into the desired shape.
This process may take some time but don’t worry — it gets easier as you go along! You may find it helpful to download a few doll patterns from the Internet so you have something to work with and aren’t trying to create a form from scratch.
As you poke and shape the wool, add additional pieces of wool if needed until it reaches the desired size. You can even use different colors of wool to give your doll different features like hair or clothing!
Adding Arms & Legs
Once you have formed the base of your doll, you can add arms and legs using a pipe cleaner if desired. To do this, simply wrap one end of the pipe cleaner around one side of your doll’s body and secure it with more wool. Then repeat on the other side.
If you’d like your doll to be “fuller figured,” you can choose to add stuffing. You will need to look up another pattern for this, since you’ll have to make a seam allowance and attach multiple pieces of wool felt for this to work. It’s more effort, but can create a more lifelike doll.
Wrap more wool around each arm/leg on either side of the body for added detail before trimming off excess pipe cleaner with scissors. If desired, you can also create accessories such as hats or scarves using leftover pieces of wool roving.
Finishing Touches
Once all parts are formed and attached to the doll’s body, use scissors to trim any excess pieces from arms or legs (if needed).
Finally, give one last poke over with felting needles all over so everything is secure before setting aside to admire your handiwork! You now have an adorable needle felt doll that was created entirely by hand – congratulations!
Add “Special Features”
Below, I will give you more detailed instructions on how to make facial features (like lips and eyes) on your doll’s face. But what if there are other embellishments you’d like to add to the bodice or hair? Don’t worry – you can do that, too!
For example, you might want to play around by adding materials like glitter, different hair styles, or even sequins. You could even give your doll bangs!
Consider adding features like buttons to give your doll character. You can also add accessories like hats or scarves using more wool roving and felting needles.
There are lots of different designs and it’s easy to get overwhelmed, so I recommend making a very simple doll first before you try adding any of these other embellishments. But then – have at it!
How To Make Facial Features
To make eyes on your needle felted dolls, you can make an indentation where they are to be placed with the needle. Then, insert a plastic doll safety eye in the indentation.
Poke around the eye socket with the needle to secure it into place. Or, you can poke in wool in the desired color to make a simple eye – and other facial features.
A third needle eye option would be to hand embroider them, and/or a mouth, nose, and whiskers in the desired spot.
To create flourishes on a project, such as stripes on a dress or fine details on a flower, you can either embroider them on or use the same technique noted above to needle felt on simple eyes.
Where to Find Wool for Needle Felting
Whether you’re a beginner or an experienced needle felter, you need to make sure you get the best quality wool at the best price.
Clearly, the best place to get the wool you need is from your own sheep, if you own them. Most people use the wool from their sheep for other projects, like spinning, but on occasion, you may have wool that has felted (or matted on) to your sheep.
Otherwise discarded since it’s not usable for spinning, felted wool is perfect for making crafts so it doesn’t go to waste. You could also ask local sheep farmers if they have felted wool you can use.
Your local craft store is a great place to begin looking for wool as well. They should have a wide selection of colors and textures available.
Of course, this convenience comes at a premium – prices tend to be higher than elsewhere (especially if you can find a local farmer who will give you the felted wool for free). You can also buy wool online or at yarn shops/boutiques.
Needle felted dolls are an easy yet creative way to pass time while making something truly unique at home. With just a few basic supplies and some patience & creativity, you too can make beautiful needle felt dolls that are one-of-a-kind masterpieces! So go ahead – grab some supplies & get creative!

Tara lives on a 56 acres farm in the Appalachian Mountains, where she faces homesteading and farming challenges every single day, raising chickens, goats, horses, and tons of vegetables. She’s an expert in all sorts of homesteading skills such as hide tanning, doll making, tree tapping, and many more.