I stumbled across wooden peg people, also commonly referred to as wooden peg dolls on Pinterest. Most of the adorable images of these simple and natural wood toys on Pinterest led to links to sale listings for completed – and expensive, dolls on ETSY. If you played with Fisher-Price “Little People” as a child, you will probably wax nostalgic over wooden peg people.
I would like to say that I was shocked by the high price of the sweet and old-fashioned little wood peg people, but I was not. Just before Christmas I discovered bendy Waldorf style dolls on ETSY via Pinterest.
The dolls are made of pipe cleaners, yarn and/or embroidery floss, a small amount of felt (optional) and 1-inch wood beads for heads. It takes only about $.50 worth of supplies and a half an hour to make the little cuties, but they carried price tags of about $15 to $65 each!
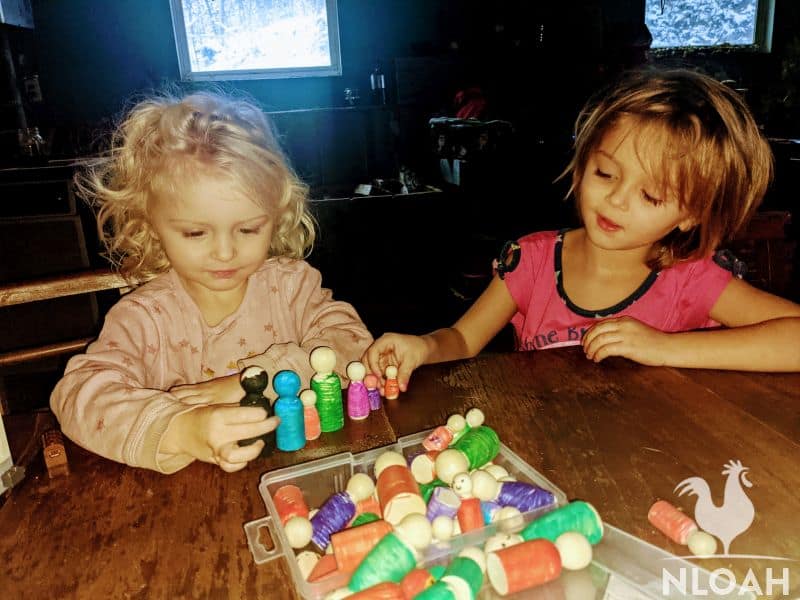
My granddaughter Auddie playing with my practice set of wooden peg dolls. She played with the dolls for nearly non-stop for three hours – clearly neglecting the store bought dolls I also placed on the table for her to choose from. Anyone who has raised or even babysat for a toddler knows that is an extremely long time for one so young to sit and play with a single toy.
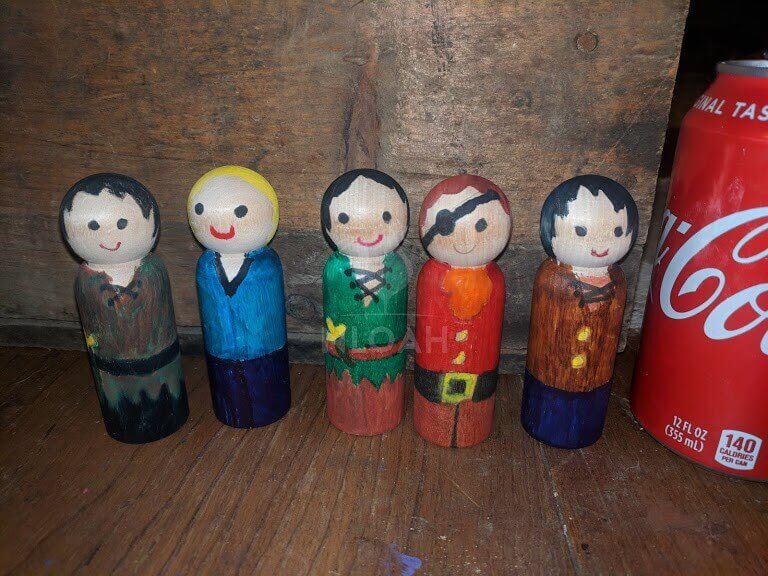
If you are a talented artist, you will probably be able to create some wooden peg people that closely resemble the ones in my inspiration pieces. Drawing talent really only comes into play on this homemade toy project if you want to get fancy with the “clothing” painted on the body.
Although I am extremely creative and more than a bit crafty, I can’t draw at all. But, because the faces on both the Waldorf bendy style dolls and the wooden peg dolls were intentionally simple, even I had no problem drawing on their faces. Armed with that knowledge and absent the desire to spend hundreds of dollars for sturdy, natural, and keepsake quality toys I could make myself, I embarked on my second doll making endeavor.
(Check out Tara’s DIY toys pinterest boards here.)
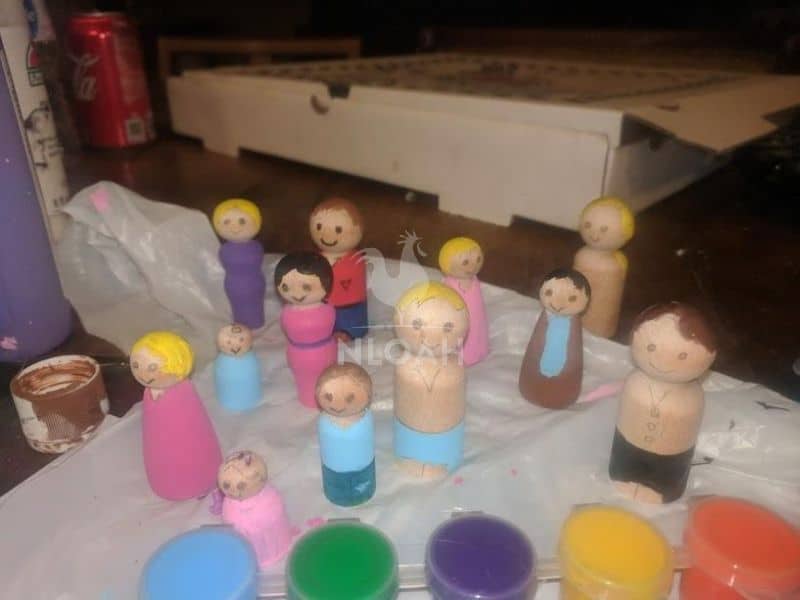
A gift was needed for a cousin’s first granddaughter, so I decided to order some wooden peg people online and make her a family. I ordered a set of 40 wooden peg dolls for $12.99. The set included five each of dad, mom, daughter, son, and baby shapes.
The wooden peg people come in a variety of sizes. The ones I purchased are suitable for a child that is at least the age of two and no longer sticks things in their mouth with reckless abandon. Most of the single, couple, and larger lots of the wooden peg dolls I found while price comparison shopping online had their size detailed in centimeters.
Disclosure: if you visit an external link in this post and make a purchase, I may earn a commission. Read my full earnings disclosure here.
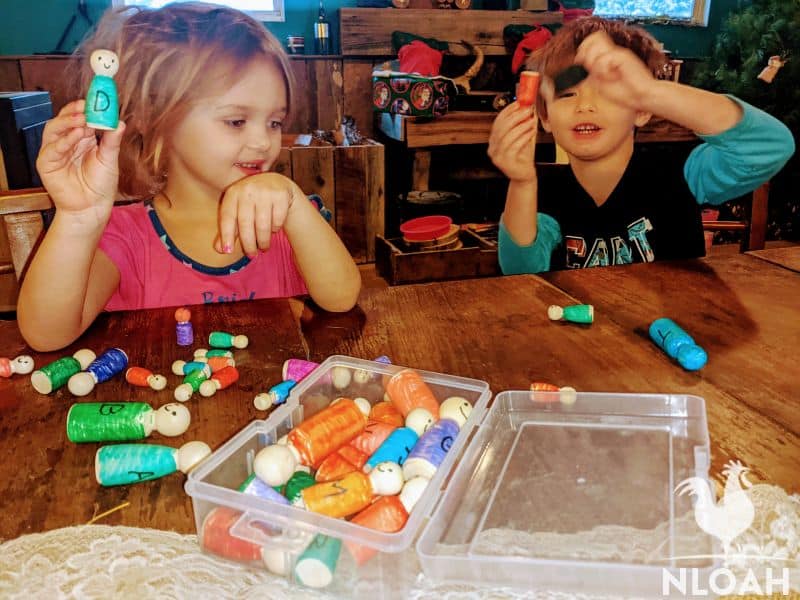
Wood peg people can be simply painted or colored with markers to create an upper case and lower case letter identification and matching learning toy. I purchased a set of 50 wood peg people in various sizes from Amazon really cheaply.
After the marker to give the impression of clothing dried, I simply wrote every letter of the alphabet onto the toys in both upper and lower case.
The children matched the big wood peg people with a capital letter “A” to a smaller wood peg person with a lower case “a.” I also typed and then printed the alphabet, again in both upper and lower case to make a game board style learning activity where the children placed the appropriate wood peg person on top of each letter.
Pay close attention to the description of the wood peg dolls before putting them in your online shopping cart so you are neither disappointed nor wind up with dolls that could be a choking hazard for their intended recipient – take the time to do the math to convert them to inches.
The set of wooden peg people I ordered range in size from 1-inch to 2 and a half inches tall. The set that I am about to order for our youngest granddaughter will be the larger variety with the dolls in lot ranging in size from 3 inches to 5 inches.

I was going to make a fabric folding dollhouse to put them in like I had made for other little girls at Christmas, but luck and a few dollars saved me a couple of hours of work creating the dollhouse. I ran in to town to pick up some livestock feed and noticed a yard sale when I stopped at an intersection.
Making a folding fabric dollhouse like the one Auddie is enjoying took only a yard of fabric, two pieces of felt, two handkerchiefs, some scrap lace, Velcro – and about two hours of time.
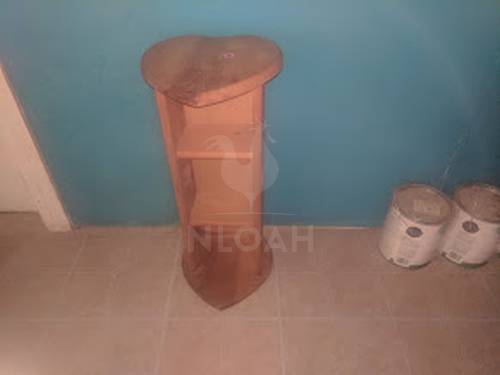
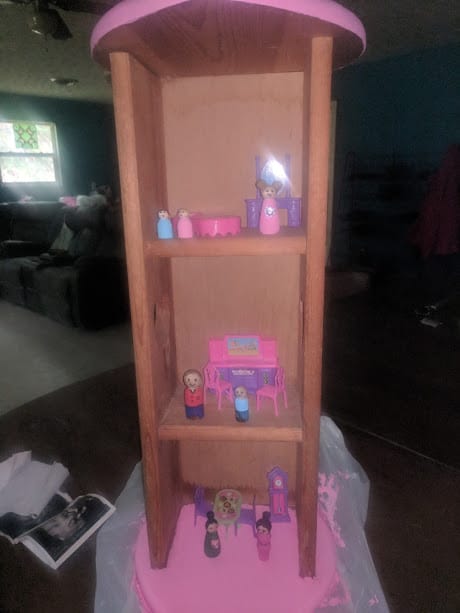
An adorable wood 3-tiered heart shelf sitting right out in front at the yard sale. On my way back home I stopped and asked what price she had on the stand. The woman told me she had $5 on it but would probably take less. I told her I thought I could turn it into a dollhouse and would give her $3, she said deal and I snagged it and headed home to start my latest homemade toy project.
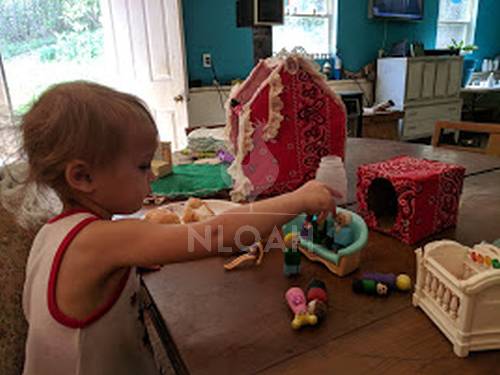
Before photo of the $3 yard sale wood shelf I turned into a dollhouse. The after photo is featured further down in this homemade toys article with the completed wooden peg dolls family inside.
To furnish the dollhouse I went to the Dollar Tree and bought three sets of furniture and on wood piece of furniture that was outside of the package for half off – totaling $3.50 plus tax. I wanted all wood furniture which the Dollar Tree always has hanging in the toy aisle – until right when I needed it, of course.
I would have made my own furniture for the dollhouse like I did for the fairy house in the first article in the DIY toys series and when I made folding fabric dollhouses at Christmas, but I had already raided my boxes of craft supplies, scraps, and upcycling material to a rather significant degree for other projects and secondly, because I needed the gift that same evening and just didn’t have the time to go full-out homemade on this one.
If the store would not have been out of the wood furniture I could have purchased a table and chairs, a bed, and more dressers like the one below for $1 each and painted them to match the color scheme I wanted. Which in this case was purple and pink, so the plastic furniture, as much as I hated to use plastic, was still brought forth a huge smile when the gift was received.

Wooden Peg Dolls Supplies
The supplies you will need to make wooden peg people are both nominal and inexpensive.
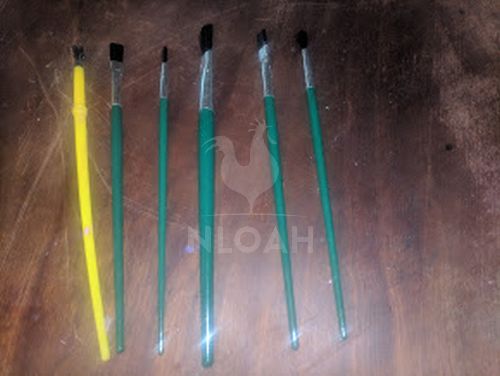
Paint Brushes
I used typical child crafting paint brushes that come in blister packs of paints from discount stores. These brushes work great when painting on the main body of the doll, but are not comprised of an end that is stiff enough and of good enough quality, to do fine detail work.
While researching wooden peg people and watching some tutorials, the crafters both professional and amateir highly recommended spending the money to purchase quality brushes from a craft store. Well, I sort of did as instructed. I bought the set of brushes shown with green handles in the photo below at the Dollar Tree – they were the same brand of brushes that sold for about $10 at Walmart and a name brand craft store.
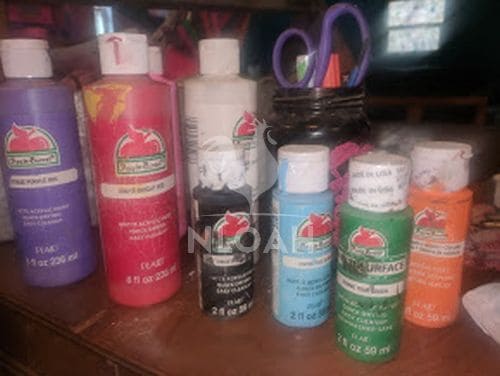
Paints
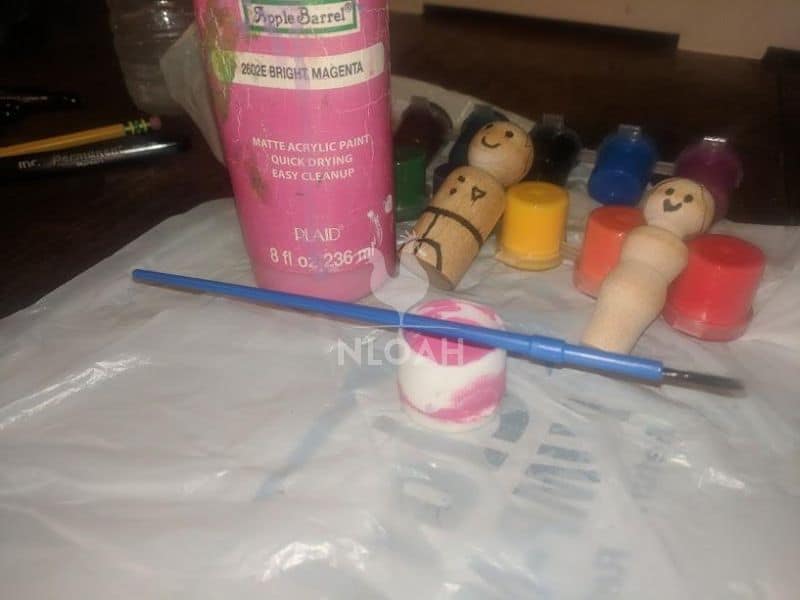
I used acrylic non-toxic craft paint. I prefer the Apple Barrel brand because it dries quickly, covers well and goes a long way, does not have a glossy finish, yet is priced for a budget-conscious shopper. The small bottles shown in the photo below cost less than $1 each and the larger bottles cost around $2 each.
Clear Coat
I did not use clear coat on my wooden peg dolls, but most folks do because it will preserve the finish during play. I don’t care for a glossy look and wanted the wooden peg people to look as natural as possible.
When using clear coat on projects I always have the best results when using the type that comes in a can and is brushed on instead of the cheaper and seemingly more convenient, spray can variety.
Detailing Tools
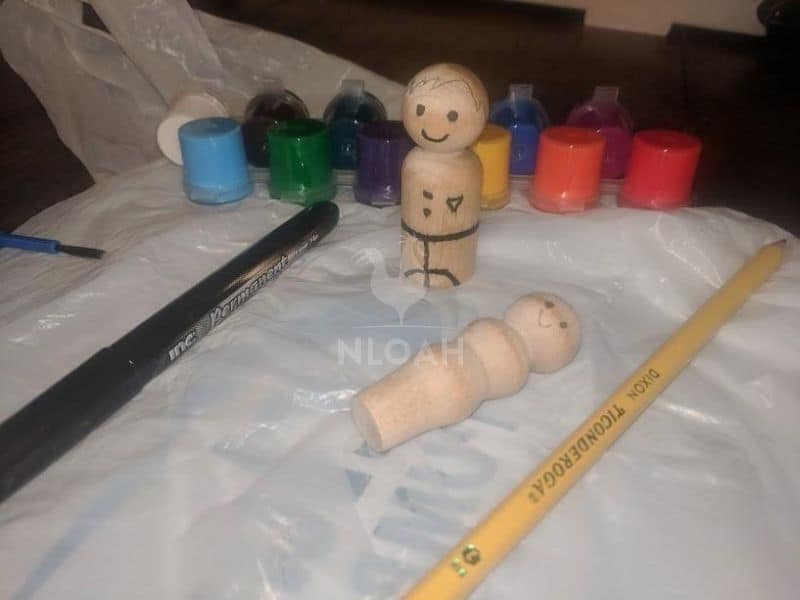
Pencil – No matter how talented of an artist you are, I would highly advise drawing the face and all body details onto the dolls with a pencil. Not only does this allow you to correct any mistakes without ruining the wood peg doll, but also permits you to easily change your mind about the chosen design once you see it completed
Permanent Marker – I used a black permanent marker to define a belt area on the male wooden peg people and to draw a line to define both a leg and shoes area.
Fine Tip Markers or Pen – I used a fine tip marker to draw on the faces As you will notice in the “how to make wooden peg dolls” section below, even narrow tip permanent markers bleed onto the wood and expand when touching the raw natural material.
You can also use the felt tip markers or felt tip pen to add some texture and depth to the hair and other details in the design – again, if you possess a moderate amount of artistic talent.
Optional Supplies
Glue – I used both low-temp hot glue and may favorite DIY toy glue – E600, to add some embellishments to the wooden peg dolls. You can also use some pieces of felt cut into a triangular shape to turn the small wooden peg people figures into cats, dogs, a fox – basically any animal you might want.
Felt – You can use felt to make ears as noted above or make actually clothing that can be glued to the wood peg dolls
Yarn – Some folks add yarn for hair when making wooden peg people. I chose not to when making this first set, but may do so when making more – which I am eager to do the next rainy day on the homestead..after all the laundry is done, of course.
Wood Beads – You can glue small wood beads to the hair on the ladies to create hair buns, ponytails, or pigtails.
How To Make Wooden Peg Dolls
Step 1
Start by drawing the eyes on the wooden peg doll with pencil. By drawing the eyes on first you can center the other facial features and the clothing to make sure the neckline on the shirts or dresses, line up properly with the face.
Step 2
Next, draw on the rest of the face with pencil. How you decide to draw the face depends upon two things, personal preference and the dimensions of the face. Some wooden peg people artisans prefer to fully embrace the Waldorf style and put no face on the dolls at all. I prefer dolls with faces and chose to do simple ones. Other artisans draw on eyes only.
When working with the child and baby wooden peg doll bodies, I found that adding a nose made the face far too scrunched. Someone with a steadier hand and more talent might have been able to pull off a full face on the tiny dolls, but I could not.
I modeled the faces on the wooden peg dolls after the Fisher-Price Little People I played with as a little girl, which is fairly commonplace.
Step 3
After the face has been drawn onto the bodies in pencil, it is time to design the hair. If you check out my wooden peg people pinterest board showcased in the link near the beginning of this article, you will find photos of common and easy to draw hairstyles that are routinely used on wooden peg people.
Step 4
Using your trusty pencil, draw a solid line around the diameter of the body to create a waistline if making dolls that are not going to be wearing dresses. You can see the dividing I did on the bodies of the wooden peg people to create a waste in the photo above.
Step 5
After you are happy with the designs drawn onto the doll, use a felt tip marker or pen to permanently set them to make them stand out and create dividing lines for use during the paint process.
Some crafter prefer to paint the body the colors desired before drawing on the pencil and permanent lines to avoid the need to paint neatly inside the lines and possibly make a mistake.
As you can see in these photos, I also draw “shoes” onto the male wooden peg dolls.
Step 6
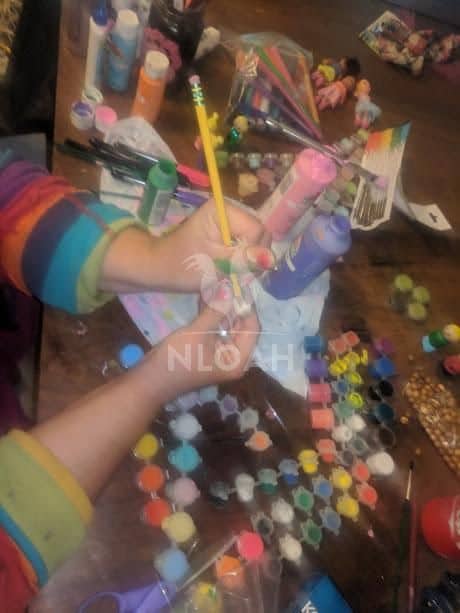
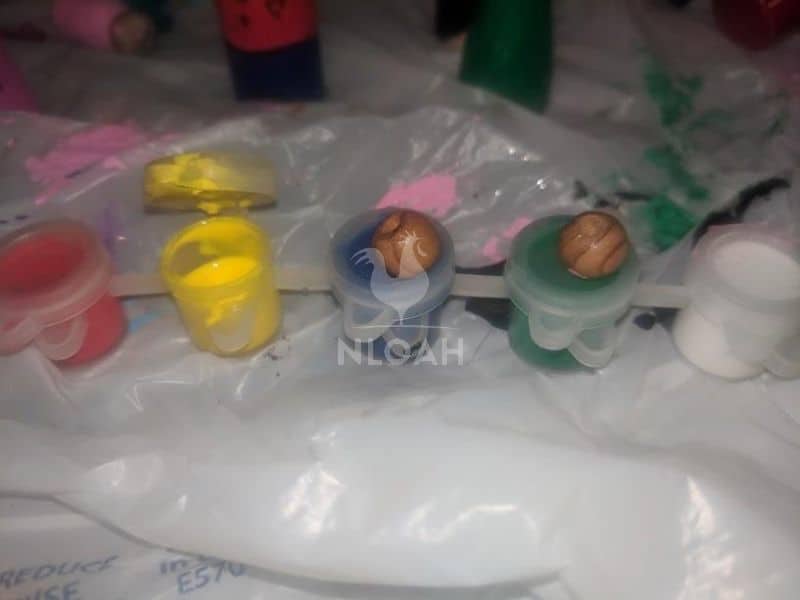
It is now finally time to paint your wooden peg doll family. I have found is extremely useful to turn my paints upside down to allow paint to drip into the cap and then dip my brush into the cap. Very little paint is needed to cover the dolls, so working this way avoids wasting paint by pouring it onto a paper plate to work from during the process.
Step 7
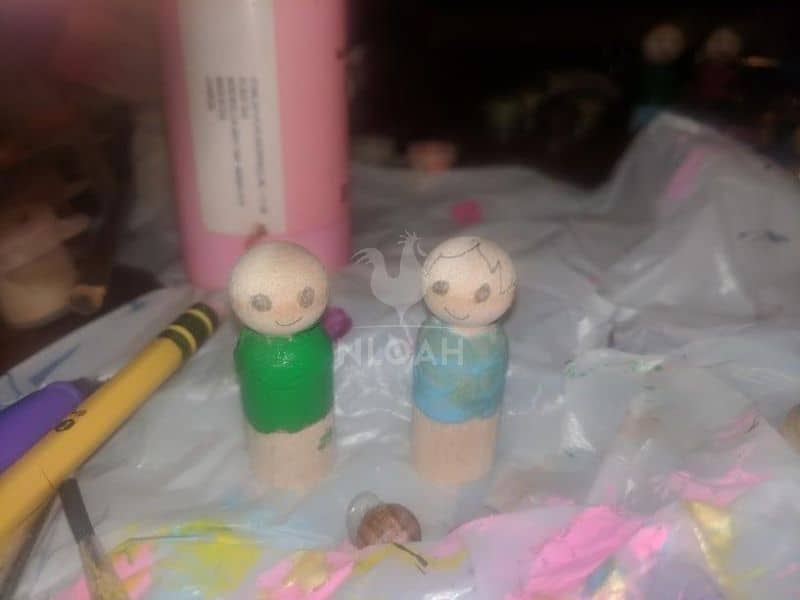
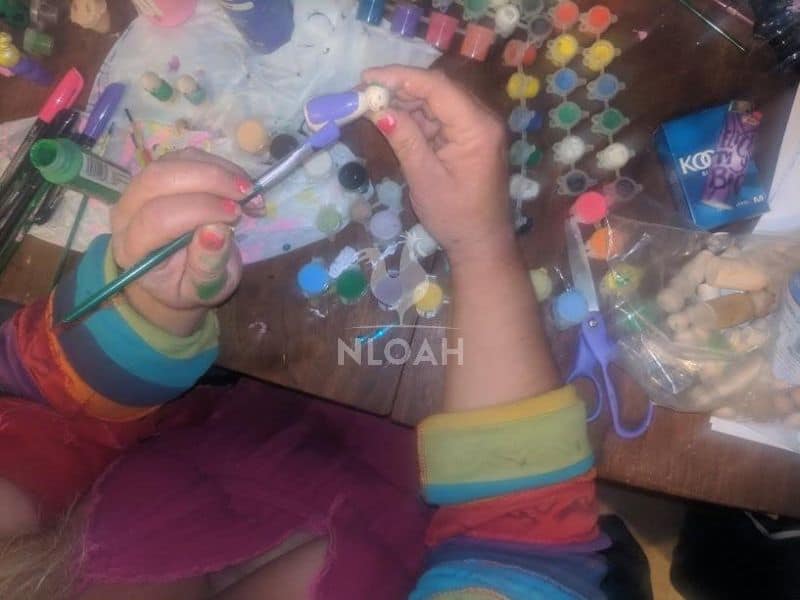
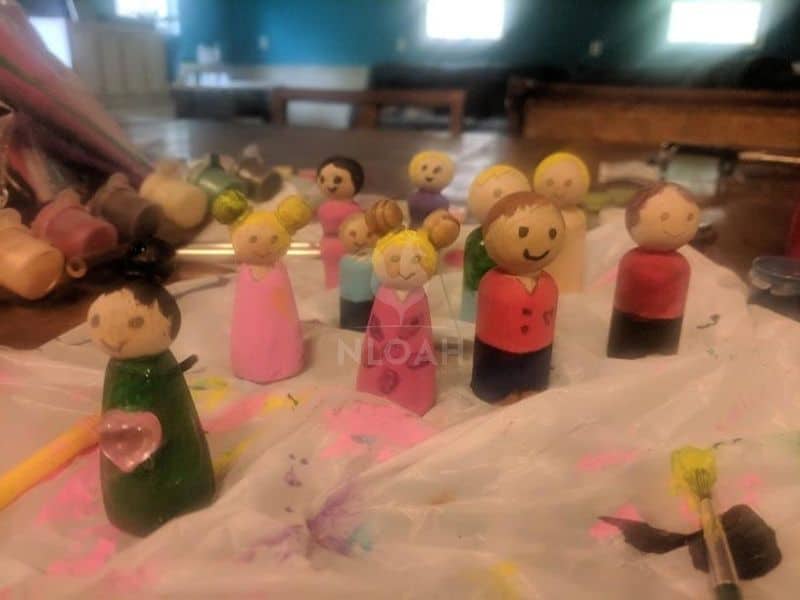
Paint the faces and hair last so you can change them to suit your body design later if needed and to avoid smudging your work – start with the body.
Paint the bodies of the dolls to reflect the clothing you want them to “wear.” I went very simple with the doll families I made, next time I may get more creative. If you do check out my Pinterest board related to this project you will also find links to websites where you can save offline for free or purchase printable paper clothing that can be glued onto wooden peg people.
I recommend painting multiple wooden peg dolls at the same time so you are not sitting around literally watching paint dry before you can more along with your project.
Step 8
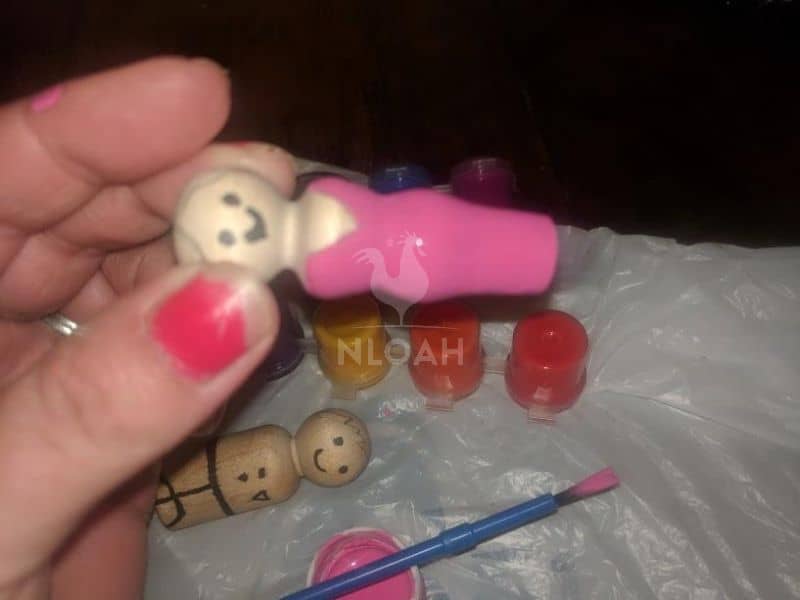
After the first body color paint dries you can paint any additional colors you are using and add embellishments if you so choose.
Step 9
If you want to make fancy hair on the ladies, simply glue the wood beads into the desired spot and allow them to fully dry and seal. Once the wood beads are dried, paint them to match the hair color.
Resist the urge to handle the wooden peg people before they have completely 100 percent dried. Once they are dried you can brush or spray on the clear coat if you choose to use any.
Here is the finished wooden peg people dollhouse – I think it turned out pretty cute. Just a couple of hours and a few dollars created a homemade toy that not only will be well loved by its intended recipient but will hopefully stand the test of time and one day be passed down to future generations.
Final Words
Have questions about making wooden peg dolls? Just leave me a note in the comments section and I will do my best to help. Trying to think of a DIY toy to make for a child of any age – or a gift for a teen or adult?
Send me those questions as well. Please share photos of your finished wooden peg people projects with the New Life On A Homestead community via our Facebook page.

Tara lives on a 56 acres farm in the Appalachian Mountains, where she faces homesteading and farming challenges every single day, raising chickens, goats, horses, and tons of vegetables. She’s an expert in all sorts of homesteading skills such as hide tanning, doll making, tree tapping, and many more.
Patti, I am not sure why it is not showing up, but I will check on that and see if it the article can be updated to include it.
I couldn’t find the pic of the finished dollhouse.
Fixed. You may need to clear your browser’s cache..