Have the dream to become more sustainable? Here’s what you need to know to get you started even if you live in an urban area, and don’t have much land, by starting an urban permaculture garden.
Permaculture, a method of gardening, originally began in Australia and was initiated by Bill Mollison and Dave Holmgren in the 1970s. The basics of permaculture is the use of elements which already exist in nature to create sustainable food producing gardens.
Using permaculture principles you will be able to turn your urban space regardless of the size or whether it’s a rooftop, balcony or patio into a sustainable food forest, mimicking nature, saving you money, time and resources. Permaculture is not only creating a sustainable garden, but also a way of life.
In addition:
- there’s less watering
- less weeding
- less re-planting
- and possibly a better yield, depending on the climate, and on your experience
All in all, permaculture is less hard work.
Let’s have a quick look at the principles and how you can apply them to whatever space you might have. We will get into the practical nitty gritty details on how to get going on these points a little further down the page. But always good to know the why before the how.
Table of Contents:
The 12 principles of Permaculture
Principle #1: Observe and Interact.
Simply put, have a careful look around, check out your neighbors, maybe they have gardens already. Have a chat with these people, they can be a wealth of information on mistakes they made and the success they have had.
Also, have a look at how the elements affect the space you want to use. How the rain flows, does it cause puddles? Is the wind going to be a problem? Do you need a wind block?
When your plants are just seedlings (babies) you don’t want them to get blown over by a heavy wind. Also where does your space get the most and the least amount of sun? Pretty basic stuff.
Principle #2: Catch and store energy.
Just by growing vegetables you are harvesting energy, the leaves on your plants capture the sun, and the roots absorb the water and nutrients from the soil and turn these elements into your fruit and vegetables.
You also need to make sure to catch some other resources like rainwater. Have a look at where all that rain comes off your roof or balcony, and catch as much as you can. You can go out and spend money on some fancy barrels and filters, or just get some buckets and stick them under the drain pipe of your roof, as simple as that.
Remember by catching the rain you are taking pressure off the system and are moving towards sustainability, the rain has some added nutrients plants love as well.
You might have an old window or sheet of glass that you can turn into a small green house. When your plants are seedlings this is a great tool for keeping them warm on those colder spring days. This is catching the suns energy using passive solar.
Principle #3: Obtain a yield.
You have to make sure you are getting more value out of your garden than the effort you put in. This is really what permaculture is all about. That’s why we set up a system that essentially takes care of itself.
Once you have put the initial labor and time in, you want to relax and let the garden do its thing until it’s time to harvest and eat what you’ve grown. You also have to see the intangible benefit, how absolutely satisfying it is to interact with nature and reap the benefits of your harvest.
Principle #4: Self-regulation and feedback.
We have to make sure we pay close attention to what we are doing right, and what we are doing wrong, what worked and why it worked and what isn’t working and how do we change that. Not only in the garden but also take a close look at how you consume things, are you buying smart?
Things that you can re-purpose or recycle, are you consuming too much? Are you buying what you need from places that are also conscious of the environment and being sustainable?
It’s important that we evaluate ourselves and make adjustments so that your path doesn’t stray too far from your goal.
Principle #5: Use and value renewables.
We all understand how fossil fuels are negatively impacting our planet and that they are running out. That makes them unsustainable or not renewable. Renewable resources are your natural elements like the sun, the rain, and the soil.
We have to treat all these with respect and in a way that benefits us. We can use the sun and the wind to generate power and the rain to support our soil, or even ourselves if needed.
Principle #6: Produce no waste
Now this is a little easier said than done in this day and age. Chances are, you are already practicing this in some ways with all the news on climate change. Just be as conscious as you can on how much and what you are buying and consuming.
Always ask yourself “is this sustainable’’ can it be reused or can it be used for another purpose once I’m done with it. Slowly this will become the new normal and you will get closer and closer to no waste.
Principle #7: Design from patterns to details
This might seem a bit confusing but really it just means stand back and observe. Observe nature how she interacts with the elements and change, also observe your community and how the people interact and react to change. You might be able to apply some of your observations to your garden and or life.
Principle #8: Integrate rather than segregate
We are going to help you learn how to put things together that support the whole system. A lot of plants of different types work better when you place them together, rather than separating them. We can observe this in our communities as well.
Principle #9: Use small and slow solutions
Smaller garden designs are easier to maintain and produce better results. So if you are just getting started keep things small and under control. Once you get good at the small systems you can keep growing bigger, trying to go too big to fast is the a recipe for failure.
Principle #10: Use and value diversity
By mixing things up and not “betting all your money on the same horse”, you add strength to the system. The way a healthy ecosystem works, and the plants’ dependencies of each-other makes the whole system much stronger.
Principle #11: Use the edges and value the marginal
In laymen’s terms this just means look how the edges of your garden interact with the environment beside them, such as when your garden is next to your fence, or perhaps you have surrounded your grow beds with rocks.
Have a look closely at these areas, see what’s growing and what’s happening. You will discover some unique opportunities such as micro climates, an example of this might be the shady area down the side of your house where nothing seems to grow. This might be an ideal place to grow mushrooms.
Principle #12: Creatively use and respond to change.
We are all aware of the constant changes happening all around us, especially nowadays. We must carefully observe changes and prepare for them before they occur whenever possible.
This can be as simple as preparing for the imminent hail season by covering our vulnerable crops, or it could be new legislation on rain water harvest we might have to make changes to our systems to comply with new standards.
Always be prepared to react when a change occurs without warning. This might be an unexpected storm or an unusual dry patch. Have your contingencies ready, tarps to protect crops or a backup water supply.
Check out my other article for a more in-depth explanation of the principles.
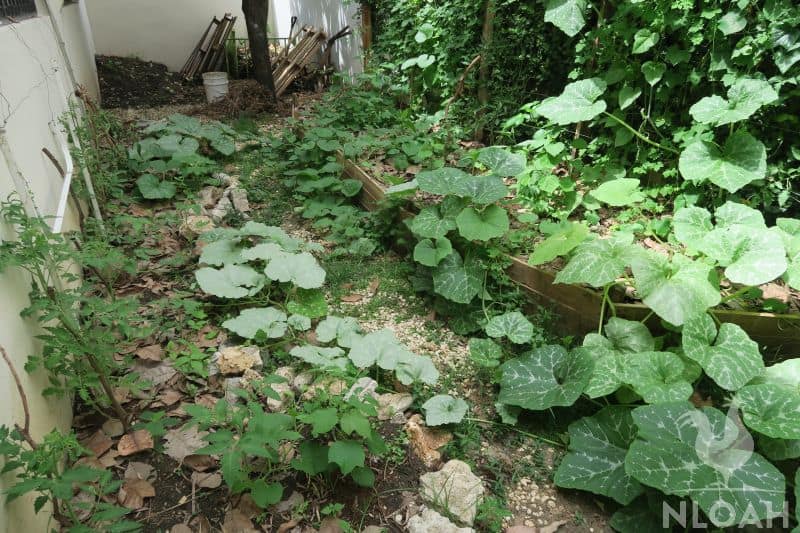
What’s a Food forest, and how can we mimic nature in an urban setting?
A food forest is just a more sophisticated garden that mimics a natural ecosystems. By creating a permaculture food forest you are using the elements of nature like sun, rain and the earth to do most of the work for you.
By following permaculture principles you are planting so the regeneration of your soil and plants goes on continually thus becomes sustainable.
Can a food forest be done in an urban setting? 100% it can! To create a food forest has to do with following the principles and nothing to do with the amount of space or the restrictions facing you in an urban setting. It’s about using guilds effectively.
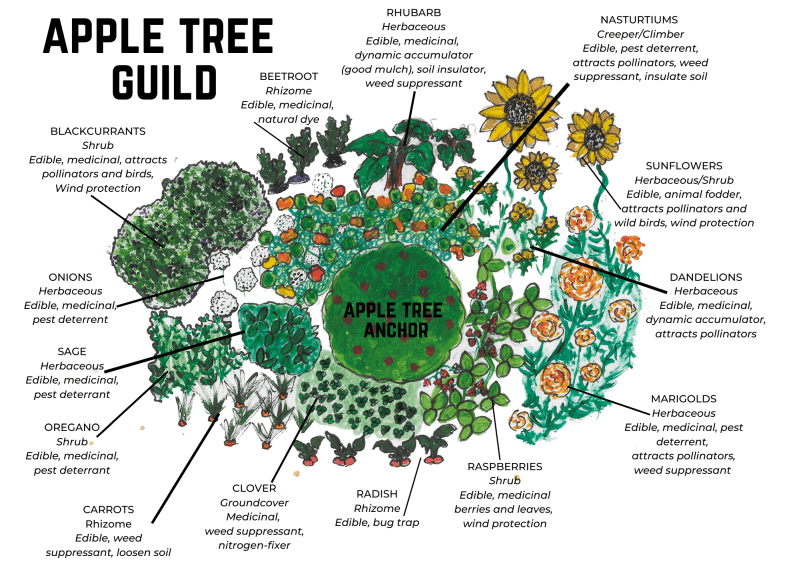
What is a guild? And can we apply it to urban permaculture?
A guild is basically a group of people or plants that have different skills but come together to make one strong association. With plants it is several different varieties of plants relying on the same ecosystem.
When you combine different plants you make the guild stronger, in that one plant has characteristics that support the other plants and Vis versa. This is ideal for the urban garden or food forest. Why? Because it provides a larger variety in a smaller given area.
Now that you have a good idea of what permaculture is and how it can benefit you by following the principles, let’s get started on the basics and start growing food.
The Design process
The next step you want to take is your design. Measure out the area of your urban permaculture project and put it on paper. Draw the approximate shape and location of your house and how it sits on the property, where your door is in relationship to the garden.
Now draw in the area for the garden, try to include any slopes and low spots. Slopes are best for small trees and shrubs, low spots can be filled in or maybe used for a small water feature like a fish pond.
Decide how you would like to enter your garden. You can make a keyhole design so everything is accessible either to your right, left, and directly in front, you can make a circle design or a Zen type garden its only up to your imagination. Create a space that not only nourishes your body, but that also nourishes your soul.
Urban Permaculture Zones
When you start to design this on paper, you are going to want to create zones. Using 4 (not 5!) zones.
Zone 1. This zone includes your house or apartment and just outside your door. This is where you will want to place all your herbs and maybe a few of your smaller vegetables, the things you need to access most often.
Zone 2. Here is where you want to plant your staple kitchen vegetables, things like tomatoes, lettuce, potatoes, peas or whatever the things you love to eat but don’t necessarily need for preparing every meal but still need quick access to.
Zone 3. This is where you want to plant your fruit trees or fruit bearing shrubs, the things you are more likely to pick or harvest once or twice a week.
Zone 4. Zone 4 in an urban setting, unless you are on a big lot will be what is beyond your garden or property’s border. So you don’t have to think too much about it unless it is likely to impact your garden.
Things like a major boulevard which is heavily sprayed or an open field that tends to flood, will require some design adjustment by using barriers or water diversion trenching.
If you do have a large plot then this zone would be where you plant your larger shade or fruit trees and also where you would keep your chickens or other animals if allowed.
If you only have a small garden, balcony or roof top you will likely only use zone 1 and 2. But you can also get as creative as you want and try in a small space to incorporate all 4, why not.
Small gardens like a patio or even balconies are the perfect place to start container gardening. You can create a bountiful mini food forest by using multiple containers that can be arranged to fit your space.
Just to add, a growing number of people and businesses are now turning to rooftop gardens, you can do this in a single flat or create a community garden on the roof of your building. This gives you much more space and a much bigger return, plus you can share the work and get to know the neighbors.
I would also like to note that in rural permaculture designs there is a zone 5. This zone would be your wildlife areas. This would apply in an urban setting if your city or town borders forest, prairie or other wildlife areas.
Once you have a rough design in mind you can get started. Your design will probably change a few times as you get into the actual process, that’s normal, just make sure you keep the zones in the right place. This will save a lot of unnecessary work once your urban food forest is functioning.
Tools
To start a permaculture garden, you need the right tools for the job. You will probably want to buy your own tools, if not, engage in your community, and I am sure you can borrow them. This also can be a great reason to engage you neighbors and community. “Many hands make light work’’.
The best place to look for tools and save a ton of money are flea markets and pawn shops. The most important thing is the durability of the tools, not how old it is or how fancy it looks.
Nothing worse than breaking a shovel handle halfway through digging a hole for the fruit tree you just brought home. Pay close attention to the quality of the steel and of the wood for all you basic tools. If you’re not sure go online and ask or find a local farmer they will know.
Speaking of tools, here is a list of the basic ones you will need to get started:
- A shovel or garden spade, both a big one and small gardener’s one. You are going to be digging a few holes. The big one you will need for the bigger holes, and the little one for potting and planting your smaller fruits and vegetables.
- A garden fork or pitch fork. Makes lifting the soil and moving piles of cut grass, weeds or small branches (mulch) easier.
- Buckets of various sizes. Remember catching your rain water? You will also be moving soil and plants around, and buckets are good friends to have.
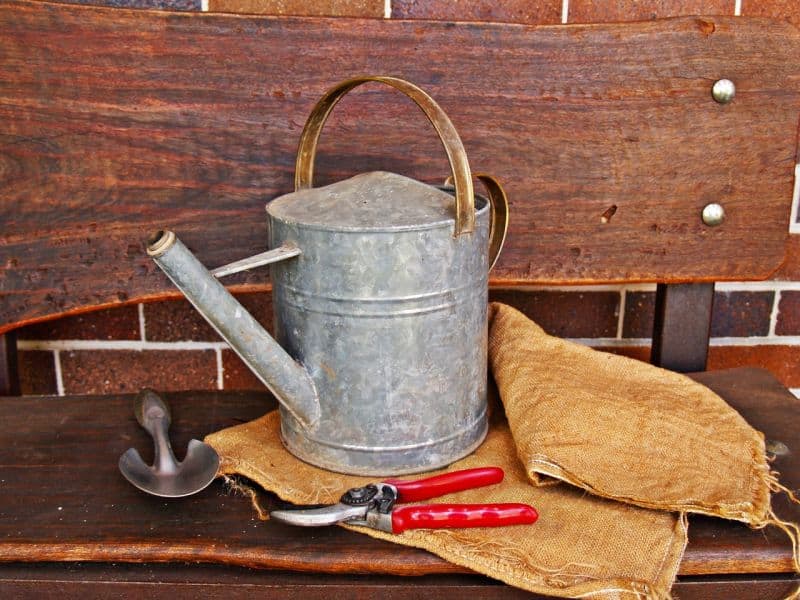
- Watering can, these are easily improvised by re-purposing used water jugs or something similar. If you don’t want to buy one, just drill a couple holes in the lid and you have yourself a watering jug. This is particularly handy when you are just starting out with seedlings or baby plants. You want to keep the water flow light or you will hammer them into the soil.
- Garden clippers or scissors. You will be using these a lot when pruning (trimming) and harvesting your vegetables.
- A hoe. This is a valuable tool for scraping around in the dirt. Whether you are making a small dirt shelf, or removing some rocks from around your plants, you will be using this one a lot.
- Also, a few commonsense things like gloves to protect your hands, a hat and sunscreen for those hot sunny days. Also have some insect repellant around until you have your garden to the point where it repels the pesky irritating insects like mosquitoes and black flies.
You will find, in time, you will want quite a few other more specific tools to make things easier, but the ones listed are enough to get you started.

Now that you have a good idea of how an urban permaculture design can benefit you, family and friends, it’s important to continue to learn the fundamentals of growing food. Keep following this journey with me, and learn more about these important skills:
- Composting, how to and how it benefits your soil. The different methods of composting, the materials you can use, other uses for compost.
- Soil and how to prepare it for planting. How to combine different soils, vermiculture (worms), understanding the PH of different soils.
- Rainwater harvesting techniques. Collecting from air conditioners, using wicking beds, using ceramic pots underground, building wicking systems from used plastic bottles.
- Planting perennials, learn to plant less annuals and reduce your work. Understanding your climate zones, the USDA zone guide has a great list of plant hardiness for zones.
- Using trenches or better known in permaculture as swales, and reduce the need to constantly water. How to follow contours for drainage, how to make a trench for maximum absorption.
- How to prepare seedlings from seeds and harden them off before planting. The best times of year to begin, the right soil combinations to use, the use of pots or bags.
- How to grow from plant cuttings (propagation).
- Nitrogen fixing your soil to avoid having to rotate your crops or plants, let nature take care of your soils nutrients. The best trees and vegetables to use for nitrogen fixing.
- The use of animals in providing a healthier ecosystem in your food forest. How chickens and ducks benefit your system and how they differ, attracting good animals, keeping bad ones out.
- How to incorporate aquaculture into your design and its benefits. The right fish to use, how to feed them without extra cost, building ponds.
We will expand on all of these and other great methods in permaculture in future articles. Guaranteed to make your journey fun and easy.
Engaging your Community
The very first thing you should do (in front of your computer) is a quick web search and see what resources are available in your community. There are probably already permaculture, gardening guilds, community gardening and seed exchange groups close to where you live.
These are all a wonderful resources where you can find great ideas and tips for making things easier. You might also be able to purchase and exchange quality seeds and tools. Additionally, these groups as well as the internet are a great resource for finding out the different legalities both regionally and federally.
Some jurisdictions might have different laws pertaining to things like water collection or keeping chickens or other animals in an urban setting. The more restrictions you have, the more creative you have to be.
Final Words
Remember there is no such things as problems, only solutions! You can make permaculture work in an urban setting, you just have to be a little creative.


Dirk is Canadian permaculture designer with a certificate from Tagari farms, studying under the tutelage of the legends and founders of permaculture Bill Mollison and Geoff Lawton. Dirk has been doing permaculture for more than 20 years, initiating and managing projects in Cambodia, Madagascar, Montenegro, and Vietnam. He’s been helping people use permaculture techniques in growing their own food, and in leading more sustainable lives across the world.