Permaculture is a toolbox of techniques aimed at regenerating the Earth and the society in which we live. However, many people see permaculture as an agriculture-based activity, driven by its originally meaning of ‘permanent agriculture’.
While permaculture now encompasses ways in which we manage energy, rebuild shelters, and rework our sociological communities, the very backbone of permaculture comes down to the understanding of how to grow a garden in order to feed, clothe, medicate, and sooth ourselves. After all, many of our resources start from the soil.

What Do We Mean by a ‘Permaculture Garden?’
A permaculture garden refers to a landscape that is focused on producing edible and useful plants that can help sustain us in our paths to self-sufficiency.
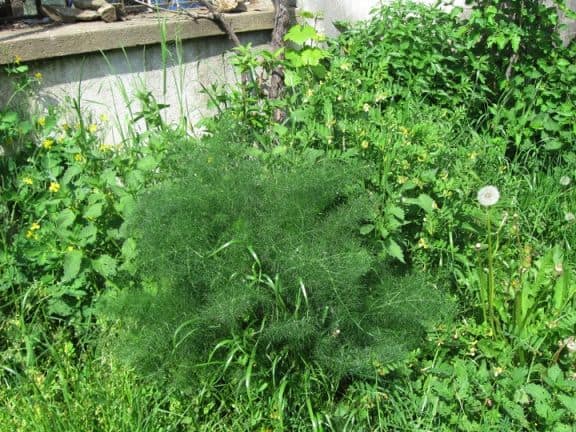
However, the true concept behind this is a garden that mimics the naturally-occurring patterns of nature, in order to promote resilience, decrease vulnerability, and increase a diverse and sustainable yield.
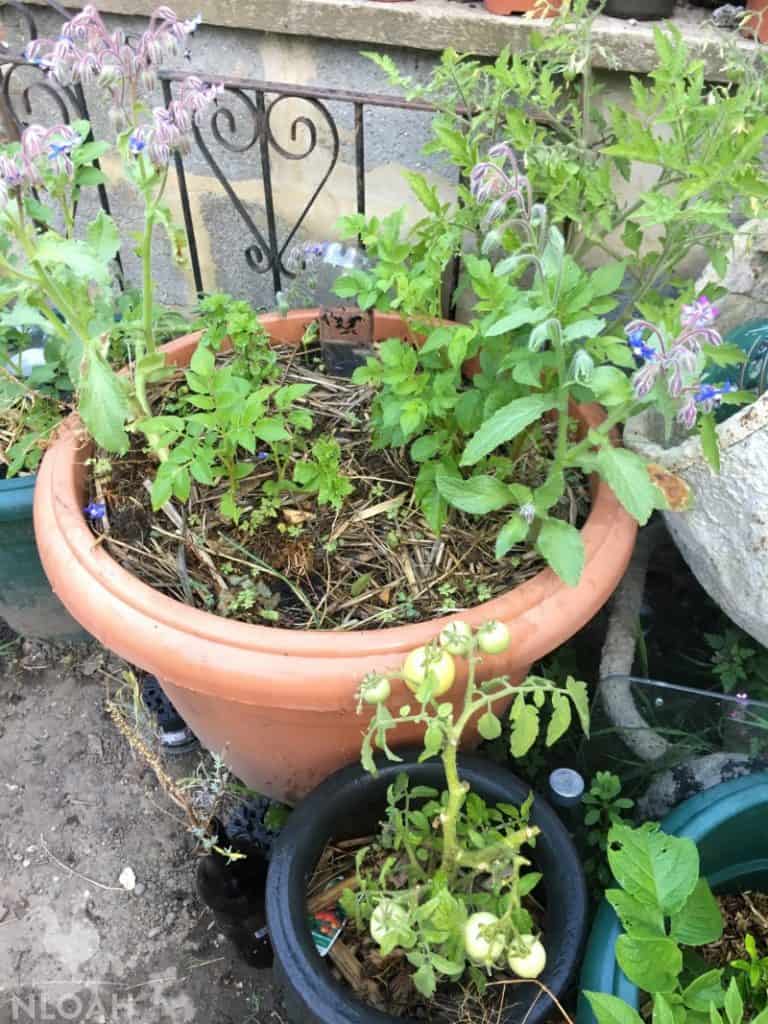
In layman’s terms, a permaculture garden is clever. It considers energy efficiency at all times, cycling nutrients and energy through its system.
This type of garden will employ biological solutions that use many elements of the ecosystem to serve many functions, all crossing over at once. By using the tools given through permaculture, you’ll spend less time managing your garden as it naturally manages itself.
The features you’ll often see most obviously present in permaculture gardens may include:
- Sheet Mulching and Composting
- Green/Living Mulch
- Herb Spirals
- Keyhole Beds
- Raised Beds
- Food Forest Design
- Guilds and Companion Planting
- Rainwater Harvesting
- Weed Suppressants
- Insect Repelling Plants
Tools You Will Need to Get Started
In permaculture, we believe in the concept of ‘appropriate technology’. This refers to the idea that using tractors and large non-renewable fueled machinery is very often not necessary. For gardeners, this can mean reducing the use of a lawn mower or chain saw, or tilling soil by hand.
Now while hand-powered work takes longer, it encourages the body to work harder, promoting personal health and self-care.
Equally, by extending the time it takes, it encourages teamwork to get the job done quicker, inciting community.
These are all permaculture aspects that demonstrate the deeper value of building a garden.
The following tools are a good start for getting yourself going with the garden:
Wheelbarrow
You’ll be carting things around the site, whether it be materials for mulch or compost for the soil. You will need to transport this with a good sturdy wheelbarrow.
A wheelbarrow of low quality, that is too heavy, or is low in height will hurt your back, so make sure to find something that suits your height and strength.
Hoe
Hoes come in many shapes and sizes. Choose the wrong hoe, and you could end up with a back injury. Select one that’s suitable for your height and won’t snap under pressure or force.
They are mostly used for weeding, dragging soil or for taking off top layers of soil, however they can be used in a chopping motion when preparing the soil to create beds. Stirrup and diamond hoes are usually better for weeding, whereas an eye hoe is more suitable for chopping.
Trowel
When it comes to planting, you’ll need a trowel. This will help you move back mulch and dig a hole in your soil that is wide and deep enough to pot your seedlings without causing damage. Wood-handled trowels are better than plastic, which tend to snap if they hit anything hard.
Garden Gloves
While it might be a good idea to build a few callouses while digging, garden gloves can help protect you when carrying other material. Spikes and thorns can come out of nowhere, as can glass in your beds and some things that bite.
Having garden gloves will stop your hands from experiencing wear and tear as such a rapid rate. Luckily garden gloves come in sizes, so make sure to get the right pair as gloves that are too big can make tasks more difficult.
Hose or Irrigation
A hose should be able to reach everywhere in your garden without dragging over beds and damaging plants, so make sure you have a line of hose long enough for your needs.
Due to the damage that hoses can do, often people employ dripline irrigation or sprinklers systems that can be zoned off to water certain sections of the garden at a time.
Pickaxe
For those making raised beds, a pickaxe becomes a great companion to a hoe. Pickaxes help to break up tougher ground and can speed up the process, especially with compact soil.
Pickaxes can be heavy so make sure you know the correct way to use one and that you choose a tool that isn’t too heavy for you.
9 Steps to Creating a Permaculture Garden
These 9 steps are a broad overview of how to get started on a permaculture garden. Design is especially important in order to create a well-thought out garden. However, getting started is just as important. Here are a few key pointers to get you on the rollercoaster.
1. Observe and Record
Biomimicry is the backbone of permaculture design. You want to create a garden that uses the natural patterns of nature and cycles biological resources through the site.
With this in mind, you should start out by watching the area that you’d like to develop to see how it progresses naturally by itself.
To get started, you’ll need a base map of your site. This will help you to see what is already there in a more ‘permanent’ sense.
On this map, you’ll want to pattern the contours of the land, any water sources, structures that can’t easily be moved, and large natural features like big trees or forested areas.
From there, you need to consider the natural sources of energy that run through the site you’ll be developing. This will allow you to create a sector diagram and a flow analysis.
In this section, try to watch out for the pattern of the Sun’s movement, how water falls and moves around the site, any wildlife tracks that move through, wind speed and momentum, fire hazards, and any shaded areas.
This will allow you to see how you can use these elements to your advantage, harnessing them and sculpting the land to enhance them.
Next you should consider the natural state of the land. Test your soil to understand what is consists of and its pH levels. This well help you to further work out how the soil needs to be improved.
After this, consider the natural flora and fauna that occur on the site. When we’re designing, to reduce vulnerability and increase resilience, patterning your own plants in similar patterns to those naturally occurring will lead to a stronger garden.
For example, if you can see a natural nitrogen-fixer in the garden, what other plants surround it? Are you seeing a ration of 2:1 of nitrogen-fixing plants (legumes) to dynamic accumulators (big leaves with tap roots that mine minerals from the soil)? If so, you will want to plant in this pattern.
Lastly, consider what is missing. Perhaps there is an area of the garden that doesn’t get too much sun or water. Maybe there are a distinct lack of pollinating insects.
Perhaps the soil is so dense that there is no aeration occurring. In this sense, you can get an idea of what needs to be added to improve the land straight away.
One thing that many people forget is to record the original observations of the garden. ‘Before and after’ recording is vital to understand the feedback loops you are receiving from the garden.
For example, by reshaping some of the land to catch water, you may see certain pests or fungi you hadn’t anticipated. Only by looking back to see the changes you have made, will you be able to make real sense of what is going on.
2. Design
From Patterns to Details
When you design in permaculture, you want to move from the big to the small. This works in terms of ideas as well as pen-to-paper design. Consider the function of the garden itself to understand what you want to use it for.
Are you creating an edible landscape, a medicinal resources, or perhaps a garden for fiber or animal feed? This will allow you to consider the elements you’d like to include whether they be herbs, small fruit trees, flowers, perennial edibles, or perhaps even small animals like chickens.
Patterns to details refers to the design from larger concepts to the small. By understanding the functionality and therefore the elements, you can start to understand the patterns in which they should occur to work together with one another.
Equally, say you want to create a rainwater harvesting irrigation system, you take this bigger idea and then zoom into the details of that element, to work out how you will build that. Some might say that the patterns represent how the elements work together to fulfil functions; whereas the details explain how each element will conduct the functions.
Inputs and Outputs
When you have a rough idea of the elements you want in your garden (fruit trees, perennials, compost pile, rainwater harvesting system, etc), then you need to consider all their inputs and outputs. An input is something that an element needs and an output it something it produces.
Take an herb spiral, for example. That herb spiral needs daily watering, sunlight, and healthy soil.
Some of the herbs may need shade. It will produce herbs for culinary, medicinal, and cosmetic purposes, while serving as an insect repellent, aromatherapy source, ornamental feature, rainwater harvesting device, and herb nursery for planting elsewhere in the garden.
By considering the inputs and outputs, you can more efficiently work out where to place this feature.
The daily watering and usage suggest it is placed somewhere that is easy to access from the house.
While an herb spiral is designed to shade some plants and provide light to others, you may consider aligning it so the Northern side is shaded by a tree to help protect the plants that need less sun, while its leaf fall will help to improve the soil and the transpiration process will create more moisture in the air.
Functions Served by Many Elements
For a permaculture garden to be effective, it needs to be resilient. Resilience is created through diversity and this is exactly what can be seen in every aspect of the garden. On the most basic level, having many different crops, as opposed to monocropping, means that if a particularly voracious carrot-eating pest gobbled all your carrots, you’d still have an abundance of edible crops to eat.
In the wider sense, look at every function that occurs in the garden. This could be water collection, energy capture, growing food, making medicine, providing shade. Every single function should have more than one element doing that function.
For example, if you rely solely on a well with a pump to irrigate your plants, what happens if the well dries up, or the electricity cuts out and the pump doesn’t work? If you rely solely on rainwater harvesting, what if there’s no rain?
This function should be served by many elements such as sheet mulching to hold water in the soil, rainwater barrels for storage, an electric and a hand-pump, a hose straight to a faucet, and so on.
Elements are Multi-Functional
To create an exponential level of resilience and efficiency, we want all our elements to be multi-functional. If each plant or element only does one thing, then we end up managing a lot more. If you’re planting something, make sure it is more than just a food or more than just a pretty flower.
For example, say you want to brighten your garden with some flowers. Why not choose to plant Marigolds at the edges of your beds. Marigolds excrete a toxin from their roots that kills harmful pests, while the orange flower attracts pollinators that help the garden to thrive.
Not only that, marigolds are edible and taste like citrus on salads and in soups.
As a medicine, Marigolds can be used to treat poorly healing wounds, reduce inflammation and swelling, deal with ulcers on the skin, reduce fever, and help with muscle spasms. The flowers you wanted to increase the aesthetic now serve 4 functions beyond looking pretty.
Relative Location
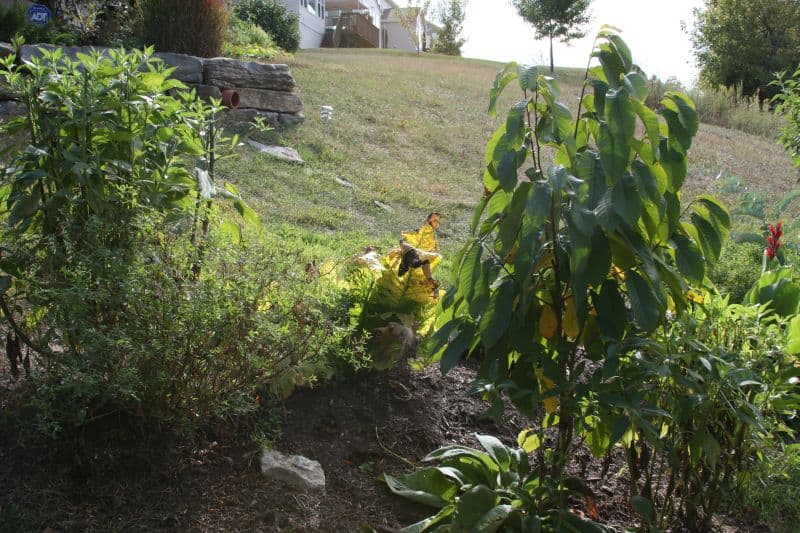
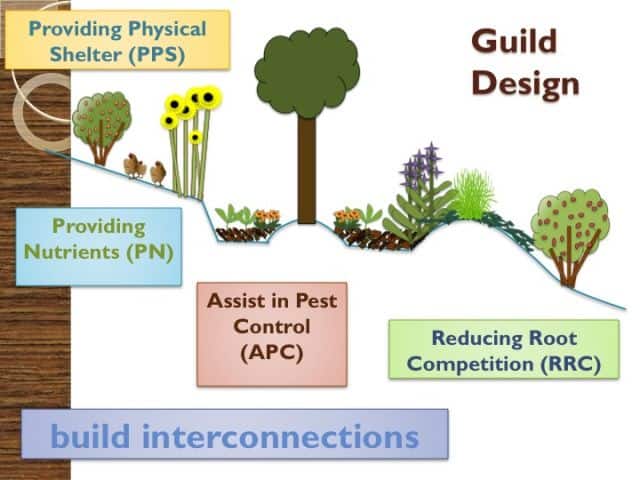
In this manner, it makes logical sense to group certain things together. Guilds, for example, are a way of having different plant elements serve functions in their own mini universes throughout your garden.
You may have a plant that fixes nitrogen, one that taps minerals, one that attracts pollinators, an insect repellant, a wind barrier, a weed suppressant, and so on.
Alternatively, you may consider that plants that need a lot of water should be placed in areas that receive a great deal of rainfall or where the water source is located. An example of this is people planting mint under water spickets so it can benefit from the hose drips.
Relative location refers to placing the elements of your garden logically to help them serve and preserve their functions. Imagine a function to be its own mini system. You take one element and consider which mini systems it is involved in. You then place it in the most logically energy efficient place for it to work in all those systems effectively.
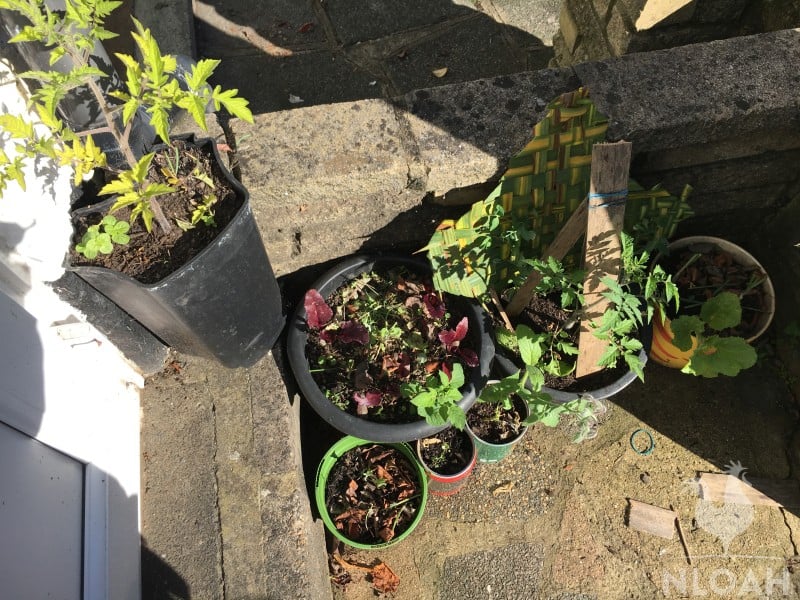
3. Source Plants/Materials
With your design in hand and an understanding of the inputs and outputs, you can work out what you need to get started.
Consider all the inputs that your garden is going to need. Before jumping to buy all those things, also look at your outputs. If any cross over, then you can strike them from the list. For example, chickens are going to produce a lot of manure; this means you don’t need to buy high nitrogen for your compost pile as you already have it.
If some of the elements won’t produce the outputs for a while, this also gives you an indication of the order in which you should construct the garden.
During this stage, you may want to get a plant nursery going so you can start to sprout seedlings. Not everything needs to be grown this way; some seeds can be planted straight in the ground. However, by giving yourself a head start, once the soil is ready to go, you’ll have your seedlings prepared to pop into the beds. It also means you can grow seedlings and take cuttings, rather than having to buy and plant lots of seeds.
4. Plant Your Water
When you say ‘rainwater harvesting’ to the average person, they tend to consider catching water in a barrel, usually from the roof of your house or a gutter. Rainwater harvesting can be far more ingenious than this and covers a whole host of techniques.
The main idea of employing rainwater harvesting in the garden is to slow, stop, and spread water around your site, before it runs off.
This allows the plants to use water that would otherwise have trickled away. By doing this, you will need to water your garden far less frequently.
While there are many rainwater harvesting techniques, some of the most famous are terracing, swales, raised beds, and waffle gardens.
Terracing, for example, refers to the process for cutting steps on contour in to a sloped garden. If you are building a garden on a hill, rainwater rushes down the hill without having time to sink into the soil.
Terracing, through the creation of steps, gives a plateau for rainwater to stop and slow down. It can then spread along this platform.
Water that overflows, passes down to the next platform. In doing this, the water is captured in the soil and the plants and isn’t running rapidly off site and eroding the soil.
Other important ways to harvest rainwater refer to the impervious surfaces surrounding our homes and land.
For example, a driveway or concrete path does not allow water to pass through it, meaning the water hits this surface and runs in any direction.
Channeling this run-off can be very helpful. By cutting gutters or French drains next to driveways that are slightly arched, water runs into these gutters, and can be diverted to gardens using gravity. This again, saves on watering and prevents flooding.
5. Prepare the Soil
Healthy soil equals happy plants. Plants feed on the soil and low-quality soil will be represented in the plants.
Not only in the quality of the food you produce but also in the number of weeds that try to come through and the number of pests you encounter. Improving soil increases succession and balances the ecosystem living within it.
In your observation stage, you will have tested the soil to determine its consistency and its quality. In doing this, you can understand some of its key components, like whether it’s very sandy or highly acidic, for example. This allows you to understand how to remedy it.
While composting is a great soil amendment, which can be used for compost teas and natural fertilizers, sheet mulching is also a good idea. This will help to insulate the soil, suppress weeds, improve soil quality, prevent soil erosion, and reduce effort.
However, if you have noticed certain unhelpful features in your soil, you may want to apply some extra measures of improvement.
For example, mixing in egg shells to your compost or sheet mulch will help to provide extra calcium in the soil, improving cell strength in plants.
By adding fruits and vegetables to your mulch or by fermenting them, you can create vitamin mixes that help to improve the content of vitamins in the soil.
Inorganic and toxic fertilizers contain 3 elements: nitrogen, phosphorous, and potassium. In the organic world, some people like to mix manures into the soil to increase the nitrogen content while kelp meal improves plants’ ability to take in nutrients by providing potassium.
Bone meal will help to add phosphorous to the soil. The difference with all these additives is that they also provide other minerals and vitamins at the same time in naturally occurring quantities.
This decreases the chances of the pest population from getting out of control as with non-organic fertilizer, and increases the nutrients your plants receive. Be aware, however, that a high imbalance of any of these can lead to pest issues, whether the amendments are organic or not.
If you have chickens or other animals, this is the perfect opportunity to let them run the site.
Pigs will till the soil with their snouts for you, looking for bugs and roots, while manuring on the soil. Chickens will scratch the soil and manure as well. This prepares the soil without having to till it whatsoever.
If your soil is very acidic, you may want to bring it closer to neutral by adding some lime (limestone, not the fruit) to the soil. If it is too alkaline, you can add fish meal.
Remember to consider that natural and biological resources native to your own environment will always be the best and most effective long-term resources for you site.
Not only in terms of cost and moving these about, but also in the sense that native plants respond best to native amendments.
If you live very far from the ocean, kelp meal can be quite shocking to plants and the soil ecosystem and may lead to higher pest populations.
Living mulch is also a great way to provide nutrients to the soil. Sometimes called cover cropping, living mulch is usually a shallow-rooted plant that covers the soil to protect it from damaging weeds and soil erosion, while providing nutrients to the soil.
Types of clover and low-level legumes are good examples of this. When you want to plant, you can just pull up some of the cover crop and plant, leaving the rest to carry on covering the soil.
6. Plant Guild Anchors
In respect of patterns to details, one of the most predominant and effective patterns to include in your garden is that of guilds.
The guild can be said to be the pattern, mimicking the arrangement of plants in their natural habitat. The details become the composition of the guild — in which plants are included.
First you need to decide on your anchor crops. The anchor plants are the primary plants that will be in your guilds of companion crops.
For example, say you want to plant tomatoes, peppers, eggplants, while they grow well together, they have similar root and spatial needs as they are all from the nightshade family.
It also means they have similar vulnerabilities to fungi, bacteria, and pests.
Aside from providing food, these aren’t really plants that are all that multifunctional.
They serve as the anchor point to guilds and companion plants but should be supported by the elements chosen to go around them to help combat some of these vulnerabilities.
These should be planted first to get a good head start and to anchor themselves into the soil, so they’re not shielded out by their faster growing companions.
7. Build Companion Guilds
Once your anchor plants have got a good foothold, you’re looking to find supportive plants to help those plants grow.
There are some companion plants that work with a particular purpose which is generic to most other plants.
For example, certain flowers are good pollinators, some herbs are good at repelling harmful insects, legumes will put nitrogen in the soil, plants like comfrey serve as great chop and drop mulch material due to their tap roots (dynamic accumulators).
However, there are also companion plants that work particularly well with specific plants and horribly with others.
For example, French tarragon helps tomatoes to grow better and taste sweeter, while basil stops whitefly and borage stops hornworms. While carrots will help tomatoes grow, tomatoes stunt the growth of the carrots.
Many gardeners will use alliums for pest control as they can confuse carrot rootfly and protect against slugs due to their strong smell. However, they’re not every plant’s friend.
Take beans: beans are a great source of nitrogen but they can not be planted with alliums (onion, leeks, etc) or things from the brassica family, like cauliflowers.
You can find many companion planting charts which will help to direct you in working out what needs to be planted with what.
8. Maintenance
Building the compost pile isn’t the end of composting. Planting the tomatoes isn’t the last thing to ensure their growth. Maintenance is where the real work comes in.
To be the most effective gardener, it is good idea to write a list of all the jobs that need doing and their frequency. This will help to budget and plan your time to make sure everything gets done without dropping the ball.
You can apply this to a calendar to create a routine whereby you know the day and time to complete each of the tasks.
This will also help with the next level of improvement where you can outline the tasks that take a long time and could be automated with a systemic changes and multi-elemental design.
In-built in maintenance is using your biological resources. As your garden functions more effectively, you’ll find that weeds occur, leaf drop builds up, and manure starts coming.
These things will enable you to continue to build your compost pile. Equally, as herbs and spices grow, you can start to utilize them on the garden, perhaps making chili and garlic ‘teas’ to apply to the plants for insect protection.
9. Accept Feedback and Adapt
It is inevitable that your garden will kick back, both in good ways and bad. After all, you are changing the landscape in order to increase production. This is bound to cause reactions from that landscape.
Sheet mulching can be a good example of this. Sheet mulching will leave the soil in a better condition than when you started. However, sheet mulching tends to increase pests at the beginning as it creates the perfect habitat for mice and slugs.
With this in mind, you need to recognize these kickbacks by seeing the changes in your plants and then remedying the issues that crop up. Including coffee in your sheet mulch, for example, will keep slugs at bay.
Equally, however, you may find that some areas are flourishing more than others. Accepting this feedback and analyzing this will help you to objectively consider why that area thrives better than other areas.
Perhaps you have some tomatoes doing really well in one and place and terribly in the other, only to realize you had added some fireplace ash to the better tomatoes and not to the others.
Moreover, giving yourself the time to step back and understand how these systems are working enables you to become more creative in your design. After all, permaculture design does not stop with the implementation of the garden; it continues to occur, forever improving your site.
Perhaps you can see a better way to harvest rainwater, or a more efficient way to divert it. Maybe you notice that some plants could do with shade, so you grow a trellis of hardy kiwis above it, increasing the yield and providing the shade.
Feedback loops are vital to becoming a keen and expert permaculture gardener. After all, those who are unrecognizing of their mistakes and impact cannot change damaging patterns, as they are not aware of them.
Wrap-Up
Starting a permaculture garden is the beginning of an exciting journey into creativity and inventiveness. It is important to remember that observation is key to solving some of the inherent problems and will save you time with trial and error.
On that note, giving yourself time to create a design will also help you to plan out your time and budget, while giving an overview of the finished product. However, don’t get caught in those stages by being a perfectionist.
Get the shovel in the soil and start the process, otherwise it will forever remain an idea and never a reality. You can always remedy your mistakes later or adapt to unplanned changes, but you’ll get nothing without a seed in the ground.


Emmy Jenkins, AKA Permie Emmy, has spent many years traveling around the globe and working remotely, dipping her toes into a myriad of disciplines. Having spent several years volunteering on sustainable farms, Emmy chose to delve deeper into permaculture theory to understand the social and economic patterns often neglected in the philosophy. When she’s not planting edible gardens and frolicking the jungle, she’s consulting on projects around the world to help permaculturalists to understand regenerative ‘Fairshare’ economic patterns and to encourage People Care patterns that focus on biomimicry.
This was from Step 9. Do you use actual coffee or coffee grounds? How much do you use?
“With this in mind, you need to recognize these kickbacks by seeing the changes in your plants and then remedying the issues that crop up. Including coffee in your sheet mulch, for example, will keep slugs at bay.
Ha, stumbled into this over a year later! I am Marilily and I still ask the same question, is it liquid coffee or grounds??
That was such an intelligently written article. I have taken two permaculture classes at college, but found they were more… um… more symbolic than practical, and very vague, which is why I’m still trying to learn about permaculture in ways that will help me design some principles into my town-property garden.
I look forward to reading more of your articles.