If you’ve decided to start a permaculture garden, maybe even figured out all the plants you want to grow, the next thing to worry about is the soil. Some don’t realize but the soil is actually the first thing they should look at. This is because without nutrient-rich soil, your plants will have a hard time growing, and you won’t know why that is.
In this article we’ll focus on enriching the soil in your permaculture garden, but really, these no-dig techniques can be used in any garden, even in container gardens.
The Main Soil Types
- Sandy. When you grab a handful of dirt from where you want to plant your garden, give it a hard squeeze in your fist. If it just falls apart, and through your fingers, you have sandy soil.
- Clay. Grab a handful and again squeeze it in your fist. If it makes a compact ball that sticks together you have clay-based soil.
- Silty. Once again grab a handful of soil give it a squeeze and also rub it between your fingers. If this breaks apart easily and feels gritty when you rub it between your fingers, you have silty soil.
- Chalky. When you grab a handful of chalky soil and squeeze it, it will just turn to dust unless it’s wet. Even wet chalky soil will not stick together.
- Loamy. Now this is actually a soil you can use without too much work. If you grab a handful of this it will only stick together slightly, more of a loose bind. This will also have a nice earthy smell to it. Remember to use your senses. Loamy soil is considered the gardener’s best friend.
We then can have a combination of these all together so you can see there are numerous different soil types.
Unless you are lucky enough to have been blessed with beautiful loamy soil then you are going to have to add components to improve your soil and, in turn, your gardens chances of success.
The good thing is that the rules I will provide will work for all of these soils. The easiest thing to rebuild a poor soil, is to create entirely new soil and incorporate it over time.
Now, let’s say your soil is already a mix of loam and sand or loam and clay, you already have a pretty good base. This is the easiest one to deal with. Just a few steps.
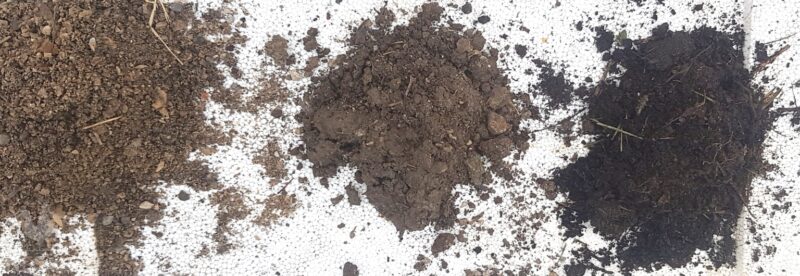
Below are photos of the most common three soil types, sandy, clay and loam. These three I have taken from my own property. Essentially, the first two are what I have started with, the third is what I have turned them into with the following technique. No buying of soil from the nursery, no use of fertilizers, no cost!
How to Build Soil
- Lift the earth or soil. Take a pitch fork and just pry up the ground. This allows the air to get at it and the water to reach deeper as well. Don’t turn the soil, this is how most of us were taught by our fathers and grandfathers. They would turn over the entire garden every year. This is not only unnecessary but will create more work for you later on with weeds popping up.
- Add cardboard, newspaper or even old bed sheets or carpet. Sounds funny, but these will break down. What this does is keep the moisture in the soil, and also deprive any weeds from sunlight.
- Add some nutrients like manure. If you have access to these, they are great nutrients. Cow, horse, chicken, duck, sheep, goat, rabbit even from your guinea pig. Pretty much any herbivore poop is good. Cow, chicken and rabbit are fine fresh. The sheep and goat are better if they have aged or been through a composting process. If fresh manure is all you have, then go ahead and put it in, but you don’t want to use as much.
- Add mulch, and then add more mulch. Mulch is anything you have around that is organic, i.e., hay, grass clippings, all the clippings from your pruning of other plants, weeds you have pulled up. Make sure you throw thee weeds in an area where they will dry out quickly before putting more mulch on top. You want all of the weed seeds to be dry and dead.
- Compost. Make sure you are no longer throwing away your vegetable food scraps, or even any paper towel or tissues for that matter. Find a place in the garden and throw these there, or keep them in a sealed bucket. You will also want to throw this on top or underneath the cardboard. You can also make a compost tower out of old PVC pipe and stick it in the ground. This is an easy way to recycle your scraps. We can cover how to build a more efficient compost in another article. For now just put your scraps back into the soil.
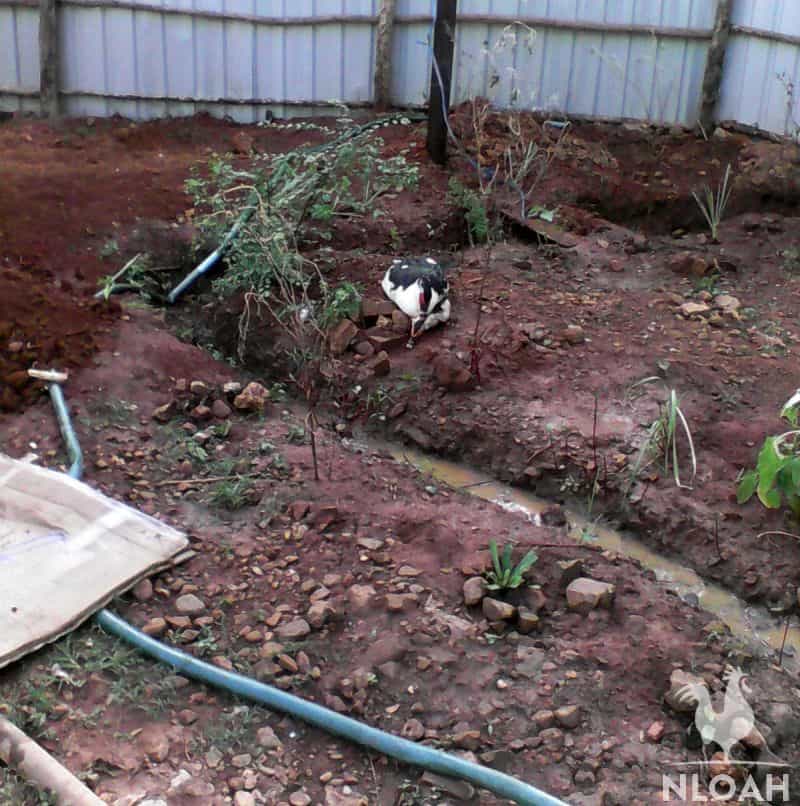
- Water. Dependent on your water resource, make sure you water throughout the entire process. The more soaked the ground is the less you will have to water when your vegetables start to grow. If water is an issue then putting in swales and a pond are the answer. You want to build a swale that runs into a pond and then the over flow from the pond can be sent down smaller swales to your crops.
- Animals/Fish. Birds and fish are a great way to add nitrogen to your soil. You can put ducks on your pond then that water is directed to crops and is loaded with nitrogen. You can even add fish to the duck pond which will help keep it clean. Both are food sources. Chickens are great for preparing you soil by taking out bugs and weeds. Their manure is very nitrogen rich.
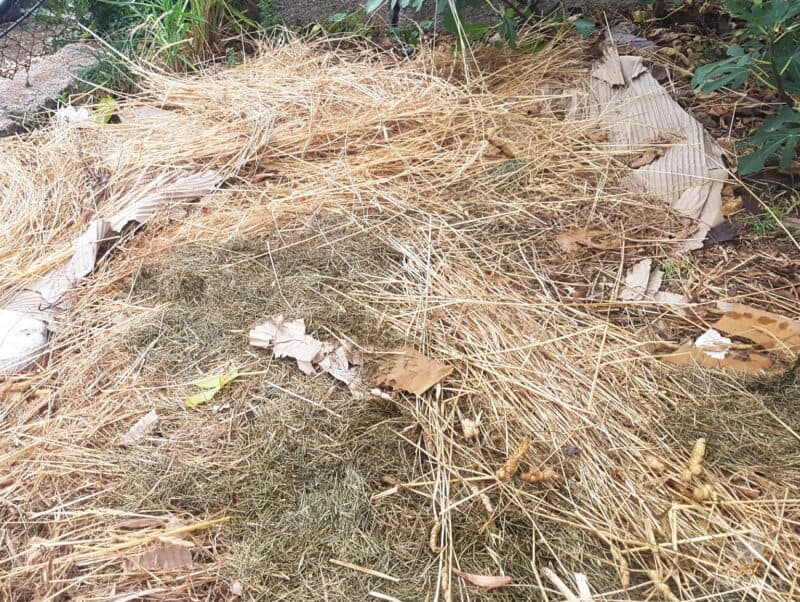
This is a mix of cardboard, weeds, straw and grass clippings. This looks messy now, but it will turn into a green zone full of delicious vegetables quickly:
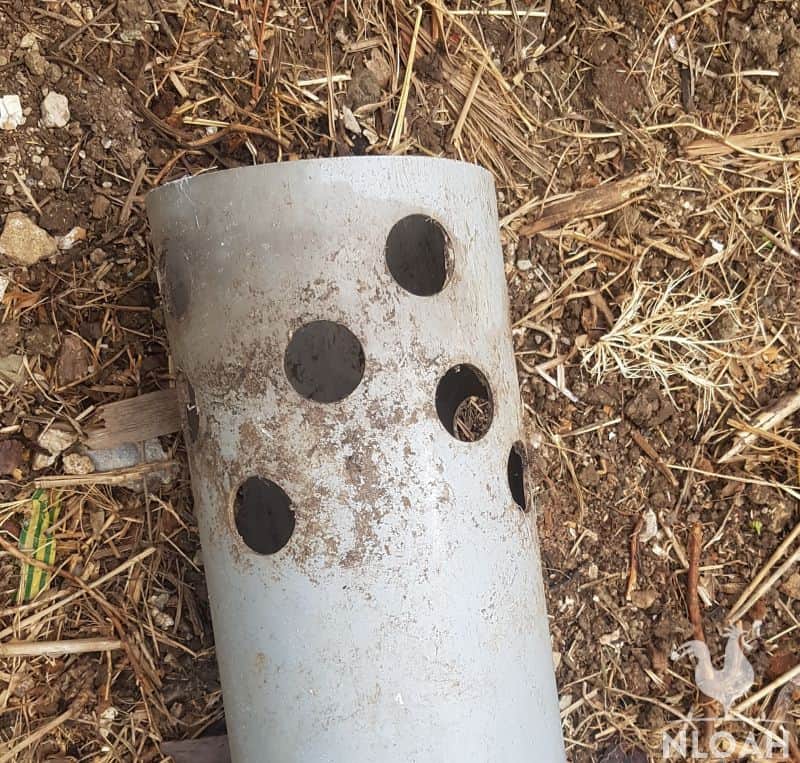
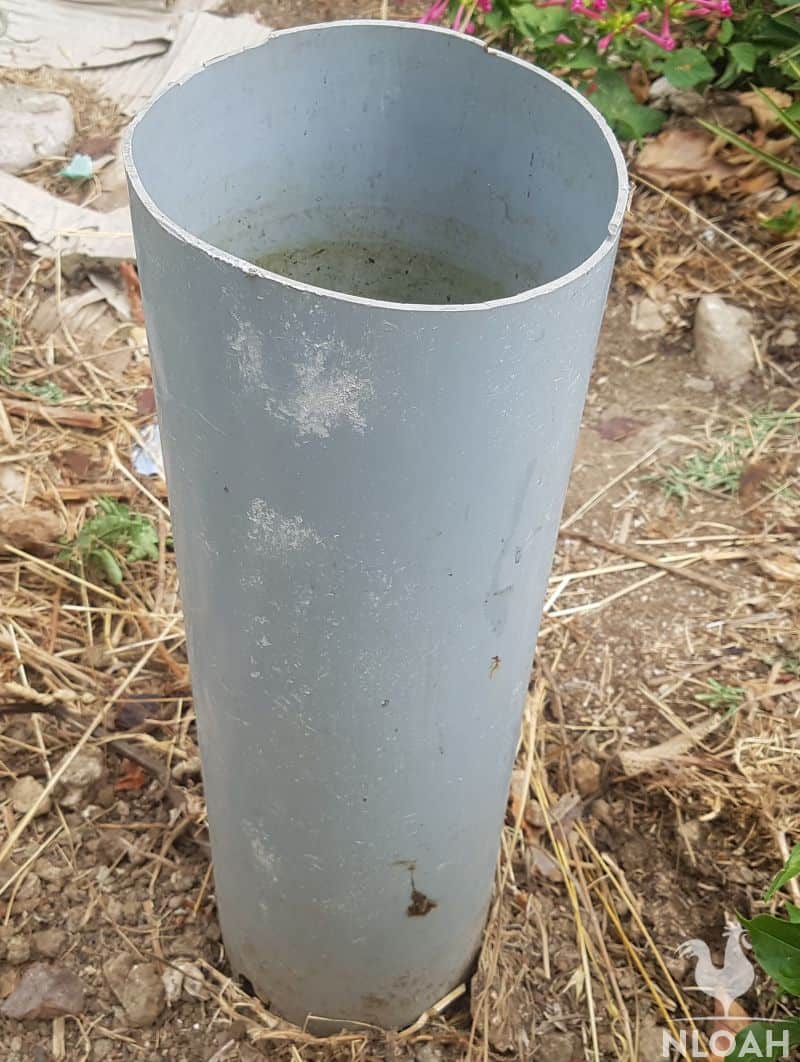
The PVC Pipe Trick
The next pictures are a really easy fix for your composting. If you can get a hold of a piece of PVC pipe about 1 ½ feet (50 cm), just drill lots of holes in one end. Bury the end with the holes so the soil is above them about 2 or 3 inches (6 cm).
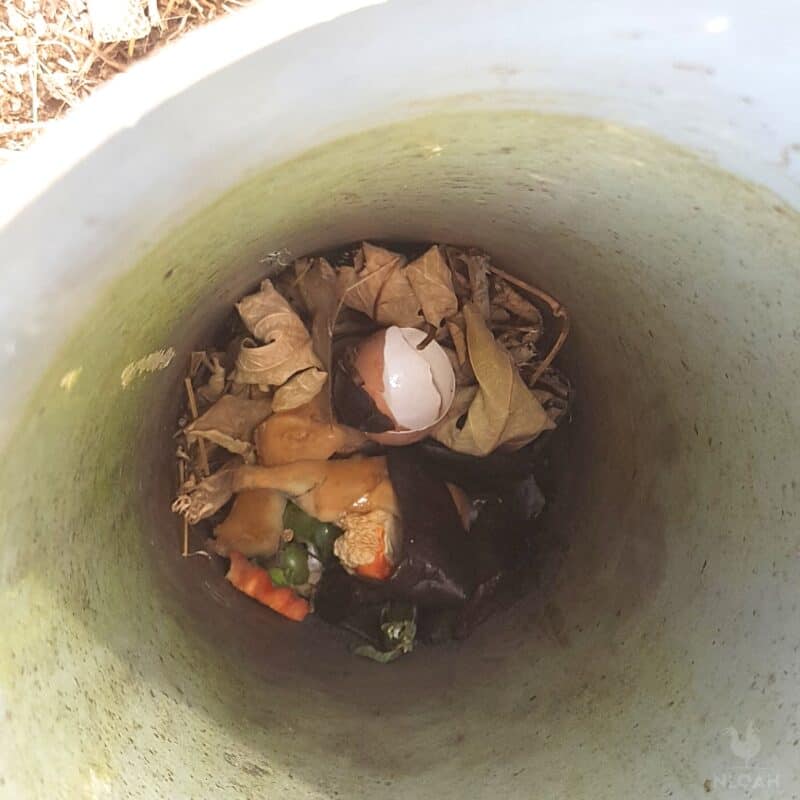
Put this in any area where you have poor soil, in a corner of your garden or grow bed where you will want to plant next season. Throw all you organic vegetable scraps and paper into the tube and watch how fast the organisms get busy turning it back into nice soil.
You will want to put some kind of a lid on it for smell. A plant pot or old repurposed water bottle will work. This is such a great tool for someone just starting out or someone who only has a small space.
You can literally see the changes in your compost almost on a daily basis once the microbes and worms start to work.
All the steps above will bring you the result you need to start to plant your fruits, vegetables or flowers. Keep in mind nature takes time. Start early in the spring or late in summer using this method, and it will be ready when you want to plant your summer or autumn crops.
Now that we understand the fundamentals of creating healthy soil, we need to ensure it stays healthy. This will save you all the work of repeating, what you have done to get it there in the first place.
How to Keep Your New Soil Healthy
This has to do with what you plant and the conditions you have created. When I’m talking about conditions, I am referring back to observing your space. Have you taken the wind into consideration and planted a wind break if needed? Are you harvesting your water to easily apply to your plants? These steps now will save you frustration and work later.
Now is the time to research what kind of plants to choose (particularly perennials) that will both provide you with food and also provide your soil with continuous nutrients.
There are numerous articles and references that include the best nitrogen fixers to plant in your climate zone. These fixers offer the best nutrients for your soil. Nitrogen is the critical factor for creating a healthy ecosystem for your plants.
In addition to planting the right annuals and perennials, continue to add mulch. Once your plants are growing add mulch around them. This creates more nutrients, and also keeps the moisture in. This lowers your maintenance of watering and weeding.
Weeds are often misunderstood as well, even by permaculturists. Sometimes, the weed you want to pull out is beneficial to your plants. Once again observe and identify, do some research, if it is not hurting and seems to be benefiting then leave it be.
Some weeds deter harmful insects or can provide shade. Or they might be starving your vegetables from nutrients, then pull them and add them to your compost. They will still be beneficial.
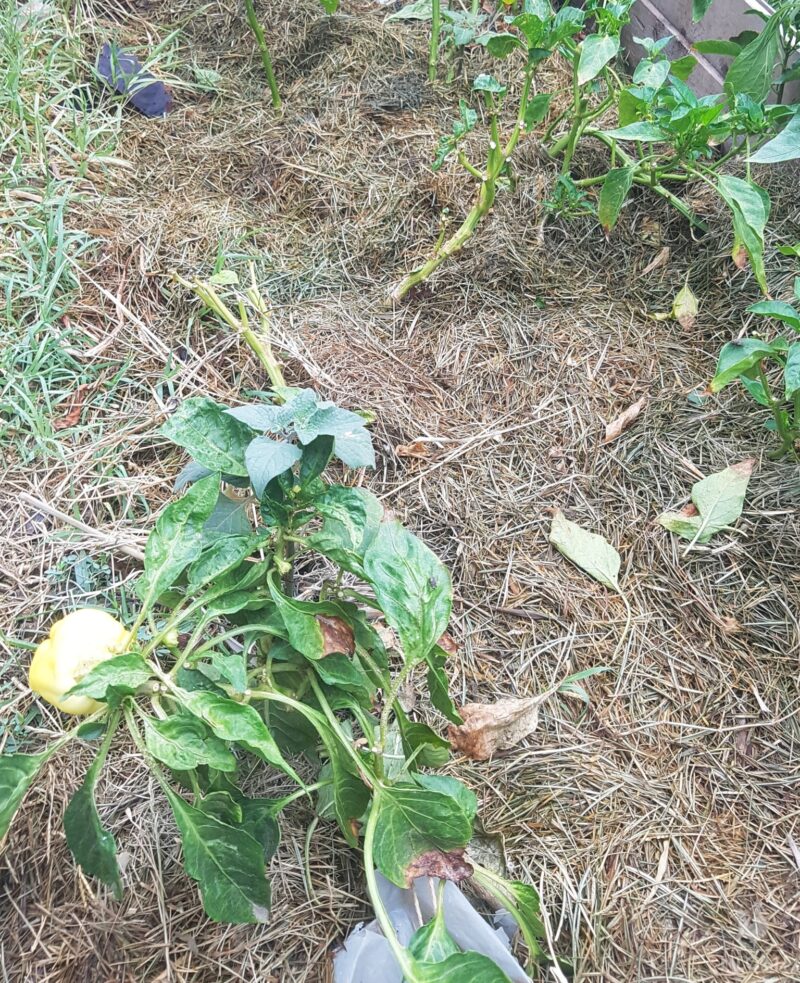
Below is a picture of mulch surrounding pepper plants in a very dry climate. The mulch prevents the moisture from evaporating so you only need to water once a week. These peppers have only been watered with grey water once a week in a very hot dry climate.
The basic components you always want to remember in order to create great soil and to maintain its health are simple; just remember NAW:
- Nutrients. The mulch and compost you add to your soil are food for the microbes, and worms that benefit your plants.
- Air. Your soil and plants need oxygen and nitrogen.
- Water. Every living thing on the planet needs water. Your plants are even easier. They love the water you are done with. So always use your grey water to feed your plants.
These three components require some effort in researching the knowledge on how to best put them to work for you. Remember that nature takes time, so don’t be in a rush, work slowly and observe, don’t be afraid to fail.
Failure is a great way to learn what can go wrong. If you have made mistakes you will be well prepared to deal with almost every scenario.
If you have the money, you can always do this very quickly by hiring a company to put your garden in, and by purchasing all the best soils and fertilizers. Maybe this is all you have time for, but by not engaging in the process of your food, you miss a great feeling of satisfaction and mental fulfillment.
You only get this by getting your hands in the soil, creating your own resources, and a sustainable life.

Dirk is Canadian permaculture designer with a certificate from Tagari farms, studying under the tutelage of the legends and founders of permaculture Bill Mollison and Geoff Lawton. Dirk has been doing permaculture for more than 20 years, initiating and managing projects in Cambodia, Madagascar, Montenegro, and Vietnam. He’s been helping people use permaculture techniques in growing their own food, and in leading more sustainable lives across the world.