Sheet mulching gets a lot of attention as an easy way to build soil and fight weeds at the same time. If you would like a beautiful garden but worry about the ongoing labor to keep it in shape, sheet mulching is a good choice.
By adding a sheet mulch layer to your garden, you can improve soil, conserve water, and fight weeds all at once.
Sheet mulching is sometimes called “lasagna gardening” because you lay out thin layers of different materials, kind of like laying out layers of pasta and sauce and filling to make a pan of lasagna.
Spread sheets of cardboard, newspaper, or other types of paper over the existing soil in your garden. Bury the sheets of paper in compost or mulch at least four inches deep. Wait four to six months for the mulch to break down, then plant your garden in the mulch.
Sheet Mulch Quick Start Guide
- Mow first. If the area you want to sheet mulch is covered in plants now, mow it short before starting. Leave the grass clippings in place.
- Spread out a base layer. Use two to four sheets of cardboard, or ¼ to ½ inch of newspaper to cover the garden. This layer keeps the plants underneath from growing up through the mulch.
- Get the base layer thick and overlapped. Overlap pieces by 6-8 inches to make sure there are no gaps where light can peep through. If light shines through, the plants will find it and grow up through the mulch.
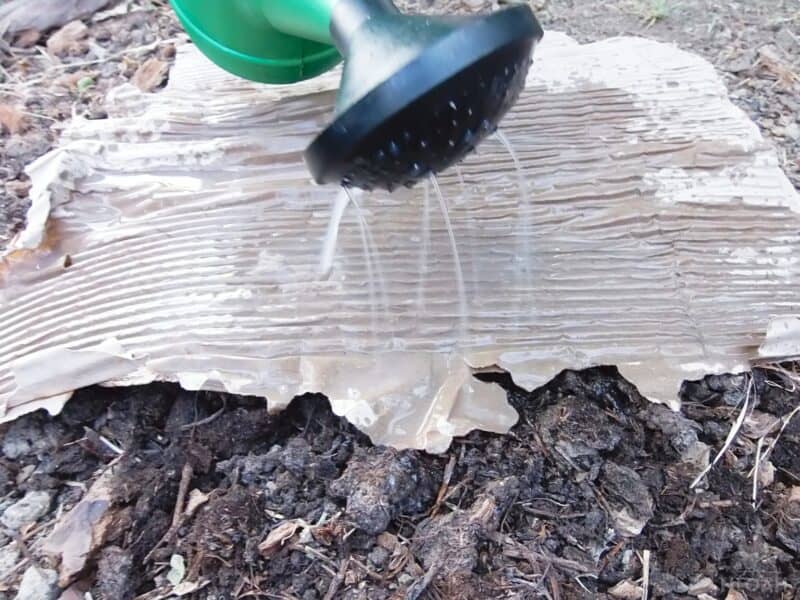
- Wet it down. The base layer will stay in place better if it is wet. It will also hold water better if it is wet when you cover it up. It’s very hard to wet down cardboard that is covered by six inches of mulch.
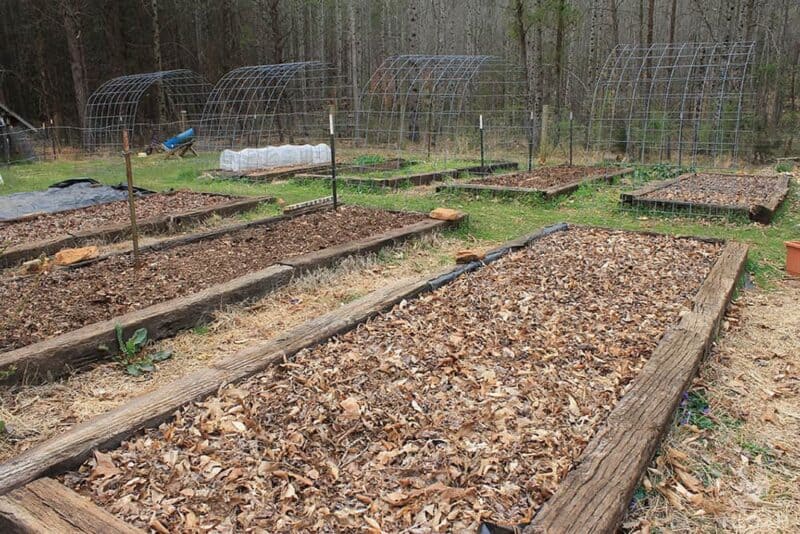
- Pile the mulch thick. Your mulch will break down and settle as it sits. The thicker you make the mulch layer, the longer it will last.
- Mix it up. Use a wide variety of materials in you sheet mulch layer. Mix up green and brown plant matter. Green matter contains nitrogen that helps the mulch decompose. Brown material contains carbon that decomposes into rich humus in the soil.
- Give it time. You can plant in your sheet mulch immediately, but you will have better results if you let it sit for four to six months.
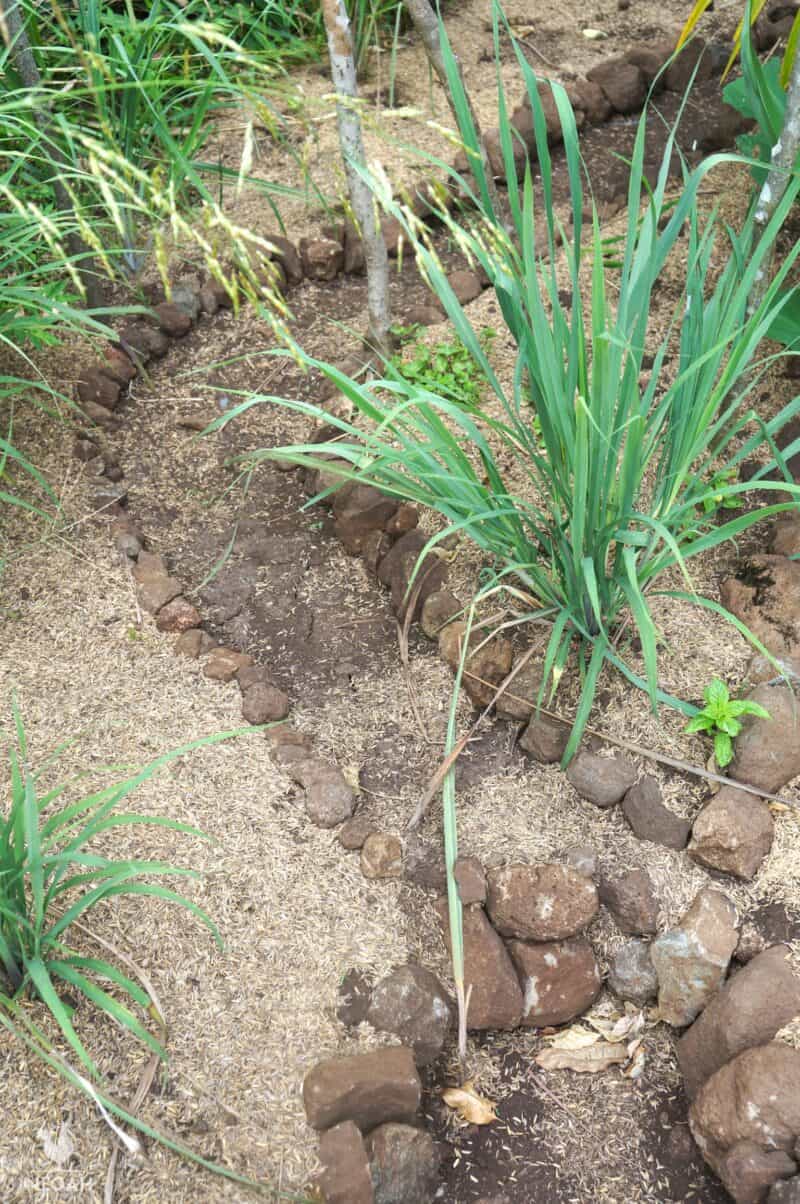
Sheet mulching is a simple process for creating good garden soil in a wide area. You can start with barren soil, a weedy patch, or even an area of lawn. Whatever the starting conditions, setting up a good sheet mulch will produce rich, weed-free garden soil in a matter of months.
It may seem like a lot of work up front, but sheet mulching pays dividends far beyond the effort. The biggest improvement is reduced weeding. The layers of cardboard and mulch will block weeds from growing in your garden and save lots of time in the long run.
The mulch layers will also hold water better than bare soil and reduce the amount of extra water needed for your garden. The mulch will turn into rich compost to feed your soil.
Gardeners usually make compost in a pile near the garden. Waste materials are watered, piled up, monitored, and occasionally turned. Once the materials break down, the finished compost is added back to the garden as a soil amendment. Compost is great for your soil, but making it takes lots of work.
Sheet mulching skips most of the work and goes straight to spreading material around the garden. As the mulch breaks down, it becomes compost.
A sheet mulched garden gets all the benefits of a compost pile, without the turning and checking and fussing with a compost pile. You just spread the mulch once and let nature take its course.
Start Where You Are
It doesn’t matter what kind of soil you are starting with. The existing soil will be covered up in a sheet composting garden. However, you can do a few things to improve the current soil before burying it. It is not necessary to work on the existing soil before sheet mulching, but it can make a difference in the final product.
Before you start spreading mulch, there are a few steps you can take to jump start your sheet mulch garden. These aren’t necessary, but they will pay results in the long run.
- Test it. A soil test will show any serious nutrient deficiencies. If you need to correct deficiencies, scatter the materials indicated by the soil test over the top of your garden plot. The sheet mulching process will work the soil amendments into the top few inches of your soil.
- Loosen it. If the soil is packed tight, loosening it a little helps the sheet mulch work into the under layer. Use a potato fork to poke into the soil, the pry a little to loosen the soil around the fork. You don’t have to turn every inch, but a little bit of movement will help the mulch work into the subsoil.
- Kill it. If the existing vegetation includes plants that are aggressive spreaders, killing the tops of the plants before mulching makes the sheets more effective. If your garden is organic, using an organic herbicide like 10% vinegar will kill the tops of the plants and slow the regrowth.
- Aggressive plants. You may need something extra to kill aggressive plants under your sheet mulch. Aggressive spreaders like Bermuda grass, blackberry brambles, and mint will eventually grow up through your mulch. The best way to kill these plants is herbicide containing glyphosate. It’s not organic, but glyphosate will eliminate these problem plants for good.
Once you have prepared your garden plot, you are ready to start spreading mulch. Here is a list of things you will need to get started…
Tools for Sheet Mulching
Sheet mulching is easier if you pick up a few basic tools to handle the mulch. Some good tools include:
- Shovels to break down piles of fine mulch and compost.
- Pitchforks for handling hay and coarse mulch. Shovels don’t slide into piles of coarse material very well, but pitchforks do. The best forks for mulch are five-tine or six-tine models. The tines are thin enough to poke into a mulch pile, but close enough together that the mulch doesn’t just sift out.
- Rake to spread scoops of mulch evenly. Bow rakes work best for this, but leaf rakes or landscape rakes are also fine if that is what you have.
- Wheelbarrow or garden cart. It’s not essential to have a wheelbarrow, but it makes it easier to move piles over longer distances. If you can get the mulch dumped on your garden, you won’t need a wheelbarrow.
- Water from a hose or sprinkler so that you can wet the newspaper and mulch as you spread it.
- Soil amendments. If your soil test shows a need for specific nutrients or lime, this is the best time to add it. Spread a thin layer of material right on top of the garden soil before you put down the weed barrier.
- Weed barrier and mulch. Those two items need a little more discussion before you are ready to start.
Weed Barrier
The first layer in sheet mulching is vital for weed control. Having a thick layer of flat material blocks out light to the plants below and kills whatever was growing there. There are a variety of materials that make a good weed barrier.
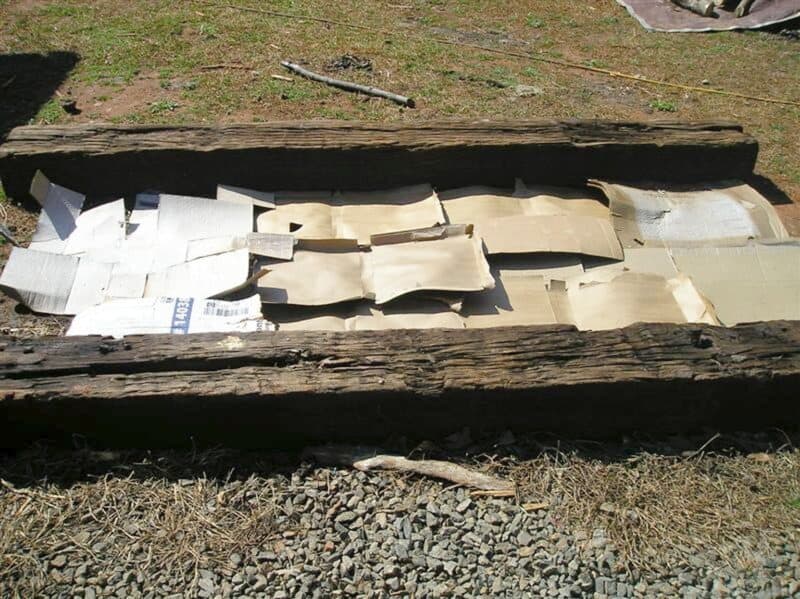
Cardboard Boxes
Cardboard boxes are a great base layer for sheet mulching. If you can get refrigerator boxes or similar big boxes, you can cover the entire area quickly.
Flatten the boxes and lay out a couple of layers of cardboard over everything. Make sure to cover the little gaps between flaps on the boxes. They don’t look like much, but weeds will find these cracks.
Tape and staples in the boxes won’t break down. You can remove these items before laying the mulch or pull them up out of the soil later. Pulling up tape after the box has broken down is easier, but your garden will look better in the future if you remove the tape first.
No matter how deeply you bury the boxes in mulch, the tape will eventually work its way to the surface. It is unsightly but harmless.
Newspaper
Newspaper is another common weed barrier. Lay out sheets of newspaper at least ¼ inch deep, although ½ inch is better. Newsprint is printed with soy-based ink that will break down with the paper. Avoid glossy paper because the ink may contain heavy metals that you don’t want in the garden.
Feed Sacks
If you have poultry or livestock that requires bagged feed, sheet mulching is a great way to get rid of the old paper feed bags. A single fifty-pound feed sack has enough layers to serve as a base layer for sheet mulch. These sacks often pile up around the homestead with no good way to get rid of them. Sheet mulching turns old feed bags into a labor-saving resource.
Don’t use plastic feed sacks or sacks from dog or cat food. Plastic feed sacks won’t break down under the mulch. Sacks for dog and cat food are plastic-lined, and the liners will remain in your soil as well.
Mulch and Organic Matter
Lots of mulch—enough to cover your garden to a depth of at least four inches. This can include hay, chipped brush, manure, yard clippings, and garden waste.
How Much Mulch?
Covering a garden with mulch requires a lot of organic matter. One cubic yard of mulch will cover 324 square feet to a depth of one inch. 324 square feet is a square eighteen feet on a side.
A standard pickup bed holds about two cubic yards of material, so you would need two pickup loads to get four inches of coverage on an 18×18 garden.
Finding Mulch
Mulch is available in bags from most home improvement stores, but this can get expensive if you have a big garden. It can also be a lot of trouble to handle that many bags.
Bulk mulch and compost are often available from specialty companies and can be delivered in a dump truck. Having mulch delivered in bulk is easier than buying bags, but it can still be expensive.
When you start your sheet mulch project, look around for business that are throwing away organic matter. Livestock farms often have piles of manure that is free to anyone who wants to come haul it off.
Lawn services and landscapers have leaves and grass clippings available. Some coffee shops give away old grounds, and microbreweries often have spent barley that is already moist and fine-textured.
Look for unconventional sources as well. Utility companies and city park departments often have chipped brush available. Furniture and cabinet shops have piles of sawdust to get rid of.
Food processors may have material available in some regions—ground oyster shells or hulls from peanuts or pecans are good sources of organic matter in some regions.
There are two broad categories of materials for composting—brown and green. Brown materials include fallen leaves, woody waste, and any other plants that have died. Brown materials provide carbon that holds the soil together.
Green materials include lawn waste, trimmings from growing plants, and manure. Greens are a good source of nitrogen that helps the brown material break down.
Special Cases
Two kinds of organic matter that require special attention are lawn clippings and sawdust. Lawn clippings have lots of nitrogen and lots of moisture. If you just use lawn clippings, they pack down and start to decay anaerobically. This results in a slimy, smelly mess.
Sawdust has the opposite problem. It packs down and doesn’t decay at all. If you put down a thick layer of sawdust, it will cake together and make a hard layer in the soil. The high level of carbon and low nitrogen in sawdust will tie up nitrogen in your soil profile for a long time.
Grass clippings and sawdust both compost best when spread thin and layered with other materials. They even work well together.
Grass clippings provide the moisture and nitrogen sawdust needs to decay, while sawdust soaks up the extra moisture and nitrogen that turn grass clippings into slime. Like chocolate and peanut butter, sawdust and grass clippings are a great pairing.
Know Your Hay
Be careful about using hay as a mulch source. While it is cheap, easy to work with, and often free of weeds, hay can come with problems. Some herbicides sprayed on grass hays have a residual effect in mulch.
If the hay has been sprayed with herbicide containing aminopyralid, clopyralid, picloram, or triclopyr, it will kill most garden plants for about a year. Find out what herbicides were used before you buy hay for mulching.
Installing Your Sheet Mulch Garden
Once you have gathered tools and found a source of mulch, it’s time to start installing your sheet mulch garden.
Step 0: Plant Big Stuff First
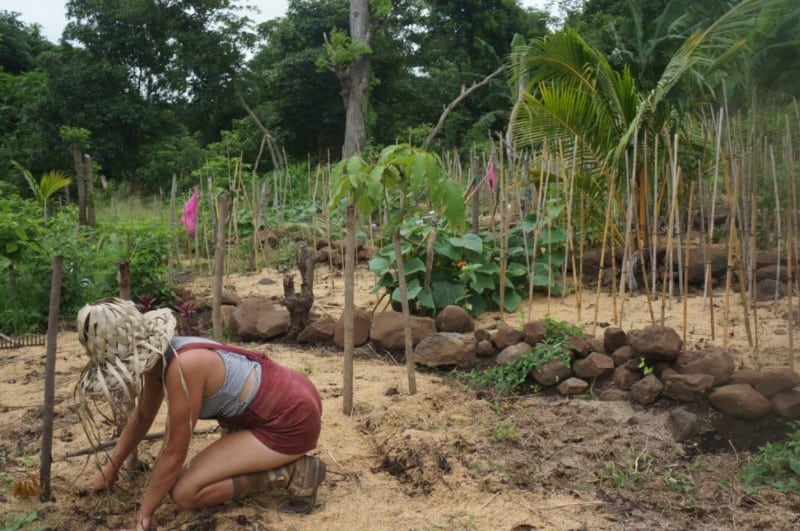
If you are planting trees, shrubs, or large transplants in your garden, now is the time to add them. Dig holes and set out the transplants. Trees and shrubs will benefit from the sheet mulch as it breaks down and feeds nutrients into the subsoil.
These plants will also spread roots into the mulch. If you don’t want to add big plants now, that’s fine. You can come back and put them any time.
The only difference in normal transplanting and planting in a sheet mulch garden is planting depth. Set the plants a little more shallow than normal. The top of the root ball should be even with the final surface of the sheet mulch layer.
Don’t set your trees at ground level and bury part of the trunk in the mulch. Trees hate that, and they won’t thrive if you bury them too deeply.
Step 1: Mow and Cover
If you are dealing with lawn or weeds, mow the garden as short as you can. Leave the trimmings in place—this will be your first layer of mulch. Spread your weed barrier over the existing plants.
Cover everything with a couple layers of cardboard or use ¼ to ½ inch of newspaper. Don’t skimp here. A thin base layer won’t stop weeds as well as a thick one. The weed control from sheet mulching starts with the base layer.
If you have already put out big transplants, make sure to cover the ground around them well with the weed barrier. It will save you lots of weeding, and it will give the transplants a leg up on any weeds. The roots of the transplants won’t have any trouble going down through the cardboard or newspaper.
Step 2: Wet the Base Layer
Once the base layer is in place, wet it down. It is also hard to get it wet once it’s buried under mulch. The paper won’t break down as fast if it is dry. It’s also easier to keep the paper in place if it’s wet.
Light, dry material is subject to blowing away or shifting as you pile mulch on top. If you are working on a windy day, you may have to wet the base layer as you work.
Step 3: Add Nitrogen
Putting down a thin layer of nitrogen-rich organic matter will help the paper layer decompose faster. Animal manure is a great source of nitrogen. If you don’t have manure, use blood meal, cottonseed meal, or alfalfa to get some extra nitrogen on top of the base.
It is fine if you don’t add extra nitrogen, but your mulch will take longer to break down. It will also be less fertile for a little while. The process of breaking down organic matter ties up nitrogen in the soil.
Without extra nitrogen, the mulch layer will not be very productive for plants until the composting process is complete. Once the mulch has broken down, there will be plenty of nitrogen available for your plants.
Step 4: Bulk Up
Now you need to bulk up the mulch layer. Any kind of organic matter will do. Old leaves, cornstalks, yard waste, and ground up tree mulch are all good choices.
The goal at this point is to get four to six inches (or more) of organic matter piled up on top of the base layer. This is where the “lasagna” label comes into play. Spread different materials in thin layers like making a pan of lasagna.
Mixing different kinds of material will help your sheet mulch decay faster. Green plant matter and animal manure in compost contains nitrogen to feed the compost bacteria.
Nitrogen is critical for breaking plant matter down into compost. Brown or dead plant matter provides carbon that remains in the soil and holds on to water and nutrients. Carbon is what makes rich soil so good for gardening.
Green plant matter can come from a variety of sources. Kitchen waste and garden trimmings are good sources of green plant matter. Some gardeners even grow cover crops with the intention of cutting the tops back to provide green matter for composting.
Brown plant matter is anything dead or woody. Bark mulch, chipped brush, and hay are all good sources of brown matter. Garden plants that have finished their life cycle and died are also a source of brown material for composting. Bagged leaves are another good source of brown plant matter. They can often be picked up for free in the fall.
Step 5: Top Off
Your sheet mulch will break down faster if you top it off with a couple of inches of fine soil or finished compost. The fine layer on top will keep the mulch layers packed firmly down and help it retain moisture. It is also much easier to start seeds in a layer of soil or compost than it is to start them in loose material.
If you don’t have good soil or compost available for the top layer, that is fine. You may have to wait a bit for the top layer to break down enough for seeds, though. While the top layer breaks down, you can still set out transplants in the sheet mulch. The loose material provides enough cover for plant roots to take hold and grow.
As the soil bacteria break down mulch, they use nitrogen to fuel the reactions. Thick layers of mulch reduce the nitrogen available to feed plants as the mulch decays. Once the breakdown is complete, the nitrogen is available to grow plants.
What’s Next?
Once you have your weed barrier and bulk mulch in place, you have a few options about what to do next. If you are in a hurry to get a garden started, you can plant directly into the sheet mulch. Fresh mulch isn’t as fertile as mulch that has had time to compost, but it is adequate for starting a garden.
If you aren’t in a hurry, let the sheet mulch sit for a couple of months. Fall is a great time to put in a sheet mulch garden because you can get bagged leaves for free, then let them compost over the winter. Nutrient levels will be higher in a sheet mulch garden that has had time to break down a little.
How Long to Wait?
As the soil bacteria break down mulch, they use nitrogen to fuel the reactions. Thick layers of mulch reduce the nitrogen available to feed plants as the mulch decays.
Once the breakdown is complete, the nitrogen is available to grow plants. Your sheet compost won’t be great for plants until it has been in place for six months or more. It reaches peak fertility in about a year.
If you are in a hurry, don’t despair. You can get good plant growth from sheet mulching if you make sure to add plenty of nitrogen-rich material at the start. That will make nitrogen available for the plants and the compost process.
Sheet Mulch and Pests
If there is one drawback to sheet mulching, it is slugs. The moist organic matter is a great habitat for slugs that prey on tender garden plants. One way to limit slug damage is to wait for full breakdown of the organic matter before planting.
The slugs will come and go while you wait. The other option is to implement slug control measures before you plant in the sheet mulch.
- Place organic slug traps around your garden prior to reduce slug numbers
- Make your own slug traps by burying bottles with a little beer in the bottom around the garden. Leave just a little of the top sticking up. Slugs are attracted to beer. They will crawl into the bottles and drown
- Wait until slugs come out at sundown, then spray them with salt water to kill them
- Spread a little diatomaceous earth around tender plants to repel slugs
- Get some ducks to eat slugs in the garden
Finishing Touches
If you want a finished look in your garden, plant your plants, then top of the sheet mulch with high-quality bark mulch or fine straw. It isn’t necessary to add a final layer, but often commercial mulch looks more attractive than whatever bulk materials you put out. This isn’t as important in rural areas, but your neighbors will appreciate it if you live in town.
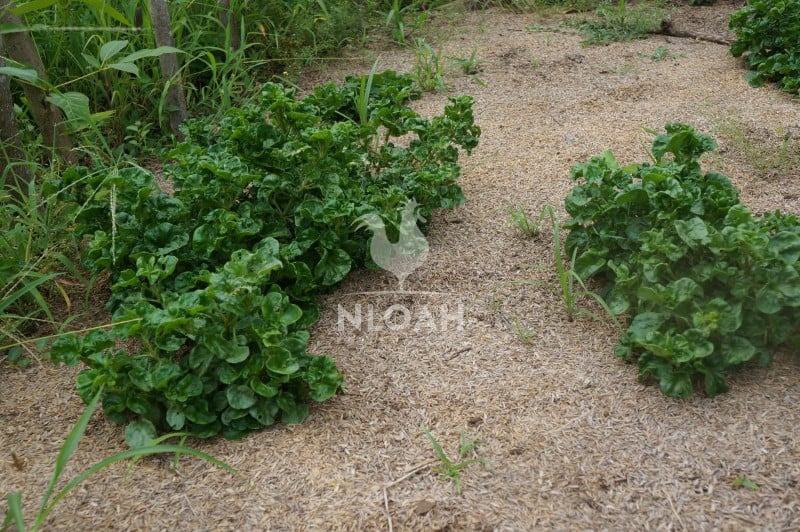
Your sheet mulched garden will be productive and easy to keep weed-free. Once you get the sheet mulch installed, all you have to do is plant and harvest. A sheet mulched garden takes a little work up front, but will deliver great results down the road.
Aaron Cummins operates a small farm in the Cross Timbers region of Texas. He raises pastured pigs, grass-fed cattle, and vegetables. He cures pork and makes his own sausages. He enjoys hunting, fishing, and raising his three sons.