Making floral soap with a melt and pour glycerin soap base is both fun and easy. The process is so simple and safe, that children can also help with the project – or do it themselves under adult supervision.
Suspending flowers inside of a clear soap base with dried flowers allows you to harness both the beauty and the scents of a particular season or place.
Floral soap can be made using a cold processed soap base, but the results are a lot less successful, most of the time. Only a handful of dried flowers can survive the curing process without turning either black or brown.
You can make a floral soap without adding any fragrances or colorants, but adding a scent with essential oils and a light tint to the soap is also commonplace.
Dried Flowers Versus Fresh Flowers
With the exception of chamomile, daffodils, and goldenrod are really the only flowers that can be used fresh in a floral soap recipe. All others will tend to disintegrate and turn to a mushy and vastly discolored matter inside of the soap.
Evergreen needles and pine cones can be used fresh, as well but it is still best to allow them to dry out for a few hours before suspending them in a melt and pour soap base.
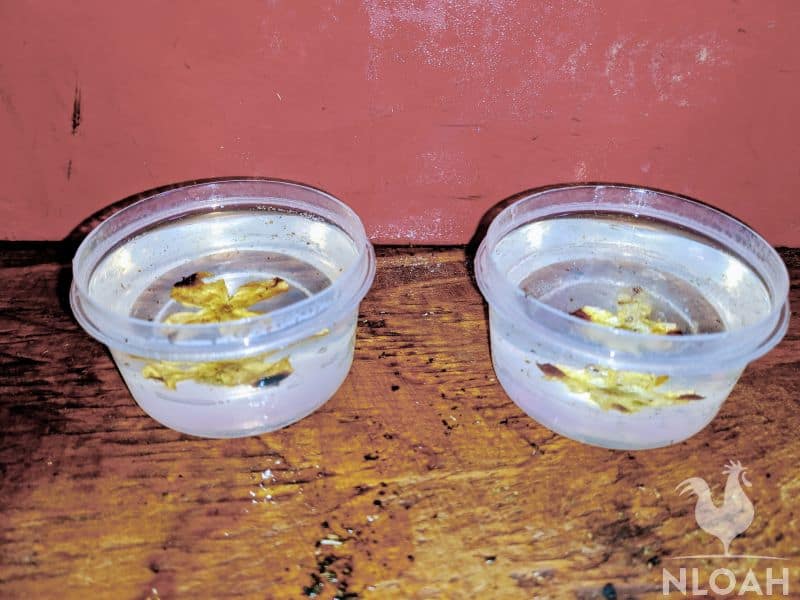
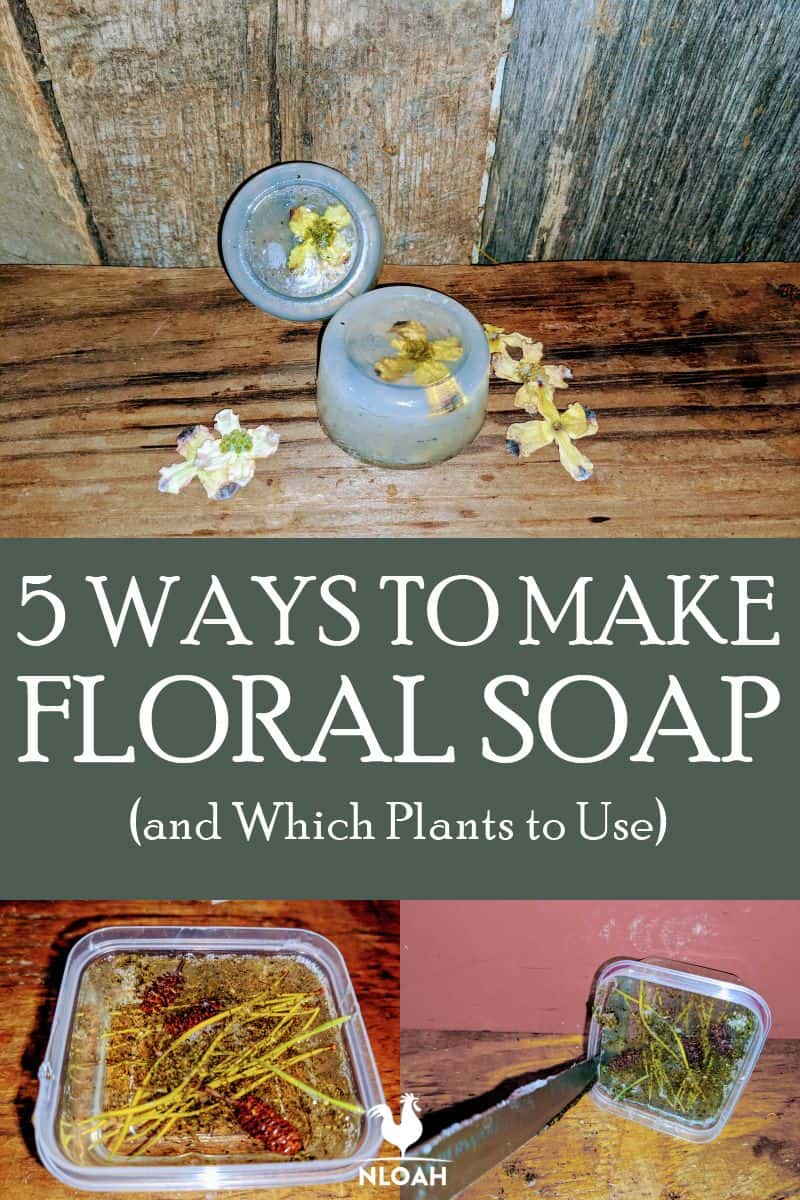
There are two ways you can add flowers to your glycerin soap – as whole flower heads, petals, and buds or shredded and sprinkled throughout the soap base. How you choose to add the whole flowers, shredded flowers, needles, pine cones, or nuts to a bar of soap is where the creativity process really gets to flow.
Floral Soap Molds
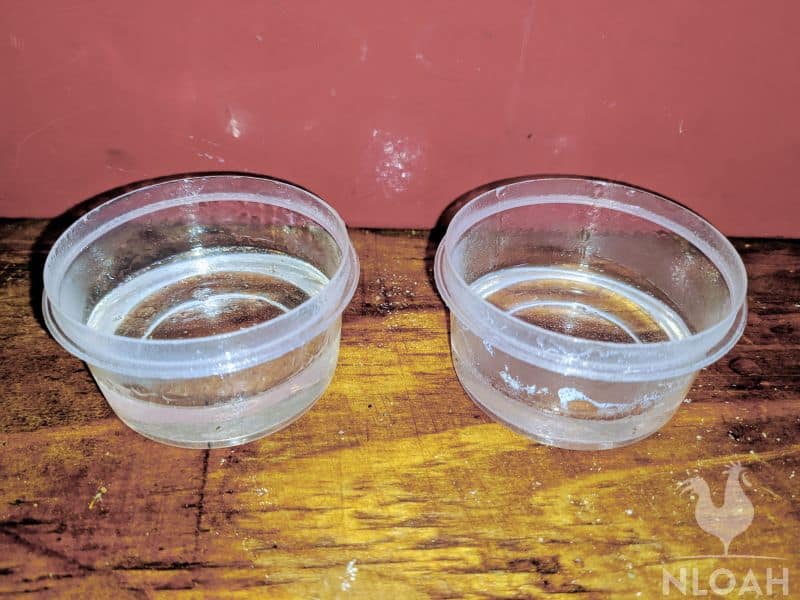
You can use the same molds for making floral soap as you would any other, regardless of whether or not you are using a melt and pour base or a cold processed soap base.
Silicone molds are quite popular because they allow you to release a hardened soap so easily. These types of molds are sold at craft stores, and from online retailers like Amazon and ETSY.
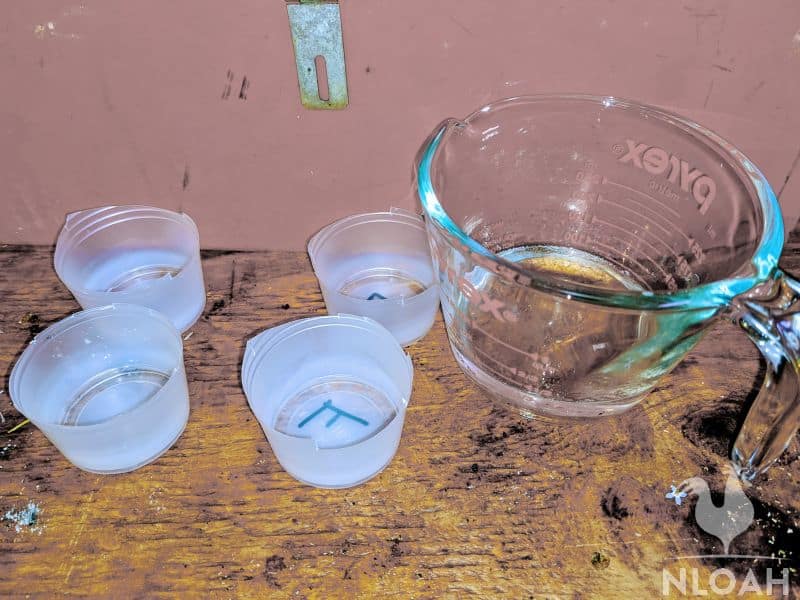
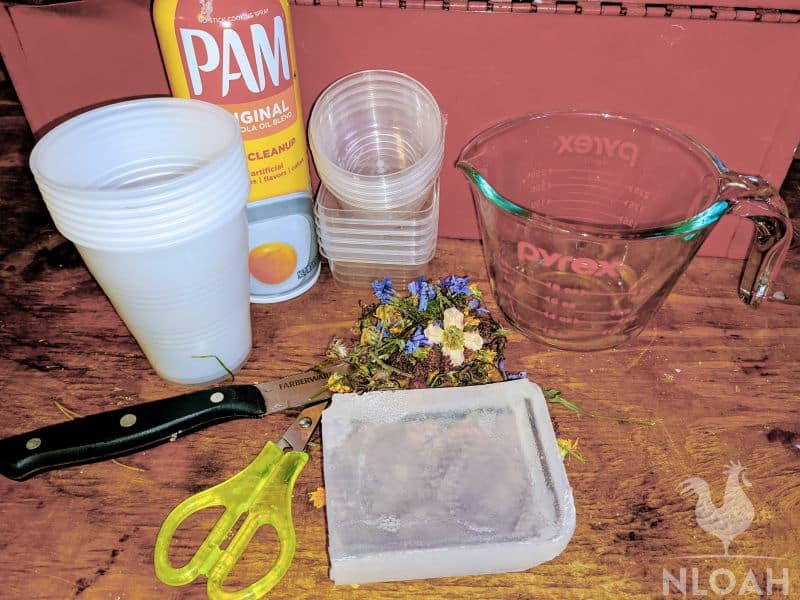
I have used plastic and paper cups as soap molds, metal muffin tins, small plastic storage containers, and even chocolate candy molds to make soaps.
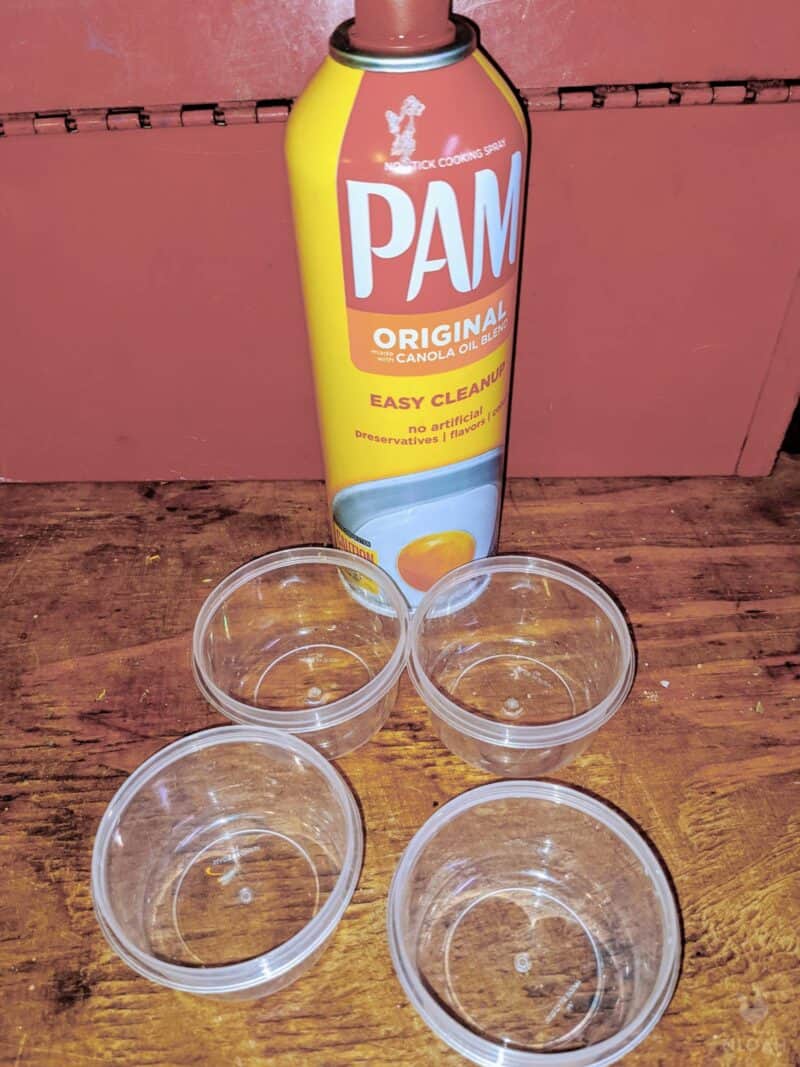
Spraying a small amount of Pam into the mold will help release the soap once it is hardened – unless you are using a paper cup mold. Those types of molds can be prone to falling apart too easily to add squirts of cooking spray into the mix:
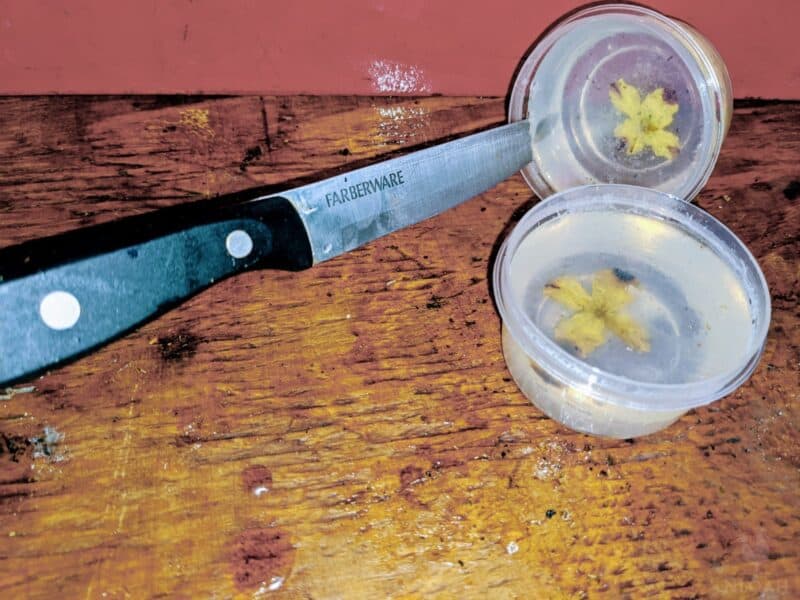
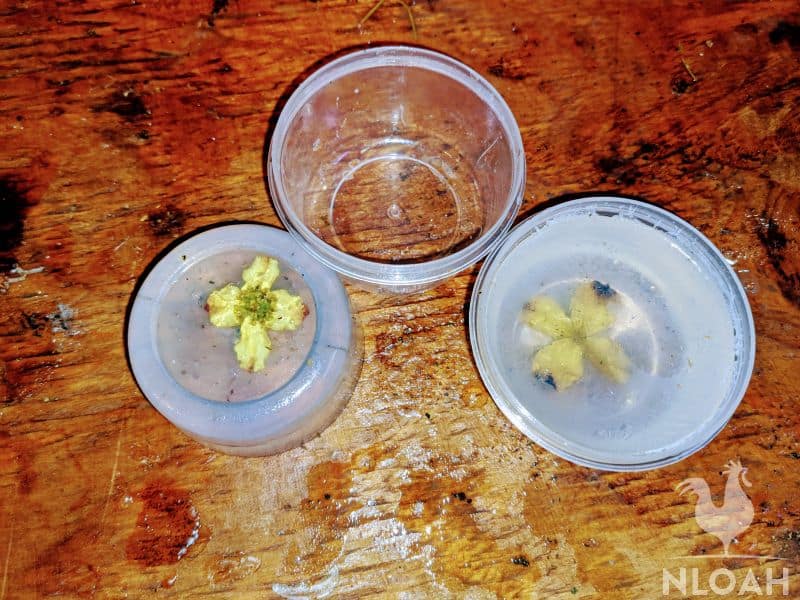
If the soap gets stuck in the mold or you are using a soap mold that is not at all flexible, take a knife carefully around the entire edge of the hardened soap to help it release:
It is best to keep a hand under the mold after edging it with a knife because the bar usually falls out quickly:
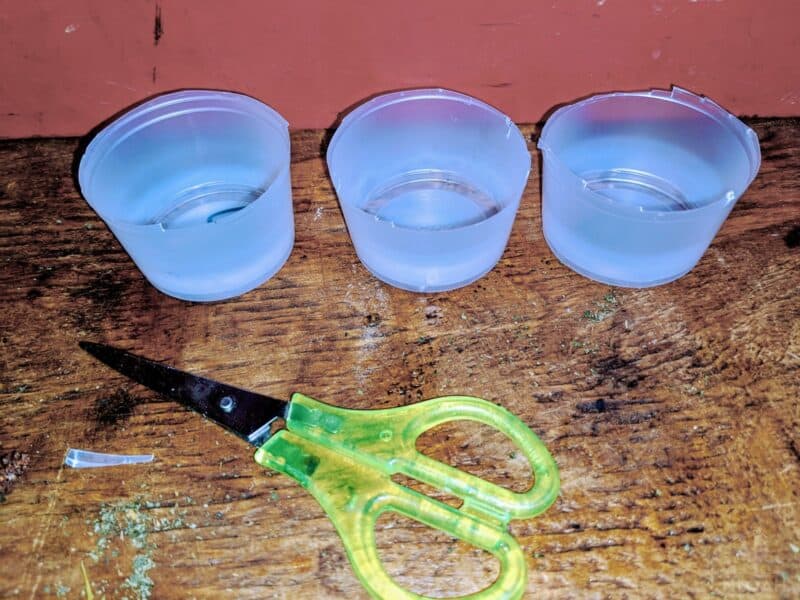
When using a paper or plastic cup as a mold, simply cut it to the desired soap bar size. The cup in the photo above had ribs around it, so I could use them as a guide while cutting.
If you are using a cup without a rib or decorative marking, take a permanent marker and draw a level line around where you want the top of the mold to be before cutting:
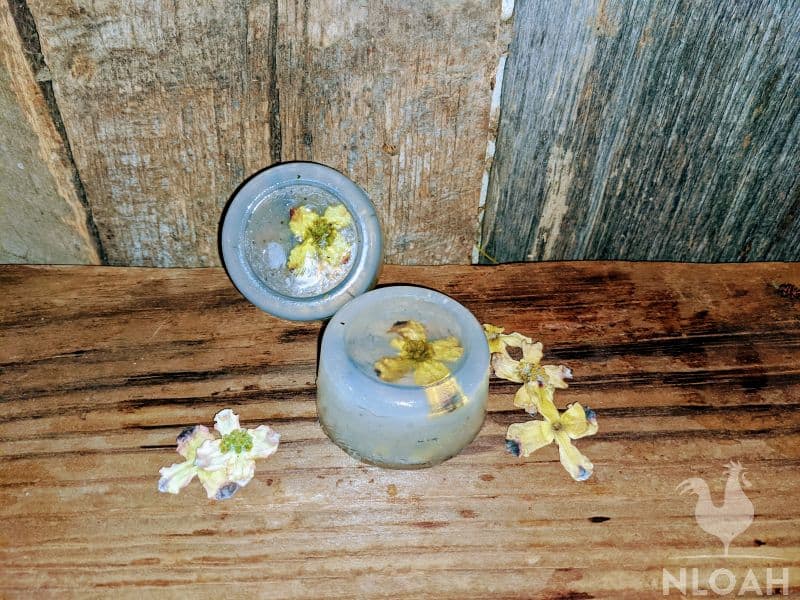
Method #1: Making Whole Flower Floral Soap
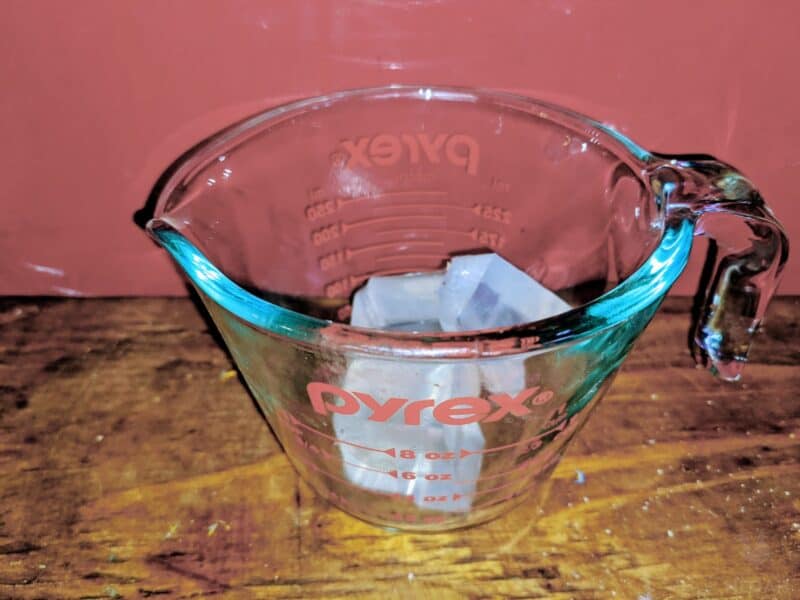
Step 1. To make two standard bars of soap, melt half a pound of glycerin soap base in the microwave for approximately 30 seconds:
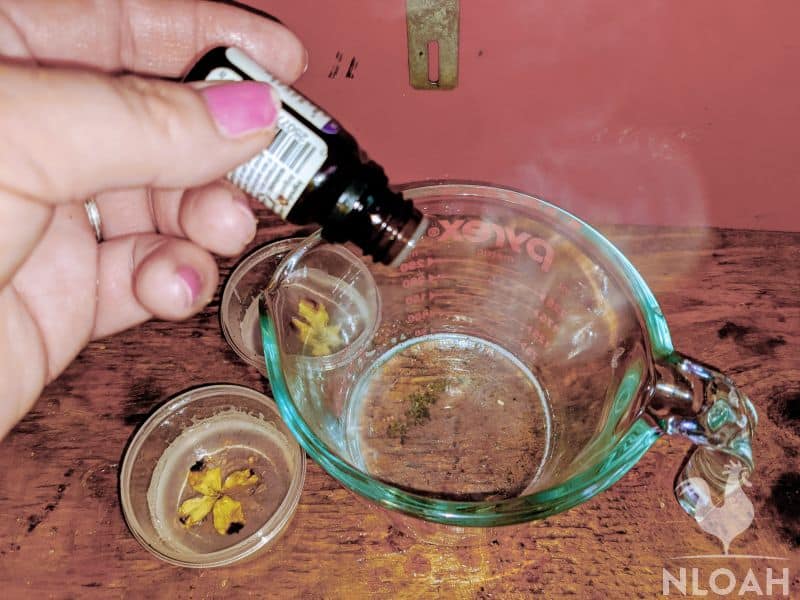
Step 2. Drop in any essential oils being used for scent, or colorants now. Two to four drops of oil for scent per bar will usually create a long-lasting and potent but not overwhelming scent:
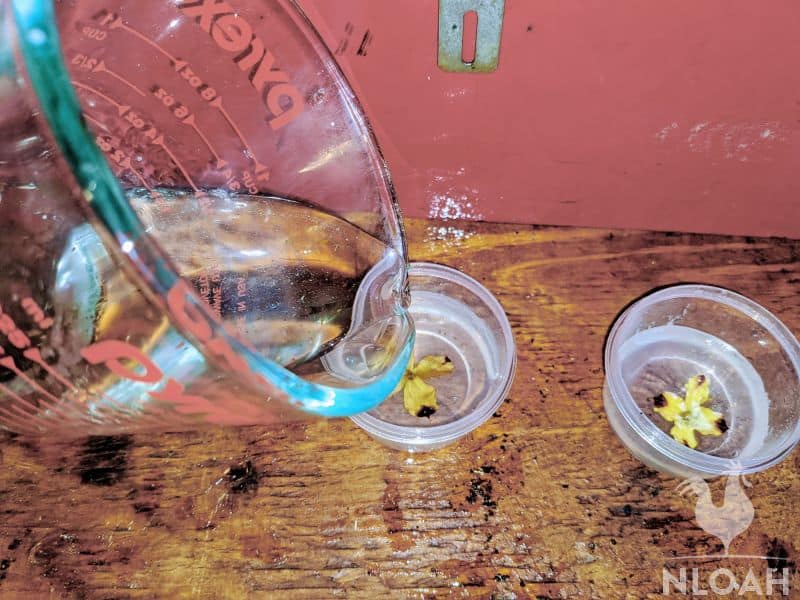
Step 3. Fill the bottom fourth of your mold with the hot glycerin base. This is the minimum suggested depth for floral soap.
You can make the first base of soap deeper if you want the flower to appear further back in the soap, or are working with a large flower head or bulb that requires more soap base on the top end of the bar.
Allow the floral soap to completely harden before moving onto the next steps. This process can take about three hours at room temperature, or up to an hour in the refrigerator.
Step 4. Melt four more chunks of the glycerin MP soap base.
Step 5. Drop in any essential oils or colorants you want to use.
Step 6. Pour the hot glycerin soap base into the molds to fill them the rest of the way up:
Step 7. Repeat the hardening steps again.
Step 8. Make sure the glycerin floral soap is completely hardened before placing in a soap dish, wrapping it as a gift, or using:
Method #2: Adding Shredded Flowers Or Herbs
Step 1. Chop up the flowers or herbs with a sharp knife, shred them by hand, or pulverize them in either a blender or food processor.
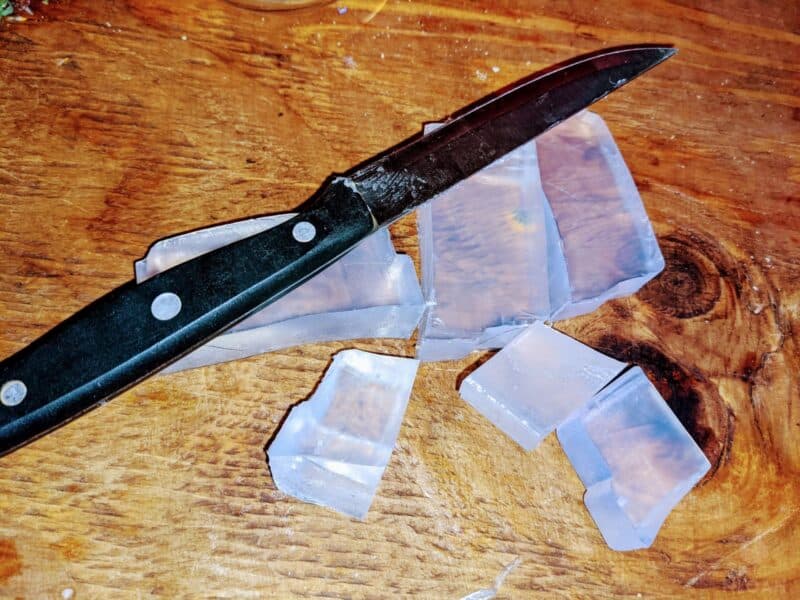
Step 2. Chop up the amount of soap base you need to fill your molds with a sharp knife. A half a pound of base should make two standard size bars of soap.
Step 3. Melt the soap for approximately 30 seconds in the microwave.
Step 4. Stir in any essential oils you are using for scent now. About two to four drops per small to medium sized soap bar is recommended.
Step 5. Fill your mold one-fourth of the way full with melted soap base.
Step 6. Allow the soap base to harden completely before moving onto the next step. You can allow it to harden on the counter at room temperature for roughly three hours, or in the refrigerator for around half an hour.
Step 7. Place the shredded flower or herb parts on the hardened base to achieve the suspended or floating look. If you want the flower parts to float throughout the entire bar of soap, simply stir them into the hot soap base.
Step 8. You can use a toothpick to move the natural matter into an exact spot if they did not fall as desired when adding them onto the hardened base.
Step 9. Melt-and-pour another chunk or so of the clear glycerin base on top of the shredded flowers.
Step 10. Allow the shredded flower soap base to harden thoroughly before placing in a soap dish or using.
Method #3: Double Base Floral Soap
If you would like to add a bit more flare to the soap and include some vibrant color to the bar, consider using two different soap bases.
As noted above, adding color to a glycerin melt and pour soap base to make floral soap is sometimes done, but adding just slightly too much colorant can nearly obscure the flowers completely.
Step 1. Use either whole or shredded flower parts using the same process of placing them in the top bar position after filling the mold just deep enough to cover the plant matter.
Step 2. Next, allow the glycerin and flower or shredded flowers to harden at room temperature, or in the refrigerator.
Step 3. Now, melt the desired amount (4 chunks is the general rule of thumb) of a solid non-glycerin soap base – goat’s milk MP soap base works great.
Step 4. Stir in your desired colorant.
Step 5. Pour the colored solid melt-and-pour soap base into the mold on top of the flowers suspended in glycerin.
If you have a deep soap mold, or even a shallow one with dividers, you can put a solid color layer of soap on each end of the bar, and house the transparent glycerin soap with the suspended flowers in the middle section, as is done in the video below.
Step 6. Allow the soap to harden at room temperature or in the refrigerator after removing from the mold before storing, using, or gifting.
Method #4: Exposed Flowers
This type of floral soap can be made with a clear glycerin base, a solid MP soap base, or a combination of the two as noted above.
If you want either whole flowers or shredded flowers to remain on the exterior surface of the bar, simply place them into the soap mold BEFORE pouring in the melted soap chunks.
Although not required, squirting the backs of the flower parts with a bit of rubbing alcohol can help prevent air bubbles from forming around them as well as possibly help them to adhere more firmly to the glycerin soap base.
Because glycerin soap tends to get used up far more quickly than a solid type of soap base, the added weight of the flower parts on top will fall off quicker if the bar doesn’t also have a solid base.
The base can be left white, be colored, or even have shredded flowers, oatmeal, or other common melt and pour soap additives stirred in for increased visual interest.
While soaps like these are definitely ready for use, they are often used as a decorative feature more than a utility every day bar of soap.
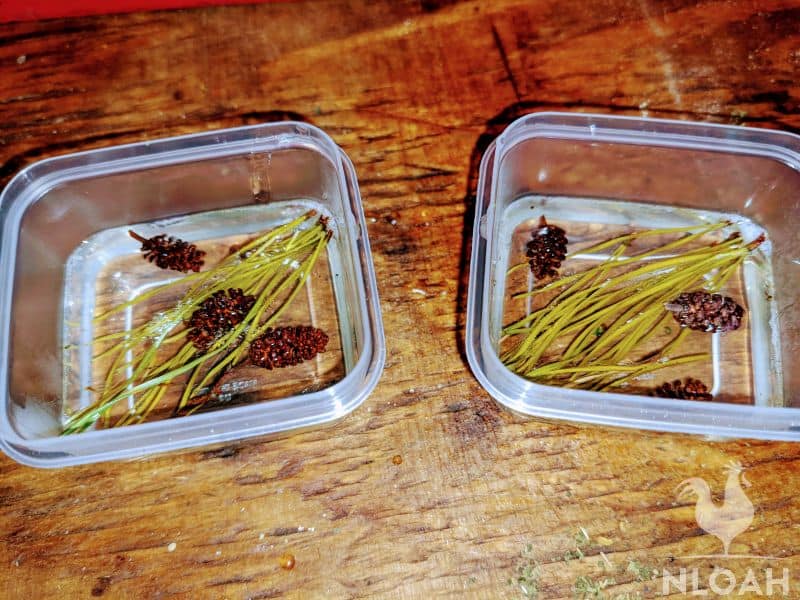
Method #5: Pine Needle, Pine Cone, And Nut Suspended Or Exposed Soap
Using pine needles, small or miniature pine cones, or small nuts in soap give the bar an attractive fall or winter flare. When making soap with tiny pine cones or nuts (acorns tend to work best from a size perspective) you must use a deep store-bought or DIY homemade mold.
Skimping on either the mold depth, or the amount of glycerin will turn what would have been a bar of soap beautiful enough to turn into a cherished homemade gift into an epic failure.
Step 1. The exact size of the mold and amount of the glycerin melt and pour soap base needed will depend upon the dimensions and weight of the hard plant material being used.
For best results with the glycerin base, pour an amount equal to at least one finger’s width deep of the MP soap base into the mold BEFORE adding the material to make a suspended floral soap.
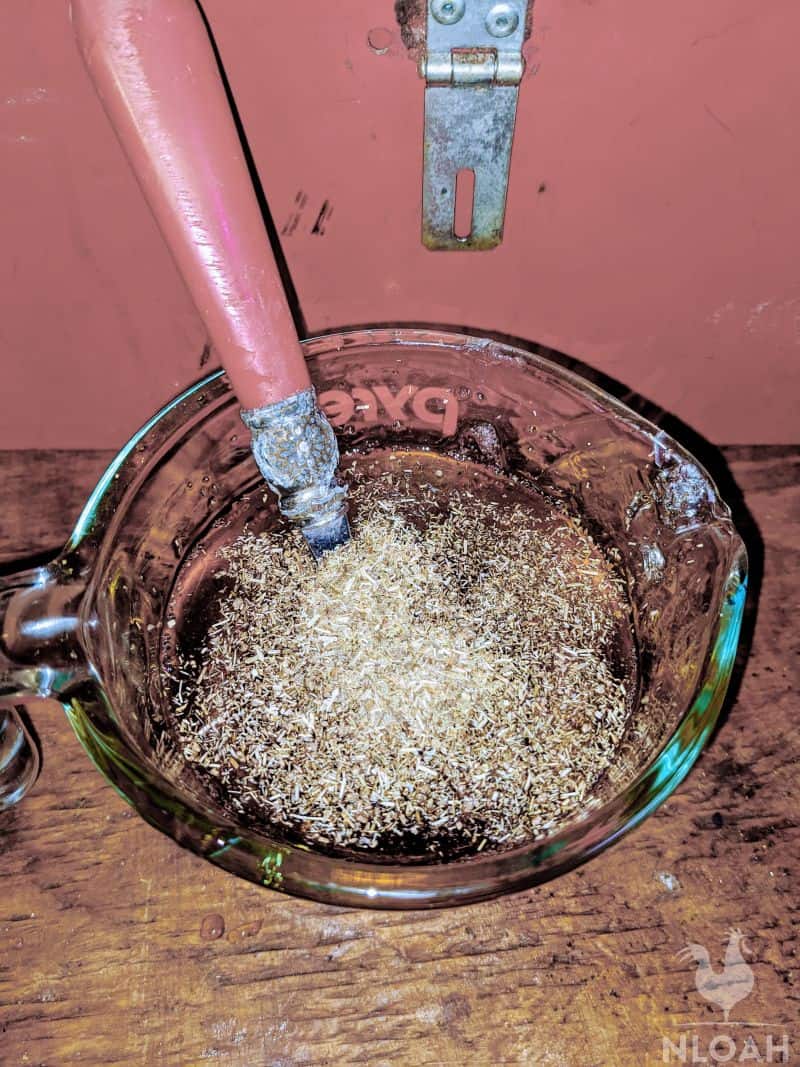
Step 2. Any scent being used should also be stirred into the hot glycerin before it is poured into the mold. I often add a peppermint scent when using pine needles and miniature pine cones to make a Christmas soap. A pumpkin scent works well with acorns or other small nuts to create a fall scented bar of soap.
Step 3. Add the pine needles to the gylcerin mix.
Pine needles tend to move about in the hot glycerin due to their lightweight nature, no matter how carefully you try to place them into the mold.
Quickly yet carefully use the tip of a spoon or a toothpick to move them into the desired place before they start to set in the base. Waiting too long to move them can often result in what appear to be scratch marks near the top of the bar.
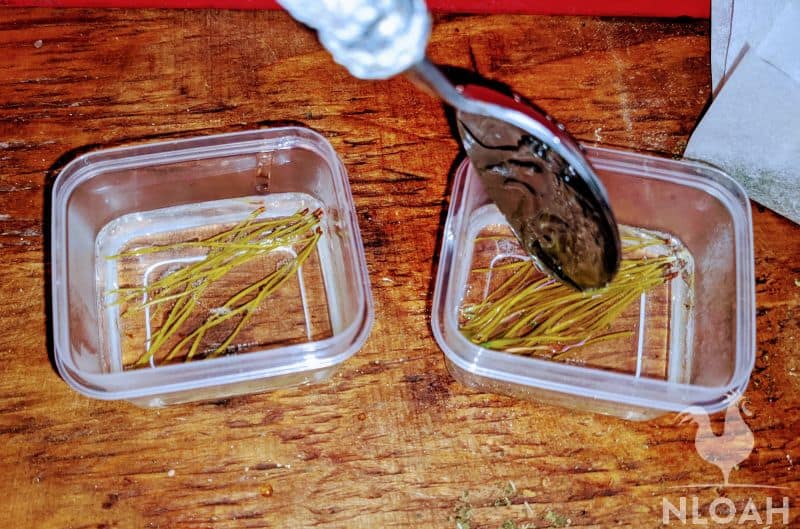
Step 4. Place the pine cones or nuts into the mold as soon as possible after placing pine needles, twigs, or any similar long plant material into the mold. They should stick in place a lot better than the pine needles because of their size and additional weight.
Step 5. Allow the soap to harden at room temperature or in the refrigerator before adding more glycerin melt and pour soap base, or a solid soap base to finish filling up the mold.
Step 6. Remove the soap from the mold only after it has hardened before use, placing in a storage container, or giving as a gift.
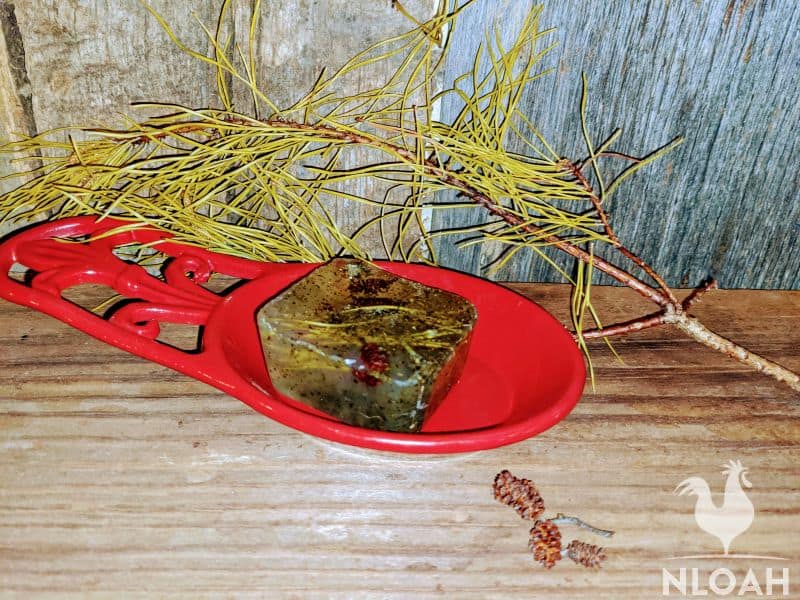
Optional Variation – You can also place the pine needles, pine cones, or twigs into the mold first, and pour a clear or colored base on top of it for an exposed floral soap – as shown here:
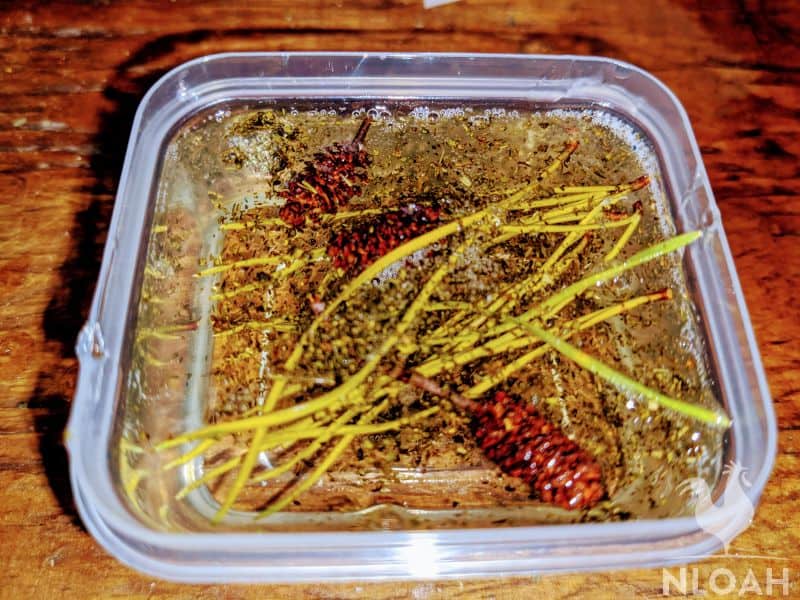
The soap in the photo also had chamomile stirred into the glycerin when it was hot to create a more moisturizing and soothing bar of soap. Notice the air bubbles around the edges.
Troubleshooting Tips
Tip #1. The air bubbles tend to appear more often, in my personal experience, when using thick plant type matter in a glycerin bar.
Tip #2. Due to the heavier weight and size of nuts, this method does not work well with such material.
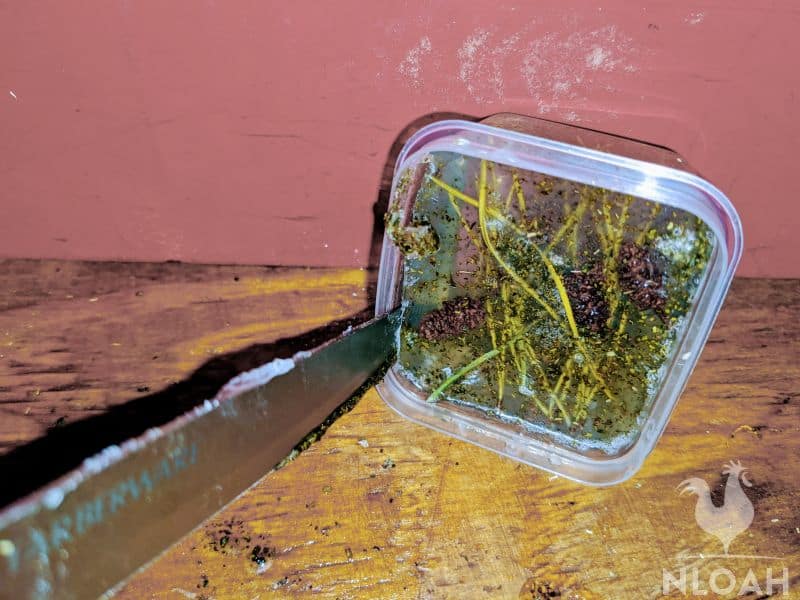
Tip #3. Expect to need a durable knife to carefully go around the edges of deep mold to release the thick bar once it has solidified.
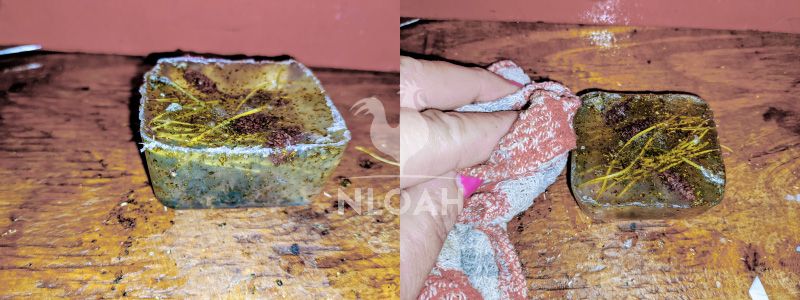
Tip #4. When a knife is used to release the soap from the mold, the edges of the bar will have visible rough spots. You will likely need to take a clean and dry rag to buff or “shine” around the edges of the bar to release rough spots caused by the knife and to create a smooth finish on the bar:
Tip #5. When making a soap that requires a deep mold or will hold something large, I often opt to use a plastic cup as a fill space. These can be fairly easily cut at the top above the fill line, and essentially peeled away from the soap – making for a far easier release with less buffing required to reduce flaws.
Wrap-Up
When stored in a cool dry place, melt and pour glycerin floral soap should retain its color, scent, and texture for approximately 12 months. It can also be stored in an airtight container in the refrigerator to extend its shelf life.
As a glycerin soap becomes wet during use, its longevity tends to be shorter than a goat’s milk, shea butter, or oatmeal melt and pour base because of the vast difference in weight and texture of this type of soap.

Tara lives on a 56 acres farm in the Appalachian Mountains, where she faces homesteading and farming challenges every single day, raising chickens, goats, horses, and tons of vegetables. She’s an expert in all sorts of homesteading skills such as hide tanning, doll making, tree tapping, and many more.
This is a great post. I’ve made melt and pour soap but never with flowers in it. I’ll have to try this soon. I’ll be making some scented soap as Christmas gifts.