There are copious amounts of ways you can design a bar of soap, but only four ways to make it. Some folks shy away from soapmaking because they either are terrified or working with lye – or think doing so is absolutely required to make soap … and it is not.
There are really only four ways to make soap: hot process, cold process, rebatch, and melt and pour soap base.
Although lye is a mandatory ingredient in all bars of soap, you do not actually have to make it (wood ash is a great and free way to make lye on the homestead), or buy lye.
You can purchase a ready to use mix that negates the worries many people have about coming into contact with lye.
What Is Lye?
Lye is a metal hydroxide that is created by leaching a strong alkali – like wood ash. Mixing the wood ashes from your wood stove or fireplace with water will create lye that can be used for soap making or even tanning leather.
In addition to being a base ingredient in soap and its traditional use in tanning leather, lye is also to cure food, to make biodiesel, in flooring and toilet disinfectants, and to unclog drains.
The caustic base solution that is made is significantly water soluble. Scientifically, lye is referred to as sodium hydroxide – NaOH, but has also been labeled and used as potassium hydroxide – KOH.
Why Is Lye Dangerous?
Lye can (really, will) cause damage to the skin and eyes when it comes into contact with them wether it is in wet or dry form.
When lye is being mixed and wet, the fumes stemming from it can cause harm to the lungs. Should you swallow lye, it will cause burning of the esophagus… or a lot worse.
Lye should never be made indoors or used in any area that is not absolutely well ventilated. Protective eyewear, and not just prescription glasses or sunglasses, should always be worn when making or working with lye.
Thick protective rubber gloves that have been carefully inspected for any worn spots or holes must also be worn when dealing with lye.
When making lye for soaps or to create a bath for hide tanning, I still have suffered red and burnt hands even though I wore very good quality and thick rubber gloves.
Skimping on all recommended safety guidelines simply should never be an option when dealing with lye, in either wet or dry form. Your life very well may depend on how carefully you work with the lye.
Is There A Substitute For Lye In Soap Making?
Nope. There is no substitute for lye in the soap making process. You can spend hours on end searching the internet to find one, but it just does not exist.
There is no way to make soap without lye being involved in the recipe. But, you can make soap without having to ever deal with lye by buying a melt-and-pour (MP) soap base.
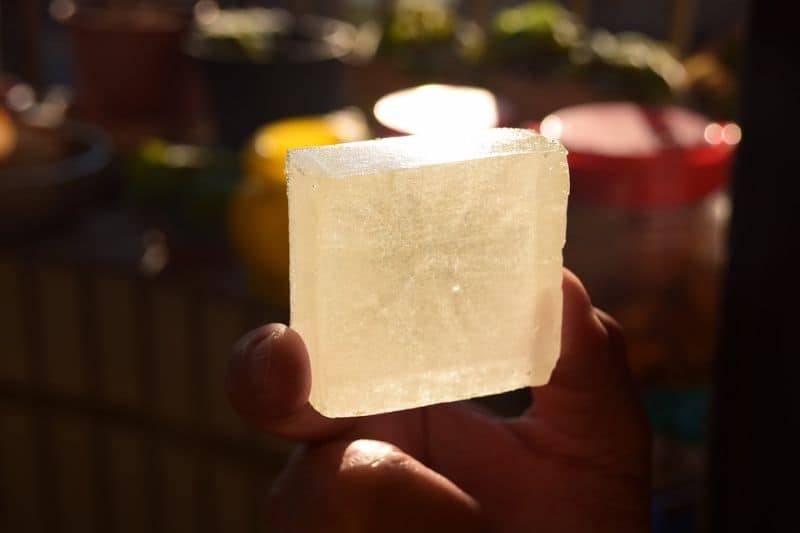
Caption – Glycerin melt and pour soap base is translucent, so you can suspend flowers and other natural and non-natural items inside of the bar. Some folks make tiny colorful soaps in various shapes that are then suspended inside of a clear melt and pour glycerin base.
Method #1: Melt And Pour Soap
Making soap this way is often considered the quickest, easiest, and safest way to create a customized bar. Under adult supervision, even children can help make a melt and pour soap because handling lye is not required.
A melt and pour soap base comes ready to melt and use. It has already gone through the saponification (lye processing) part of the process – so not handling, smelling, or even seeing actual lye, is required.
Because handling lye is not involved, there is not need to worry about wearing rubber gloves or safety goggles.
Melt and pour soap bases come in a variety of ingredient options: clear glycerin, honey, goat’s milk, oatmeal, aloe vera, and shea butter being the most common.
Soap made using this process will harden in about two or three hours at room temperature, or in roughly half an hour in the refrigerator.
Melt and pour soaps tend to readily accept essential oils for scenting without a problem – even those with strong vanilla content.
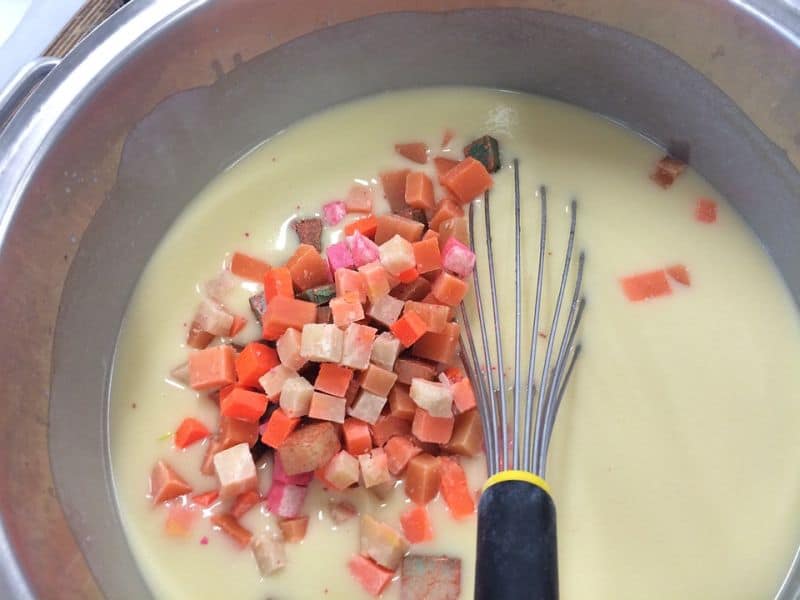
- Mica coloring powder and glitters attach to melt and pour bases quite well, especially if using a clear glycerin base.
- Layering a bar of soap in different colors or even using a mixture of various melt and pour bases is part of the fun of using this quick and safe soap making option.
- A clear glycerin melt and pour base also allows you to float or suspend flowers, nuts, twigs, tiny toy charms, etc. inside of the see through soap.
- Because a melt and pour soap of any type contains at least a moderate amount of glycerin, it can be more apt to “sweat” when exposed to warm temperatures.
- A melt and pour base is not as dense as the recipes used in the other soap process options on this list. Heavy additives, be they thick flowers or a natural ingredient like honey, can sink. I have not personally had a problem with using honey or miniature pine cones in a melt and pour base, but always go with a thicker bar mold to help avoid this problem.
- Melt and pour soap can burn a lot more quickly during the melting process than a cold process or hot process method of hand making soap.
- Using fresh ingredients in a melt and pour base is STRONGLY discouraged. These items will turn rancid rather quickly, and make the soap stinky, nasty looking, and basically unusable.
Method #2: Cold Process Soap
The cold process soap (CP) method may offer the most flexibility and creativity when making DIY soap bars.
You can put fresh ingredients into a cold process soap recipe that cannot be added to a melt and pour soap base, because doing so would allow them to spoil and spark the growth of bacteria and mold.
You can trace designs into a cold process soap to create symbols, swirls, etc.
A thick tracing technique on a cold process soap makes a “soap frosting” that is very attractive and can increase the price of the DIY handmade soap bars if selling them either locally or online.
The thick texture that can be created when making cold process soap can allow you to float or suspend heavier flowers and other objects in the bar that can be done with a glycerin melt and pour soap base – or even a goat’s milk melt and pour soap base.
Cold process soap does require the maker to handle lye, unlike melt and pour soap bases.
Cold process soap also takes longer to cure than a melt and pour base. Typically, handmade soap created using this method requires between four to six weeks to fully cure.
While you could use the bars before they have hardened to the proper degree, they will not last as long and get a lot softer when exposed to water than a fully cured cold process bar of soap.
While there are a lot of fresh and natural options for adding scent to a cold process soap bar, they do not always react well when using commercially manufactured fragrance oils or essential oils. Almost always and oil with a substantial vanilla ratio will ultimately turn the cold processed soap bar a deep shade of brown.
If you want to suspend something inside of a bar of soap, cold processed soap is not the way to go. The CP process makes ONLY opaque soap, so you can not see through it as you can a glycerin melt and pour soap base.
Method #3: Hot Process Soap
When you hot process soap the lye and hot oils are mixed together to launch the saponification process to make the bar.
The heat effectively “cooks” the soap before it is poured into the mold, and makes the time it takes to cure the soap occur a lot more speedier than is required when making a cold process soap.
Hot processing is the traditional way to make soap.
Pioneer women would make their own lye from the wood ashes in their cast iron ovens or fireplace and then mix it with the tallow they rendered from the beef fat of cattle they had slaughtered, and used the two ingredients to make a simple soap.
Just like with a cold process soap, you can choose every single ingredient that goes into the soap recipe – something that is not possible when using a melt and pour soap base.
The hot process soap mixture expands once it is poured into the mold, you must be mindful of this when creating a batch so it properly fit into the desired molds and does not overflow.
Hot process soap typically cures completely in a single day.
You do not need any special equipment to make a hot process soap. A double boiler or a slow cooker to be used as a heat source are the only tools you will need outside of ingredients and molds.
Hot process soaps often have a more handmade or rustic look to them because the texture is so thick – making them an excellent choice if you want to toss heavy additives into the recipe.
Making cute little swirls or even layering can be problematic when using a hot process soap because it is so thick and starts to cure so quickly.
Fresh ingredients may be used when hot processing soap, but the end results do not always turn out well – especially if you are a newbie. Fresh ingredients like purees, berries, and milk are often scorched during the heating process.
You may need to use more of a desired fragrance oil that initially might be considered necessary because the low flashpoint of the oils often cause them to burn away during the hot processing of the soap mixture.
Method #4: Rebatched Soap
This is another great way to make soap for newbies. You do not have to handle lye when making rebatch soap. You simply use a grater to shred a bar of cold processed soap and melt it.
Once it is melted, you can add in fragrance oils, colorants, and decorative exposed natural matter at the top of the bar – or on all sides if you would like.
You do not need to wear safety goggles, gloves, or a mask when making rebatched soap because you are not directly handling lye because the saponification process has already completed.
Because you are working with an already processed bar of soap, the curing process takes only seven to 14 days before it completes and the soap can either be used or cut into bars if using a large mold made for big batches of individual bars.
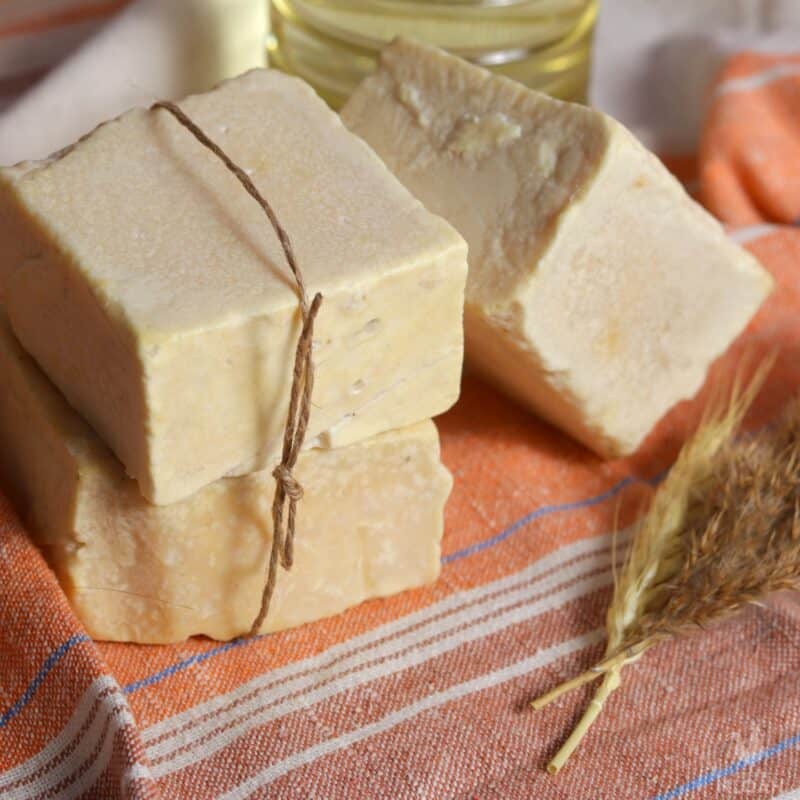
A rebatch soap bar resembles the more rustic appearance of a hot process soap:
While the recipe of a rebatched soap base cannot be completely customized like a hot process or initial cold process bar, you can still add colorants, fragrances, dried flowers, etc. to the mixture after it has been melted to create something that suits your personal preferences.
The rebatch soap’s thicker texture also may make it more difficult to make creative swirls on the surface of the bar but will not prevent successful layering.
When first learning how to make soap, especially if you want to include the children in the traditional homesteading project, melt and pour soap bases and rebatched soap making are the way to go.
Once you have mastered the simpler form of creating a soap, moving onto cold process or hot process can be a very exciting and fun activity for adults – as long as you follow all of the necessary lye safety precautions.
Handmade soap that is made and stored properly in a cool and dry space should all last at least 12 months – with cold process and hot process soaps potentially lasting longer due to their thicker texture.
Fragrance will dissipate less quickly with a hot or cold process soap, on average.

Tara lives on a 56 acres farm in the Appalachian Mountains, where she faces homesteading and farming challenges every single day, raising chickens, goats, horses, and tons of vegetables. She’s an expert in all sorts of homesteading skills such as hide tanning, doll making, tree tapping, and many more.
I make soap too, Cold and hot, usually hot in a slow cooker. its so easy. I use oils that I have infused with dried healing herbs myself. I have also rendered my own tallow but now just use lard, which I buy in bulk boxes at a wholesale restaurant supply place. Its the colouring that I’m researching now, how to make my own organic colour. I’d be interested in hearing what you use.
Does Tara have a fb page or website?