So, this past Friday I gathered my courage and tried something new and a bit intimidating…
I made soap. Cold-process soap, to be exact.
Intimidating, ’cause handling lye takes caution; it will burn the heck out of you if any touches your skin.
Plus, I’d never even watched anybody make soap, so I was completely at the mercy of the directions.
Is it Better to Make Your Own Soap?
Making your own soap can be a gratifying and rewarding experience. Not only do you get to choose your own ingredients and fragrances, but you also get to control the quality of the finished product.
Store-bought soap can often be drying or harsh on the skin, but homemade soap can be customized to be as gentle or luxurious as you like. In addition, making your own soap is a great way to reduce your carbon footprint.
By using natural ingredients and avoiding packaging, you can help to reduce your impact on the environment. So whether you’re looking for a unique gift or a more sustainable way to cleanse your skin, making your own soap is definitely worth considering.
What Are the Main Ingredients of Soap?
Soap is made up of two main ingredients: fat and oil. Traditionally, animal fat was used to make soap. However, vegetable oils are now more commonly used. The fat or oil is combined with an alkali, such as lye, to create soap.
The exact ingredients will vary depending on the type of soap. For example, bar soaps typically contain glycerin, which helps to keep the bar from drying out and prolongs its shelf life. Liquid soaps may also contain glycerin or other agents to help keep them from drying out.
Fats
Fat is an important ingredient in soapmaking. Without it, soap would not be nearly as effective at cleansing the skin. Fats help to create a thick, creamy lather that can easily remove dirt and oil from the surface of the skin.
They also help to moisturize the skin, preventing it from feeling dry and irritated after cleansing. There are many different types of fats that can be used in soapmaking, but some of the most popular include olive oil, coconut oil, and palm oil.
Each type of fat has its own unique properties that can impact the final product. For example, olive oil is known for its ability to cleanse without stripping away natural oils, while coconut oil is prized for its ability to create a rich, luxurious lather. When selecting fats for soapmaking, it is important to consider the needs of your skin and the desired properties of the finished product.
Glycerin
Glycerin is sometimes called glycerol or glycerine, and it can be derived from plant or animal sources. When used in soapmaking, it helps to create a bar that is mild and gentle on the skin. It also provides some lubricity, which makes the soap easier to spread. In addition, glycerin helps to attract moisture to the skin, making it an effective humectant. However, too much glycerin can make the soap sticky and difficult to use. As a result, soapmakers must carefully balance the amount of glycerin in their recipes.
Lye
Lye is a powerful chemical that has been used for centuries in a variety of different products, from soap and detergent to drain cleaner and oven cleaner. It is also a pivotal ingredient in the production of biodiesel.
While lye can be an effective cleaning agent and is an important ingredient in soap, it can also be extremely dangerous if not used properly. Ingesting or inhaling lye can cause serious health problems, and skin contact can cause burns.
For this reason, many people are hesitant to use products that contain lye. However, when used properly, products that contain lye can be safe and effective. In fact, a recent study found that soap made with lye was more effective at killing germs than soap made without it.
Want to know how it works? It’s quite simple.
The alkali breaks down the fat or oil into small molecules called “soap molecules”. These soap molecules have a polar head and a nonpolar tail, which gives them the ability to bind with dirt and grease. When you add water to soap, the soap molecules bind with the water to form a thin layer called “soap film”. This soap film is what allows the soap to lift dirt and grime from your skin.
Lye is often considered much more effective than other ingredients at killing germs, as I said before – even despite the risks. That’s why soap technically has to contain lye in order to be considered “true soap.” But taking precautions, like working in a ventilated area and wearing gloves, with lye is essential to avoid any dangers.
Other Ingredients
In addition to fat and oil, soap may also contain other ingredients, such as fragrance, colorants, and moisturizers. I love some lavender in mine, personally!
Despite its simple ingredients, soap plays an important role in keeping us clean and healthy.
Hot Process vs. Cold Process Soap
Cold process soap is made by combining oils and lye and then allowing the mixture to cure for several weeks. This type of soap results in a bar that is hard and long-lasting.
However, it can take some time to get used to the feel of cold process soap, as it is often quite drying.
Hot process soap, on the other hand, is made by combining oils and lye and then applying heat to the mixture. Many people do this in a crockpot. This causes the soap to set immediately, so it does not need to be left to cure.
Hot process soap tends to be softer than cold process soap and may not last as long. However, it is often easier on the skin and can be used immediately after it is made. That said, it is beneficial to let some time pass before you use it, as it will develop a more desirable texture and appearance.
In this recipe, I’ll give you notes for the cold process – but it’s pretty easy to learn either technique, to be honest!
What Else Do You Need to Make Soap?
The few tools I did need to gather before hand were:
- Safety goggles
- Rubber dishwashing gloves
- A heavy duty rubber spatula
- A steel whisk
- A measuring cup (for water)
- A metal thermometer (make sure it shows 95*F)
- Towels and a cooler
- A medium stainless steel pot
- A plastic, white 2 gallon bucket
- And 3 one-quart milk cartons (I didn’t have any, so I improvised.)
How to Make All Purpose Soap: Step by Step
Making soap at home is a satisfying process that can yield beautiful, natural results. And while there are myriad ways to create handcrafted soap, the basic process is always the same.
Whether you’re using a kit or working from scratch, the steps below will walk you through everything you need to make all-purpose soap at home.
This recipe yields 9 lbs of soap.
Ingredients
- 1 can lye or 13 oz
- 2 ½ pints cold water
- 6 lbs clean fat
Instructions
1. The first step to making your own soap is to add lye to water and stir until it is dissolved. It should reach around 75-80 degrees.
At this point, the mixture is ready to be used in your soap recipe. Keep in mind that lye is a caustic substance and should be handled with care. Be sure to wear gloves and eye protection when working with lye.
2. Heat the fat or oil to 97 to 100 degrees. This allows the molecules to break down and become liquid.
3. Stir both mixtures often during this process.
4. Pour the lye into fat The key to success is to pour the lye into the fat in a steady stream, stirring slowly. If you stir too vigorously, the mixture can separate.
5. Allow up to 20 minutes for the lye to be incorporated into the fat. This process is known as saponification, and it helps to create the soap’s distinctive properties. Once the lye has been completely incorporated, you can add any desired fragrance or color.
6. Pour the soap into a wooden box that has been soaked in water and lined with a clean cloth. Once the mold is filled, it should be placed in a protective pan and covered with a board to retain heat.
7. The next step is to allow the mixture to sit undisturbed for 24 hours. After this time, the soap is removed from the mold, cut into bars, and left to cure for 4-6 weeks. To get clean, well-cut bars of soap, it is important to use a sharp knife or wire.
8. When making soap, it’s important to put the cut soap out so that air can reach it. This will help to prevent the soap from freezing, which can cause it to lose its lather. After two weeks, the soap will be ready to use but it will continue to improve with age.
By following these simple tips, you can ensure that your homemade soap is of the highest quality!
How Long Does it Take to Make Soap?
Once I had everything I needed to get started I was ready to go! The instructions advised setting aside 3 hours of uninterrupted time to make the soap, so I waited until the three youngest were down for their naps before beginning.
Jada was my little helper. Unfortunately, there wasn’t much she could help me with once the oils were poured.
She hung out in the kitchen with me anyways though, and manned the timer when I needed her to. As always, I enjoyed her company and it was fun at least explaining to her what I was doing.
I didn’t take pictures of every step, so I’m not gonna do a step-by-step “how to” type of post. (I was too busy reading directions and trying not to get hurt!)
But I’ll tell you, making soap is a lot of WORK! Whew! I’ve read it many places, and can now confirm, if you are going to get into soap making, GET A STICK BLENDER! Your arm muscles will thank you.
Getting everything mixed and poured didn’t take very long at all, and overall it was quite simple. The house smelled wonderful too!
The stirring, however, took about 45 minutes. As I worked, I was suddenly very grateful for every bar of homemade soap I’ve ever been given!
Let me tell you, if anybody ever gives you homemade soap, thank them profusely and acknowledge the hard work that went into that little bar. It was no small task to make it!
Do All Soaps Have Lye?
Many people believe that all soap is made with lye, but this is not always the case. While most soap does, by definition, have to contain lye, there are DIY recipes that don’t call for it and in some cases, it makes sense to skip it.
Lye, also known as sodium hydroxide, is a caustic substance that can cause skin irritation and burns. While it is necessary for the soap-making process, not all soaps contain lye. In fact, many modern soaps are made with glycerin, which is a by-product of the saponification process.
Glycerin is a humectant, meaning that it helps to attract and retain moisture. As a result, glycerin soap is often gentler on the skin than traditional soap made with lye. In addition, glycerin soap typically contains fewer harsh chemicals and fragrances than its counterpart. For these reasons, glycerin soap has become a popular choice for those with sensitive skin.
What Can You Replace Lye With?
There are a few other substitutes for lye besides glycerin, too.
One option is to use caustic soda, also known as sodium hydroxide. This substance can be found in many household cleaning products and is less dangerous to work with than lye. However, it is important to note that caustic soda will not produce the same results as lye and may result in an inferior final product.
Another option is to use potassium hydroxide, which can be found in some drain cleaners. Potassium hydroxide is more commonly used to make liquid soap, but it can also be used to make bar soap.
However, this substance is more dangerous to work with than lye and should only be used by experienced soap makers.
A Few More Tips for Making Soap
With a few simple ingredients and a little bit of knowledge, you can create beautiful and fragrant soaps to suit any taste. Here are a few more tips to help you get started:
Choose the Right Base
The most common soap bases are glycerin, olive oil, and coconut oil. Each has its own unique properties, so be sure to choose one that will suit your needs. For example, glycerin is very moisturizing, while olive oil is ideal for sensitive skin.
You Can’t Really Fail
Soapmaking is an inexact science, and even experienced soapmakers will occasionally run into problems. However, there is no such thing as a failed batch of soap. If separation occurs, the ingredients can be reclaimed and reused.
Soapmaking may not always go according to plan, but with a little creativity, even the most challenging batches can be salvaged.
Don’t Use Aluminum Utensils
When making soap, it’s important to use the right type of utensils. aluminum utensils should never be used when making soap. This is because aluminum reacts with the soap-making process and can give the soap an unpleasant taste. In addition, aluminum can also discolor the soap.
Add Fragrance or Colorants
One of the best things about making your own soap is that you can customize the scent to suit your preferences. You can add essential oils, fragrance oils, or even dried herbs to give your soap a unique aroma. Just be sure to add the fragrance slowly and carefully so that you don’t end up with a soap that’s too strong.
If you want your soap to have a bit of color, there are several natural options available. For example, you can use spices like turmeric or annatto seeds to add a yellow hue, or fresh berries for a pink or red tint.
Just be sure to add the colorants slowly and carefully so that they don’t affect the final consistency of your soap.
You Can Use All Kinds of Different Fats
When it comes to choosing the fats for your soap, the sky’s the limit. Tallow, lard, olive oil, coconut oil, and Shea butter are all popular choices, each with its own unique benefits. Just be sure to avoid using mineral oil, as it won’t produce soap.
And if you’re planning to use poultry fat, be aware that it will yield a very soft, spongy bar. Regardless of which fats you choose, be sure to source them from a reliable source and use only those that are fresh and pure.
When you’re making your own soap, it’s important to choose the right fat. You want to make sure the grease is clean and pure, without any impurities.
Old, rancid fat will give your soap a bad smell and may even cause skin irritation. Instead, opt for fresh, high-quality fat that will make your soap smell great and feel luxurious on the skin.
Measure Everything Carefully
Lye water is a caustic substance, so it’s important to add the right amount or you could end up with a batch of soap that’s too harsh for your skin.
The proportions of each ingredient will vary depending on the type of soap you’re making, so be sure to consult a trusted recipe. When measuring the lye, it’s best to use a digital scale for accuracy.
Aging Always Improves Soap
The perfect bar of soap requires the perfect balance of oils, but even the best recipe can produce a soap that is less than perfect. One common problem is that the soap may be too harsh, causing it to dry out the skin or leave behind a residue.
Fortunately, this is often simply a matter of time. Soap that is left to age for several weeks or months will usually become softer and more gentle, thanks to the process of saponification. Over time, the fats and oils in the soap begin to break down, resulting in a soap that is easier on the skin.
Is Making Your Own Soap Cost Effective?
Making your own soap can be a fun and rewarding hobby, but it’s important to consider the cost before you get started.
Store-bought soap is relatively inexpensive, so you’ll need to make sure that you can save money by making your own. The good news is that there are several ways to make soap without spending a lot of money.
For example, you can use glycerin soap base, which is made from vegetable oils and doesn’t require the use of expensive ingredients. You can also make cold process soap, which uses less energy to produce than hot process soap.
And of course, you can always sell some of your extra soap to recoup some of your costs, too!
If you’re willing to invest some time and effort into making your own soap, you can find recipes that fit your budget.
Final Thoughts
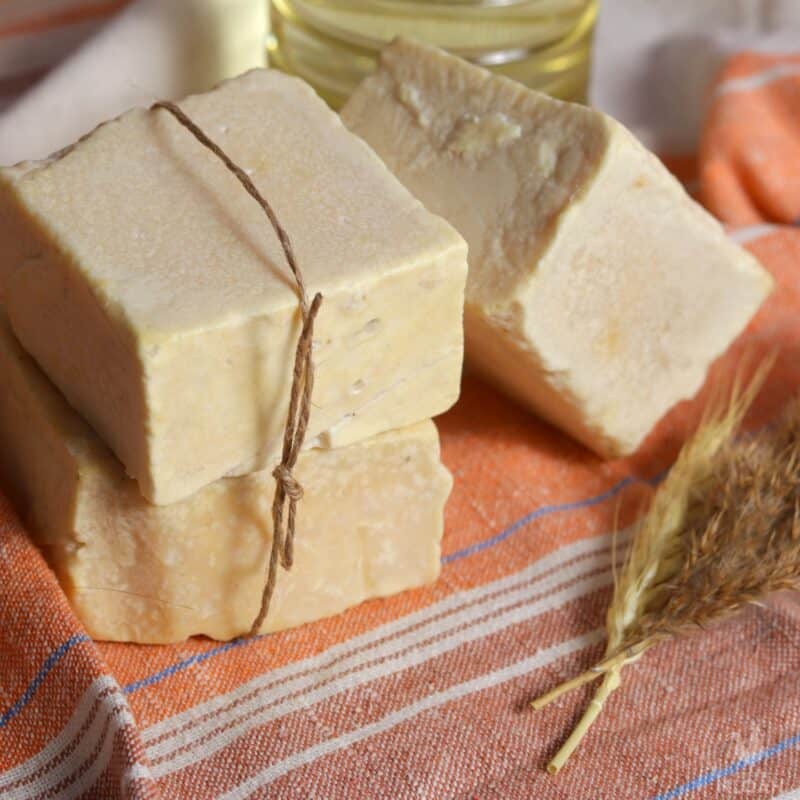
Since we didn’t have any one-quart milk cartons, I used a cardboard orange juice container, and an empty sanitizing wipes tube. As I type, the soap is curing in these.
Tomorrow they will be ready to dump out and cut into bars, and then allowed to dry for 3 more weeks before we can use them.
I’m SO anxious to see how they turned out!! I’ll have to let you know what I think in a few weeks after I’ve had a chance to try a bar.
I’m pretty proud of myself for finally making my own soap! Another notch on my “do-it-yourself” belt. Next on my list is using our goat’s milk to make a batch! After I get a stick blender, of course.
What about you? Do you make your own soap? Have you been wanting to make it, but just haven’t jumped in yet? I’d love to know where you’re at!
*UPDATE: The soap turned out really good! The wipes container (tube shaped) was NOT a good idea. I thought I’d never get the soap out! The cardboard container worked well though; it was easy to tear away from the soap block. I’m loving this homemade soap!

A city girl learning to homestead on an acre of land in the country. Wife and homeschooling mother of four. Enjoying life, and everything that has to do with self sufficient living.
I’m really curious if you’ve continued to make soap and with the goat milk and any new information you might have since your first time!?
yes i have use soap nut be for
Well,that’s great!Soap making is a great option for anyone wanting to do more for themselves.Soap making is fun, provides a natural outlet for your creativity, creates a viable product for market and is simply wonderful for your skin.
Hey Kendra. Congrats on making soap for the first time! It’s on my list of to-dos for the fall. I feel the same way about being a bit intimidated using the lye. I recently watched a video called “Homestead Blessings: The Art of Soap Making” by the West Ladies. I got it from our library. It was really helpful to have the visual. I did a review of the DVD on a blogpost. Enjoy your soap!
If I have soap that is stuck in a mold I pop it into the freezer for a while.
I made my own soap this year from scratch. The hardest part was the stirring! I am in search of a stick blender and have every flea market vendor I know looking for one too! I’d actually like two, one for soap making and one for cooking.
My husband and boys have skin issues and lye soap is perfect. I added goat milk and oatmeal and I used lard instead of oil. The whole idea for me was using what was available. Palm oil, olive oil and such are expensive. We have farmers all around that practically beg me to take their lard! My next project is making lavender scented goat milk soap using essential oils and herbs.
I also have some dried lavender soaking in a jar of olive oil and I bought some beeswax from local beekeepers and I’m going to attempt to make hand salve.
You will love the feel of the soap!
I wonder, if you make plain lye soap can you use that to make homemade laundry detergent instead of buying the Fels Napths soap?
Melissa,
YES! I have heard of other ladies who grate up homemade lye soap for laundry detergent. Actually, that’s how they did it back in the days… no borax or soda added, just straight up lye soap 🙂 I’m gonna get there, eventually!
Fun!! I started making soap last fall and had to stop when I didn’t have room to dry any more!! We have just a few bars of mint soap left, so I need to be making more very soon. I gave away lots of soap to extended family for Christmas. I use goat milk in my soap and we really like it. And the stick blender? I can’t imagine NOT using it! A helpful video is the one on soapmaking from the West ladies at Homestead Blessings. Are you familiar with their dvds produced by Franklin Springs? Wonderful resources for homesteading families!
I forgot to mention if you have silicone baking pans they work great for making mold. I bought some online at Target and have had them going since my first batch. I did go and buy real molds this year since I suck at cutting the bars staight. But I still use my silicone ones when making tons of soap for market.
How did your soap turn out??
I have been making soap for about 3yrs now and love it. I just blogged about it earlier this week. Tomorrow morning my dh and I are going to make 15lbs of Goats Milk Soap and 5lbs of a coffee/cocoa soap for grabbing odors in the kitchen. My daughter loves to stay and chat with me while I am making it too.
I just came upon your site because of Anais’s post of this entry on FB. It caught my eye, not only because of the soap making but because we share the same name! 🙂
I’ve been wanting to try making my own soap for awhile now. It’s something I’d like to try this summer and am debating on whether to buy a kit or get all the supplies myself. I’ve been leaning toward making goat’s milk soap but I’m having a hard time finding goat’s milk. 🙁
I’m starting to browse your blog and LOVE it. Keep up the good work! 🙂
Hi Kendra!
(Whoa, that’s weird to say 🙂 )
I’m so glad you came by to check out my site! Definitely give soapmaking a try! Buying the ingredients yourself *may* be cheaper (depending on where you get your stuff and what you get), but a kit is SO much more convenient and easy for your first time. Whatever you decide, I wish you the best! You may find somebody on Craigslist who would sell you some goat’s milk for soap. I’ve often seen it for sale there in the farm and garden section. Good luck!
A stick blender definitely shortens the mixing time. We’ve made it three times now and it’s come out every time. Not from a kit, just getting the needed items and using recipes from books and online. Congratulations on your first batch!
Welcome to the club! Soapmaking is one of my favorite things in the world! It’s an art/craft/science that is useful and consumable! 😀 A tip: don’t settle for anything less than a stainless steel stick blender. I have gone through three plastic ones. The lye makes it (the blender) break down very quickly. I’ve had my stainless one for about two years now, and it still works great!
Good for you, Kendra! Hope your bars turn out well. Soap-making is something I haven’t tried yet. I do have a cheese-making kit my husband ordered for me that I’m looking forward to trying, though!
Good for you, I have been wanting to make my own soap for awhile and have had a hard time getting a hold of lye (like you said its a bit intimidating). But I had determined a few weeks ago to do it this summer and I will soon as we get some other things done.
How well do you think the water would heat up in a pan on a propane grill (really good grill). My kitchen is in the middle of the house with no real ventalation to the outside. Also I just got a new induction stove and I hate to use one of my new good pots for soap, but I could use the old pots on the grill.
Anyway thank you for the review and link I will check it out.
Teresa
Teresa,
So, with this recipe anyways, you can opt to only heat the oils in your pot, and then pour them into the bucket and mix in the lye. This way you aren’t ruining a good pot. The only thing you would need to heat is the oils, to 95*, so I think a propane grill would work okay for heating (though I don’t have any experience trying). You will need a sink though, to cool off the lye if it’s too hot. Hope that helps! Good luck with it 🙂
Hi Kendra,
Congratulations on making your first batch of soap – especially with a newborn! I just started making my own in January using the West ladies recipe from Homestead Blessings. I have a Cuisinart stick blender, but it must not be a very good one because I find much more success with getting a trace when I use a plain old fashioned whisk. I haven’t done much with additives, yet, but will try that on my next batch. Looking forward to seeing how you like your new soap!
Hi Kendra,
We have not made soap in many years.When we tried for the first time probably seven years ago now,we had a difficult time finding the lye.We finally found some at a pool store when I got brave enough to call a business near us that sells homemade soap to find out if they would sell us some.They would not but told us where they buy it.So that was nice and we headed there.
We made a big batch of goats milk soap and while curing in the garage some mice decided to take lunch.It was so depressing that we have not tried it since BUT I am thinking that maybe we will try it again one of these days.Glad that you were able to make a batch.Can’t wait to hear how it turned out.:)Nikki
Kendra,
First I want to say that you took a big step doing this on your own. You have a right to be proud!
I learned to make soap 2 years ago. My son has eczema and he can only use cold process, all natural soap made with lye. It was getting expensive to buy this stuff and I REALLy wantec to learn to make it. Like you, I had a fear beyond fears of handeling the lye. My good friend Julie invited me over one cold novemeber day and I was hookef from there! You can read about my first adventure here:
I agree with what you said the other day…You NEEd a stick blender! This was one thing I hesitated on investing in, but now that we are selling our soap here locally and on Etsy, the $30 stick blender has paid for itself:)
Its so relaxing for me to make a batch of soap. My children loved being involved in the process and I love that they are. I never let them handle the lye, but measuring and mixing, they can do:) One thing I would love to invest in next, is a nice wooden soap mold:)
It was exciting to read your post, as it’s been a few months since I’ve made a batch and I must say that you’ve given me the bug to whip up a batch:)
inspiring!
i have all the ingredients that I need to make many batches of soap, but haven’t tried it yet!!
maybe its that 3 hours of uninterrupted time that I keep waiting for?
I do have a stick blender but I was wondering if maybe I should try make it the old fashioned stirring way to appreciate the process and see what this “trace” thickness looks and feels like…
anyhoo, when I have finally taken the plunge I will let you know.
thanks!
Yes, Erin, let me know how it turns out whenever you get to it!! It didn’t really take 3 hours to make, closer to 2, I think 😉