Waldorf dolls will take longer to create than a typical cloth doll, but making one of these sweet old-fashioned toys is so well worth the effort. Once you master making a Waldorf doll head, the rest of the process is easy-peasy…I promise.
I allowed myself to be too intimidated by the head-making process, that it took me two years to give it a try. Once I made my first head, I firmly chastised myself, and then promptly make a grand total of four more heads that same day.
Making a Waldorf-inspired doll head took me about half an hour or so the first time; the following heads took only slightly less time to complete.
Now, when I say made the head, I literally mean just forming the tight basic head shape. Tying the strings and sewing them into place took another 10 minutes.
Completing the nose soft sculpting work took an additional 10 minutes. Making a Waldorf-style doll head is not the rocket science of natural toymaking experiences that I had made it out to be in my mind. If I can pull off a perfectly crafted Waldorf doll head, so can you!
I was all ready to make traditional Waldorf dolls for our two youngest granddaughters for Christmas but kept putting the project on my end of my homemade toys-making to-do list because of my doll head phobia.
Come the middle of October, I became really worried that I would not be able to pull off the project and waste a bunch of money trying to in the process.
The Waldorf doll kits that I had found online ranged in price from $50 to $90 each, depending upon the dimensions of the doll, and how much soft sculpting and hand embroidery was included in the kit.
Well, fellow homesteaders, I wound up breaking the rules on those first two Waldorf dolls. After literally hours of searching over multiple days, I finally found a Waldorf doll that was not going to cost much more than the kit, and the additional items that were not included in the kit… there were always additional items needed.
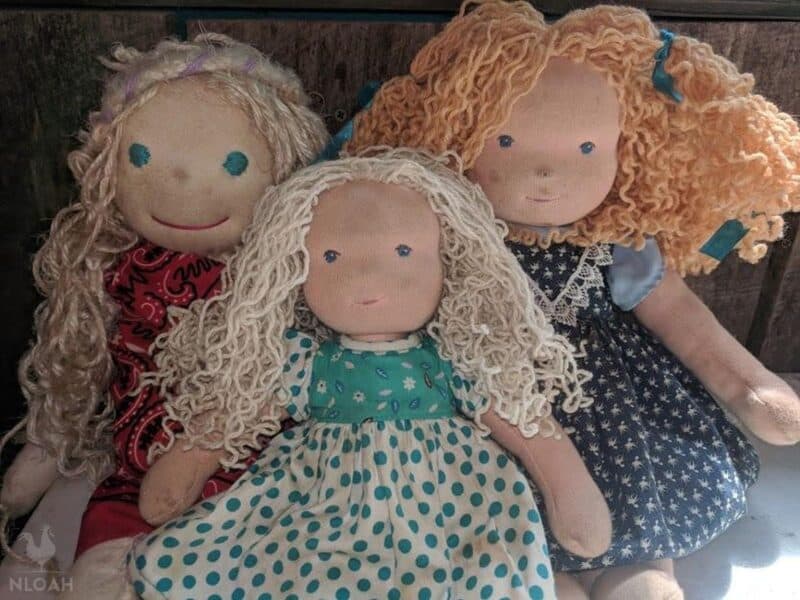
I bought two dolls from a wonderfully helpful dollmaker in Ukraine, Happy Waldorf Dolls which I had found on ETSY, and gave those to our granddaughters for Christmas and made them extra clothing.
Unlike most dollmakers, she charges between about $60 to $150 each for her lovely dolls and not $200 to $500 – seriously, some charge that much for a doll!
I used her two dolls (shown above) as an inspiration for my own.
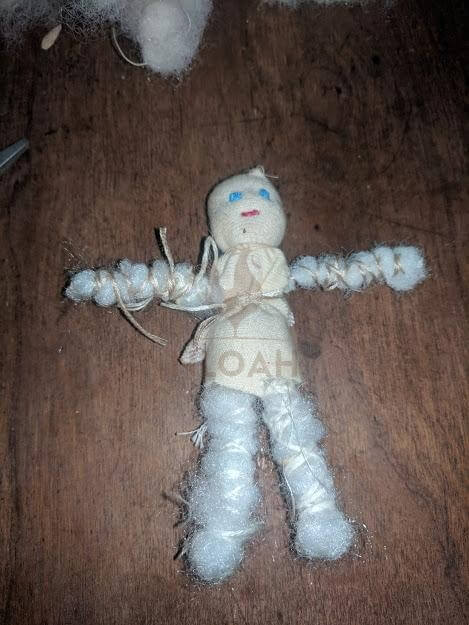
Even though the two Waldorf dolls I made our granddaughters for Valentine’s Day were as simplistic as the original ones (and the doll skin I ordered was way too light-toned) the girls went as nuts over them as the perfect ones from the sweet dollmaker who has been creating soft beautiful keepsakes for many years.
In fact, Auddie and Ariyah would come check on my progress daily, and run around with the Waldorf doll heads, even before I had made them wigs, cradle them with love and push the body-less dolls around in their strollers.
Your first few dolls will probably be as full of tiny imperfections like mine were while you are still learning the crafting process, but I can just about guarantee you their intended recipients will not notice a single one of them as they shout with joy when handed their new best friend.
Waldorf Doll Head-Making Materials
Disclosure: if you visit an external link in this post and make a purchase, I may earn a commission. Read my full earnings disclosure here.
The head you will be making in this Waldorf tutorial is designed to be used to create a 10 to 12-inch doll.
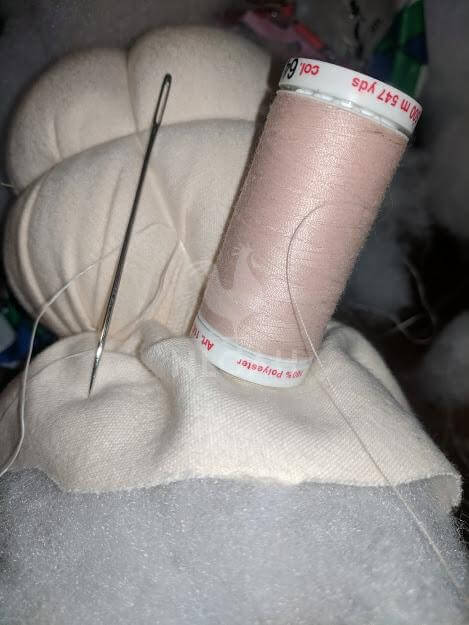
- 3 to 5 inch Dollmaking needle or upholstery needle – I used both during different parts of the Waldorf doll head-making process.
- Dental floss or jewelry string, or thin but strong cotton string – unwaxed dental floss is what I have always seen recommended but waxed is what we have so I used it and keep on using it because it didn’t pose any problems.
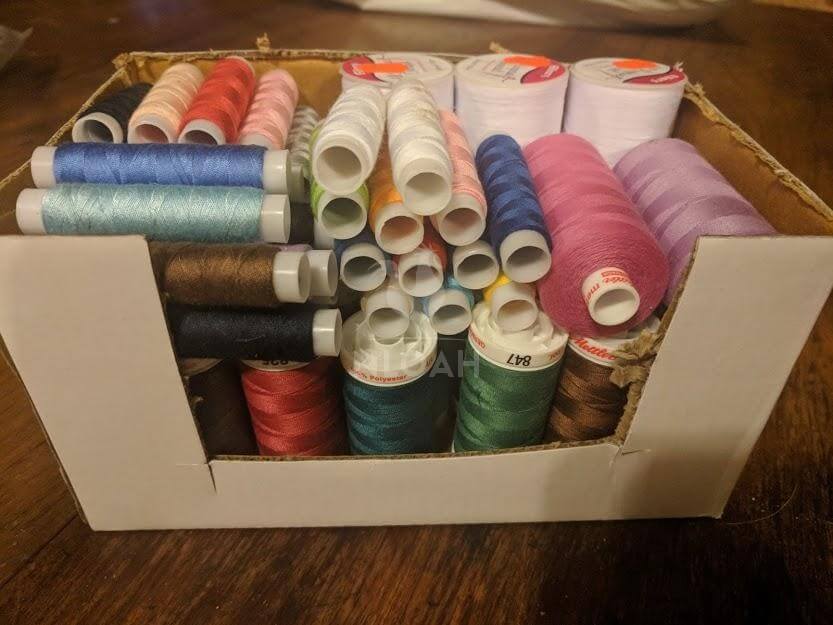
- Flesh-toned embroidery thread or sturdy string about the same color and thickness.
- 1 pound of wool stuffing or a large bag of fiberfill for stuffing – Waldorf dolls are supposed to be made entirely out of natural materials. Wool is expensive and has to be ordered online, or collected during shearing (at least where I live) so I used fiberfill for my first few doll heads.
- ¼ of a yard of doll skin – This is a soft cotton interlock fabric and does not cost but a few quarters more than the polyester doll-making material. You can also use cotton or flannel material in a skin tone shade if you can find it – or use tea to dye the material to look more like the desired skin tone.
- Sock or cotton tubing – I just used clean but old and unmated socks instead of the cotton tubing, many Waldorf dollmakers do. It is cheaper and saves you the step of sewing one end of the tubing closed. Even if you do not have gently used unmated socks laying around, run out to the local Dollar Tree and buy some socks light enough that they will not show through your chosen skin tone.
- Pencil
How to Make a Waldorf Doll Head
The key to making a Waldorf doll head is getting the initial ball as hard as a rock. If you mess up this step, the head will be floppy, not hold its shape, wear down over time, and be virtually impossible to soft sculpt with a needle felting tool – or even to sew a nose on.
The process is exactly the same for making a Waldorf doll head of any size. We will delve more deeply into selecting the right head dimensions to match the torso a little later on.
Step 1 – Rolling The Core
Grab a piece of wool or polyfill that is approximately 3 inches wide. You will keep rolling in more wool until the core is not only as close to being as hard as a golf ball as you can make it, but boast the same circumference – about 7 to 8 inches wide.
Keep testing the hardness of the core with your hand as you add more and more wool polyfill. It would be impossible to stress firmly enough how important it is to make the core hard.
Wrap your dental floss, embroidery thread, or jewelry string around the core in all directions, pulling it hard and tight as you go.
Do not release the pressure on the core ball the least little bit while wrapping the string around. If the string breaks, quickly wrap a new piece over top of it to keep the core intact and hard – or you have to start all over again.
Leave a tail on the string about three inches long so you can tie it – again tightly, around the core.
I test my core by trying to bounce in on my work table. It must be golf ball or rock-hard.
Measure the core to check the circumference again after tying. Some Waldorf doll makers instruct you to scrap the core and start over if it is much less than 7 inches in diameter – 5 inches will be too small for the doll you are making in this tutorial.
But, when I was first learning how to make Waldorf doll heads and they came up too small (but rock hard) I simply added more stuffing and then did the tying again. This was a big time saver and it did not cause any problems when making the rest of the head.
If your doll head core measures more than 8 inches, you will need to untie and remove the wool or the polyfil – likely making it too loose to simply tie again and move onto the next step.
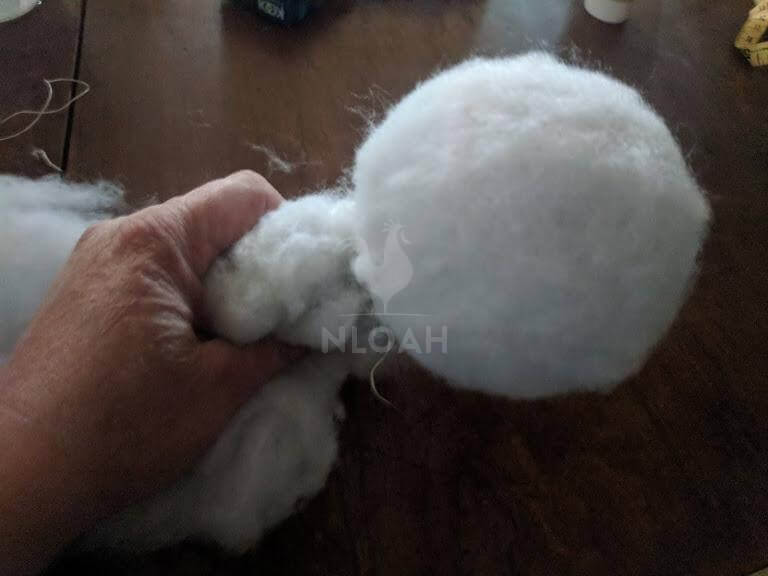
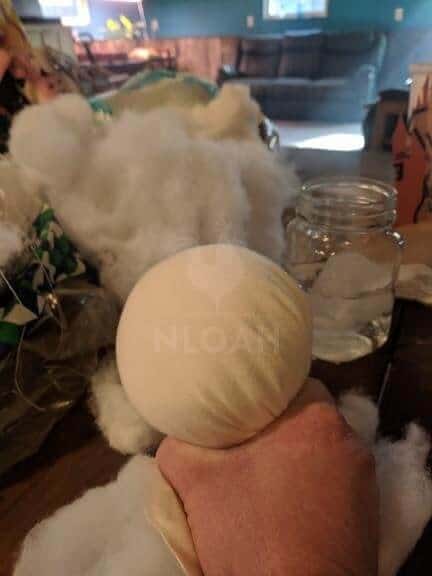
Step 2 – Covering The Core
Wrap the core in more wool or polyfil to form the shape of the Waldorf doll head. The wool or polyfil must cover the core fully and thickly but will not be wound around until it is rock hard like the core, but still extremely firm.
I often roll my core onto the additional stuffing to make the new and larger ball.
Keep covering the head until it measures about 10 to 12 inches around.

Now that you have a larger and firm head ball, cover it with another layer of wool or batting that dangles long enough below the head to make a “neck.”
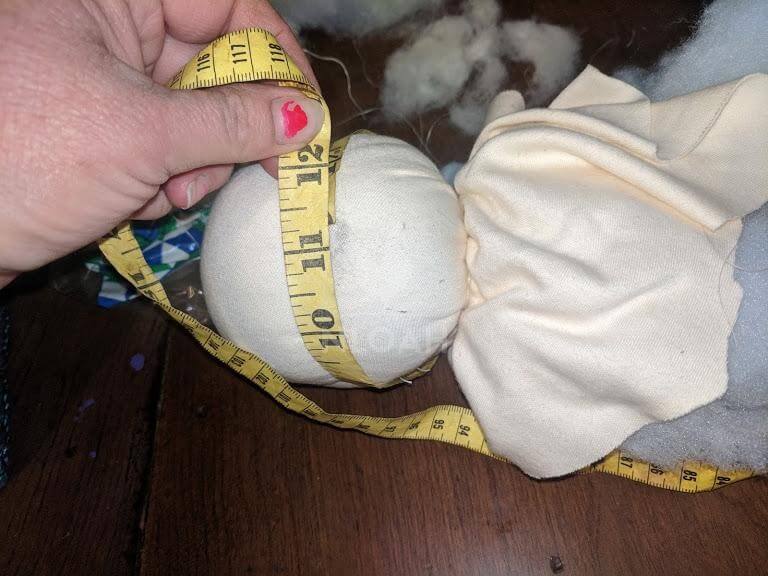
Measure the head once again. It should now be about 12 to 13 inches around. Ideally, it will be 13 inches around so when you place the cover over the head, compacting either kind of stuffing you used, the final Waldorf head circumference will be exactly 12 inches.
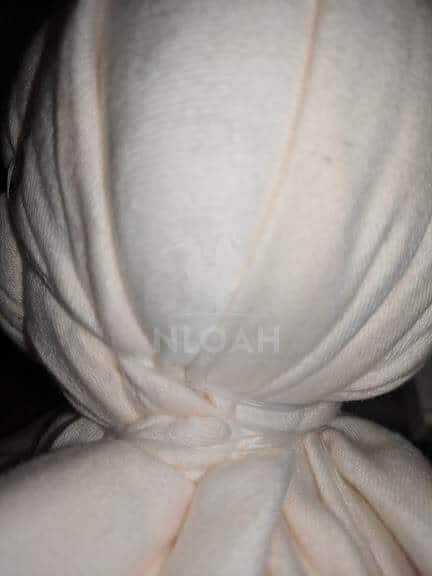
Gather the neck portion of the head in your hands and tie it where the loose and dangling stuffing meets the head. Now would be a great time to have a helper to do the tying while you hold the doll head firmly inside the final layer of covering.
Tie the neck area firmly by wrapping your dental floss, jewelry string, embroidery thread or cotton string around at least twice before making a knot.
Step 3: Covering The Waldorf Doll Head
Gently yet firmly pull a white or light-colored cotton sock over the Waldorf doll head. If using cotton tubing, cut a piece that is approximately 12 inches long and sew one end closed – making it look more like a sock.
The closed end will lay mostly flush on the top of the head. If it is slightly lumpy that is fine, the wig we will make later will hide the tiny flaw.
Step 4: Tying the Head
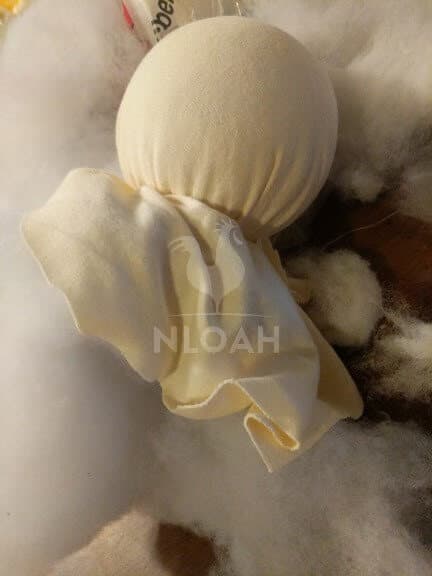
Grab your dollmaking helper and have them once again make a tie around the neckline just as you did above – but over the sock or cotton tubing.
While I almost always use an actual sock for this step, I happened to have some scrap light colored flannel fabric that was a perfect fit to cover this head, so I used it.
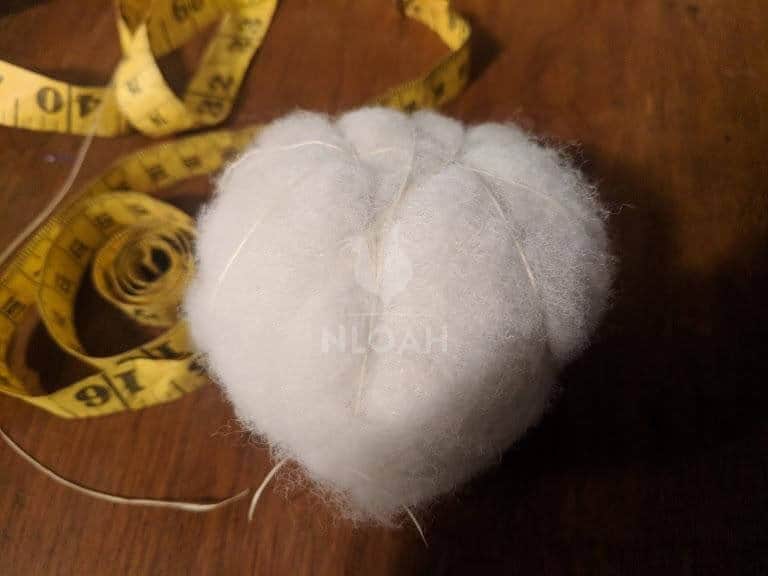
Step 5: Creating The Eyeline And Cheeks
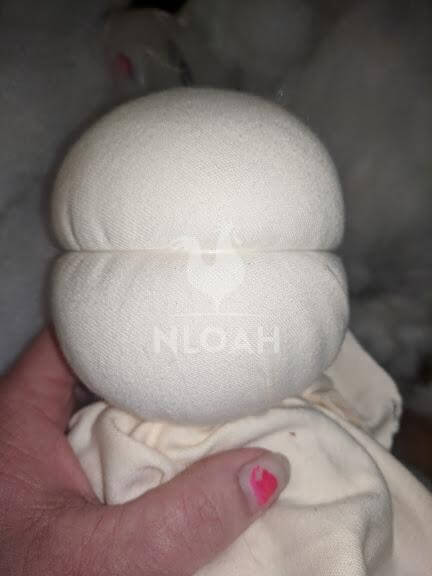
Either just eyeball or measure to find the middle of the Waldorf doll head.
Tie cotton string or embroidery thread around the head as tightly as possible to create cheeks and a chin area on your emerging doll face.
Knot the ties together tightly and then trim away the excess.
Keep the head covering as smooth and wrinkle-free as possible. Deep wrinkles can show through the dollskin covering that will be added soon.
Step 6: Creating A Chin
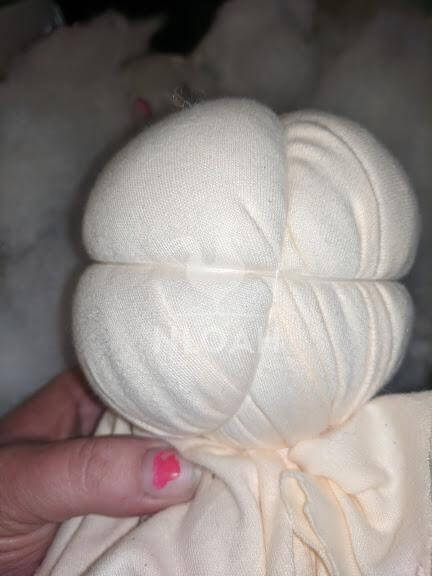
Using the same string or thread, tie it vertically from the top of the head to under what will be the chin area to complete the facial outline.
Knot the ties together tightly and trim.
Step 7: Connecting The Stings
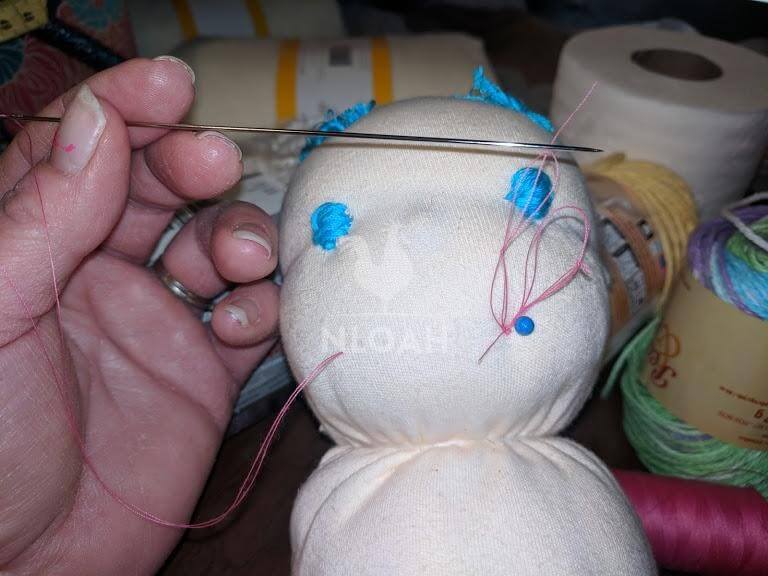
Using the thin but sturdy cotton string or embroidery thread, sew and “X” shape where the strings now tied onto the head, connect on each side.
I sew the “X” on to connect the head strings about three or four layers deep to make certain it is sturdy.
I prefer to use an upholstery needle for this step, but many folks use a doll making needle. When buying a doll making needle set, spend a couple extra dollars and get a sturdy set. I have bent several needles when stitching on the eyes.
Using the thin but sturdy cotton string or embroidery thread, sew and “X” shape where the strings now tied onto the head, connect on each side.
I sew the “X” on to connect the head strings about three or four layers deep to make certain it is sturdy.
I prefer to use an upholstery needle for this step, but many folks use a doll making needle.
When buying a doll making needle set, spend a couple extra dollars and get a sturdy set. I have bent several needles when stitching on the eyes.
Step 8: Adjusting The Eyeline And Cheek String
Carefully slide only the back of the eyeline and cheek string down to the nape of the neck on the back of the head so it looks just like it does in the sample Waldorf head photo below.
I can use my fingernails to get under the string and gently slide it down without applying so much pressure that it snaps – but you could also use any thin crafting or household tool you have handy to again, gently, move the eyeline and cheek string down.
Take a moment to measure your head again to make sure all the manipulating of it has not reduced it too significantly. If the Waldorf doll head measure around 11 and a half inches in diameter, it is just fine.
If the head measures substantially smaller, consider reducing the pattern dimensions slightly to ensure the head and the body remain proportional.
Step 9: Forming The Nose
Locate the center of the Waldorf doll face just slightly below the eyeline and cheek string.
Use a pencil to draw on a simple round little nose. Tracing a little button can help you achieve a perfect circle. Draw lightly onto the face in case you need to gently erase (while holding the fabric on either side of the nose firmly in place) and draw again…or several times more until it looks just right.

Thread the upholstery needle or the dollmaking needle with cotton string or embroidery thread.
Pinch up a little bit of BOTH the fabric and stuffing below it, but only a little, and sew under the nose marking and pull the need through to the other side of the nose marking.
Repeat this step, making certain to catch wool each and every time, until the nose has the shape, fullness, and height that you want for the Waldorf inspired doll face.
Pull the string tightly, but not roughly or it could snap and you would have to start the nose all over again. This will gather up the threat under the nose and give it more dimension and firmness.
Knot and tie the end of the nose string and trim.
Step 10: Covering The Head With Doll Skin
Take the cotton interlock doll skin fabric you purchased and double it over so the right sides are together – do not cut the fabric. Remember, you can tea stain a T-shirt to save money. Using the resources you have on hand while still learning the Waldorf doll head-making process is a great idea.
Lay the doll head with the nose facing the fold in the fabric, directly on top of it.
Grab your pencil and while pressing lightly, trace around the doll head, extending down to leave a neck area that will later be inserted into the doll body.
Do not draw right up against the head. Even though the fabric will stretch, the head will still expand the fabric substantially when inserted inside. Do not leave too much space (no more than one finger’s width maximum) or the doll skin fabric will not fit snugly and bunch up.
Next, sew just outside of the head outline your traced with a very tight zigzag, stitch, a straight stitch, or either a single or triple stretch stitch.
Cut around the outline of the head you drew only after tugging on the sewn head covering to make sure the stitches are tight enough.

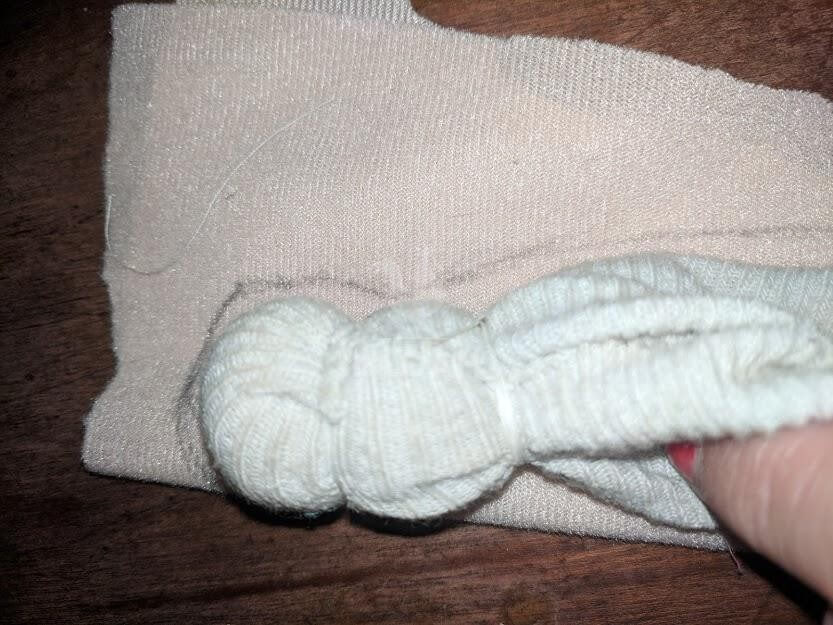
Slide the head inside of the outer covering and smooth out any wrinkles before tying it off under the head at the top of the neck.
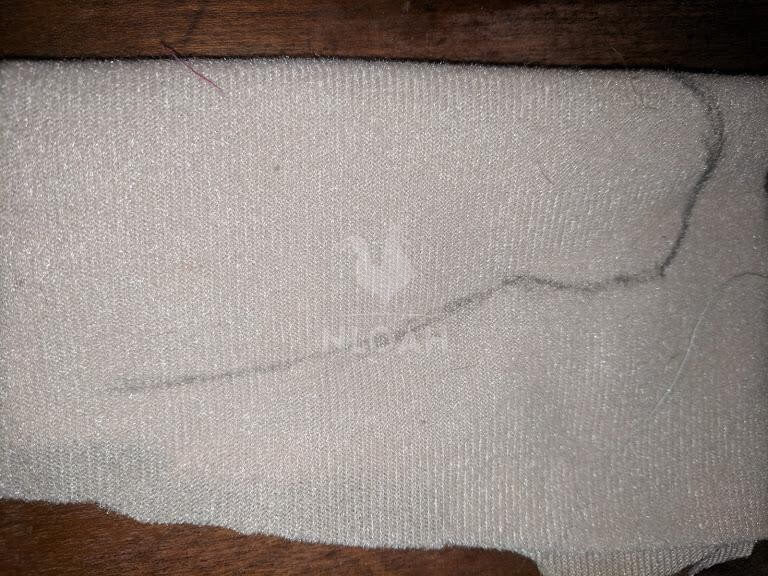
When the doll skin fits properly and is tied tight it will resemble the covered head in the image below.
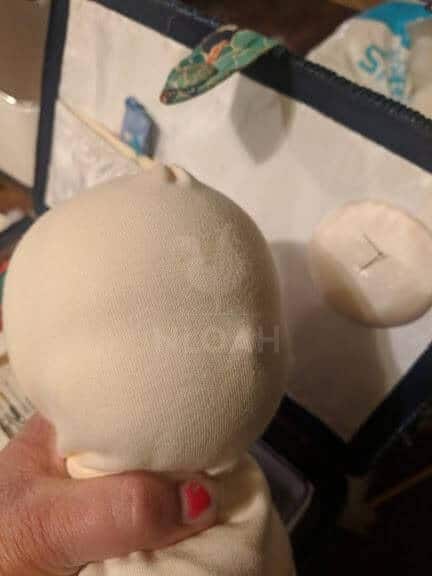
The doll skin should fit very snugly around the head so the nose is clearly visible and distinct. The eyes and cheeks will become more distinctive as you hand embroider the eyes and mouth onto the head because that draws the doll skin fabric in more tightly.
If the doll skin fabric is too saggy around the head, remove the head covering and place the doll head on it again – with the nose still facing toward the fold. Trace another line around the head and repeat the same steps you did above.
Waldorf Doll Head Making Tips
While you can make the entire head all by yourself, there are several steps where an extra pair of hands =will come in handy to ensure the string being tied will be extra super duper tight, while the untied part of the head in your hands also retains its stiffness.
If you have any hand dexterity issues or have had carpal tunnel, your hands will likely ache a good bit during and after working on the Waldorf doll head. Many years of playing sports, coaching sports, and typing all day can make my hands ache – the head making process was not an exception.
Do not let fear over the complexity of making a Waldorf doll head prevent you from grabbing some supplies and getting started making these keepsake homemade gifts for a little girl you love today.
I’m somewhat inpatient, but learned the process and have made many heads since getting slowly through the first one. But, I now fully understand why professional doll makers charge $30 or more for just for the basic head this Waldorf tutorial just taught you how to make!
How to Make a Waldorf Doll Wig and Face
You start by drawing circles where you would like your eyes to be. Draw your circles smaller than you think you should, as embroidering them always tends to make them larger.
You will need your long dollmaking needle, an embroidery needle, and floss for eyes and mouth. You will need to get a length of floss (approximately 15 inches) and separate it into a single strand for the eyes.
This is a huge tip, as many new makers try to use the entire 7 strands, which makes the eyes very bulky and it is difficult to keep a nice shape with.
Waldorf Doll And Face Embroidery Supplies
- Dollmaking needle and/or embroidery needle;
- Embroidery floss in eye, mouth, and wig matching colors;
- Felt or doll skin that blends in with the wig or in a scalp color that matches the doll’s skin tone;
- Scissors;
- Sewing machine for the wig or needle and embroidery thread to hand sew;
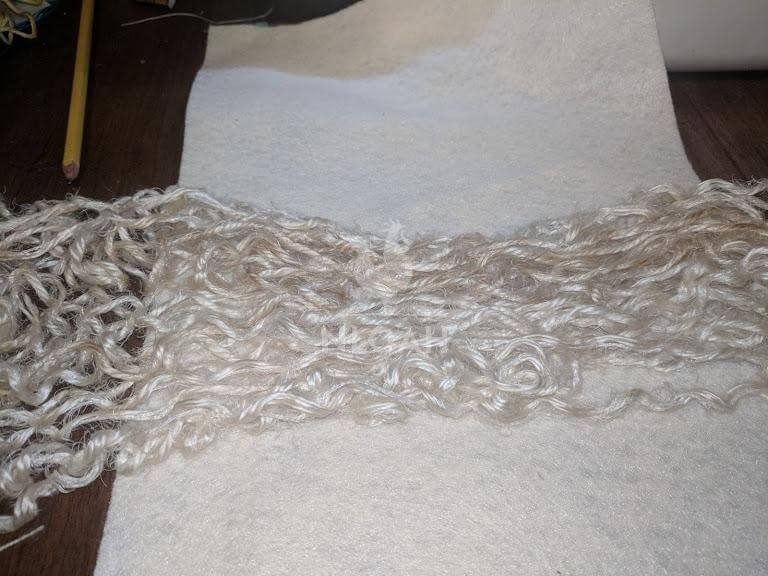
- Yarn for the wig. How much yarn is needed will depend on the dimensions of the doll head. One skein should be more than enough even for a large doll with long hair.
- Dowels rods up to ½ inch in diameter, a cook pot, baking sheets, and hot water if you are going to make the yarn for the wig curly.
Wig Yarn Selection
You can get as creative as you want to with the yarn for the doll’s hair. You could go with a traditional hair color or get a little funky when making a fairy princess and choose yarn with little adornments in it or cool colors.
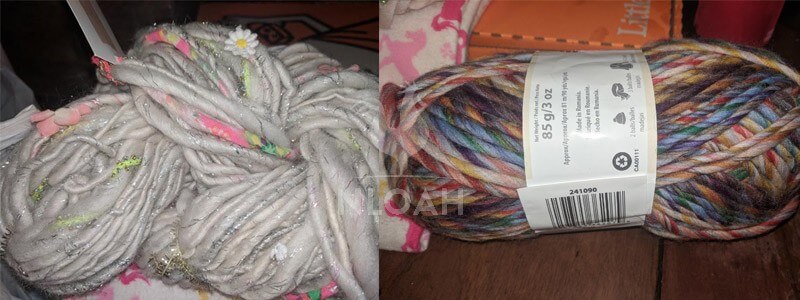
Whatever type of yarn you choose should be of a natural and not a synthetic material. Unlike the wool stuffing for the head, natural yarn is readily available and typically does not cost much more than synthetic yarn. Natural yarn will wear far better over time after heavy play.
If you want your Waldorf doll to have curly hair you must use a natural yarn to garner success with the curly process I will walk you through in this tutorial.
Boucle yarn, especially the DollyMo brand that was created by dollmakers, is very popular, affordable, and great to work with when wig making.
Step 1: Waldorf Doll Eyes Embroidery

Choose where you want the eyes to go along the eye line, and draw a circle (or whatever shape of eyes you wish to create) in the desired spots.
Make sure the eyes are placed evenly and level on the face – double-check using your measuring tape, and are as equal in dimension as you can get them.
Using the dollmaking needle and a single strand of embroidery floss in your chosen eye color, go from the top of the head down through the head and out the center of the eye circle using a vertical stitch.
Try to keep the stitches that you will be bringing up to the top of the head as thin as possible, but do not fret about this too much because you can trim them down before sewing on the wig.
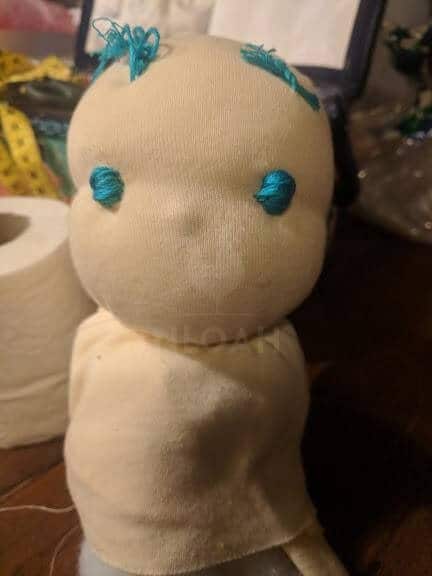
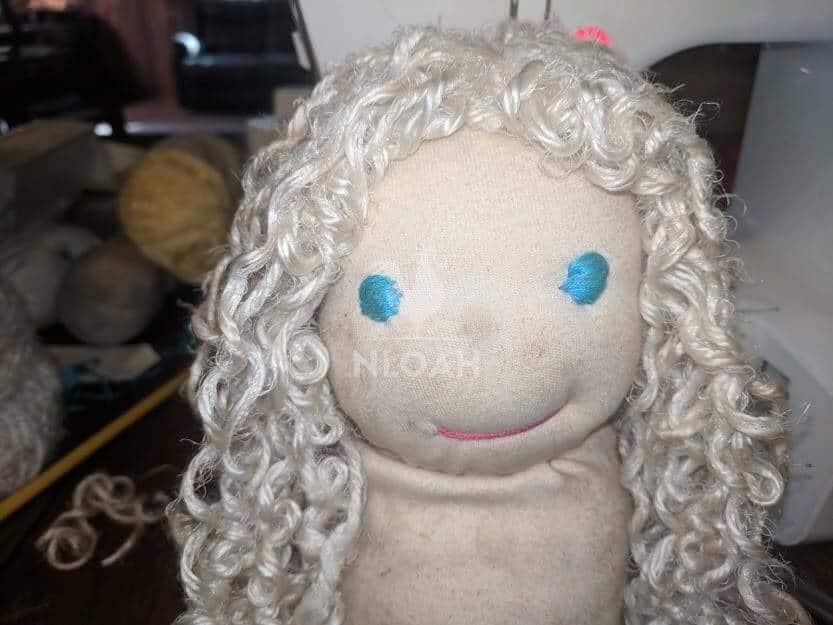
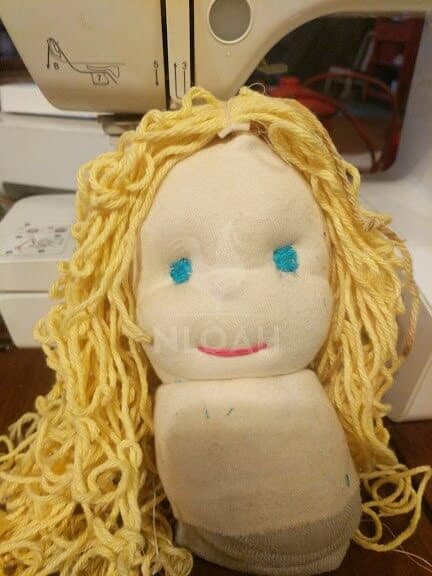
The eyes on this Waldorf doll are a bit more “poofy” than I would like. As a novice hand embroiderer, I opted for more turns through the eye circle with the floss than were actually needed.
Still using the dollmaking needle, go back and forth through the head placing horizontal stitches until you fill out the eye circles that you drew. It’s quite easy for the eye to become elongated.
While you need to pull the embroidery floss going through the eye circle snugly, do not pull too tightly or you can make an unwanted indentation into the head that cannot be undone unless you pull out all of the eye embroidery.
Scroll back up to the Waldorf doll head with the yellow hair in the wig section of this tutorial.
Look at her eye screen left and you will be able to easily tell how pulling the embroidery thread too tightly can distort the face.
Ariyah, my year-and-a-half-old granddaughter didn’t mind at all and loved her “baby dollie” even with her imperfection.
Once you have the eyes situated to your liking, go to the top of the head one last time to tie off your embroidery string and trim away the excess.
Eye Embroidery Hints and Tips
- You can also use one strand of embroidery thread to create eyelashes on a corner or above the whole eye.
- Some Waldorf doll makers use light brown or black embroidery floss to make an angled small eyebrow above each eye with or without the addition of eyelashes.
- After becoming frustrated with keeping my eyes circular and not oblong (very common Waldorf doll maker newbie obstacle) I thought about breaking the rules.
Yes, I know, breaking the rules is bad. Well, my decision to machine embroider an eye onto the doll skinhead covering before sewing it together worked just fine.
The eyes were a perfect circle and in the right spot, but the machine embroidery looked completely out of place with the hand-embroidered mouth using floss and not thread, and basically took the sweet simple magic entirely out of the Waldorf process.
I hated the perfect eye and went right back to practicing how to hand embroider them better – forgiving myself for any slight imperfection the girls the dolls were given to, just did not even notice or care about anyway.
I saw girls, but plenty of Waldorf doll makers make knights, pirates, monsters, and superhero Waldorf “dolls” for boys to love and cuddle up to go to sleep with, as well.
Some folks prefer almond-shaped or oblong eyes – both of which are easier to pull off. The love of oblong eyes is clearly evidenced by the very high price Bamboletta Waldorf dolls bring and their ever-increasing popularity. So far, the eyes I embroider are Bamboletta-ish without trying to be.
Personally, I prefer the smaller round eye with a little white circle embroidered in them like the dolls I purchased from Happy Waldorf Dolls last Christmas, but I can’t yet pull that off perfectly.
The doll artist from Ukraine and I happened to connect on a Waldorf doll Facebook page, and she kindly offered to video how she makes her eyes when creating her next doll and share it with me.
So when I can make those type of eyes better I will definitely be updating this tutorial so I can pay her courtesy forward and share it with all of you, as well.
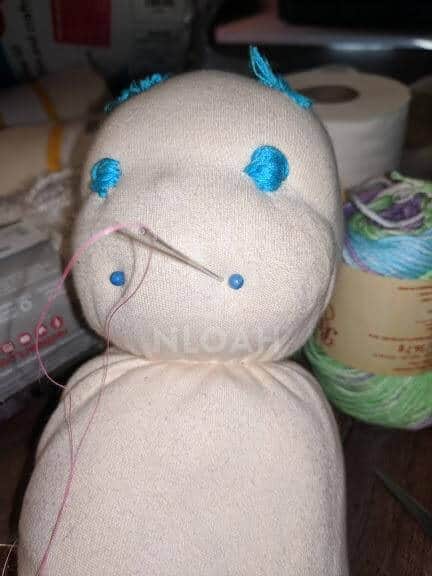
Note, I placed the needle by the stick pin to highlight its placement. DO NOT start the mouth embroidery from the front of the head.
Step 2 – Waldorf Doll Mouth Embroidery
1. Center the spot for the mouth below and in between your eyes.
Mark what will be the corners of the mouth with stick pins to help you guide the dollmaking needle to the right spot when going from the back of the head to the front and bringing 1 strand of embroidery floss out to create the Waldorf doll mouth.
2. You will need almost 10 inches of pink or red embroidery floss to complete the mouth on a doll head that is approximately 12 inches in diameter.
While the mouth itself takes up little embroidery floss, pulling the floss from the back of the head through the front, back again, and then tying it off will probably use more embroidery floss than you think.
You can make the mouth using thread, but you will have to repeat the process multiple times for it to have any real depth.
The problem with layering thread to create the mouth involves how easily the thinner thread can become loose or snap with regular play.
3. Push the dollmaking needle with the floss through the back of the head and out through the face, right next to the push pin.
4. Insert your threaded needle back into the face, getting as close to the other push pin as possible.
5. Now, gently yet firmly, tug onto the starting and ending strands of mouth embroidery floss visible at the back of the head. This action will draw your mouth up into a smile.
Pull the thread while watching the embroidery floss mouth move in position to avoid adding knotting each exposed end on the back of the head with a mouth drawn back either too tightly or too loosely.
The good part about the simple mouth embroidery is that correcting a mistake is both quick and easy.
Simply snip the knotted ends and pull out the single strand of embroidery floss is the Waldorf mouth result is not initially to your liking.
Step 3 – Waldorf Doll Wig Making
There are several ways to make a Waldorf doll wig – and copious amounts of fairly simple and cute hairstyles to choose from. I was initially a bit intimidated about wigmaking, nearly as much as I was about learning how to make the doll head.
Many wigmaking tutorials and kits involved using a skull cap and crochet needles. I have absolutely no idea how to do anything crochet-related, and honestly, no real desire to learn.
I spent a few hours over the course of several weeks searching for and watching Waldorf doll hair and wig making tutorials, and eventually combined several of those techniques into something that worked for me, and held up under young child play.
In this tutorial you will learn how to use the yarn sewn down method of wig making.
I truly wish I could find the website I visited that taught me how to make yarn curly, I’d definitely like to give the woman a courtesy link back, but try as I did, I simply could not find it again.
My version of curling yarn is slightly different because I streamlined the process slightly, and am thrilled with the consistent results.
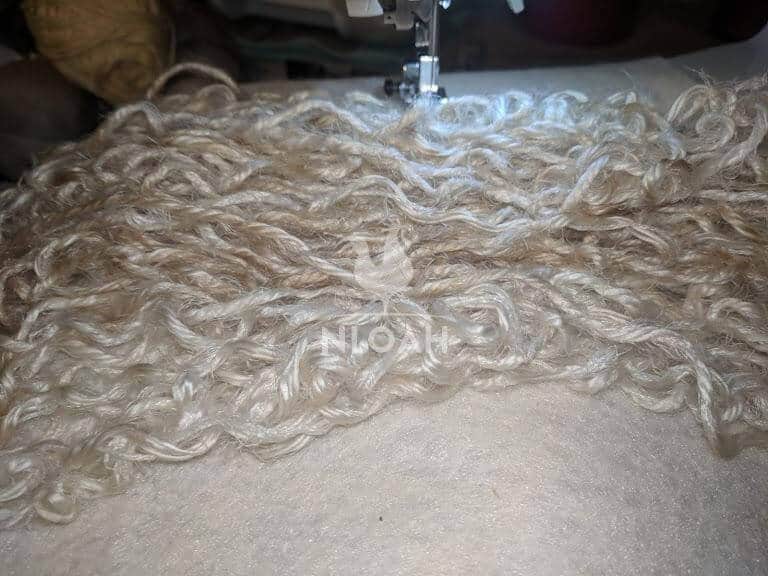
How to Make Curly Yarn for Wigs
1. I used dowel rods that were almost ½ an inch in diameter and pencils to curl my yarn. While going with smaller dowel rods would work just fine, I wouldn’t recommend going any larger because the yarn does not want to hold really big curls.
The dowels I used were about 12 inches long. They will be going into your oven (yes, oven, that was not a typo) so just make sure you cut down any dowels that will not allow your door to nearly close.
2. Wrap the yarn only one layer thick around the dowel rods and/or pencils. Make sure to wrap the yarn as tightly as possible – like Waldorf doll head core level of tight.
Your hands will probably ache by the time you are done wrapping enough yarn for a wig or two – I tossed the dowels and pencils on the table and volunteered three family members to help, and the process still took a little over an hour.
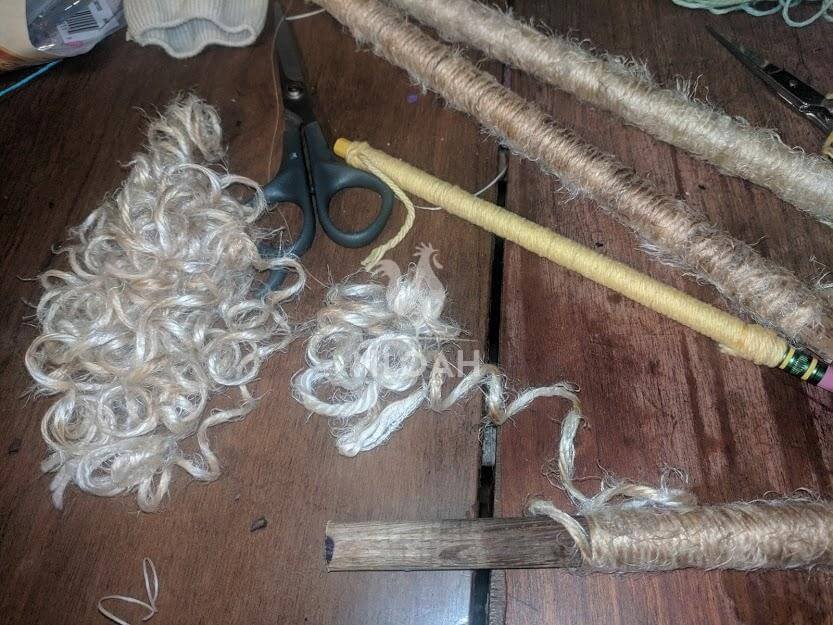
During that session, we wrapped enough yarn for four 12-inch in diameter doll heads. It takes about 10 to 12 dowel rods to make enough hair for the doll you are making in this Waldorf tutorial.
3. Put a large pot of water on the stove to boil, and preheat your oven to a low heat setting. I used 225 degrees.
4. Bring the water to a rolling boil, and put your stopper in the sink.
5. Place the dowel rods and penicles in the sink, and pour the boiling water over them.
6. Once the water has cooled enough to touch, drain the water.
7. Place the dowels and pencils on baking sheets and put them in your oven.
8. Keep the door propped open just slightly so you will be alerted if the yarn becomes too hot and starts to become a fire concern, and to increase air ventilation.
I have never once had a problem putting the damp yarn in the oven as long as I leave the oven door open for a little extra ventilation.
9. Remove the yarn-covered dowels and pencils from the oven in about 10 minutes – or when they are dry to the touch.
I sometimes flip them about halfway through but I really don’t think it is necessary because I get the same good results when I just leave them be as they were placed for the full seven to 10 minutes.
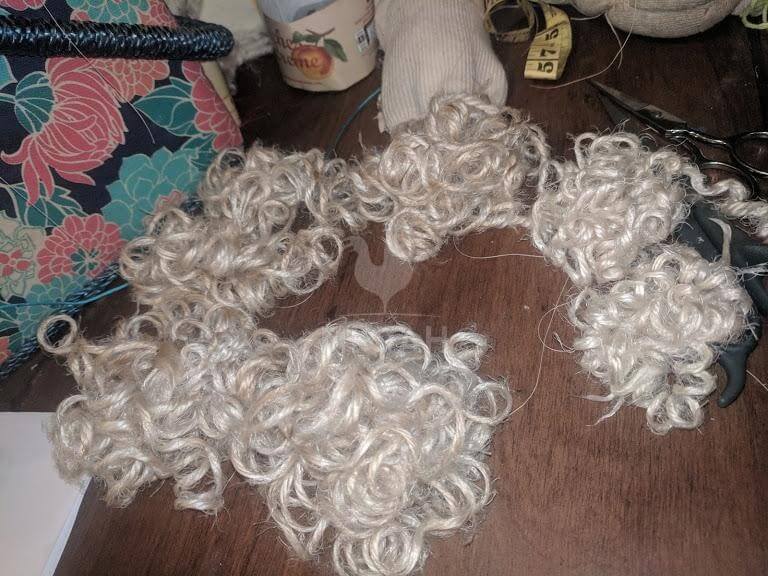
10. Once the yarn has again cooled enough to touch, begin unwinding each dowel and pencil to stare in pure glee at your curly Waldorf doll wig in the making.
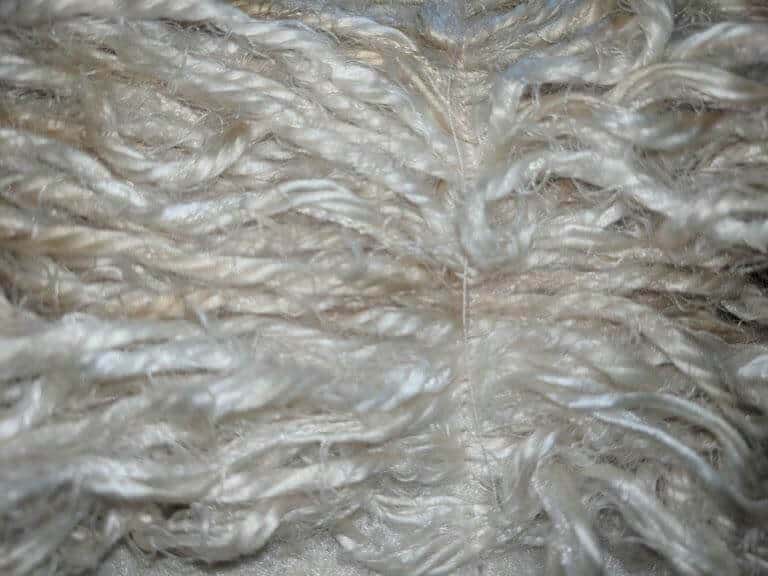
Mohair yarns tend to curl the best, but I have had great results with every type of natural yarn that I have tried.
How to Figure out How Much Yarn to Use
1. Lay your yarn out flat, and then double the length you want the hair to be on your Waldorf doll before cutting.
2. Measure the doll’s head from the hairline above the forehead to the back of the head all the way down where you want the hair length to end on the doll.
3. Repeat the first two steps until you have the thickness of hair for the Waldorf doll wig that you desire.
Waldorf Doll Wig Assembly
1. Cut a strip of felt, doll skin fabric, or other natural fabric that will blend in with the yarn hair and skin tone.
The piece of felt et al should be a minimum of two inches wide, and long enough to go from the forehead down the back of the head to the hairline on the doll.
Do not worry about how wide the strip is at this point, once the yarn is attached it will be trimmed down. The wider the strip the easier it will be to balance out the yarn evenly and keep it situated in place.
I typically use a full sheet of felt, and then trim away the excess and use the scrap when making tiny dollhouse Waldorf dolls, or in other projects when a little bit of felt is all that is needed.
2. Center the yarn across the cut “scalp” strip.
3. Once you have a single layer placed on the strip, add a second layer so the Waldorf doll wig will be fuller.
If you are adding some fun colored or textured yarn into the wig for highlights, I recommend hand sewing them onto the wig after it has been attached to the head.
It is simply too hard to determine placement for a select few adornment strands at this phase of the dollwig making process.
Resist the temptation to add more than two layers of yarn to the scalp strip – or prepare to have a tangled mess that will likely induce both cursing and scissors grabbing to dislodge your scalp strip from where it was sucked down into the bobbin carriage.
4. Once you place the scalp strip with yarn onto the sewing machine you will likely need to smooth out the yarn again because it is nearly impossible to keep it from shifting until it is sewn into place.
If you want the Waldorf doll to have a side part instead of a center part, adjust the yarn accordingly before sewing it into place.
5. Trim away the excess scalp strip. You only want a little more than one finger’s width left after sewing on the wig.
6. Position the scalp strip with the yarn attached to the head. Make sure it covers the nubs of knots left from making the eyes and mouth, lays as flush as possible, and is centered on the head.

7. Use the dollmaking needle or upholstery needle (which is the one I prefer for this step) and hand sew the scalp strip into place.
Make certain to use embroidery thread (not sewing thread, it is not durable enough) that will blend with the scalp and/or yarn wig.
I do not recommend using embroidery floss for sewing on the scalp because it will stand out way too much on a finished Waldorf doll.
8. Randomly hand sew around the head affixing the first layer of yarn (near the top of the strand only) to the head to anchor the wig down, using embroidery thread.
I basically use a weaving in and out action about three-quarters of the way up the strand of the yarn to attach it to the head.
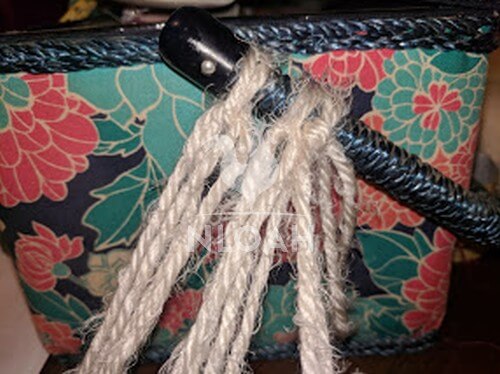
9. Now it is time to make any final hairstyle decisions. I added a braid crown-type decoration to the front of this doll – which is a great way to hide any lumpiness from eye embroidery nubs left over after trimming them down.

I tied the curly yarn to the handle on my sewing basket to help hold it tight and then braid it together – along with some purple yar accent strands.
Lay the braid across the area of the head it will cover periodically during the braiding process to make sure it stretches to cover the area you want to be covered.
Waldorf Wig Hints and Tips
• If you want the Waldorf doll to have a ponytail or pigtail, pull the hair into the style just as you would if fixing a child’s hair. Then, tie it into place with a hair ribbon and not a rubber band.
If the ponytail or pigtails seem a bit too floppy (and it is fairly likely they might) use the same hand-sewing weaving in and other methods that helped tack down the first layer of yarn, around the base of the tail hairstyle.
• Completing a perfectly connected, and hanging ponytail or pigtail on the first few wigs might be a bit difficult.
The half-up ponytail, like the doll screen right in the feature photo at the beginning of this tutorial is far easier to pull off.
• If you want to add bangs to your Waldorf doll, make a shorter scalp piece and sew yarn onto it.
This time the yarn will not be centered, but will have one end of the yarn sewn directly onto the center scalp line with the chosen amount left dangling freely.
Hand sew the bang scalp piece in place BEFORE sewing on the full-head wig.
• Strands of yarn might not hand as evenly as you thought they would when sewing it onto the scalp, just snip off the pieces that are too long to even out the ends of the wig.
I recommend waiting until the head is attached to the body to do the trimming because it is best to know how both the head and the wig “hang” once the neck is stuffed inside the body and sewn firmly into place.
How to Make a Waldorf Doll Body
Now that the Waldorf doll head is complete, it is time to move on to the easiest part of this entire project – making the torso. Before we move along I want to note that some fabric doll makers connect the head to the body before completing the face embroidery, making the wig, and attaching it.
I find it easiest to manipulate the head and work on the wig without the body attached, but you may not. Neither way works better than the other, it is all up to personal preference.
In what follows you will find not just a free Waldorf doll pattern to make the body to go along with the head you just completed, but multiple additional sizes of doll body patterns ranging from Waldorf dollhouse doll size patterns up to 20 inch dolls.
A guide to help you determine the right head dimensions for each doll will also be waiting for you at the end.
Supplies
- Embroidery thread that matches the doll’s skin tone
- Scissors
- Upholstery needle or standard hand-sewing needle
- Stuffing – wool, polyfill, or fiberfill are recommended.
Waldorf Doll Body Pattern:
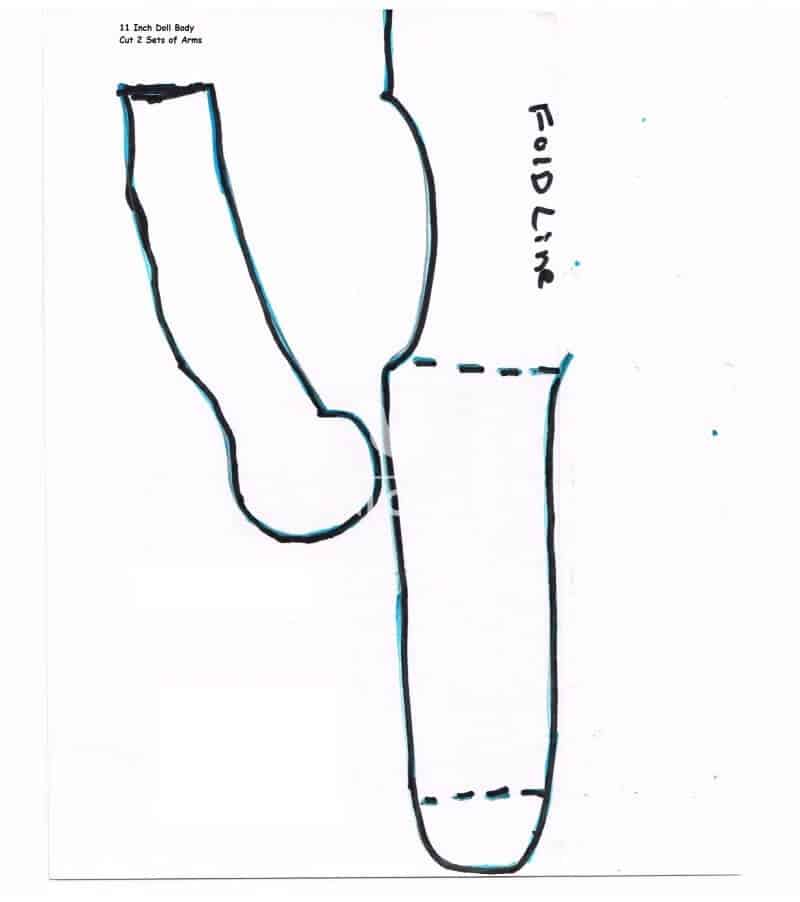
To make your pattern stand the test of time either print it out on cardstock paper or laminate – or both.
I buy clear contact paper from the local Dollar Tree store to laminate my sewing and project patterns.
Tracing and Cutting The Waldorf Doll Pattern Option 1
- Cut out the body pattern piece.
- There are two ways you can cut and use this pattern. The first is to fold your doll skin fabric so the right sides are facing.
- Place the body pattern piece directly up against the fold, trace, and cut. This piece will be the front of the body pattern.
- Repeat step 2 to create a back-body pattern piece.
- Cut out the arm pattern piece.
- Trace it onto the doll skin fabric, and cut 2 for each arm – a total of four pieces.
Tracing And Cutting The Waldorf Doll Pattern Option 2
- Cut out the body pattern piece.
- Fold the doll skin fabric with the right side together.
- Place the cut body pattern piece in the middle of the piece of fabric.
- Trace one side of the pattern piece and then flip it over so it lines up with the already traced piece and completes the other side of the body.
- Cut out the arm pieces, and place them on the folded-over fabric. Cut two pieces for each arm – a total of four pieces.
Sewing Together The Waldorf Doll Body Pattern
Option 1
- Place the front and back body patterns with right side facing each other.
- Pin the doll skin fabric into place and then either hand sew or machine sew the pieces together – leaving the neck area unsewn so the head can be inserted.
- Turn the doll body pattern right side out and set aside.
- Repeat set 1 with each set of arm pieces.
- Turn the arm pieces right side out and set aside.
Option 2
- Sew the front and back body pattern pieces together before cutting them apart. There is not as much of a need to pin the pieces together here, but since the cotton or jersey knit doll skin you are working with can tend to move about a bit during either the hand sewing or machine sewing process, it is not a bad idea. You must sew OUTSIDE of the marked pattern lines to leave a seam allowance.
- Once the body pattern pieces are sewn together, turn them right side out and set aside. Be careful not to cut too close to your stitches or they can come loose and you will have to sew the body pattern pieces back together again.
- Sew each set of arm pieces together before cutting. Be careful to sew outside of the marked pattern lines to leave a seam allowance.
- Turn the arm pieces right side out and set aside.
The seam allowance for either cutting and sewing option should be up to 1/16th of an inch around the pattern cut lines.
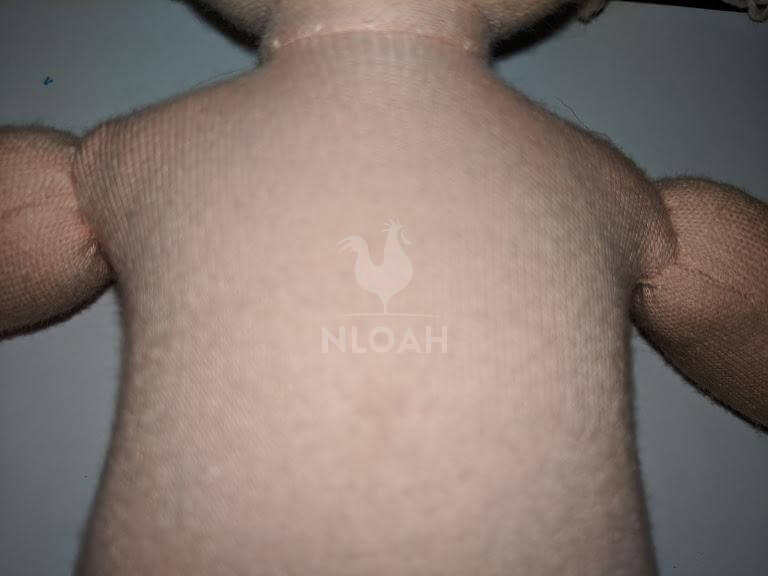
How to Stuff A Waldorf Doll Body
The stuffing you use in the body will shrink over time, especially if the one-of-a-kind Waldorf doll you are hand-making for someone you love gets a lot of cuddle time.
You MUST stuff the body tightly so it does not wear down. When made solidly, a Waldorf doll should be an heirloom gift that can be passed down several generations.
- Both wool roving or batting works excellently for stuffing not just the head, but the body as well. I have known several doll makers who use felt scraps to stuff the body so it holds its firmness longer. This process takes quite a bit longer, especially when working with small Waldorf dolls – and can make the doll extra strill and less cuddly in the short term, but it does work. If you are choosing not to go the more expensive wool route when stuffing the doll, fiberfill will work just fine, as long as it is tightly packed into the pattern pieces just like you would do with the wool filler.
- You will likely need to use a dowel rod, unsharpened pencil, or a similar tool to pack the chosen type of stuffing in so it firmly fills the body and especially the arms and the legs.
- Do not pack the neck and chest of the doll more than halfway full because there must be room to dig out a little hole with your fingers to sink the neck of the Waldorf doll inside when attaching the head.
- I usually make a mini head sore to stuff into the front of the feet in my Waldorf dolls to give them more definition and firmness – which really helps to keep those little doll shoes on during play!
How to Attach a Waldorf Doll Head
- Open the neck and chest area with your fingers to make a space down into the body pattern far enough to allow the neck to fit. If the neck (or muff as dome Waldorf doll makers call it) is too wide or long to allow the head to fit properly on the doll body, trim it up and re-insert.
- Push the Waldorf doll gently but firmly into the opening you created in the stuffing inside the body. You will finish filling out the area inside the body pattern around the inserted neck with stuffing, just not yet.
- Start at either shoulder and use a ladder stitch to close the front of the neck while working your way to the other shoulder. There are some excellent tips on using the ladder stitch offered over at Faith & String by the Brambles And Blossoms custom doll maker, if you are unfamiliar with this stitch.
- Now, use the opening that has not yet been sewn shut at the back of the Waldorf doll’s neck to finish filling it up with stuffing. Pay attention to the position of the head while adding the extra stuffing, if you push the inserted neckpiece forward just slightly it tends to position the face nicely. No one wants a Waldorf doll that is looking down at the ground or constantly up at the sky.
- Check the shoulder area of the doll to see if it might need a bit more stuffing to firm that portion of the body up as well.
- Using the ladder stitch again, hand sew across the back of the shoulders to close the opening around the neck that you just filled with stuffing.
- I always ladder stitch around the front and back shoulders a second time just for added durability and stability.
- If you can pull off the hand sewn invisible stitch (I am still trying to perfect that one), you can use it around the area you just sewed to decrease the visible look of the seam left by using the ladder stitch.
- If necessary for either looks or stability or both, you can ladder stitch around this same area a third time to help prevent the Waldorf doll from ever acquiring droopy head syndrome.
Do not overly stress out over learning how to do the ladder stitch. It is really the best stitch for this stage of the process. And when attaching the arms, a strong straight stitch will work almost as well.
If the Waldorf doll is going to be played with by young children, check out the stitching from time to time look for signs of loosening that might need repairing.
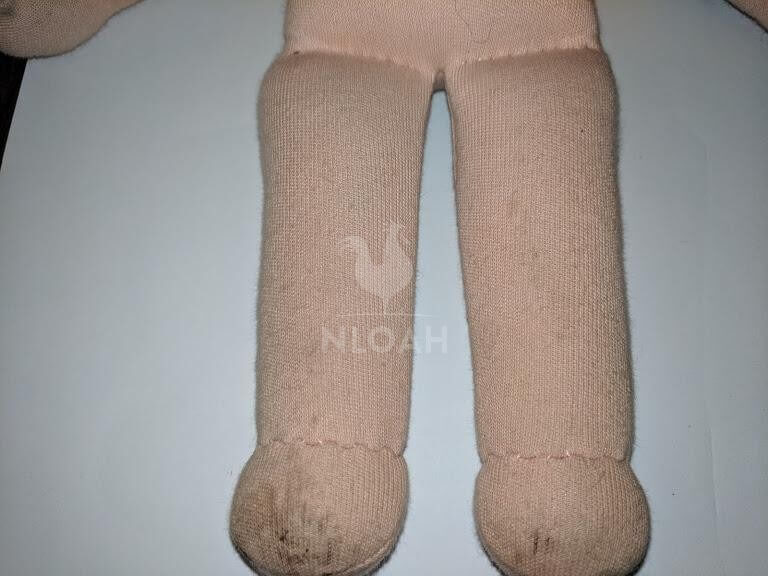
Legs and Foot Creasing
Hand sew along where the dotted lines were on your pattern pieces using a straight stitch to give them more definition and to enable the Waldorf Doll to sit better.
How To Attach The Arms
- Stuff each arm and sew each set together at the end using a straight stitch.
- Hand sew the arms onto each shoulder using a ladder stitch, or straight stitch.
- Go around the attachment area two more times to make the doll extra durable. Little ones often tote their dolls around by a single arm, so do not skimp on the layers of hand sewing here even if your arms are tired.
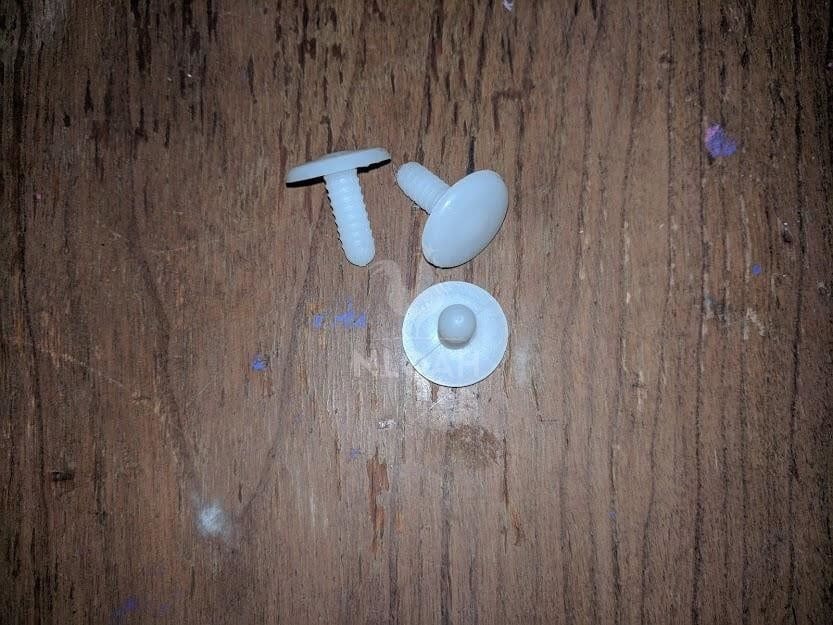
These are doll joints. They can be purchased with the ring they attach into in a variety of dimensions at a relatively low cost.
Once your Waldorf dollmaking skills have advanced, you might consider using doll joints or buttons to attach the arms to the body so they can hold their position better during play.
If you want to make a doll for a young girl who might want to always be undressing her dolls or a little boy who is enamored with superheroes, dinosaurs, or something else, you could change up how the body pattern is made.
Instead of using doll skin fabric for the entire body, you could use a fun print fabric instead and perhaps only cover the hand area with doll skin.
That’s it for the instructional part of this tutorial folks. You just made a genuine homemade Waldorf-style doll! See, I told you if I could do it, so could you!
In what follows you will find the free Waldorf doll patterns I mentioned along with the guide to understanding Waldorf doll head and body proportions.
Bonus – Free Waldorf Doll Pattern Printables
You can make Waldorf dolls in all sorts of shapes and sizes. You can even use your newly found Waldorf dollmaking skills to create more life-like and simplistically sweet stuffed animals.
The most common Waldorf doll sizes are 12, 14, and 18 inches tall – but you can make your doll any dimension that you wish.
Finding clothing patterns might be slightly more difficult to fit especially small or large dolls, but they do exist.
If you use just one doll dress or outfit pattern it can be easily changed up by using different colored, patterned, or textured fabric and by adding little adornments like ribbons and embroidery designs to it, as well.
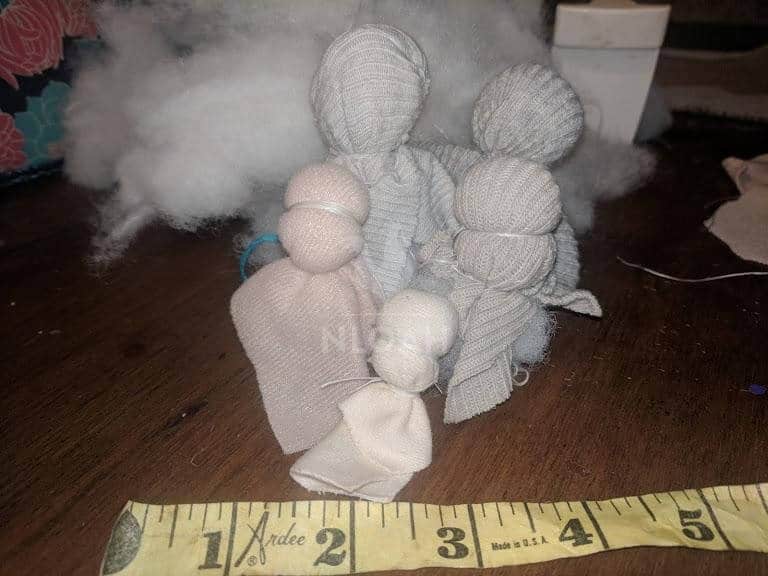
Get creative with your scraps by using the doll skin you have left over from creating a Waldorf cuddle doll, to create small Waldorf dollhouse dolls.
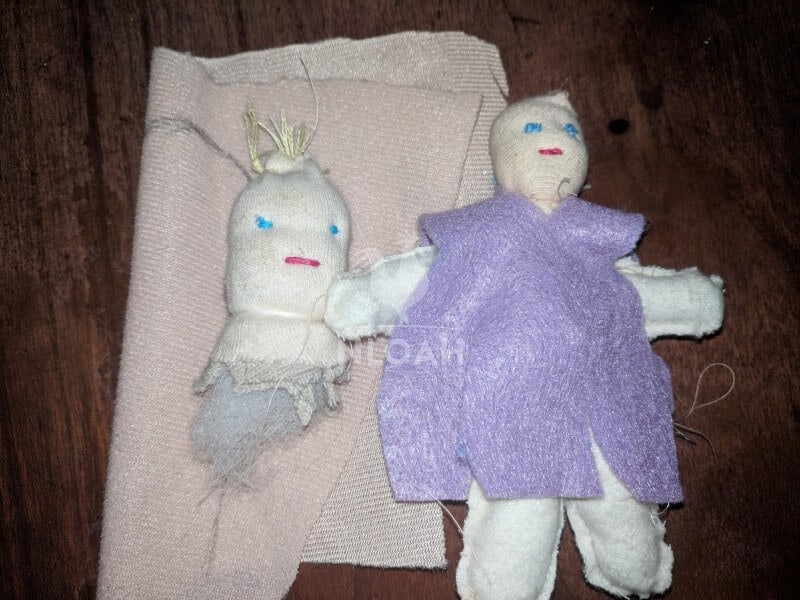
These Waldorf dollhouse size dolls might not look like much now, but when they’re finished they will be part of an adorable little family.
Making the tiny heads is really no more difficult than creating a larger head. The facial embroidery is generally more simplistic and does not often include a nose.
Waldorf dollhouse dolls are not usually stuffed the same way as large dolls – unless you are making them for an infant or young toddler, and merely want a little soft doll. The dollhouse dolls are usually bendy dolls for children a little bit older to play with.
You bend pipe cleaners to match the dimensions of the pattern you are using and tie the head around the top of the stem with embroidery floss.
Then you wrap a little bit of stuffing around the pipe cleaner, and secure it into place by tacking it down using embroidery floss, before inserting it into the already sewn body pattern.
I always wrap some embroidery floss around the pipe cleaners to give them more bulk and to make the core of the Waldorf dollhouse dolls softer to the touch.
Among the free Waldorf doll patterns below you will find several for tall dolls. The little loved ones you give these dolls to can sit with them in their lap or hug them to sleep at night, feeling extra safe with a soft forever friend to cuddle with.
Deciding on the Age of Your Doll
This is something you probably never thought about when deciding to learn how to make Waldorf dolls, right? I sure didn’t.
But, after reading a great article at Fig & Me when first learning how to figure out what size head should be made to fit a doll body pattern of a specific length, I gave the age of the dolls I am making a good bit of pondering.
The age of the doll helps determine the body proportions and shape. A Waldorf baby doll typically has chubby arms and legs – with the legs being formed in a constantly slightly curved shape.
Toddler dolls and dolls that are supposed to represent older children or teens – like the popular American Girl 18-inch dolls, boast more mature faces and body styles.
The Fig & Me guide to figuring out how large or small to make a head so it is proportional to the body is the best I have come across after I spent hours trying to find anything that even addressed the subject.
That accomplished Waldorf dollmaker determines the length of her bodies in a “heads tall” manner – kind of like measuring a horse in “hands.”
- A Waldorf baby doll looks to be about 3 heads tall because of the curled legs – if the legs were straightened, the doll would actually be closer to 4 heads.
- A young child (think toddler to 1st-grade age) should stand about 4 heads tall.
- An older child doll is typically made to be about 6 heads tall.
- If you want to make a teenage fashion doll designed to look older and likely be constantly changing outfits and hairstyles, make her (or him) stand about 7 heads tall.
If you follow the link above to the Fig & Me website you will see the fairly simple math formula the doll maker created to determine the right circumference to make a head so it remains proportional to the length of the doll you are making.
You will need to grab paper and pencil and do the math (or open the calculator app on your cell phone) to decide what size head you will need to go with the doll bodies featured in the free Waldorf patterns below.
Or, you could do as I did when making these patterns, and create the body first so you have it in front of you when creating the head so you can just eyeball it and decide on how large to make the head.
Free Waldorf Doll Patterns
- The sizes noted on each pattern are the lengths of the bodies without the heads, and not the actual doll sizes. When the head is attached to the doll, it will be approximately one inch (dollhouse dolls) to four inches (12-inch dolls) or even 6 inches, taller.
- There is no seam allowance on any of these patterns, so adjust your tracing or sewing accordingly just as you did with the doll pattern in our Waldorf tutorial.
- Follow the sewing instructions in our tutorial for sewing any of these patterns – choosing either option 1 or 2. Any variations or special notes a particular pattern requires will be noted beneath the photo.
- There is a 2-inch test scale strip on each free Waldorf doll pattern to help you check for proper print size.
The following will open in a new tab, after that you can go ahead and print them from your browser.
- 3 inch 001
- Doll patterns 001
- Doll patterns 002
- Doll patterns 003
- Doll patterns 004
- Doll patterns 005
- Doll patterns 006
- Doll patterns 007
- Doll patterns 008
- Doll patterns 009
Be sure to pin this for later on Pinterest, and to let us know if you tried making your first Waldorf doll!

Tara lives on a 56 acres farm in the Appalachian Mountains, where she faces homesteading and farming challenges every single day, raising chickens, goats, horses, and tons of vegetables. She’s an expert in all sorts of homesteading skills such as hide tanning, doll making, tree tapping, and many more.
Thank you for these simple to follow directions! Wonderful!
Hi Kendra,
thank you so much for so generously sharing the instructions for making dolls.
Hi there
Comment from kstocker re: polyfiller not felting is misleading
It’s true the very fine, silky stuff doesn’t but I have successfully felted using the batting you show. I used normal felting needles obtained from EBAY UK.
Like you Tara, my first “Waldorf” doll was made during the first lockdown in England and I didn’t want to buy expensive items if I couldn’t manage to make one. I am 73 and have been sewing since I was a child and have made many a rag doll style in that time so not a complete newbie. I didn’t felt that first doll and my 48 year old daughter claimed it for herself and personally I feel that it is the prettiest doll of all I’ve made since but ave nt managed to replicate the face
I had the batting, I had a couple of brand new, unused stretch camisoles in nude colour (never got to wear them with my new outfit due to lockdown so donated them to my doll making stash).
I don’t embroider the eyes because my arthritic hands don’t hold a fine needle very well so I use/used black dome shanked buttons (again, ebay in size 10mm I think it was)
Having said that, I’m getting a little bored by the black domed shank buttons and coloured ones are too shiny and it occurred to me just this morning that I could try a self covered button in maybe brown to see if that works . 11mm seems to be the smallest i can find however and that may be too big. I’ll see. Worth a try anyway
Having formed the face using dental floss or equivalent like you show, you will find that using shanked buttons allows you to pull the eyes a little further into the wadding of the face (whether it is felted or not) and ties off at the back of the head. Lips will also be formed by pulling the thread a little tighter and tying off at the the back (By the way a little tip for any doll maker struggling to get eyes and mouths placed evenly, I found a hint online that suggests threading your needle and going in from the FRONT to the back, leaving a tail on the face. Remove the needle from the back thread and thread the trailing tail from the front. For mouths for instance, it makes it much easier to get them aligned.
Maybe your “Waldorf” style doll is more like a Steiner doll Tara (in that it is less detailed than a true Waldorf doll, but for somebody embarking on their first doll making journey it will be very helpful and far less intimidating than looking at some of the very detailed Waldorf dolls on the internet. Yes they are beautiful but a lot of work goes into them, not to mention expense so I’m not surprised that they cost so much.
Apart from anything else Steiner dolls allow a child to use their own imagination as to how their “child” is feeling. A doll with a big wide grin can’t be said to be sad can it, but a more ambiguous expression can have many interpretations
I thoroughly enjoy making the doll’s clothes, including their little leather shoes, which I learned how to do from watching Youtube videos just like yours.
A personalised doll for a child is a thing of joy. Yours are very cute and I’m sure are much loved
Sandra
i learned what not to do from this lol! but at least it got me started. i think the reason ur doll looks so different from the actual waldorf dolls is that you didn’t use wool for filling. that’s such an important part of this, to felt it and make a face. poly will not felt, it will not keep its shape. no matter how good you are, if you use poor quality materials, it just won’t turn out. thank you for the blog and pics. please share if you ever use natural materials!
Those $500 dollar and up dolls are way more detailed, utilize “Natural Fibers” which is way more expensive than polyfill. Mohair Wefts are used for hair which run $25-$40 per doll, also clothing is tailored to the individual doll. Natural fibers such as wool cotton linen and others are used to make clothing. The more expensive dolls also have needle felting details done on the face. I follow some of the artist and I am embarking on the journey to become one.
Your doll is cute but not nearly as detailed as the artists I follow that are “pricey”.
Wonderful, wonderful! Thank you so much for sharing…
This has been so very helpful. I have great granddaughters that I have purchased Waldorf Dolls for because I too felt the intimidation in making these loovies. But, with your videos I feel I can accomplish this. Kudos
Hi Tara,
You are amazing. I love your blog and your videos. So many other videos had me just about in a panic as they seemed so complex. I really related to your comments as I totally love your style of doll making. It brings it down to earth, right the way down to ‘drop the doll if you prick your finger with a pin.” That happened to me last week when working on a doll. It is great to have someone who totally knows what that is all about. You are great. Thank you so much I learned so much from your videos and your words.
Impressed with your skills to make this adorable doll. I didn’t realize it would take so much to make one doll. You really do have so much patience! Thank you for sharing
(Just a thought for you…I am interested in your doll skills not your cleavage)
Are you for real!! Someone takes the time to share there talent and knowledge and you comment on their cleavage. Strange comment
Thanks for all the information. I made my first Waldorf doll thanks to you. It was a challenge I have to admit but I succeeded. Thanks again.
Hello Tara,
It’s 15 December, and I am so happy I found this series of tutorials and photos. I plan to make at least three dolls for my young nieces and nephews. The smallest will be for my great niece who is all of five days old. I will be using whatever materials I have on hand, as there is no source to buy unessential material because of restrictions. I plan to start tomorrow and hope to have many photos to share.
Again, thank you for this opportunity.
Avis
OH MY GOSH, TARA!!!!! Honey, you have waaaay much more patience than I do! This does make me appreciate, a whole lot more, the dolls my Grandma made me when I was little. She was 97, when she died a couple decades or so ago, and I’m getting close to 70, but I still have these treasures! Thank you so much for sharing!!
Susan, Thank you! What treasures you truly have in the dolls your grandma made you so many years ago! I love the simple sweetness of Waldorf dolls and was determined to learn how to make them for my own granddaughters.
If you are having difficulty finding the Waldorf doll how to videos, please turn off your ad blocker.