Do you want to start a homesteading based business but don’t know where to start or think you don’t have the necessary start-up funds?
Never having to leave the homestead to earn a living is a dream most of us self-reliant folks share. I just turned a hobby into a steady homesteading money-maker for only $500, and I am willing to bet you can too!
Let me preface this entire “how to turn a machine embroidery hobby into a money-maker” article by stating I knew nothing, basically nothing about my hobby until mid-February, other than a very basic grasp of how it is done and that I wanted to do it. Today, I have more orders than I can barely keep up with, both locally and online.
Perhaps the most fabulous aspect of this home-based business is all homesteaders can do this – even if you live in the suburbs or an urban area.
Disclosure: if you visit an external link in this post and make a purchase, I may earn a commission. Read my full earnings disclosure here.
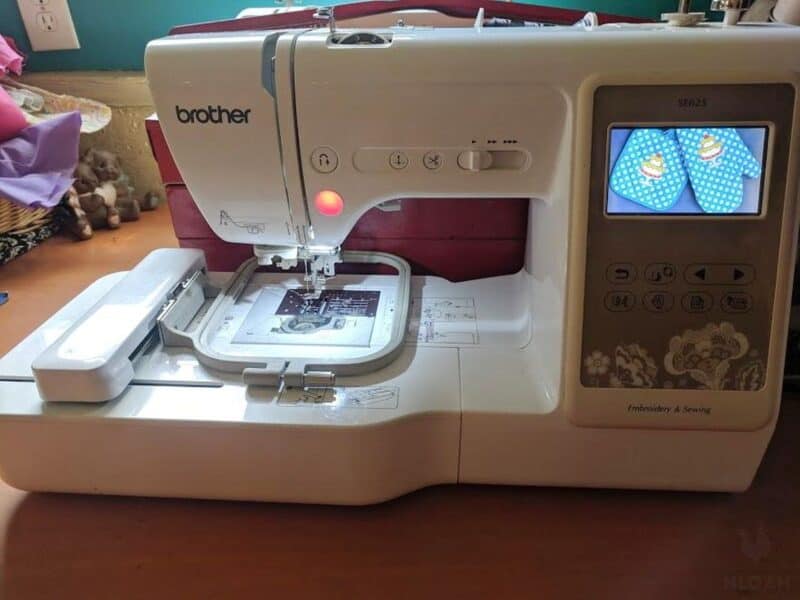
I cannot overstate how simple my Brother SE6 sewing and embroidery machine was to use right out of the box. Not only do you a manual with better than average instructions and graphics, but it also comes with a computer disc manual and on-screen step-by-step instructions, with graphics showing you how to use and troubleshoot the machine.
This is the first of what I am hoping are many, detailed reports that teach homesteaders how to increase home-based income. My hobby turned money-making homesteading business will likely appeal far more to the ladies than the gents, but perhaps the couple can work together to package, market, sell, and deliver the homemade goods to customers.
If you have been a member of the online New Life On A Homestead community for a while now, you might recall my mother surprised me with a computerized embroidery and sewing machine.
Best. Gift. Ever!
I love the look of handmade embroidery, it is truly an art form. But, living and working on a 56-acre survival homestead, I just did not have the time to devote to such a pursuit.
The sewing and embroidery machine helped fulfill my desire to create custom handmade gifts, to embellish common household objects, and adorn/repair clothing with a bit of flare. I only learned how to sew a couple of years ago, so I found this fancy combo computerized embroidery machine more than a bit intimidating.
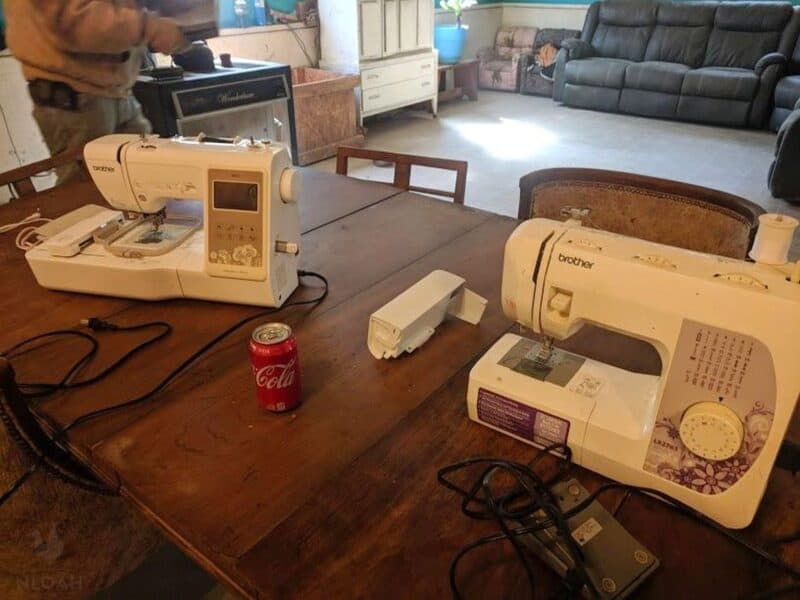
Above are my two Brother sewing machines side-by-side. You can see how basic of a sewing machine I was using before upgrading to the sewing and embroidery computerized machine. Even though the new machine had a multitude of new features and options to learn, I actually found it far easier to use – and I am by no means a fan of high-tech gadgets.
But, after I actually took the time to read the instruction manual, and with a little technical help from my husband learning how to switch out the embroidery and sewing presser foot, it was such a simple and easy process I was sure that I was doing something wrong. But nope, my first project turned out flawlessly.
Embroidery Machine Costs
Now, embroidery machines could run you into the thousands of dollars range, but my basic starter model that completes 4×4 inch projects, was no more costly than a quality sewing machine.
My Brother SE625 was only about $350. When buying a machine at this price point, that leaves you $150 for start up supplies like thread, designs, and material.
$150 for supplies will be far more than enough to make and sell enough reasonably priced items recoup the $500 initial investment if you shop wisely. Working just in your spare time on a daily or weekly basis, it is possible to make the $500 back in less than a single month, like I did…and more.
More expensive embroidery machines, the ones that allow you to use a larger hoop, a 5X7 and up hoop, and thread more than one spool of embroidery thread at once, range in price from $500 to $8,000 at most retailers.
Homesteading Based Embroidery Business Start-Up Cost Breakdown
| Item | Amount |
| Embroidery Machine – or Combo Sewing | $285-$350 – depending upon the brand, Brother being one of the cheapest and Janome being one of the most expensive |
| Embroidery Designs | Free to $40 for large design instant download packs. I have downloaded 543 freebies to date |
| Embroidery Thread | $1.99 to $15 per spool. Spool yardage and brand dictate price. |
| Material | Varies – I used a lot of felt because it is cheap, clearance rack fabric, yard sale clothing, sheets, or curtains are turned into material, 2 for $1 pot holders and the like from Dollar Tree, and old clothing that has made its way into my scrap fabric bins |
| Batting and Fiberfill | If making blankets and “stuffie” toys and dolls, price fiberfill and batting and purchase when it goes on sale. |
| Stabilizer | Price varies from about $7 to $12 per roll depending on amount. I am not a rule follower by nature, I only use stabilizer when embroidering outside the hoop on thick materials like pot holder, leather, vinyl, ball caps, and the like or when making jewelry or using tulle, satin, and similarly thin material. |
| Embellishments | I often use ribbon, Velcro, buttons, and similar adornments in my embroidered creations. Price will vary based upon what you use, how much you use. |
Embroidery Designs
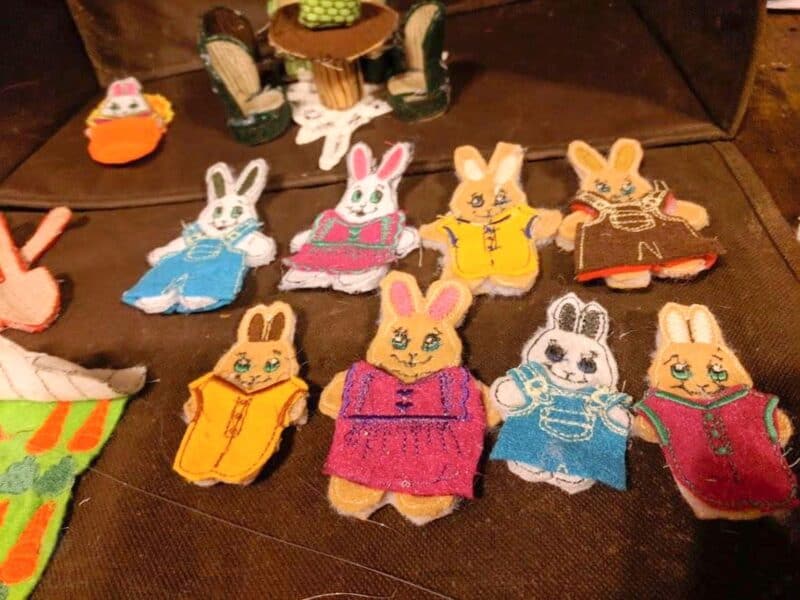
This was most most intricate embroidery design set so far. I purchased a bunny playset from Golden Needle Designs. I followed the directions and made the playset using fleece to create a more stuffed animal look, and then made it in felt to create quiet book play accessories, also commonly referred as “flat paper dolls.”
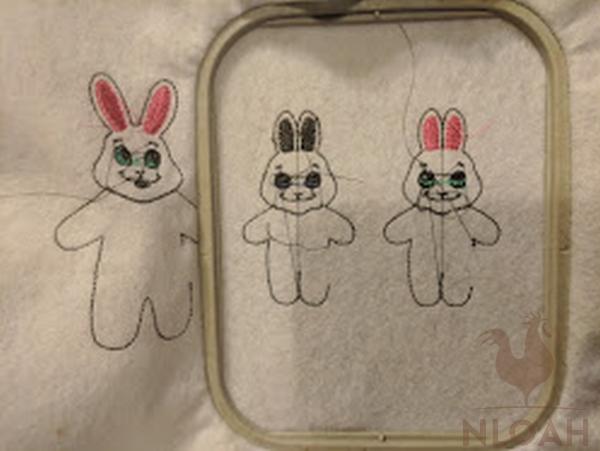
The playset stitched out perfectly and the PDF printable instructions on how to use cardstock (you can also use thin cardboard scrap pieces, like the flat from a shipping box) to back the table and chair pieces, was both simple and easy to follow.
I had not yet trimmed the flat batting I used to “stuff” the members of the felt bunny colony, nor had I yet trimmed the hot glue I got a bit messy with on the furniture in these photos. I was quite pleasantly surprised at the detail in the clothing designs for the bunnies and the little vegetables.
You were supposed to cut and glue the veggies together and follow the direction to make a garden plot to “plant” and “harvest” them during play, but this homemade toy was for a toddler, and wanting to avoid potential choking issues I just left the vegetables flat and placed the fence around it to create a little garden.
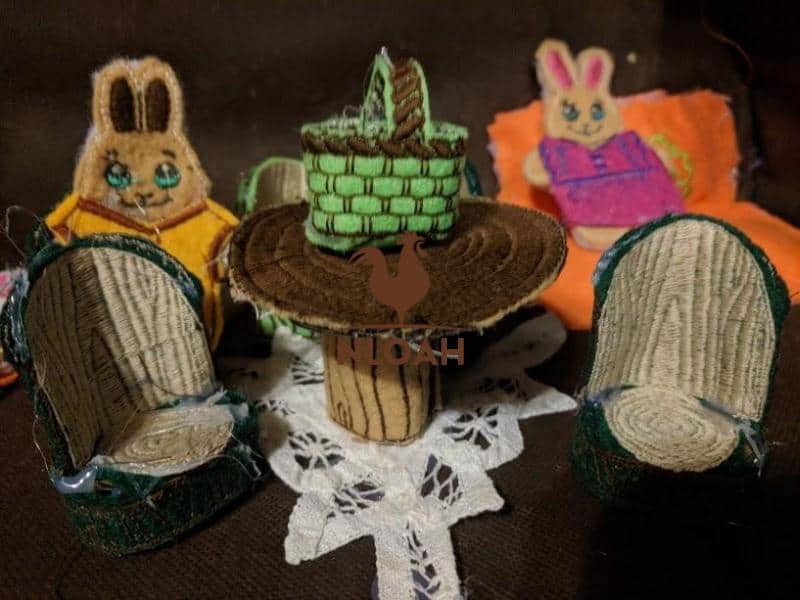
The texture created during the embroidery process on the felt furniture gave is a real wood feel. A playset like this one routinely sells for at least $35 on artisan online marketplaces like ETSY and Craftsy.
Some embroidery designers and website marketplaces that host designs for sale from hundreds of designers, place restrictions on selling a finished project with their materials. Most however, like Golden Needle Designs, only restricts copying their digital embroidery designs and reselling them as your own.
This image, from the design website, shows what the fleece stuffed version of the playset looks like. The one I made was a rush order for an Easter gift and I neglected to take the time to photograph it before the delighted seller arrived to pick it up.
This was an ITH – in the hoop pattern. That means the sewing that is required is worked into the digital embroidery design. The instruction sheet which is downloaded in the digital pattern file tell you how, when, and where to place a piece of fabric that is sewn into place before the design already in the hoop finishes.
Some websites only allow you to get a certain number of designs free per week after you sign up for their newsletters (I think my entire family is now signed up), others post a certain number of free designs each week, some allow you to choose from an entire catalog of retired designs and post a number of new embroidery freebies on a regular basis.
Some of the digital embroidery design websites offer a specified number of free designs with every purchase, $1 deals, and other flash sales. I happened across a flash sale when the owner of Designs by JuJu was celebrating the birth of her first grandchild and purchased 12 design packages (about 10 to 20 designs) for $12.
One of my go-to websites for free embroidery designs is best suited for folks with machines that hold multiple thread colors at once, but I cannot recall which one. I know what I decide to use one of the designs from that website quickly though.
The designs, which are cool and were a combo of free and cheap, outline each part of the design before starting stitching instead of doing the outline followed by stitching it. Switching out thread colors 10 times per design is annoying – but for a free or cheap cool design that looks professionally perfect when it is done, I will deal with it.
Soon I am going to order a spool stand. These handy embroidery machine accessories stand behind the machine and hold three to 12 spools of thread. You do not have to take it off the stand to use it but just feed it directly into the first notch on your machine each time you need to do a color change.
I have seen really cheap spool stands online, but they are made of thin plastic and looked like they would tip or allow for pulling when the machine in running – none of them had good reviews. A wood and metal sturdy stand seems to cost anywhere between $20 to $40, so that will be my next homesteading based business purchase.
Embroidery Design Buying and Saving Tips
• A specific digital embroidery design format is used for different brands of machines. For example, my Brother SE625 uses a PES format. Make sure you are buying and/or downloading the proper format that will function on your machine.
Typically, all major design formats are offered for each design, but if you have satellite internet with a data usage limit on your homestead like I do, you do not want to waste data downloading all of the formats in a zip file or the wrong one and have to get back online and find the file again to download.
• When buying a set of designs that is advertised as containing X number of designs, know what you are buying before selecting “yes.”
What you are getting might be exactly what you need and still a great deal, but some websites put “25 Designs” in big bold letters but when you look at the files you will see that number reflects every possible machine file format and hoop dimensions currently on the market. You might actually be getting only 5 digital files that you can use.
• Pay close attention to hoop size when downloading free or buying, embroidery designs. Make sure the digital design will fit into your hoop. Typically, a search bar on the left side of the digital embroidery design website will allow you to search for a particular hoop size.
Top 7 Free Embroidery Design Websites
1. Embroidery Designs
2. Embroidery Online
3. Embroidery Library
4. Designs By JuJu
5. SWAK Embroidery
6. Oma’s Place
I am now learning how to create my own digital designs. If you visit an embroidery forum, especially one created exclusively for designers, you will see sometimes vehement responses when a visitors asked how to create their own designs – which is super cool when you are turning a family photo into an embroidery design to put on a project or to frame.
The major complaints from the folks who are accomplished digital designers and manually and painstakingly create designs from scratch, is that the quality of automated digital embroidery design software will not look professional and thereforese diminish the look of the project.
They might very well be right, but not necessarily so. And let’s remember, these folks make money from their designs and would not want to see their sales decrease if novices find a way to make their own embroidery designs at will and at no cost.
I know my abilities and fully admit I would never, ever, be able to create a design manually like these professionals can and value the designs they put up for sale and share for free as samples of their work. I can’t imagine ever walking away from any of the above noted websites because of their quality and prices.
But, the very simplistic designs, commonly referred to as “redwork” in the embroidery realm, turned out superb using a free trial of the Sew Art automated digital embroidery design software. So much so, that I am going to order the $75 full version of the software next week.
The automated suits my custom designs purpose without costing me a bundle to pay for special order designs from a professional. The software easily walks you through using a standard .jpeg photo or clipart and turning it into a digital embroidery design.
Our county did not have a flag until about 25 years ago. A contest was held to design it and my mother-in-law won. With the free trial of the software I was able to convert a photo of the flag into an embroidery design and place it inside of an outline of our state, also a design I converted instead of paying $3 for it online.
Getting To Know Your Machine
Embroidery Machine Basics
1. You do not buy patterns. All embroidery machines use digital designs to make projects. You simply grab some freebies online (a list of where to find freebies is noted at the end of the article) or buy some designs, download them to your laptop, and then save them onto a jump drive that plugs into your machine.
You can also have the digital embroidery designs sent to you for a free, on a disc. If you purchase the necessary cord, you can connect your computer or laptop to most brands of computerized embroidery machines.
2. I amassed a ton of free designs and had ample of all varieties I needed to make delightful projects for gifts and to sell. Once I started making some money with my embroidery machine, I purchased some individual designs and designs packets or sets online.
Typically, I paid no more than $1 a piece for a single design or $10 for a large (12 to 20) set of designs or playset embroidery kit – these are awesome sellers and gifts.
3. Expect to use a ton, and I mean a ton, of bobbin thread. When I am embroidering a design that encompasses my entire hoop and has thick fill and is not merely an outline, I go through an entire bobbin before I am done.
4. You absolutely cannot use cotton thread on your embroidery machines. It creates too much dust and can/will ruin your machine over time. Oiling the components of the high-tech machine to keep it free of dust is not an option. Polyester thread of a specific weight range (may vary by machine brand) is recommended (really required) for embroidery machines.
5. Can you live on an off grid homestead and still have an embroidery machine business? I think so. Even though my embroidery machine has all kinds of fancy gadgets, it does not put a large drain on our electrical system.
During one of many power outages we were forced to deal with during an exceptionally hard winter, I was able to keep right on embroidering by plugging it into our generator.
The additional draw to the generator that was running multiple necessary pieces of household items, did not cause any negative issues to either my project or the alternative power system.
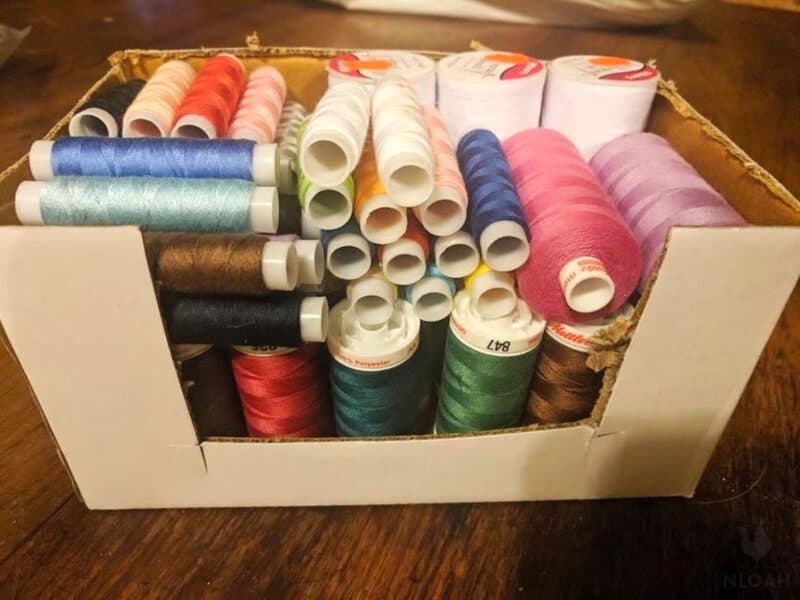
Embroidery thread spools look a whole lot different than sewing machine thread – and hand embroidery floss. The cross-thread spools feel like a thin string. I lucked into a great deal at the local Christian craft supply outlet recently and stocked up on every color of thread possible.
Even the large spools of embroidery thread from a high-end manufacturer were only $1.99 each. The small spools were part of a multi-pack, 24 for $3. I purchased these to snag some shade variations I used on occasion.
These same bargain little spools are routinely available on Wish and Mama for about $4 or $5 including shipping – which may take a month to get to you since both websites are a clearinghouse for various goods located in China.
If you are going to purchase a combo machine and use it for both sewing and embroidery, you will need to learn how to use the tools that come with the machine to remove each type of presser foot and reposition an new one. It is not hard and a standard screwdriver should suffice if you ever lose the tools – at least on the Brother SE625 machine I have, other manufacturers could use fittings that require a special tool.
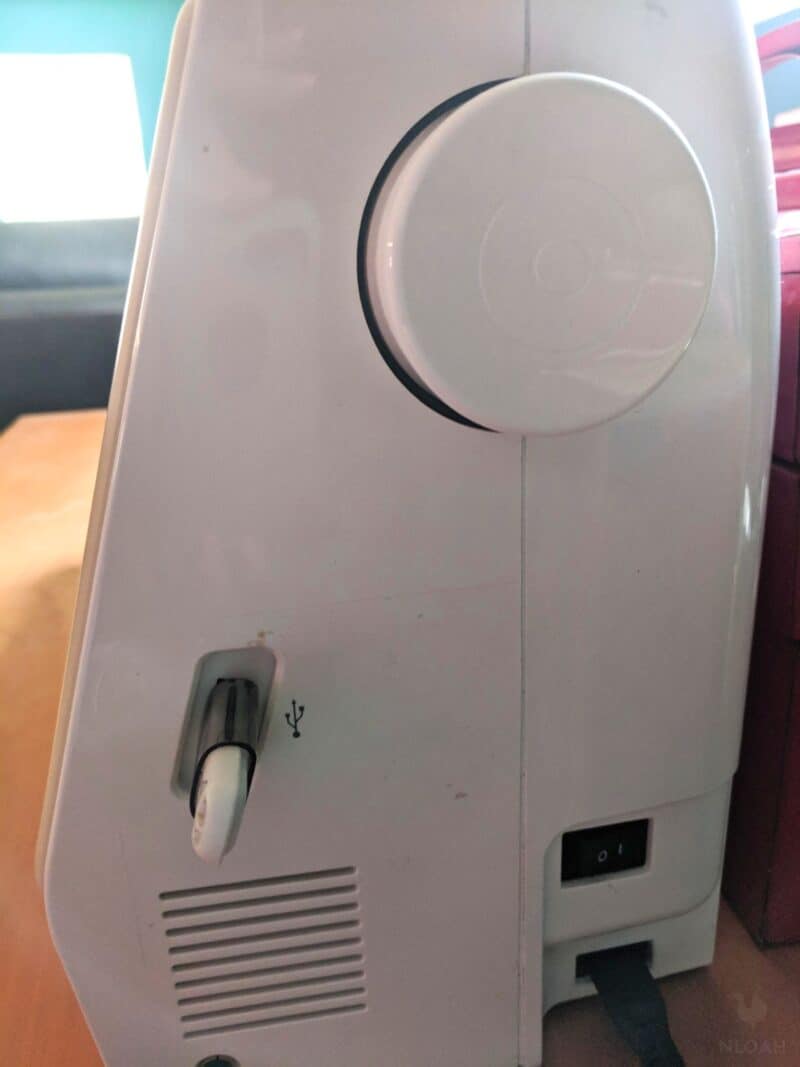
This is the side of my embroidery machine. It came with several complete alphabet fonts and about 200 digital embroidery designs already loaded to it. To have access to more designs, the machine needs to be connected to a computer, laptop, and perhaps even some smart phones or tablets, to load the designs.
There is not much internal memory on my machine, enough to hold 50 extra designs or so – I am not sure, I only store designed I have adjusted the dimensions on “in the pocket” of the machine if I am going to use them frequently and want them to be either uniform to fit onto a ribbon, bow, or hair band.
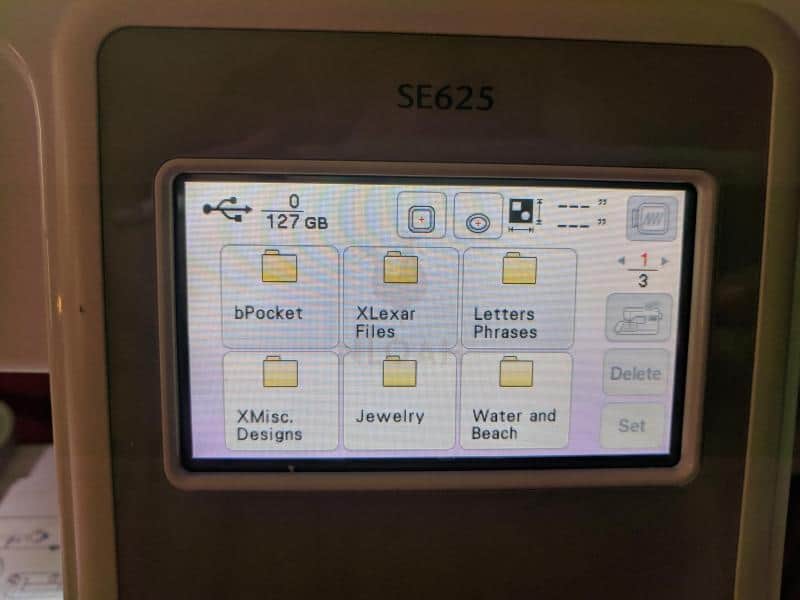
On my digital embroidery machine, you simple plug the jump drive into the slot and the photos can be accessible via the touchscreen. I keep my embroidery designs in specific folders so I do not have to go searching through a few thousands designs to find what I am looking for each time.
My folders have gotten incredibly large at this point, so I may have to wait a few minutes for all of the designs to load and then use the arrow buttons to sift through them.
This is what the start screen looks like on my embroidery machine. All machines have something similar, some may be in black and white and others may be larger.
You can use the touch screen to adjust the colors the design is shown in to show you how they all look together before stitching them out. You do not need to do this and can simply thread the colors you think will look good, or the ones you have on hand.
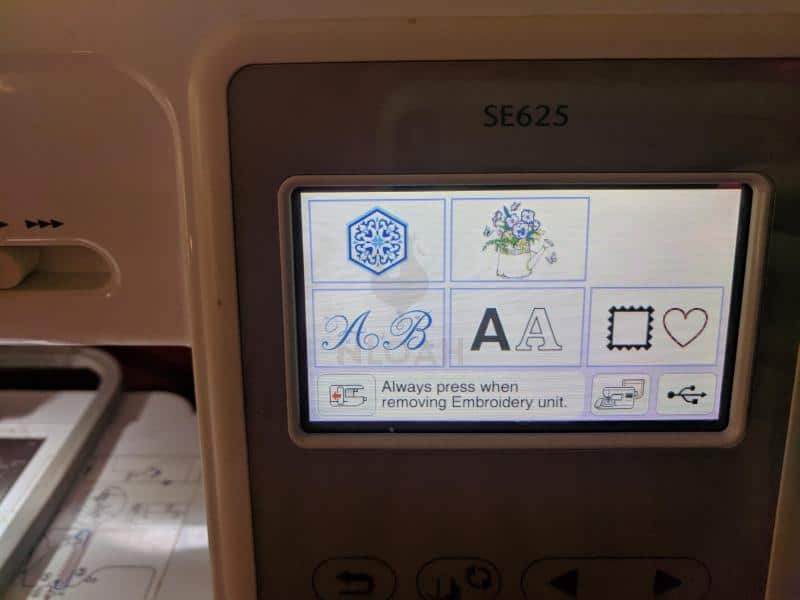
In the bottom right you can see where you would touch to access your designs. The icon of the machine with the pocket behind it is where you would click if retrieving a design you saved to the machine’s memory. The icon to the right in the bottom corner is where you would press to open up your jump drive filled with digital embroidery designs.
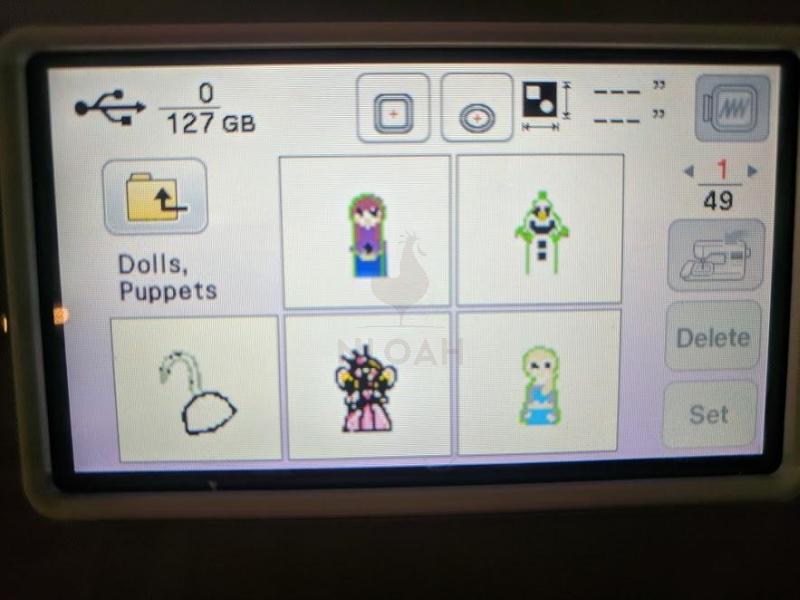
In this image you can see what the touch screen on the embroidery machine looks like after you select the icon indicating to the machine you want to pull your images from the jump drive. Just tap on the folder you want and it will open on the screen.
This photo shows what the digital embroidery designs look like on the touch screen after my chosen folder has loaded:
After you select the design you want the touch screen will guide you through the rest of the process in a few short and quick steps. Then all that is left do it put your hooped material onto the machine in its slot and hit the start button. See, I told you only novice skills are required to start this type of homesteading-based business – that and about $500 and a creative mind!
The Making Of the Bunny Playset Fence
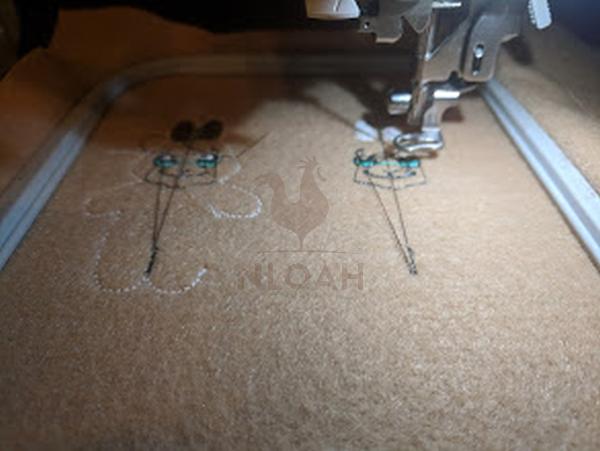
In this video, you are watching the stitching out of the fence for the bunny playset:
This video is of the second design I ever embroidered. After threading the machine and selecting a design from the screen, I simply had to hit the green button with the black arrow. I have already used the embroidery machine so much the black arrow is now worn off.
Part One:
Part Two:
I was told by an experienced stitcher friend of my mother’s from church that hooping is the most difficult aspect of machine embroidery to learn.
Those same sentiments were echoed on embroidery forums and in how-to website articles I read when teaching myself how to embroider outside of the hoop. I am sure glad I didn’t know that when hooping a piece of felt for my trial run on a first project, I did not find hooping difficult at all.
The key to hooping is to fit the material being stitched up into the hoop snuggly, so that when you hold it sideways in your hand and tap at it, a drum sound results.
Hoop too loosely and your material will ball up and get tangled in the bobbin or upper thread and you will have to cut it free – sometimes cutting your project material along with it.
If you hoop too tightly, the material will pull and either distort the design and create enlarged hole-like openings around the stretched stitches in your fabric – or both.
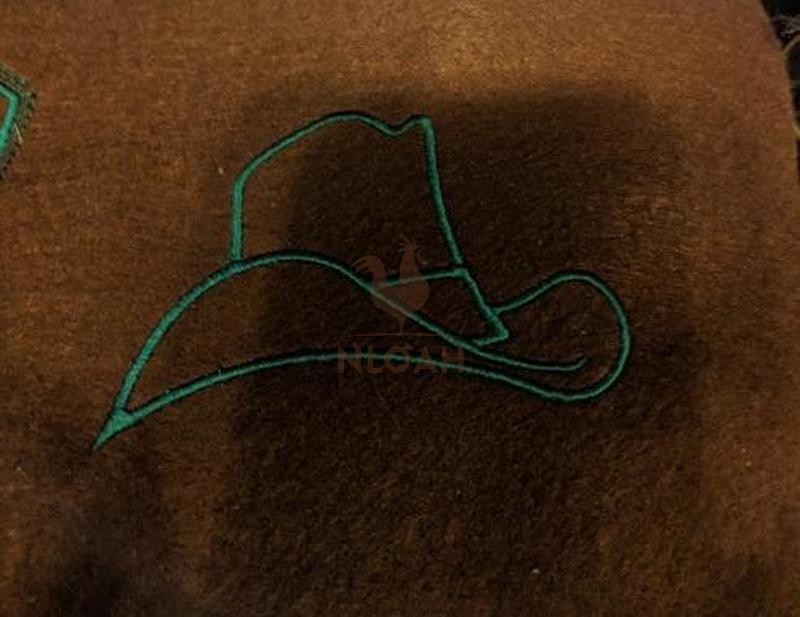
The first embroidery project created on my machine was a cowboy hat. I whooped with joy when not only did the machine work just like it was supposed to after I hit the buttons and chose the right diameter spool cap to prevent the thread from tangling (tangled thread WILL pull the embroidery foot and break your needle) but the design stitched out at a professional level quality.
I was a bad bad girl and did not use stabilizer on my first project – and few since. It is pricey and if I really do not think it is needed, I save my stash for projects where it it a must.
If you are working with material that is exceptionally thick, thin, slick, or making lace, you will have extremely poor results if you skip using stabilizer.
When embroidering on a towel, for example, the stitches will sink into the thick material and create a messy look, to say the very least. When using silk or a similarly thin, slick, easily pulled material, stitches will looked dropped, pulled, or mar the material.
When stitching outside the hoop, stabilizer must also be used. If you cannot make the thick material fit into the hoop, you embroider on top of the hoop. You do this by hooping only the stabilizer and place the thick material just above it on top of the hoop.
Butcher or hunt for your own meat on the homestead? Learn how to tan a hide if you do not know how already and create your own nearly endless supply of leather to use in your embroidery business.
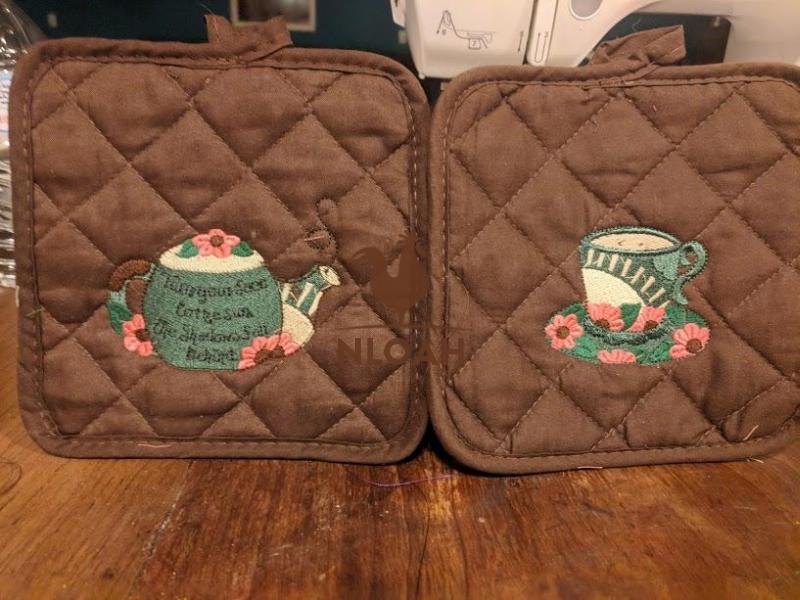
I embroidered these potholders outside of the hoop for my mother. I cheated, they were $2 for a $1 at the local Dollar Tree, so I bought multiple to make her a complete color-coordinated and themed set.
I used self-adhesive water soluble stabilizer as my in the hoop backing for the potholders. You can buy a cheaper stabilizer that you iron on or use a self-adhesive spray to adhere fabric too.
Also, in a pinch a tried using some scrap white linen fabric with self-adhesive spray for backing and it worked just as well as the more expensive store bought variety.
So, I plan on doing a lot more scrap material stabilizer in the future using the same cheap spray adhesive or just pinning the fabric together as long as I am not working with leather, vinyl, or burlap.
If you make lace (and you should because it sells fabulously), always use water soluble stabilizer. What can you make using lace embroidery designs besides doilies? Jewelry, for one. I bought an earring free standing lace (FSL)
It is possible to create a large design, like the back of a jacket, a comforter pattern, or curtain pattern, using just the 4X4 hoop. You merely have to get a bit clever with your moderately priced machine and do the design in stages.
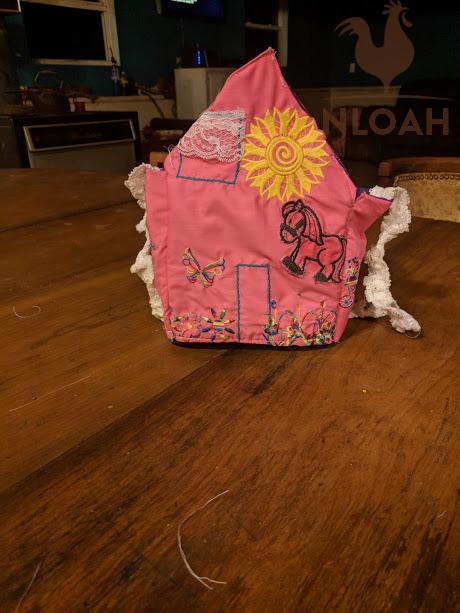
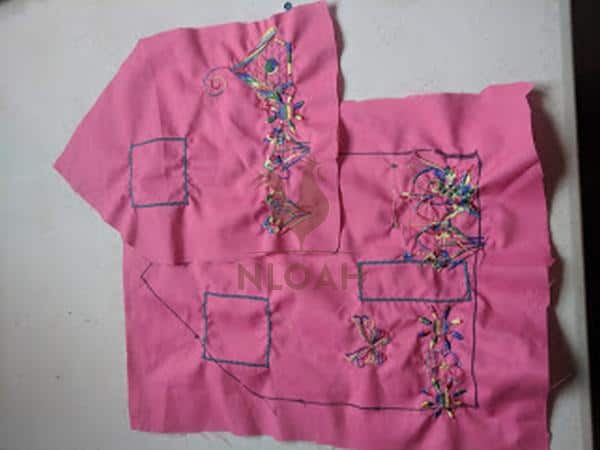
One of my first projects was to make a house-shaped purse for our granddaughter Auddie’s second birthday – that little gal sure loves her purses.
As you can see from the photos below, I simply created the scene I wanted by embroidering different designs on the material one at a time. This may take a little bit longer than using one medium, large, or extra large hoop – but for those of us on a tight budget, my $285 machine got the job done just fine.
It almost makes you feel bad to take create for the beautiful projects you create because the machine does all of the work. You simply press a few buttons here and there after threading the machine and wait for your latest creation to appear before your eyes.
Our toddler grandkiddos have embroidered some fantastic projects, they might not know that they did because all they did was have fun pressing buttons on the embroidery machine and its touch screen, but they did as much work as I do when making purses, dresses, potholders, toys, towels, etc.
Your embroidery projects will look live you slaved over them for hours, days, or weeks, but in all reality, your work was done once you hit the appropriate buttons. I must warn you, the first 10 or so times you embroider a project, everyone in your home will crowd around you to watch it appear on the fabric, it is a mesmerizing process. It is simply astounding how the computerized embroidery machine works, it equally fascinates men and women and young and old alike.
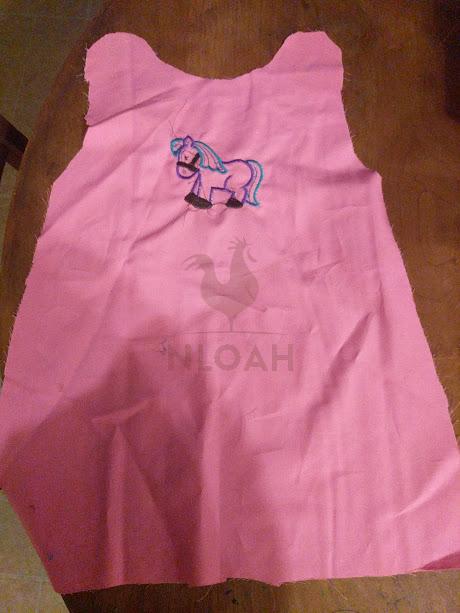
I made several adorable horse-themed dresses from $2.99 per yard material from a Walmart clearance table. I had about two hours in each project, counting the 20 minutes of stitching on the embroidery machine that did not require my active involvement.
Each dress cost me approximately $5 to make, when the fabric, enclosures, linen lining, and embroidery thread were taken into consideration. These dresses were a gift, but they caused a lot of “oohs” and “aahs” when the little girls wore them, resulting in orders for the dresses that I priced at $30 each.
I trimmed each dress out in lace my hubby won via our county’s Facebook online auction page. I am still working through the two trash bags full of lace and embellishment he won for only $8.
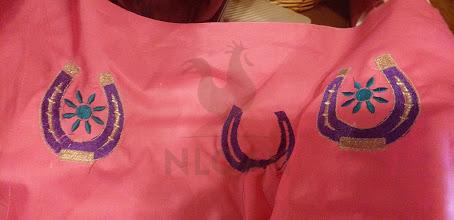
I added an eye to the horse design with a wood bead in a matching color and sewed on the white flower in the horse’s mane. In the photo below you can see how I used scrap fabric from the pink dress to make embroider pockets that were placed at a drop waist level. I combined a horseshoe pattern with a little flower pattern to make the pockets that were ultimately sewn onto the dress.
Making Projects To Sell For Profit
Now that you know how easy and affordable it would be to start a homesteading based machine embroidery business, it is time to start planning what you will make. I center my projects around specific things so I can re-use the same designs multiple times when creating projects to sell on the local level.
For example, I have sports and cheerleading designs in both a large and small size so I can use them to make lace jewelry, hair bows, hair ribbons, and stretchy hair bands and also put them “sweat” towels, potholders, shirt pockets, washcloths, etc.
The small digital embroidery designs are known as “minis” or miniature embroidery designs. These typically fit nicely on 1 and half to 2 inch hair ribbons and on jewelry. You can size up or down any digital design, but only as far as the designer created it to be manipulated on the touch screen.
I use the mini designs to make school mascot and sports specific free standing lace jewelry for female athletes, their mothers, grandmothers, and other ladies who routinely attend sporting events and are school teachers.
These always sell out quickly. When I first started making the jewelry and other items noted above, I gave away some freebies to the athletic boosters, coaches, and athletes. Their modelog of my designs quickly generated interest in school spirit goodies they could not find elsewhere. I now offer unique designs to youth and school groups as fundraising items.
When making free standing lace jewelry or other projects, you use water soluble stabilizer. You embroider the chosen design directly onto the hooped stabilizer – the thread becomes the lace. Dipping the finished product in water and allowing it to air dry removes the backing and creating the see-through lace look.
Because my hoop is only 4X4 inches, I have to make two lace bracelets and sew them together and use Velcro to allow adjustment to fit the wrist, when making them for adults. I place a sports ball or mascot that I have embroidered onto the free standing lace jewelry using spray adhesive or E600 glue.
I downloaded a 4-H symbol that was available as a freebie from one of the websites I frequent for great deals, but use it only on donated items to the county 4-H group because of copyright issues that probably meant it should not have been created outside of the group in the first place.
The freebies items I make and donate to the group when they are having a fundraiser do not garner any profit, but create a ton of goodwill and orders for other items. I do make 4-H themed items for the kids to wear, those typically involve the animal they are showing placed on an item they can wear at the fair.
Dollar Tree is becoming my favorite place to shop for project materials. I can buy stretchy hair bands, potholders, hair ribbons, dish towels, etc. there probably more cheaply, and I know more quickly, than I can make them.
I recently purchased white and pastel ball caps there for $1 and made matching hats for a group of ladies taking a beach trip together so they could find each other easily in a crowd. Each hat had a palm tree on the front and their name on the back.
I sold the hats for $10 each and had only about $1.75 in each of them. It took about 26 minutes to stitch out the design, again, without me being actively involved in the process at the time. I did dishes while waiting for the embroidery machine to let me know it was time for a color change.
My embroidery machine, and I am making a safe assumption that all others, tell you how long the design will take to stitch when you select it.
I am currently making similar hats for a youth group taking a field trip – it is a huge order so I discounted the hats to $5 each.
Making custom throws for sports and civic groups, for baby showers, and table runners for holidays and events, often times largely from scrap materials, is also becoming a more than steady money maker for my new hobby turned business venture.
These are just a few examples of the types of low cost and low time projects you can create out of your initial $500 investment in the new homesteading based business. You are limited by only your own creativity and bargain hunting skills when deciding what to make to fit the needs and wants of your local customers.
How To Sell Locally
• Create a Facebook page for your embroidery business.
• Get a booth a local flea markets and farmers markets.
• Network with local groups to make items for their members and to sell as fundraising items – especially school PTO or PTA groups and sports leagues.
• If you county or town has an annual yard sale, get your homestead on the location list to sell stock items, run an extension cord and make custom items on the spot, and take orders from new and hopefully returning, customers.
• Donate. We live in a small rural country with few brick-and-mortar businesses. Everyone gets hit up for silent auctions. Donate a nice quality item when an auction is scheduled to take place to get your work in front of the public and leave plenty of business cards next to your items on the display table where it is located.
How to Sell Online
• Create a shop on ETSY and similar websites. A small fee is charged to post an item and when it is sold, but the usage fees do not inhibit your profit margin to any real degree and vastly increase your customer base.
• Again, create a Facebook page that not only showcases local customs orders you are creating, but similar products for customers regardless of where they live. If you spend some time searching online you will be able to find common school mascots or nearly every school.
• Sign up for a Craftsy account. You can post your services and products for sell on the platform on an individual or bulk basis.
Once you get our homesteading based business underway, you may get overwhelmed with orders rather quickly – more so if you start selling both locally and online at the same time.
Create a standard order form and a workload calendar to ensure you do not take on more work than you can handle, confuse one order with a similar one, spells the names correctly on custom orders, and deliver a quality product on time each and every time.
Failing to keep good records and making order mistakes will sink your new digital embroidery business rapidly. The record keeping should also include all the receipts and profit details you will need come tax time. You should be able to deduct home office space, a fraction of your electric and internet bill, mileage, and the costs of materials on your tax return.

Tara lives on a 56 acres farm in the Appalachian Mountains, where she faces homesteading and farming challenges every single day, raising chickens, goats, horses, and tons of vegetables. She’s an expert in all sorts of homesteading skills such as hide tanning, doll making, tree tapping, and many more.
Awesome ideas! Thank you for posting all your great advice and how-to videos. I am motivated to get an embroidery sewing machine asap! 🙂
You are really getting things done. Love your designing!!
I love seeing how people, especially women, “make it work.” I am always inspired by people who have farms.