You probably heard of the permaculture technique known as ‘sheet mulching’. An on-the-spot composting solution, sheet mulching seems like a convenient way to compost without as much hard labor as building compost piles.
However, there are some key differences between sheet mulching and composting that make them equally as good as each other and suitable for different scenarios. Having both skills in your arsenal will help you to create diverse ways to improve the soil nutrient level and encourage healthy plant growth.
What is Compost?
If you’re looking to improve the quality of your soil, you may have considered compositing. Available from most garden centers, compost can be bought outright.
However, when we use permaculture methods, the aim is to reduce consumption and waste; buying compost goes against these principles as it increases our costs and introduces waste through its packaging.
Compost, fondly referred to by gardeners as Black Gold, is a nutrient-rich soil amendment. Compost comprises of decomposed organic matter and is in fact, easy to make yourself.
The process of making soil allows you to recycle the organic material that comes from your home and site, capitalizing on what would have otherwise been waste, while also improving your soil quality and in turn, your yields.
Compost’s nutrient-dense content promotes the growth of soil microbes, improving the ecosystem below your feet and encouraging plant growth.
On the most basic level, compost comprises of two major components — nitrogen-rich organic material and carbon-rich organic material. Simply put, nitrogen-rich materials are the green things that come from your home and garden such as grass cuttings or pruned leaves. Kitchen scraps are also included in this.
Carbon-rich materials are brown materials such as hay, dried leaves, paper, and tree branches. To encourage a healthy soil balance, you need both fungus and bacteria to thrive. Fungus feeds on the carbon and bacteria feeds on the nitrogen, causing these products to break down, forming this ever-desirable amendment.
How to Compost? – Hot and Cold Composting
You’ve probably seen compost bins in kitchens and compost piles in gardens. Often people haphazardly throw organic waste on a pile as and when they accumulate it. This isn’t a bad thing and will eventually lead to compost.
However, if you’re looking to create high-quality compost, layered compost piles will provide far better results.
There are two main types of composting, hot and cold.
How to Hot Compost
Thermophilic composting or hot composting is a far faster method to achieve compost but it does require more attention than its counterpart, cold composting. The idea with hot composting is that by reducing the surface area of your compost pile, it will produce heat through the chemical reactions and will therefore decompose faster.
The ratios of carbon to nitrogen are debated by many farmers and gardeners, but as a rule of thumb, you are looking to include 60% carbon materials to 40% nitrogen materials (5-10% of this nitrogen level should be high nitrogen). You need enough materials to make a cube that is 1 meter x 1 meter x 1 meter. Hot composting piles also need water and air.
First, you need to break down the green materials. It is better to shred the leaves by hand as machine-shredded materials have such a high surface area that the compost pile can become so over-heated that it kills all the bacteria inside.
Next, you need to break down your carbon materials and soak them with water — really drench them.
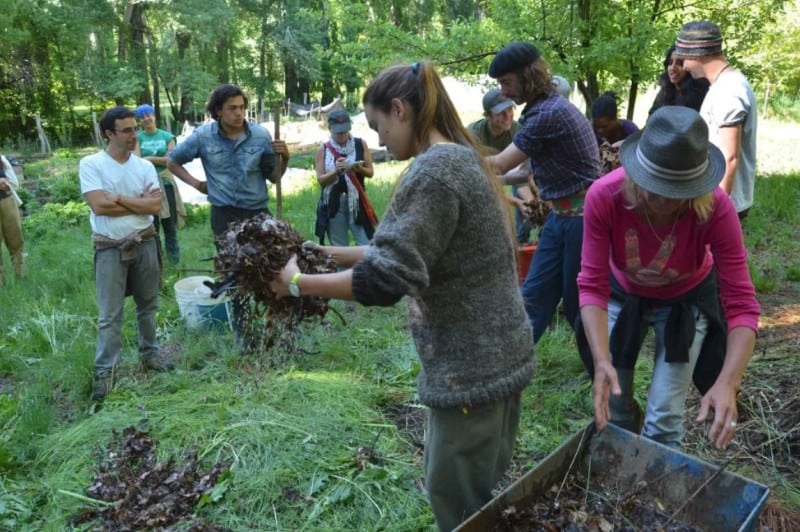
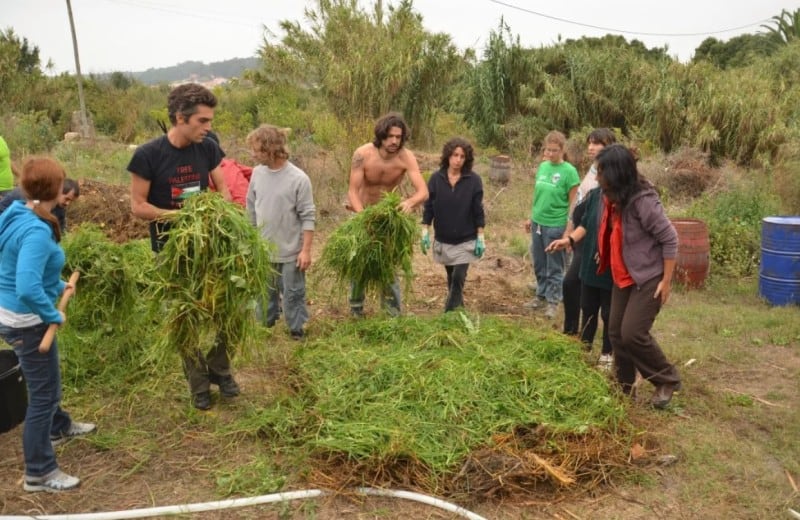
To build your pile, start with a layer of carbon materials; you want this to be twice as thick as the layer of green material you’ll place on top. Make your base a meter by a meter. Next add a layer of green material half as thick as the carbon layer.
When you get to the middle, some people like to spread a layer of high nitrogen to kickstart the pile’s process. High nitrogen can include finely shredded green material, plants high in nitrogen (legumes), or manure. Carry on building your pile until it stands at a meter cubed.
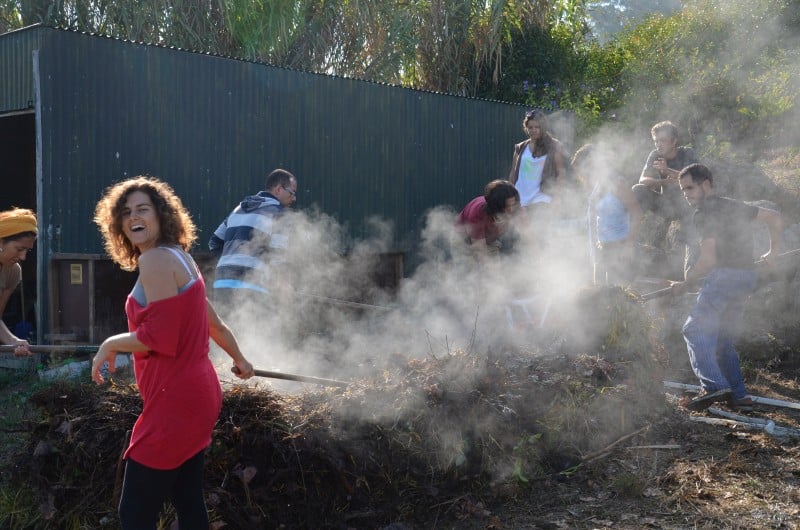
Hot composting is a process, so you’re not finished just because you built it. You need to monitor the temperature of your pile. The optimum temperature is 160F (72C). Use a thermometer to measure this and keep a good eye on it — piles that go over this temperature will burn up and kill the life in the compost; piles that don’t reach this temperature won’t decompose well.
When the pile reaches your goal temperature, you need to turn it. Use a hayfork to turn the pile bit by bit. The easiest way to do this is to create another cube next to your original one. Thermophilic composting promotes aerobic decomposition, so turning the soil allows air to get into the pile, which fuels the processes going on within.
Water is integral to this process. You need to make sure you monitor the pile’s moisture. If you squeeze the materials, a couple of drops of water should come out. If it’s too wet, the pile will putrefy. If it’s too dry, the process will slow down. In general, wetting the pile as you turn it is a good habit to pick up.
Within a couple of weeks, you should have some good quality compost, ready to spread on your garden.
A really great tip is a process called inoculation. If you’ve made compost before, when you make your next pile, put a shovel-full of your old compost in the middle of the pile. This inoculates the new compost with all the bacteria, fungus, and soil life that is in your previously-made compost. This speeds up the starting process, like an ignition to fuel.
How to Cold Compost
Your cold composting pile is the ‘as and when’ pile. This is where people tend to throw their scraps and materials as they appear and usually ends up taking a less structured form. Cold composting takes much longer than hot composting but needs far less care and attention.
Cold composting is very simple. Throw your organic waste in a pile and wait. Over time, this will degrade. You may want to add some water every now and again if you live in an area with little rainfall.
Pros and Cons of Composting
Composting provides a valuable source of nutrients for the soil using only the waste products from your life and site. However, it also has a few downfalls as a method that make it unsuitable in certain situations.
Positives of Composting
• Composting improves your soil by encouraging a diverse ecosystem to thrive, while introducing carbon and nitrogen, encouraging plant growth.
• Composting reduces your waste by cycling resources back through the site. Where you would usually throw kitchen scraps into the bin to end up in a landfill or leave your raked leaves for the garbage collector, composting utilizes these resources. It embodies the permaculture principle that ‘there is no such thing as waste, just things in the wrong place’.
• Composting reduces costs as you can build the nutrients in the soil for healthier garden beds without having to buy extra resources. Instead of purchasing soil amendments from your local garden nursery, you have created your own resources for free.
• Composting reduces toxins in the soil by recycling organic products. When we want to increase soil health, it is very tempting to add nitrogen-rich fertilizers. Over time these same fertilizers actually reduce the health of the soil.
• Composting is flexible to your needs as you can adjust the ratios depending on your garden needs. For plant growth, you can up the nitrogen content. If you garden is suffering from a lack of fungal activity, you can increase the carbon materials.
• Composting is easy and pretty much anyone can do it. Young or old, composting is one of the easiest techniques to improve the soil. There are no complicated processes or complex tools needed to do this.
• Composting doesn’t spread weeds unlike other methods of soil improvement. The heat in the process burns up the weed seeds, preventing them from being able to spread across the garden.
Negatives of Composting
• Hot composting is labor intensive as you need to continuously check the temperature, turning and watering the pile. This constant monitoring and the physical labor of turning can feel like a drain on your own personal energy levels. Once made, it also needs spreading which adds another task.
• Compost needs to be moved which can be damaging to the compost itself. When you move compost from its pile to the bed, oxygen wafts into it. Imagine what happens to a fire when you fan the flames.
This happens to the compost, which leads to an increase of heat, inevitably burning up some of the soil life you have created. In this sense, it is often argued that compost doesn’t have as high a nutrient content as it’s cracked up to have, due to the loss of nutrients when it’s moved around the site.
• Composting can lead to soil imbalances if you are not careful. Test your soil first to understand the ratios in the soil and what the soil needs. If your soil is already high in nitrogen, dumping a lot more of it can cause an imbalance that can lead to pests and weeds.
• Compost doesn’t suppress weeds; in fact, it encourages them. By improving the soil, plant growth boosts including weed growth. As weeds, more fondly known as pioneer plants, can thrive in destruction and tend to grow more easily than vegetables, you’ll find that compost can encourage the weed population.
• Composting doesn’t work well in certain climates such as cold or dry areas. In these places, more work needs to be done to ensure that the pile thrives. In very wet places, you will need to cover the pile so it doesn’t become sodden and putrefy.
• Composting isn’t always suitable for large-scale properties due to either the effort it takes to hot compost or the time it takes to cold compost. If you have a broadscale site, composting can become a full-time job if you’re trying to cover the whole area.
Composting Mistakes That You’re Making
You may be following the composting instructions to the letter only to find that your compost pile isn’t quite kicking off as you imagined. Perhaps it smells strange or isn’t getting hot enough. Maybe you’ll find that you are making some of these mistakes. Don’t worry, they’re pretty simple to remedy.
The Pile Smells Bad
If your pile smells bad, the likelihood is that it’s smelling a little like urine or rotting food. This is because you have too much nitrogen and not enough carbon to balance it. Carbon will prevent your pile from giving off unwanted odors. Try adding more brown materials when you turn the pile. Smaller particles will help the odor quicker, which is why some people tend to use sawdust or wood shavings.
Another reason for the smell could be too much water. When the pile is too wet, the nitrogen materials begin to decay due to putrefying bacteria. Not only are these bacteria harmful to your health, but they won’t produce good soil. Try spreading the pile out so that it dries and then putting it back together when the pile is a little less moist.
The Compost is Far Too Hot
The heat from a compost pile comes from the bacteria going to town on the nitrogen. The higher the number of bacteria, the hotter the pile will get. If your pile is heating up far faster than you can control it, it’s going to burn up all the life within it, which defeats the object of composting. Try adding more carbon-rich materials to balance this out.
If you feel the balance is pretty good, try letting it dry a little as the water will encourage the process too.
Make sure to assess your own behavior. If you’re turning the pile too often, you’ll find it has a dip in temperature as you turn it, but suddenly increases in temperature after the process. When you turn it, you flush the pile with oxygen which speeds up the aerobic process. Try turning it less often.
You’ve got Company – Rats and Other Pests
Many people complain about rats getting into their compost piles. Rats and mice are generally drawn to piles that contain meat products. Never throw meat or meat leftovers (bones, skin etc) into the pile. Aside from attracting pests, it can also lead to your pile harboring harmful pathogens.
Many people advocate throwing egg shells into the pile to increase calcium levels. While this does increase calcium levels, try to wash the shells first before throwing them in.
With other food scraps, try to bury them within the pile, covering them with non-food materials. This will make it harder for raccoons and other animals to penetrate the pile.
The Compost Pile Isn’t Doing Anything
If your compost pile isn’t decomposing, this is usually due to it not having enough nitrogen. Nitrogen ignites the aerobic process and a deficiency in nitrogen will leave the pile sitting there without decomposing.
Water is another aspect to think about. On the one hand, your pile will just rot and won’t compost if it is too wet. Not enough water, and the pile won’t do anything at all but dry out.
Equally, the aerobic process needs oxygen to gain the heat it needs. If you leave your pile sitting without turning it, it will become anaerobic. It will break down eventually but this will take a really long time. Encourage aeration by turning the pile or loosening it a little so air can get in. If you have the pile covered for rain protection, make sure there is space for air to flow though.
The Compost Isn’t Really Helping the Soil
Now one of the biggest mistakes that people make is a lack of diversity in their pile. It’s easy to cut grass and add this as the only green materials. However, this won’t give diverse nutrients to the resulting compost. Instead, you’ll only get what grass offers. Adding different fruits will increase vitamins, whereas dynamic accumulators (big leaf plants with tap roots) will provide minerals and legumes will provide even more nitrogen.
What is Sheet Mulching? How Is It Different?
Sheet mulching is basically on-the-spot composting. Where composting usually takes place in a pile and is then moved to the location it is needed, sheet mulching occurs in the garden bed itself.
Sheet mulching is a philosophy that is backed by no-till gardening. In other words, the idea is to create a rich and diverse soil life in the garden bed without turning the soil. Over time, microbes, bacteria, and fungus breed and lead to worms, insects, and other life in the soil.
This life helps to keep a healthy under-foot ecosystem that decomposes the mulch layers, leading to high quality soil. Sometimes this technique is referred to as ‘lasagna mulching’.
Sheet mulching doesn’t heat up as hot as a hot composting pile and decomposes slowly over time, while also providing a soil cover to prevent erosion.
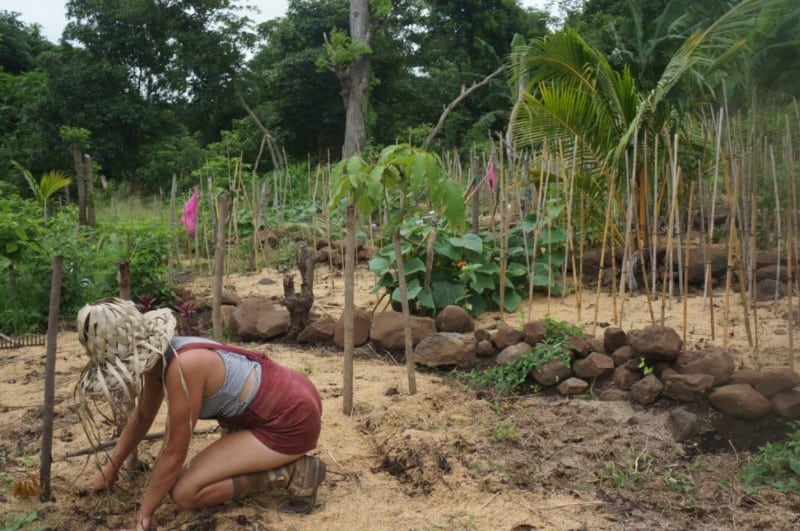
How to Sheet Mulch
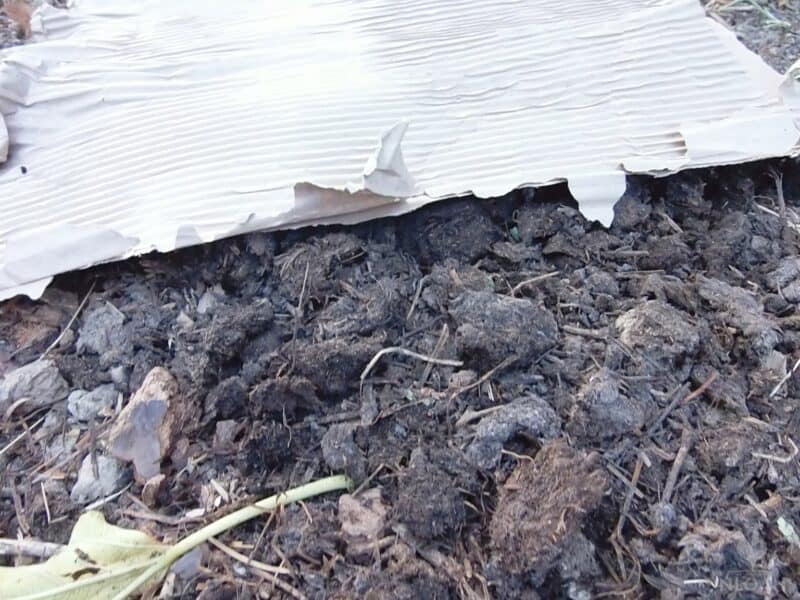
Sheet mulching is quite easy but can be a little laborious at the beginning. Similarly, to composting, you’ll need both nitrogen-rich and carbon-rich materials in the same ratios. Unlike composting however, you’ll also need as much cardboard or newspaper as will cover the surface area of your garden beds.
You want to soak the cardboard in nitrogen-rich liquid. Some people choose to soak the cardboard or newspaper in water, however using a compost tea or a garden ferment (you can also use urine!) will provide an extra natural fertilizer for the underside of the soil, while encouraging bacteria. Lay this on the base of the garden bed.
Next layer your carbon and nitrogen in the same manner as composting. You need twice as much carbon as nitrogen each time. Start and finish with a carbon layer and make sure this carbon layer is wet first.
The top layer of your sheet mulch should be a heavy carbon material such as wood chips or rice husks. Some people use hay but often this can blow away if you have strong winds. Wen you have finished, the whole bed should be between 8 and 12 inches deep.
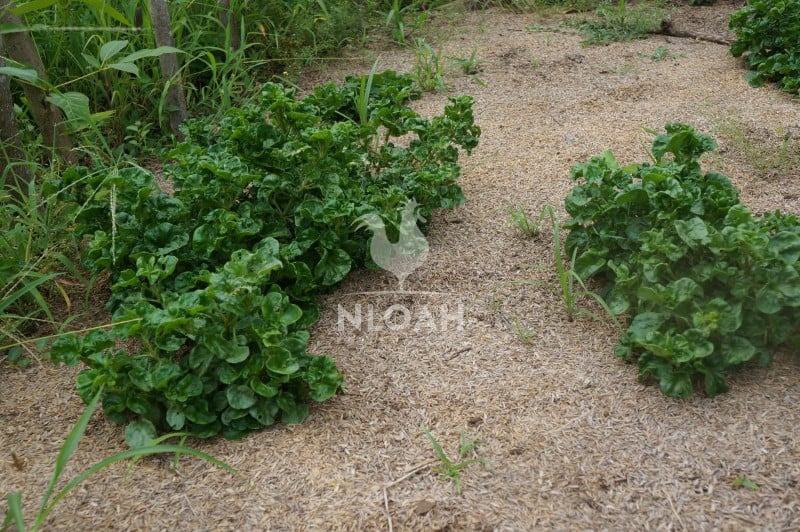
While there is little upkeep with sheet mulch, it is a good idea to water it every now and again to encourage decomposition. As you can plant straight into mulch immediately, you’ll no doubt be watering your beds anyway. However, if you’re preparing the soil without planting, keep it moist, especially if you live in a dry area.
Sheet mulch will decompose over time so you will need to replace it as it breaks down.
Pros and Cons of Sheet Mulch
Sheet mulching is a technique advocated throughout permaculture literature. It is an old technique that has been promoted by the likes of Bill Mollison and David Holgren. However, it is important to understand that some of the drawbacks of sheet mulching mean it is not always the most suitable technique to use.
Positives of Sheet Mulching
• Sheet mulching is less labor intensive than composting — especially hot composting — as you do not need to turn the soil continuously or monitor its temperature. Equally, the sheet mulch is placed exactly where you’ll plant so it doesn’t need to be moved to a new location once fully decomposed.
• Sheet mulching decreases disturbance of the microbes in the soil, which helps to keep the complex ecosystem intact. Every time compost is moved, some of the microbes are burnt up as the diverse ecosystem is broken apart and oxygen floods it.
With sheet mulching, it is not neither moved nor tilled so these complex systems can continue to grow undisturbed, improving the soil over time.
• Sheet mulch works as a weed suppressant due to the newspaper or cardboard layered first. You don’t need to clear the land first, because the mulch will block out the light, killing off the weeds that already exist. The cardboard works as a physical weed barrier, preventing them from growing through.
• Sheet mulching holds water preventing it from running away from your beds. The mulch will soak up the water and hold it in reserve for the plants, promoting healthy growth, saving resources, and decreasing your need to irrigate so often.
Sheet mulch protects the soil from erosion by working as a cover. Soil that is left uncovered tends to erode away with wind and rain. Equally, hot sun can cause problems for the soil life. Mulch provides a cool and damp cover for the soil to prevent erosion and to function as an insulator.
Sheet mulch enriches the soil with nutrients in the same way that composting does but as it stays in one place and is not decomposing at high heat, it actually tends to provide more nutrients than composting. On that note, any nutrient leakage that may occur happens in place, meaning that it leaks straight into the soil that you’re trying to improve.
Sheet mulching increases your spider population by 30% which is bad news for arachnophobes, but great news in terms of controlling certain garden pests. This is especially true in areas that have tarantulas and they love to live in the soil. Tarantulas will even eat mice that find homes in your mulch.
You can plant immediately into your sheet mulch without having to wait for it to decompose. This allows it to leech nutrients slowly to the growing plants, rather than flooding them with nutrients as compost does.
Equally, unlike composting, you can get your plants started while the process of decomposition occurs, giving you a head start.
Negatives of Sheet Mulching
Sheet mulch can attract pests because it provides the perfect habitat for voles, mice, and pesky insects. Voles are routinely named as a problem and they eat plants form the root up. Unfortunately, sheet mulch provides the ideal home for them and once you have an infestation, it can be hard to shake them.
Slugs also love sheet mulch and can end up eating your whole crop. It is important to understand that when you start from scratch, you are taking your garden from being young and barren through the stages of succession.
While slugs may ravage your garden the first year, in the future their presence will attract their predators such as lizards. While this may be comforting to a home-grower, many market farmers cannot afford to lose crops for a year or two while this kicks in.
Sheet mulching doesn’t kill weed seeds that may be in your nitrogen-rich materials. Because composting reaches high temperatures, these seeds are burnt up. However, you can find with mulching that persistent weeds will either seed in the mulch or some that have been pulled up may try to re-root.
Sheet mulch can divert water away from plants if not installed properly. If you accidentally use cardboard with wax on it, water can soak through the mulch, hit the cardboard and drain away. In fact, regular dry cardboard can sometimes do the same too, so it is important to ensure the sheet mulch doesn’t completely dry out.
Sour mulch can become an issue if the mulch gets too compressed. Often people will use a heavier carbon material for the top layer to stop the mulch from blowing away, such as rice husks or wood chips.
If this layer is too thick and heavy, it will compress the layers below, preventing air from flowing through. This will lead to anaerobic decomposition which can cause sour mulch. Sour mulch can turn the soil acidic and damage the plants.
Sheet mulching takes a long time to break down, unlike hot composting which is a very quick process. While you can plant sheet mulch immediately, the plants won’t necessarily benefit from the nutrients fully until the decomposition process is complete.
You can’t use this for your day to day waste as sheet mulching is a little less flexible with its composition; it needs to have this lasagna effect. This means you can’t just throw last night’s kitchen scraps on there like you can with a compost pile.
Tips and Tricks for Better Sheet Mulching
1. Sprinkle diatomaceous earth on your mulch as a natural repellant to pests. It repels ants, aphids, maggots, flies, and mostly importantly slugs. Rodents don’t like it either.
2. Soak your cardboard in compost tea made from a compost pile you’ve previously made. You make compost tea by running water through the pile and collecting the compost/water mix. This will inoculate your mulch.
3. Reduce the grass that you use as nitrogen-rich materials. Grass tends to clump together which prevents the air from flowing through well, which slows the process and encourages sour mulch.
4. Diversify the materials you use in your sheet mulch. Don’t just use leaves and branches from one type of tree as this leads to limited nutrients. Try to include mulch materials from a whole range of plants and trees, including their nuts and fruits.
5. Add a calcium tea by crushing eggs shells and leaving them in water for 48 hours. Spraying this on to the sheet mulch will increase the calcium, promoting cell strength in your plants as they form.
6. Coffee grounds are an incredible addition to your sheet mulch, providing phosphorous, copper, magnesium and potassium. It works as a natural fertilizer, a plant stimulant, and repels slugs and rodents.
7. Add a little manure,but not too much as too much nitrogen will imbalance the soil. However, manure helps to boost the processes going on in the soil. Some people swear by emptying fish tank water on to their sheet mulch, as fish manure is highly nutrient-rich.
8. Sprinkle some fireplace ash on to the sheet mulch. It will increase the alkalinity a little, so don’t add too much. However ash provides minerals like calcium and potassium to the soil.
Which is Best? Composting or Sheet Mulching?
This is not an easy question to answer as each has suitability in different scenarios. Bill Mollison has always advocated sheet mulching, yet more recently he has criticized permaculturalists’ misunderstanding of their differences. The two are not synonymous and serve different roles, making them suitable for different jobs.
Big Sites
If you have a big site to work with, this comes with various different issues. Making enough compost to cover a whole site may be back-breaking labor, especially when including the spreading time. However, trying to acquire enough cardboard boxes for your space may be a whole different kind of challenge.
In general, sheet mulching is generally a better option for larger sites as the work is decreased once the mulch is laid. Moreover, compost needs to be covered by a mulch anyway (whether that be a plastic cover or wood chippings). In this respect, you may as well sheet mulch. To avoid the issues with cardboard boxes, use thick layers of newspaper instead as it is more readily available.
Market Gardeners
In reality, market gardeners cannot afford to wait for the cycle of succession to take hold. In other words, if you are having pest problems with sheet mulching, you probably don’t have the time to wait for predators to appear and naturally rebalance the system — you would likely be in danger of losing business due to a lack of crops.
In this sense, sheet mulching creates a haven for critters and may not be most suitable. You may prefer to lay down compost and cover it with a heavier organic mulch like wood chips or a non-organic mulch like plastic coverings.
Space Saving
If you have a smaller space, you’ll probably find that a meter cubed compost pile takes up a lot of space unnecessarily. While you can make your compost pile smaller, sheet mulching may be a little more suitable to save space.
Limited Materials
For some permaculturalists, such as urban gardeners, a constant supply of organic materials isn’t viable. While you may have kitchen scraps and a few dead leaves, sheet mulching needs a lot of organic material constantly. However, compost can be made in bulk, stored, and used as necessary. In this sense, those who have limited access to materials may want to compost rather than sheet mulch.
Invasive Species
If your garden has a high presence of invasive species of plants such as bindweed, sheet mulching may not be enough to suffocate these plants. Without realizing, bindweed can take hold inside the sheet mulch and create competition, pushing your plants out.
If you have a big problem with invasive species such as this, composting can help by burning up seeds and completely killing the weeds, while also not leaving the weeds to do their own thing.
Improving soil health is very important to promote healthy plant growth. Whether using sheet mulching techniques or composting, you’ll find that the soil will benefit immensely. To work out the most suitable solution for your own garden, take a little time to observe the patterns that are occurring on your site.
Take into account your space, pest population, current soil health, and time restrictions.
Remember, having both compost and sheet mulching will allow you to reduce the time spent actively creating large amounts of compost while protecting the soil from erosion, yet equally giving you the chance to create compost teas, regularly recycle your kitchen waste and have access to quick-boosting soil amendment.
Think diversity; never underestimated the power of having more than one element to serve the function of soil improvement!

Emmy Jenkins, AKA Permie Emmy, has spent many years traveling around the globe and working remotely, dipping her toes into a myriad of disciplines. Having spent several years volunteering on sustainable farms, Emmy chose to delve deeper into permaculture theory to understand the social and economic patterns often neglected in the philosophy. When she’s not planting edible gardens and frolicking the jungle, she’s consulting on projects around the world to help permaculturalists to understand regenerative ‘Fairshare’ economic patterns and to encourage People Care patterns that focus on biomimicry.