If you’re a homesteader or aspire to be one, sooner or later you’re going to make a compost bin. Turning yard waste, kitchen scraps, and manure into rich fertile compost is just plain common sense, right?
If you’ve always wanted to have a compost bin, but don’t know where to start, don’t worry; this article will help you consider fifteen great, easy-to-build compost bins that you can make from scrap wood or other inexpensive materials. So read on, and get ready to turn your garbage into black gold!
Why Should Homesteaders Compost?
Before you even begin to gather materials together for a bin, you should ask yourself: why do I want to compost my homestead’s waste materials? There are dozens of great reasons; here are a few of them:
- Save Your Soil. Adding compost to your garden, flower beds, or orchards can help make your soil healthier. It adds much needed nutrients to the substrate, such as nitrogen, phosphorus, and potassium. Compost can also help to improve the structure of your soil, and make it a better environment for beneficial microorganisms. Both of these factors can definitely help you improve your garden’s and orchard’s productivity.
- Save Water. Compost can also help the soil in your garden beds retain water more efficiently. Plants in garden beds that are routinely composted tend to have deeper, healthier root systems. They help prevent water from rapidly draining from the soil, and in turn need less watering themselves.
- Save Money. When you throw away garbage, more often than not you are throwing money away as well. Even if you have some sort of municipal trash pickup, you are still purchasing trash bags, right? And in many areas of the country where homesteaders reside, you frequently have to pay to have your trash picked up. Composting your yard waste and kitchen scraps can help decrease the amount of bulk materials you’d otherwise just throw away, and save you some money in the process.
- For The Sake Of It! One of the best reasons to compost waste materials is for the fun of it. It is extremely satisfying to toss leaves or kitchen scraps – materials you’d otherwise be paying people to haul away – into your bin, and watch them turn into rich, black compost. After a few years of composting your garbage, you’ll think the people who don’t compost are a little bit crazy.
Buying Vs. Building Your Compost Bin
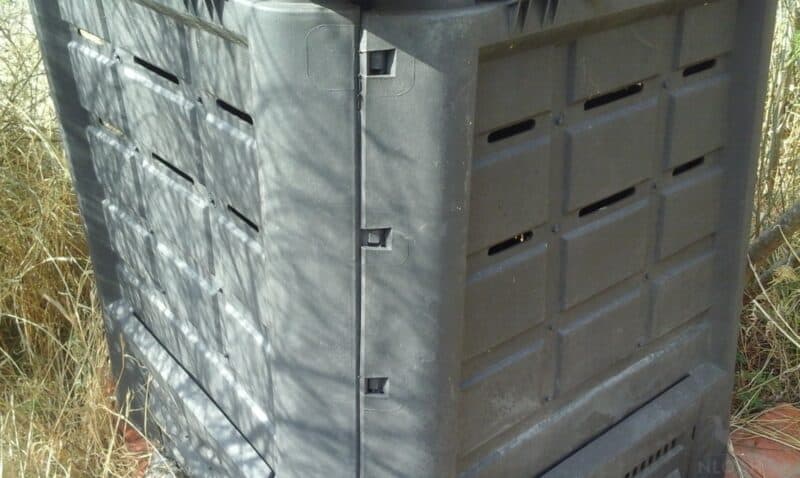
There are numerous compost bins on the market, from tumblers to wood-frame bins, to worm composters. Many of these are high quality items that are simple to assemble. So why not just buy one of these bins and be done with it?
One of the first reasons to go the DIY route is cost. Many of these commercial compost bins are prohibitively expensive. Conversely, most DIY bins can be made of inexpensive materials; pallets or scrap lumber from completed projects often cost next to nothing.
Additionally, building a compost bin is a great “gateway” homesteading project. None of the bins discussed in this article are particularly complicated or difficult to build. They don’t require a carpenter shop full of tools to complete, either. If you can master a compost bin, you’ll have the confidence and skills to move on to other projects around the homestead; maybe a DIY greenhouse will be in the works next!
So if you are ready to get to work, here are 15 great DIY compost bin designs to consider.
#1. Pallet Compost Bin
Wooden pallets are one of the most versatile and widely used DIY building materials, and for good reason: they’re easy to find and usually free. If you establish a contact at the local big box hardware store, you can probably ensure an unlimited supply of pallets for your homestead.
Try to find four pallets that are in good condition and approximately the same size. Four-foot square pallets are ideal for a project like this. Choose a generally level area in your yard that receives a liberal amount of sunshine year-round.
Clear an area approximately five square feet of any vegetation or debris. Stand one pallet up on its end. Then grab another, place it along the end of the first pallet and perpendicular to it, and fasten the two pallets together.
You can secure the pallets together with standard wood screws, or some sort of strong wire if you have it available. Repeat this process with a third pallet, to create a three-sided open box or pen.
Once your pallet bin has three sides, you are ready to compost waste materials inside of it. If you want the bin to have a tidier appearance, you can use the fourth pallet as a gate. Use your wire, or obtain some used or cheap hinges, and attach the fourth pallet to one of the pallets on the “open” side of your bin.
Make sure there is enough ground clearance for the gate to swing freely; you may have to dig out some of the earth in front of your bin for it to open and close without any hassles.
Check out this video for a great step-by-step description of simple pallet bin construction:
#2. Circular Wire Mesh Compost Bin
Scrap pieces of wire fencing are another item you often end up throwing away. When you complete a project, such as a chicken coop or perimeter fence, inevitably you have wire fencing left over. Instead of letting it rust in a useless pile, turn it into a compost bin.
To make a circular wire mesh compost bin, you’ll need approximately twelve feet of four-feet tall hardware cloth or narrow wire mesh fencing. You’ll also need three to four five foot posts.
You can use left over metal posts from a fencing project, or cut some poles from small straight trees growing on your property. You’ll also need wire to secure the posts to the fence, and to fasten the two ends of the fence together to make a circle.
Take your twelve-foot piece of fencing, stand it on its end, and shape it into a circle approximately four feet in diameter. Use the wire to connect one side of the fence to the other, creating the circle.
Pound the posts into ground, evenly spaced, on the inside of the wire mesh bin. Secure the fencing to the posts with wire. Once the posts are secure, you are ready to place waste materials in your bin to compost.
This simple design is easy to construct and extremely effective. Keep in mind if you don’t have the materials on hand to build this bin, check Craigslist; you can often find scrap wire fencing for sale there that, while not good enough to use on a chicken coop, is ideal for a wire mesh compost bin.
Here is a great video demonstrating how to build a circular wire mesh compost bin:
#3. Log Compost Bin
If your homestead includes some wooded areas, you can put those excess logs to use as a compost bin. Look for trees that are four to six inches in diameter to use as your bin walls. Cut these logs into four foot sections for use as a bin; any larger than that and they’ll be difficult to move around by yourself.
To make a bin, simply alternate your logs in a square, bin-shaped structure, until you form an enclosed area of approximately four cubic feet. The spacing between logs will allow air to circulate more efficiently through your pile, aiding in decomposition.
#4. Scrap Wood Compost Bin
Like fencing, scrap wood is another item that accumulates on the homestead. You should keep a pile of it covered with a tarp, so you can put it to use when the opportunity arises for a DIY project.
One great way to get the most out of your scrap wood is to build a compost bin with it. Four cubic feet is a great dimension for a basic compost bin. When you accumulate a sufficient quantity of scrap wood, go ahead and build your bin.

There are many ways to build a standard wooden three-sided compost bin. One particularly effective (and simple) method is to use four narrow pieces of wood, such as 2 X 2s, as corner posts, and fasten wider boards, such as 1 X 6s, as the side boards. If the boards you have on hand are different dimensions, simply modify your construction plan. The goal should be to build an effective bin as cheaply as possible.
Here is a great video detailing how to build a wooden compost bin:
#5. Corrugated Tin Compost Bin
Another building material homesteaders often have on hand is corrugated tin. Tin is used as roofs and walls for outbuildings, like sheds and chicken coops; you can also use it to build a DIY compost bin as well.
To make a corrugated tin compost bin, simply cut the tin into 3 four foot by four foot sections. Then, using spare boards as corners, make a three-sided compost bin out of your three tin sheets.
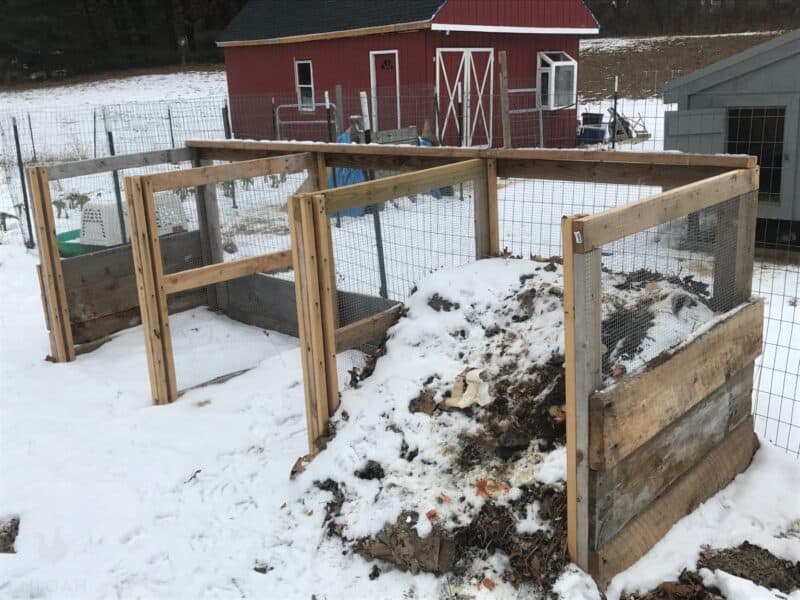
#6. The 3-Bin Composter
Many gardeners and homesteaders make use of multi-bin composting systems. This allows them to have waste materials at various stages of decomposition.
For example, in a typical 3-bin composting system, the first bin will be where you add new waste to the system. The second bin will consist of material that is further along in decomposition. Finally, the third bin will consist of completed compost that is ready to be added to the garden.
Multi-bin systems are great for homesteaders who produce a great deal of waste, and who want to have a good supply of compost on hand at all times. Most homesteaders with large gardens and livestock on hand will build a three-bin composting system sooner or later. While slightly more complicated than the systems described earlier, they are still fairly easy to build.
Typical 3-bin systems consist, naturally, of three bins that are three to four cubic feet in volume. The 3-bin system depicted at the top of this section is the author’s.
It consists of three 4-foot bins, only one of which (the initial bin) is in use at this time. It was built almost completely from wood and wire mesh left over from building the chicken coop and barn in the background; the 2 X 2s and hardware (screws and nails) were the only items purchased specifically for this bin.
Here is a video demonstrating how to build a wooden three bin composter:
Again, remember to make the most of the materials you have on hand to build your three-bin composter; the waste materials won’t mind, and will decompose just fine in a bin made from scrap materials!
#7. Block or Brick Compost Bin
Whenever you build something out of bricks on your homestead – retaining walls, outbuildings, or patios – inevitably you have materials left over; so why not turn them into a compost bin?
If you have forty to forty-five cinderblocks on hand from a recent project, you can easily build a three-sided compost bin that can hold four cubic feet of material. You’ll need more of the standard bricks or patio pavers to make a similar size bin with these materials.
Simply find a nice flat area, and carefully lay out the bricks you have on hand into a three-sided structure that is four cubic feet. There is no need to use any sort of mortar to the structure; you want to be able to move the bricks to a new location at times to speed up the “turning” process:
#8. The Tire Composting Bin
Used up tires are often eyesores in the countryside. Old tires end up in piles behind our barns, or on the edges of our property, until we finally get the energy to transport them to the dump. Instead of letting those old tires just sit around on your homestead, how about transforming them into a useful compost bin?
Tire composting bins are easy to assemble. Simply stack three to four tires of a similar size atop one another in a flat, sunny area. Once you’ve stacked the tires up, you’re ready to compost! You may want to get an old tire rim or piece of plywood to serve as a cover.
Black tires absorb the sun’s heat effectively, which aids in composition. Turning a tire compost bin is really easy, too; simply re-stack the tires a yard or so away from where they were originally standing, and shovel your waste materials back into the new stack.
Here’s a video with an example of a tire composting system:
#9. The DIY Tumbler
Disclosure: if you visit an external link in this post and make a purchase, I may earn a commission. Read my full earnings disclosure here.
Compost tumblers consist of a large barrel-type container positioned on a cradle that allows it to rotate, which aids in the rapid decomposition of the waste materials inside the barrel.
While tumblers are very effective composters, buying a commercial one can be expensive. Fortunately, you can build one on your own out of inexpensive materials.
A clean 55-gallon plastic barrel can serve as the waste container. Cut a two-foot square out of one side, and fit it with hinges and a hasp to serve as a door. Drill several ¾ inch holes around the barrel to aid in aeration. Cut three-inch holes center mass in the top and the bottom of the barrel, and run a 3-inch PVC pipe through the entire axis of the barrel; when placed on a cradle, this will allow the tumbler to rotate.
Build a cradle for the tumbler out of scrap 2 X 4 boards. Place the barrel in the cradle, and use brackets to secure the PVS pipe on both sides of the cradle. Once complete, your cradle is ready to use.
Here is a great video showing how to build a DIY compost tumbler:
Tumblers are great for homesteaders who have small amounts of waste to deal with; they are terrific for turning your kitchen scraps into compost in very short order. However, if you produce significant amounts of waste, or want to create larger amounts of compost more rapidly, you will likely need something like the 3-bin system to get the job done.
#9. Make A Worm Bin!
All of the aforementioned bins rely on heat and microbial decomposition to turn waste materials into compost. An entirely different type of system relies on hungry little creatures to eat your waste and poop out compost: a worm bin!
Worm bins employ the common redworm, the species eisenia fetida, to compost your waste materials. Redworms eat roughly their own weight every single day; a worm bin consisting of one pound of redworms can turn one pound of garbage into nutrient-dense organic material daily. Serious gardeners treasure the organic material that the worms produce, which is often called castings.
Every homesteader should have a worm bin on hand to compost his or her kitchen scraps. Having one can allow you to turn your coffee grounds, uneaten oatmeal, and newspaper (if you still get one) into a valuable compost that will greatly benefit your plants. While you can buy a worm bin, it is just as easy to build one from inexpensive materials you probably have on hand already.
One of the simplest methods to construct a DIY worm bin is to use two 25-30 gallon plastic bins; you likely have several in your attic, storing old baby clothes or holiday decorations. You’ll need four small terra cotta pots as well to complete this project.
Take your first plastic container, and drill two dozen 1/8 inch holes on its sides, bottom, and on its form-fitting lid. Place the four small terra cotta pots in the bottom of the second bin, and then place the first bin inside of it, atop the pots.
Fill the first bin with 3 inches of slightly damp peat moss. Then, replace the lid, and place it in a cool dark place, like your basement. Your bin is complete and ready for action. You can now buy and add your red worms to it.
Toss your kitchen waste daily to the worm bin, and harvest the worm castings as the worms produce them. You can use a small garden rake or cultivator to move things like kitchen scraps and your worms around in the bin, and a garden trowel to harvest the castings.
The bottom bin will gradually fill with liquid, a byproduct of the worms: activity; use this liquid to fertilize your garden plants as well. From time to time you’ll also have extra worms in your bin you can share with likeminded homesteaders, or sell on Craigslist, too.
Here’s a great video demonstrating how to build a worm bin system like the one described here:
#10. Plastic Crate Composter
The same plastic crates described above for the worm bin make great small composting systems in their own right. You’ll need one bin, with a cover, along with four standard bricks to turn a crate into a compost bin.
Drill several 1/8-inch holes in the crates bottom, sides, and cover. Then place the crate on top of the four bricks in an area of your yard that receives generous amounts of sun. You can begin adding waste materials as soon as your crate is in position. Keeping the crate covered will limit odors and unwanted pests.
As the crate fills, use a small shovel or rake to mix the waste materials inside every few weeks. A small bin like this should be great at turning your trash into compost at a high rate of speed. The holes on the bottom will also prevent too much water from collecting in the waste, too.
Here’s a great video illustrating how to make one of these nifty little bins:
#11. Trash Can Composting
If you have a spare 55-gallon garbage can, why not transform it into a homestead composting machine? Any standard heavy duty metal or plastic can will suffice. Drill 1/8-inch holes on its top, sides, and bottom, and position it on four to six bricks or cinderblocks to aid in drainage (just like the plastic crate composter mentioned earlier). Once the trashcan is in position, you are ready to begin composting.
When the compost bin is sufficiently filled up with waste materials, you can dump it out and shovel the waste back in to turn it. It may be worth getting a second garbage can to store your finished compost, too.
Here’s a great video discussing how to use trashcans as compost bins:
#12. Straw Bale Compost Bins
If you have poultry and livestock on your homestead, you likely buy straw bales in bulk. Besides great fodder for your animals, they can also serve as an impromptu composting bin as well.
Simply arrange several bales into a three-sided bin; twelve bales stacked two high is a great size for a bin like this. Once your bales are stacked, go ahead and add your waste materials.
The bales will begin deteriorating over time. When they do, simply break them apart and add them to the waste materials and replace them with newer straw bales. This is a simple but highly effective method to rapidly turn your excess straw and homestead wastes into valuable compost.
Here’s a video demonstrating the use of straw bale compost bin systems. Note that the gentleman in the video lines his straw bale bin with a plastic tarp; while that may extend the life of the straw bales, it isn’t necessary.
#13. Anaerobic Composting: The Trash Bag System
A composting system to consider, especially if you have some time on your hands before you need the finished materials, is anaerobic composting.
Anaerobic composting relies on microbes that thrive in oxygen-poor environments to break down your waste materials. An effective way to create this type of environment is with a standard plastic garbage bag.
Fill the garbage bag with an equal amount of moist “brown” and “green” materials, and then seal the bag as airtight as possible. Then store the bag in a cool dry place. Anaerobic composting is normally a very slow process, so your makeshift compost bag will likely have to sit in that cool dry place for several months.
It is a good idea to make several batches of this type of compost with different bags; just store them in the same place, like a shed or other cool dry outbuilding. However, once the process is complete, you will have some terrific compost to use in your garden beds.
Here is a great video that describes this entire process:
Composting Indoors
Who says you have to have a large homestead to be a homesteader? You definitely don’t need acreage, or even a yard, to turn some of your household garbage items into black gold. Here are a few techniques you can use to compost indoors, and avoid unwanted odors and pests while you’re at it.
#14. The Closet Composter
You can turn a little-used hallway closet or space under the sink into an effective composting area. All you need is a bucket and some waste material to compost. Get a cheap plastic 5-gallon bucket, preferably with a lid; most large hardware stores practically give these buckets away.
Add small amounts of “green” and “brown” materials to the buckets, keep the mixture slightly damp, and stir it occasionally. Keep the lid atop the bucket, but do not secure it; you do not want the compost bucket to be airtight. As long as you keep the bucket covered and add only small amounts of waste, you’ll be able to have an odorless, pest-free composting system in your apartment’s closet.
Here’s a great video demonstrating how to build and start an indoor composting system:
#15. Kitchen Composting
You can also build an effective two-step system that makes it easy and convenient to compost your home’s kitchen waste. You’ll need a lidded kitchen-sized trash can (for your kitchen, obviously), as well as a larger lidded garbage can that you keep in your garage, basement, or yard. You’ll also need a supply of organic garden soil, preferably in its own lidded bucket.
Add a thin layer of garden soil to the kitchen trash can. As you produce kitchen waste, such as coffee grounds, newspaper, and leftover greens, place them in the can. Once you can no longer see the soil, place a second layer of soil atop the kitchen scraps. Repeat this process until the trash can is full.
Empty the kitchen trash can’s contents into the larger garbage can, and continue to repeat this process. Stir the contents of the larger can occasionally to aid in the composting process. Once the material in the large can has fully decomposed, it is ready to be added to your garden.
Here is a great video illustrating this two-step indoor composting system:
Parting Thoughts
Every homesteader should have a compost pile in their yard somewhere; if you have the time and are willing to put in the effort, you should probably have an indoor composter or worm bin to deal with your kitchen scraps as well. And if you are willing to put your handyman skills to work, you can easily build a compost bin that is just as effective as the expensive systems that are commercially available.
Composting will save you time and money you’d otherwise spend dealing with your trash. And it will allow you to turn that trash into something that can improve your soil, conserve water, and increase your crop yields. So what are you waiting for? Go do a quick inventory of your scrap wood or fencing pile, make a quick plan, and start building your homestead’s composting bin today!
When Tom Harkins is not busy doing emergency repairs to his 200 year-old New England home, he tries to send all of his time gardening, home brewing, foraging, and taking care of his ever-growing flock of chickens, turkey and geese.