If you are going to grow a healthy garden, mulch is absolutely essential.
Up until this year, I’ve always been hesitant to use wood chips as mulch in the garden. I use a combination of cardboard and hay or straw to keep weeds down, and help the soil retain moisture.
Although this has worked well so far, the mulch has to be constantly reapplied as it breaks down so quickly.
My husband has finally won me over on buying a wood chipper, so we will be using wood chips to line our paths and help our plants stay adequately moist and fertilized.
There are many benefits to using wood chip mulch in the garden. Luckily, if you’re learning how to make mulch from wood chips – and why you should – you don’t have to go far to figure out why. This article will tell you everything you need to know.
Why Wood Chip Mulch?
Mulch offers so many benefits to a garden. Not only does it help retain moisture in the soil – meaning you can water less often without having to worry about your plants being over- or under-saturated – but it also suppresses weeds.
Mulch can also protect soil against extreme temperatures, a plus if you are gardening in very cool or very hot conditions. It will make your garden beds look attractive and nicely groomed, offering a gorgeous aesthetic even for functional gardens.
Use an organic mulch, like wood chips, and you’ll add a ton of fertility to the soil as it decomposes, too. You’ll find that all kinds of garden organisms, like earthworms and microbes, are present in soil that has been adequately mulched.
Why Make Your Own Wood Chip Mulch
Traditionally, bark mulch is made at lumber mills. Here, large trees are fed through machinery that strips the bark before the wood is sawn down into lumber.
The likelihood is that you probably don’t have the equipment necessary to make bark mulch for yourself, but you can easily make your own wood mulch.
You can always buy wood mulch for landscaping stores, or have somebody drop it off. In fact, there are many companies that will drop chips off for free at your home.
If you live in a rural area, though, obtaining access to free wood chips is a challenge. In an area surrounded by farms, wood chips are in high demand and short supply, so you’re better off making your own.
You can easily use a wood chipper or shredder to make your own mulch. It’s not only a great way to provide inexpensive mulch to your garden, but it’s also an excellent way to recycle debris, broken limbs, and trees from your yard.
A benefit of making your own wood chip mulch is that you know exactly what you are putting on your garden. Some people worry that diseases on wood can be transferred to plants, but this is unlikely to happen – especially if you know your trees and the conditions they were grown in.
Overall, the benefits of wood chip mulch can’t be overstated. It can:
- ✅ Add organic matter
- ✅ Retain moisture
- ✅ Recycle old wood and debris
- ✅ Control weeds
- ✅ It’s free
- ✅ Suppress pathogens and pests
- ✅ Increase biodiversity and enhance beneficial organisms
- ✅ Can be spread at any time of the year
- ✅ Reduces winter frost heave
The Myths About Wood Chip Mulch
Now here’s a bit of interesting information for you – for years, gardeners were told not to use wood chip mulch in their gardens.
That might sound odd, but the belief was that if you used wood chip mulch, particularly the kind that was made and delivered for free by tree removal services, then you would run the risk of spreading insect infestations and disease to your garden.
However, the likelihood of this happening is slim to none. For starters, most insects will not survive the arduous process of chipping and shredding. Most, like termites, won’t tag along, either, since they prefer older lumber versus mulch – the wood isn’t as easily digested.
If you’re really worried about bugs like termites getting into your house, just keep it at least six inches from the house and you’ll be fine. Termites won’t be attracted by mulch necessarily, so they won’t affect your garden plants either.
As for toxic chemicals, for the most part, you aren’t going to be chipping wood that was made with dangerous chemicals. You’ll be chipping actual trees.
Just don’t get into the habit of chipping things like scrap wood and lumber, because then you could be introducing toxins to your soil. If you’re using free wood chips, just double-check that the chips weren’t made out of construction materials or fence posts with toxic creosote treatments.
More than nine times out of ten, that will not be the case, as most arborists simply chip up trees that were cut out of ditches and power lines, or from peoples’ properties.
As for diseases, the likelihood of your plants contracting disease from bodo chip mulch is a bit higher. However, the wood chips will need to be in contact with the soil that is closest to your plant’s roots. Otherwise, it won’t be able to spread.
You shouldn’t use wood chip mulch that close to your plants anyway, as it can lead to root rot, so this should keep you safe across the board.
One other myth that tends to prevail about using wood chip mulch is that it can tie up available nitrogen in the soil. Several studies have proven this not to be the case.
Although there is a shallow zone near a layer of wood chips where nitrogen is lacking (since microorganisms use nitrogen as they decompose the chips), the deep roots of your plants shouldn’t really come into contact with them. On the contrary, that shallow zone where nitrogen is deficient will actually prevent weed seeds from germinating.
How to Make Mulch from Wood Chips
1. Get the Chipper
To start with, you’re going to need to either purchase, rent, or borrow a wood chipper or shredder. There are all kinds of models you can choose from, each of which comes in varying sizes.
The smaller models generally can grind branches up to three inches in diameter, but if you want something that can process branches that are six to eight inches (7 centimeters) in diameter, usually pulled on a trailer, you will need to rent a larger model.
These are large wood chippers that you will need to hitch up to a truck or tractor, so make sure you can get the chipper home before you buy.
If you plan on processing large tree trunks, know that you will need an industrial chipper. These are very pricy so you may want to hire a tree trimming or landscaping company to take care of that task for you instead.
Although buying a new wood chipper can easily run you several thousands of dollars, you can rent one for $75 a day or so. That’s worth the investment when you realize that mulch can cost up to $30 or more per yard!
2. Familiarize Yourself With How it is Used
You will then need to familiarize yourself with the instructions that come with your wood chipper. Often, it’s just a matter of feeding debris into the hopper and waiting for the chips to come out the other end.
However, it’s important that you read the instructions as you don’t want to get hurt.
Pay attention to the rating on the wood chipper so you don’t feed wood that’s too big for the machine. Oh, and make sure you wear protective gear, like safety glasses!
3. Prep and Feed Your Wood
Store up wood that needs to be chipped so you have a big batch ready to go ahead of time.
Then, you will want to make sure you remove any leaves and twig-like material before feeding it into your wood chipper.
Only shred wooden branches. You can add some leaves and grass mulch if you want to make a more compost-like mix, too.
When adding trees, only use those that are not from allelopathic species. For example, walnut has demonstrated allelopathy (which means it can suppress the growth of plants nearby).
Your mixture will come out in relatively large chunks. If you want a finer mulch, just feed it back into the wood chipper for a second grinding.
4. Move the Mulch
While your wood chipper is hard at work, periodically cart away the mulch to prevent it from piling up. This can overheat your machine and will also make it messier to deal with.
5. Unplug When Not In Use
When you are done using your wood chipper, turn it off or unplug it. The same goes for if there are any jams – don’t just reach in there without powering down first.
6. Spread Your Mulch
Once your mulch is ready to go, you can spread it in the garden! Weed your garden first, or you’ll risk fertilizing your unwanted weeds, too. You should then mulch at a depth of three to four inches.
Try not to add too much mulch directly around the base of trees, or the crowns of plants. This can make it hard for them to receive adequate airflow and can lead to rot.
The best time to mulch is in the summer or winter, but you can really do it at any time. In the spring, remove old winter mulch and add fresh stuff to really get your garden going!
There are several ways you can spread wood chip mulch in your garden. You can use your mulch to start a new garden, cover between rows of plants, or even make paths for walking. Before you spread your mulch, you may want to kill the grass or weeds first just to prevent the mulch from nourishing those weeds.
If you are still concerned about pathogens or diseases in the mulch, just let it age for a year or two before you use it in your garden. However, the likelihood of either being an issue is slim, so spread away!
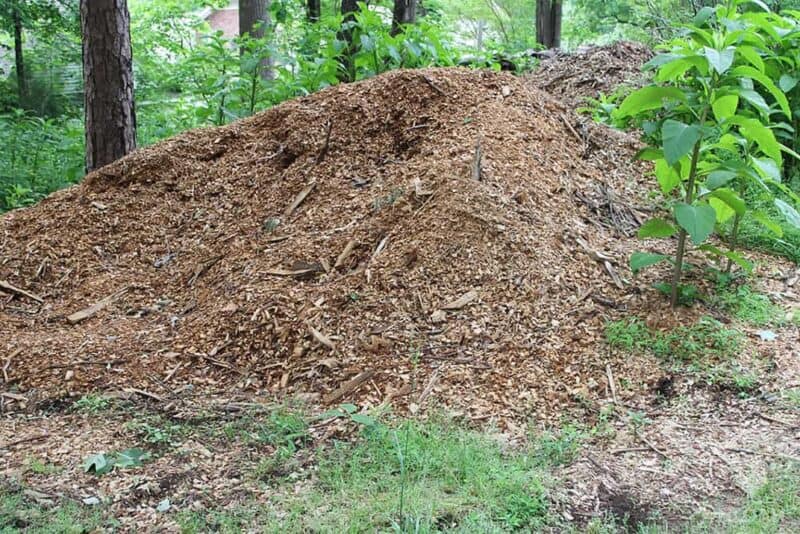
7. Storing Wood Chip Mulch
You can store wood chip mulch long term, between seasons. However, just make sure you have a dry (and ideally, elevated) place to do so. You will want to keep your wood chip mulch in a pile of at least four feet tall.
Otherwise, it will start to heat up inside and start to smell sour. Although you aren’t as likely to have a pile of wood chips combust as you are a pile of moldy hay, I would still steer clear of it just in case.
Plus, although the heating process can kill pathogens in the mulch, you wouldn’t want to spread it on your plants.
Since “hot” mulch is essentially fermenting wood material, it can accumulate acids that will damage tender seedlings and foliage or even kill your plants. Try not to let your mulch get wet, as it can get moldy.
To prevent it from getting wet before you spread it in your garden, just distribute it out to dry and to get air circulating through it or a few days.
There might be small white tendrils of mold that appear, but in general, these are fine. They are helping to decompose organic matter. Just watch out for the darker stuff.
Can You Make Mulch From Wood Chips Without a Wood Chipper?
I’ve seen a few articles online that talk about making bark mulch without making a wood chipper. It can be done, but I prefer to use a chipper so the pieces of mulch are more uniform and easier to spread.
However, if you’re making bark mulch, know that you can just save pieces of bark from firewood you’ve cut (or from blown-off pieces around your yard) to be used as mulch. To do this, you will want to lay out the mulch in the sun for a few days.
Hit it several times with a club or axe. This will give you golf-ball-sized pieces of bark that you can then apply to your garden.
Although it may look a bit odd, the benefit to making wood mulch in this way is that the pieces will last a bit longer than finely shredded mulch.
Be careful about using sawdust in your garden. When used fresh, it can mat together, and this makes it difficult for water to permeate. Let it rot down first.
Fresh Wood Chip Mulch: A Great DIY Project For Your Garden
There’s nothing I love more than a DIY project that kills two birds with one stone – and this project is one of the best in that regard. You’ll not only be able to get rid of a ton of lawn waste, but you can fertilize your garden at the same time.
Making mulch from wood chips is easy – and it’s a great way to reduce your chores on the farm, too.

Rebekah is a high-school English teacher n New York, where she lives on a 22 acre homestead. She raises and grows chickens, bees, and veggies such as zucchini (among other things).