No-till gardening is a recent trend for homesteaders looking to improve their land instead of depleting it.
Traditional farming and gardening tactics reduce soil biology and fertility, leading to successive plantings that are less productive. No-till gardening aims to build soil life and structure while reducing some backbreaking jobs that traditional gardeners deal with regularly.
If you want to start a no-till garden this is the guide for you!
What Is No-Till Gardening?
No-till gardening is a permaculture effort to build soil quality and fertility through gardening methods that simulate a forest floor. Instead of tilling to reduce weeds and mix in soil amendments, soil structure is built on top of the existing soil with organic practices.
One of the major designs is using a market garden style with permanent walkway and garden beds. The garden beds are never stepped on to reduce compaction. The walkways are permanent and built with soil-building materials, like wood chips or nutshells.
Instead of tilling in organic matter, like compost, it is applied to the top of the garden beds and allowed to leach nutrients to the soil below.
To reduce weed growth, a compostable material is placed below both the walkways and garden beds as they are built. This will smother out the current plant life and ensure that any seeds aren’t close enough to the soil’s surface to germinate. Something like cardboard or newspaper is typically used for this purpose.
In the long run, this gardening technique builds soil quality and fertility, allowing more to be produced in the same area season after season, unlike traditional tilling methods that rob the soil of nutrients and kill of beneficial microorganisms.
No-Till Benefits
There are quite a few benefits that no-till gardeners can appreciate. Here are the main benefits:
- ✅ Fewer weeds
- ✅ Enhanced soil life
- ✅ Increased crop yields
- ✅ Easy to implement
- ✅ Continues to improve over time
- ✅ Better water retention
- ✅ Reduced pests and diseases
Let’s discuss each of these benefits more in-depth.
When building out no-till beds, it’s best to put a biodegradable weed blocking material down over the current soil. Using something that will compost and enhance the soil structure is best, like standard brown cardboard or paper.
Avoid using plastic-based weed barriers since plastic leaches into the soil, and can even make it into your crops!
This weed blocking material laid below the beds will smother current plant life, and ensure that seeds are kept deep enough below the soil surface to reduce the chance of germination. Since you won’t be tilling, they won’t ever have a chance!
With the reduction of tilling, microorganisms that live in the soil will never be exposed to the air and killed off. Instead, they will thrive as you continue adding more organic material season after season.
This organic material feeds the beneficial bacteria and mycorrhizae fungi that live in the soil. In turn, that bacteria ends up feeding your crops to increase yields and plant health in general!
Crop yields will rise due to the microorganisms thriving in the garden beds. The more there is, the better. Worms will also be drawn to your beds, leaving fertilizing worm castings to feed your plants even more. More fertile soil means bigger fruits and vegetables over time!
Building no-till beds is very easy. Mow down the current plant life, lay down your weed block material, and spread your walkway and soil materials to the dimensions that you’d like!
As you continue working more organic compost into your beds, the soil life increases in population and health, improving the fertility of the beds over time. More will grow in the same amount of space over time, leading to a more efficient garden space!
Water retention will improve with your no-till garden beds as well. The compost and walkway materials will readily hold moisture, and ensure that plant roots can spread deep and wide to reach the available moisture. Less irrigation means a lower utility bill!
Pests and diseases are known to spread with weeds and unhealthy soil. Since you avoid both of those with no-till gardening, your disease and pest pressure will be lowered.
No-Till Drawbacks
While it may sound like the perfect setup, no-till gardening does have a few drawbacks. Here are the common ones:
- ❌ It may be expensive to initially build
- ❌ Permanent beds allow for less flexibility
- ❌ Initial growing seasons may be less efficient than tilling-based gardens
Let’s discuss these drawbacks and how we can counteract them.
To build no-till beds, you’ll need a lot of carbon-based material for the walkways, and even more high-quality garden soil and/or compost for the beds themselves. You’ll also need the weed-blocking materials to put under the beds.
I purchased a large roll of Kraft paper to put under my beds for around $40. It supplied enough paper for double the garden space, which is useful if you need more in the future for expansions or improvements.
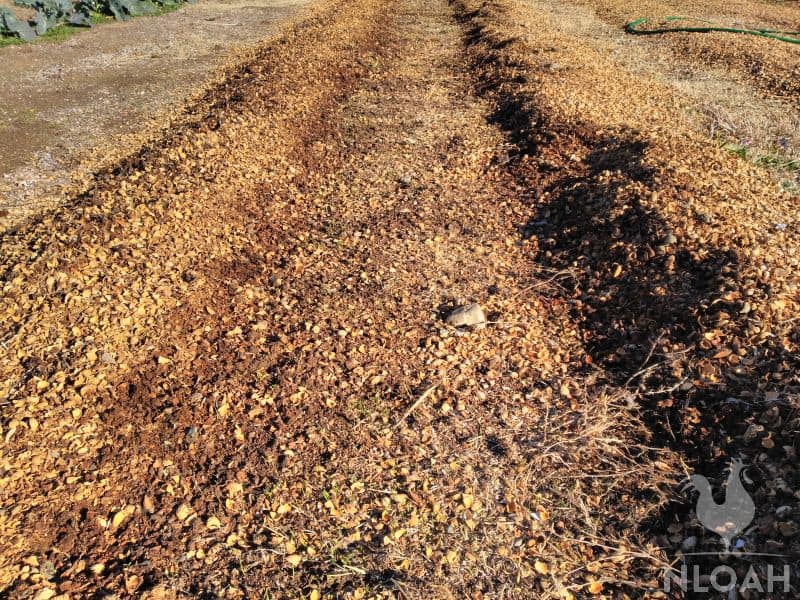
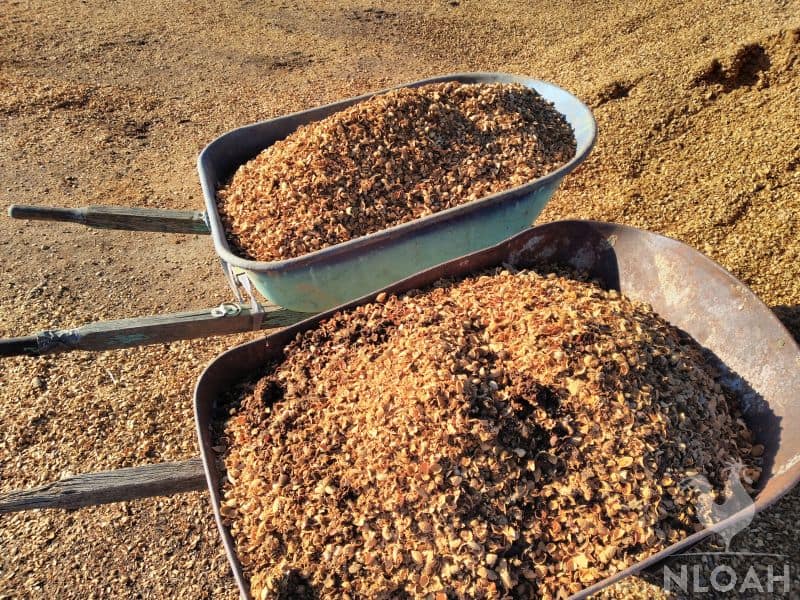
For the carbon-based walkway material, I sourced free almond shells from a local nut processing plant. I had enough hauled to my homestead for my livestock and gardening needs.
It was much cheaper to pay for the hauling service than going out and buying wood chips. You may find wood chips for free by using services like ChipDrop as well.
My largest expense is the soil, and it’ll probably be yours too. I purchase around 10 cubic yards of garden soil from my local nursery for about $350.
I could’ve bought better quality soil for much more, but I will work on the soil quality as I amend the beds with my compost in the coming season.
The lack of flexibility isn’t a problem if you have a permanent garden area. However, if you like to rotate your garden area year after year along with your livestock, no-till gardening probably won’t be worth the effort.
As I mentioned, since I bought lower quality garden soil than I could have, my initial growing seasons won’t be overachieving. Instead, the yields may a bit lower.
I can counteract this with organic fertilizers that work to improve the soil life at the same time. Synthetic fertilizers typically harm soil life, so it isn’t worth it to boost yields for one season.
Patience is imperative for no-till gardening!
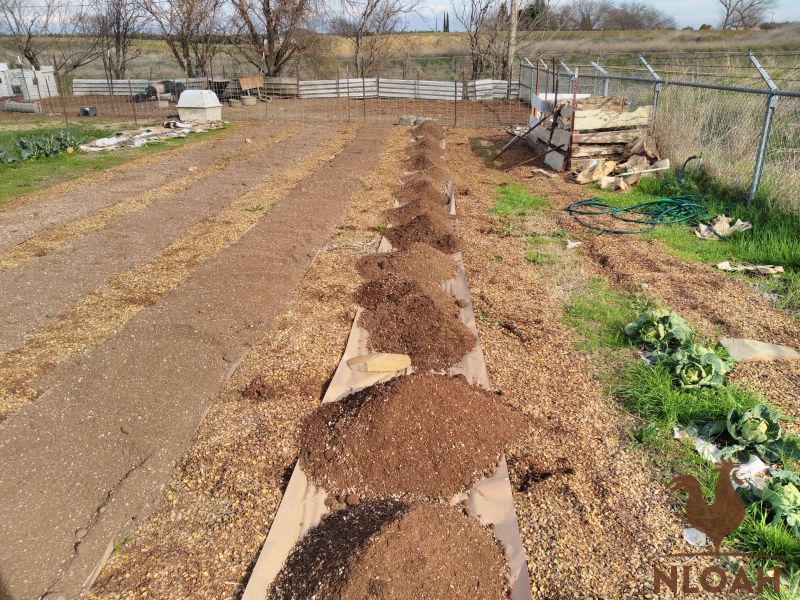
No-Till Design
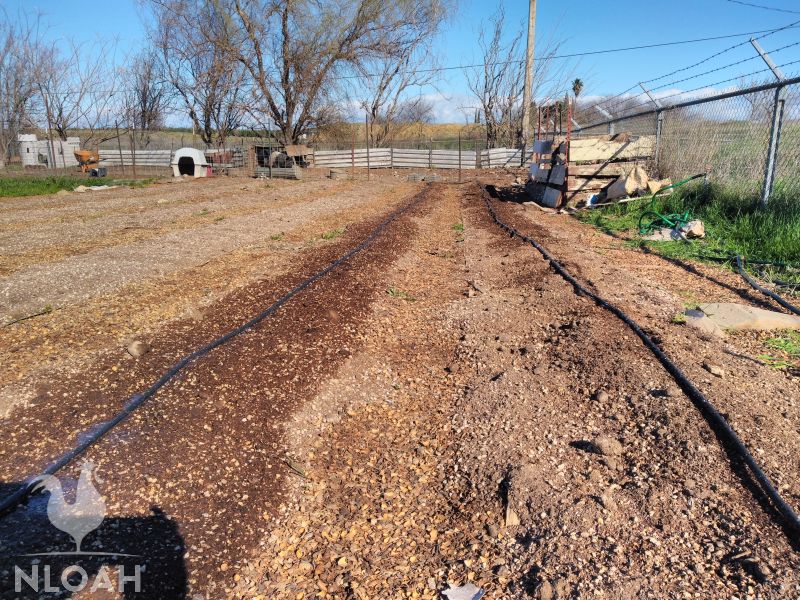
I mentioned that market garden designs are typically used for no-till gardens since many tools are made for these dimensions. I’m currently building out 7 garden beds that are 30 inches wide with 18-inch walkways between:
This is the typical sizing found in market gardens, meaning any tool I buy made for market gardens will be compatible.
My beds are 50 foot long, which make them compatible with market garden irrigation systems, just in case, I want to invest in that in the future.
You can design it any other way you’d like that fits your gardening needs. This style is just the most flexible and readily expandable as I continue making an effort to grow more food on the homestead!
Weed Block Materials
Before building your beds, you have to lay down your weed-blocking materials. I chose to use a roll of Kraft paper as it is affordable, readily compostable, and lays out straight lines for you, making part of the designing process easier. You can also use cardboard or newspaper.
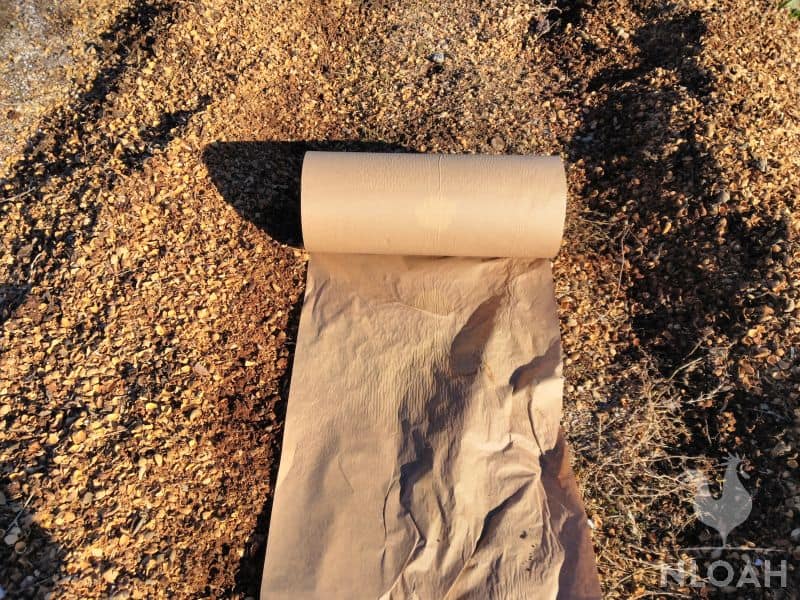
Essentially, you want to ensure that the material will compost in place, allow water to seep through to the soil below, and block weed germination and plant growth below the surface.
In particularly weedy areas, cardboard is better suited for the application. Since my garden area isn’t overly weedy, I chose paper. I do have one corner that I will be laying cardboard down as the grass growth there is out of control most seasons.
Not all cardboard is the same, though, some may harm your soil, so be careful what you choose:
One to two layers are typically all that is required to block weeds and plant growth. One is better for permeability but may not be enough if you have tough perennial weeds.
For example, bermuda grass is notoriously hard to get rid of in gardens, so laying down multiple layers is a good choice. Ensuring there is amply overlap so the bermuda grass doesn’t just grow through is also important.
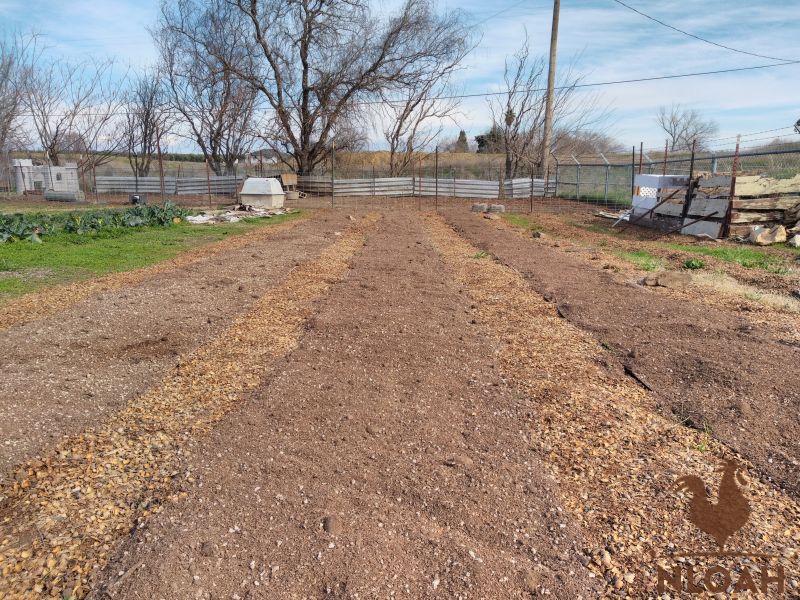
Walkway Materials
The walkways should be layered with a material that will feed the soil life below and still provide a good walking surface.
I chose almond shells because they were free and also useful for deep litter in my livestock pens. Wood chips are the most popular choice for walkway material.
You can also try something like straw. However, it tends to get a little slick when wet and won’t block out all the sunlight from the soil below, potentially allowing weed seeds to germinate once your weed blocking material has fully decomposed.
Lay down this walkway material around 4-6 inches deep. The depth should be the same as your soil depth so the walkways and beds are level initially.
Garden Bed Materials
The better garden soil you start with, the more productive your initial growing seasons will be. Since you are an avid homesteader, you are currently composting and creating high-quality organic material to amend your garden beds.
But, most homesteaders won’t be producing enough compost to initially lay down 4-6 inches of compost in each garden row. That’s why you’ll probably be investing in garden soil or compost from your local nursery.
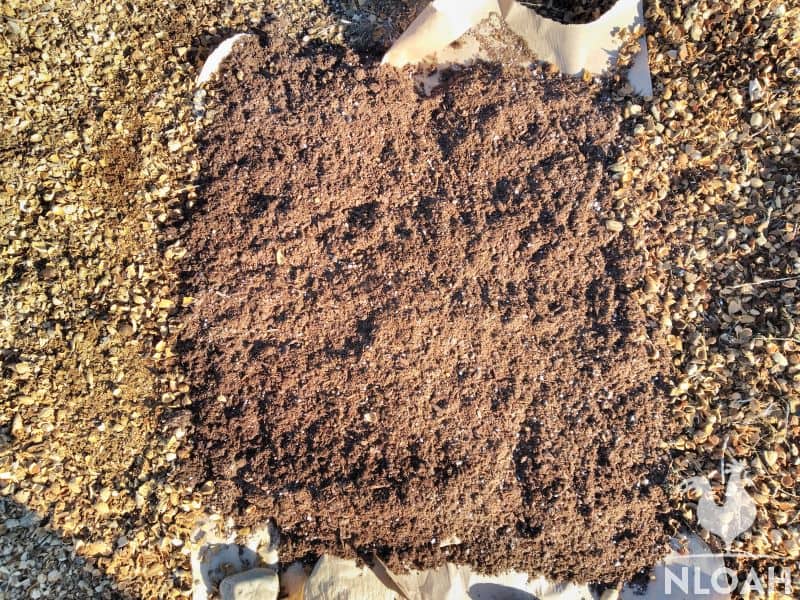
If you have the extra money, go ahead and splurge for the best soil you can buy. This will ensure your first few crop cycles are highly productive, and continue to be over time as you add your compost over the years.
Or, you can do it more budget-friendly like I am, and chose a lower quality garden humus that enhancing my soil structure but won’t add too much in terms of nutrients. Then, I’ll rely on organic fertilizers through the first couple of seasons while producing more compost to add fertility back to the soil.
Laying down the garden soil over the existing soil creates a raised bed effect, so you have control over the soil quality, structure, and fertility, just like you would in a raised planter in the garden!
How To Plant Crops
No-till gardening reduces all tilling obviously. But, you will be digging slightly to plant your seeds and transplanted seedlings each season.
Since the garden beds are never compacted, you can make a small hole in the bed to plant the seeds or seedlings and cover it back up with new compost.
This small amount of digging will not hurt the life inside the soil. It’s nothing like the flipping and breaking of soil structure that tilling does!
How To Remove Spent Crops
Exhausted garden plants must be removed to create room for subsequent plantings. But, we don’t want to disturb the soil life and structure in the process. Instead of ripping out the plant in its entirety, you’ll be cutting the plant at the base of the soil and leaving the roots in place.
The plant can be composted while the roots stay intact in the ground, and start to compost in place. This will create more aeration in the soil as well as the roots create pockets throughout the decomposition process.
All the nutrients that were in the roots will go back into the soil and feed new roots from your garden plantings next season!
Tilling is the traditional way to flip beds for the next growing season, but as I’ve mentioned, it reduces life in the soil, and harms the soil structure. This leads to erosion of your precious garden soil, something that is best to avoid!
How To Amend Garden Beds
Side-dressing current crops and top-dressing exposed beds are the main methods of amending no-till beds. You can also grow cover crops that fix nitrogen from the air and feed the soil life below.
Remember, typically gardening practices allow for tilling that readily mixes amendments into the native soil.
Top and side-dressing with compost and other organic materials may lessen the immediate availability of nutrients when compared to them being tilled in. However, the nutrients will still slowly leach into the soil below, and doing this regularly ensures our garden beds stay fertile year-round!
Pro Tips For No-Till Gardening
Here are the top 5 tips that can boost your experience with a no-till garden:
- Amend every growing season
- Practice crop rotation
- Interplant with companion plants
- Plant a row of pollinator-friendly plants
- Plant rows of perennials
Let’s look at how these tips can enhance your no-till garden!
Amend Every Growing Season
Keeping your garden as fertile as possible is the best way to ensure long-term success with no-till practices. Amending each bed as the current crop expires will lower the need for fertilizers.
If you produce your compost on the homestead, your fertilizer expenses could be non-existent. Getting high-quality organic food for lower prices is the ultimate goal for pro-homesteaders!
You can also put mulch in your garden beds to reduce the chance of weed growth even further. One of the best sources of mulch for a no-till garden is unfinished compost.
The unfinished composting materials will slowly decompose in place, and leach more nutrients into the soil over time. This can serve as your soil amendment each season.
Practice Crop Rotation
Crop rotation will ensure more equal fertility in the garden beds as some crops are heavier feeders than others. For example, planting a crop that doesn’t require a lot of nutrients right after a heavy feeding crop has been exhausted is a great way to use a garden bed.
Crop rotation also reduces pest and disease pressure since many diseases and pests can live in the soil below the plants themselves.
Interplant With Companion Plants
Companion planting will increase the amount of food produced in the garden. For example, you can plant a bunch of radishes between melon plants. Since melon plants require a lot of space in between them, it’s typically wasted when the melon plants are small.
That space will now be utilized with a fast-maturing crop like radishes. You harvest the radishes in around 30 days when the melon vines are just approaching that growing area!
There are plenty of companion plant combinations that can be utilized to boost yield in small areas!
Companion planting also has the benefit of using more of the soil space for growing, effectively crowding out any weeds that happen to grow through the thick layer of compost and the weed barrier.
Plant A Row Of Pollinator-Friendly Plants
A perfectly fertile no-till garden does no good for pollination! If you plant crops that need to be pollinated, you should think about planting a row of pollinator-friendly plants, like seasonal flowers, in your no-till garden.
Flowering cover crops are an even better choice to draw in beneficial pollinators and improve the soil below as well!
Planting a row of pollinator-friendly plants right in the middle of the garden will ensure that they branch out to all the crops you need to be pollinated.
Plant Rows Of Perennials
No-till techniques are perfect for perennials since you won’t be digging and planting in perennial beds once the crops are established.
You still need to keep these perennials fed and healthy with side-dressings of compost. You can build a bed just for perennials in the garden designed just like your annual beds.
The weed-blocking effect will ensure ample opportunity for the perennials to establish and grow without competition.
Final Words
No-till gardening can work for every homestead, no matter the size. You can out in a no-till garden in the backyard or plant acres in the no-till style.
The results speak for themselves over the seasons as soil life improves, irrigation needs lower, weeds become non-existent, and yields increase! When are you going to start your no-till garden?

Milo Martinovich was born and raised in a small town in Northern California. Throughout his life, he has been involved in agriculture and now lives on a 7-acre homestead raising livestock and growing food for his family. Self-sufficiency is his ultimate goal.