Bees are great to have on your homestead. The term “worker bee” is an apt one, since bees can be an amazing asset to any homesteader, farmer, or even someone with a little bit of space on their urban rooftop.
Honeybees are tremendous pollinators, and can ensure larger and healthier yields of the fruits and vegetables you grow to sustain your homestead or make a living.
The bees themselves produce honey and beeswax that can be sold or put to good use as well. While bees are relatively low maintenance, especially when compared to other homestead animals and plants, you still do need to take good care of them all year round.
Hive health is essential to maintain during every season if you want your bees to be happily working in your garden and feels. Here is what you need to know about keeping the bees on your homestead healthy in spring, summer, fall and winter.
Table of Contents:
What is Hive Health?
Hive health is the state of your hives, bees, honey, and eggs. The sole goal of the honeybee is to reproduce, and make enough honey to survive the coming winter.
It is your job as the beekeeper to ensure good conditions for continuous bee reproduction, and to maintain an environment that will produce more than enough honey for the bees to thrive. That way, you’ll be able to regularly harvest honey with minimal harm to your hives, ensuring the future of these little worker bees.
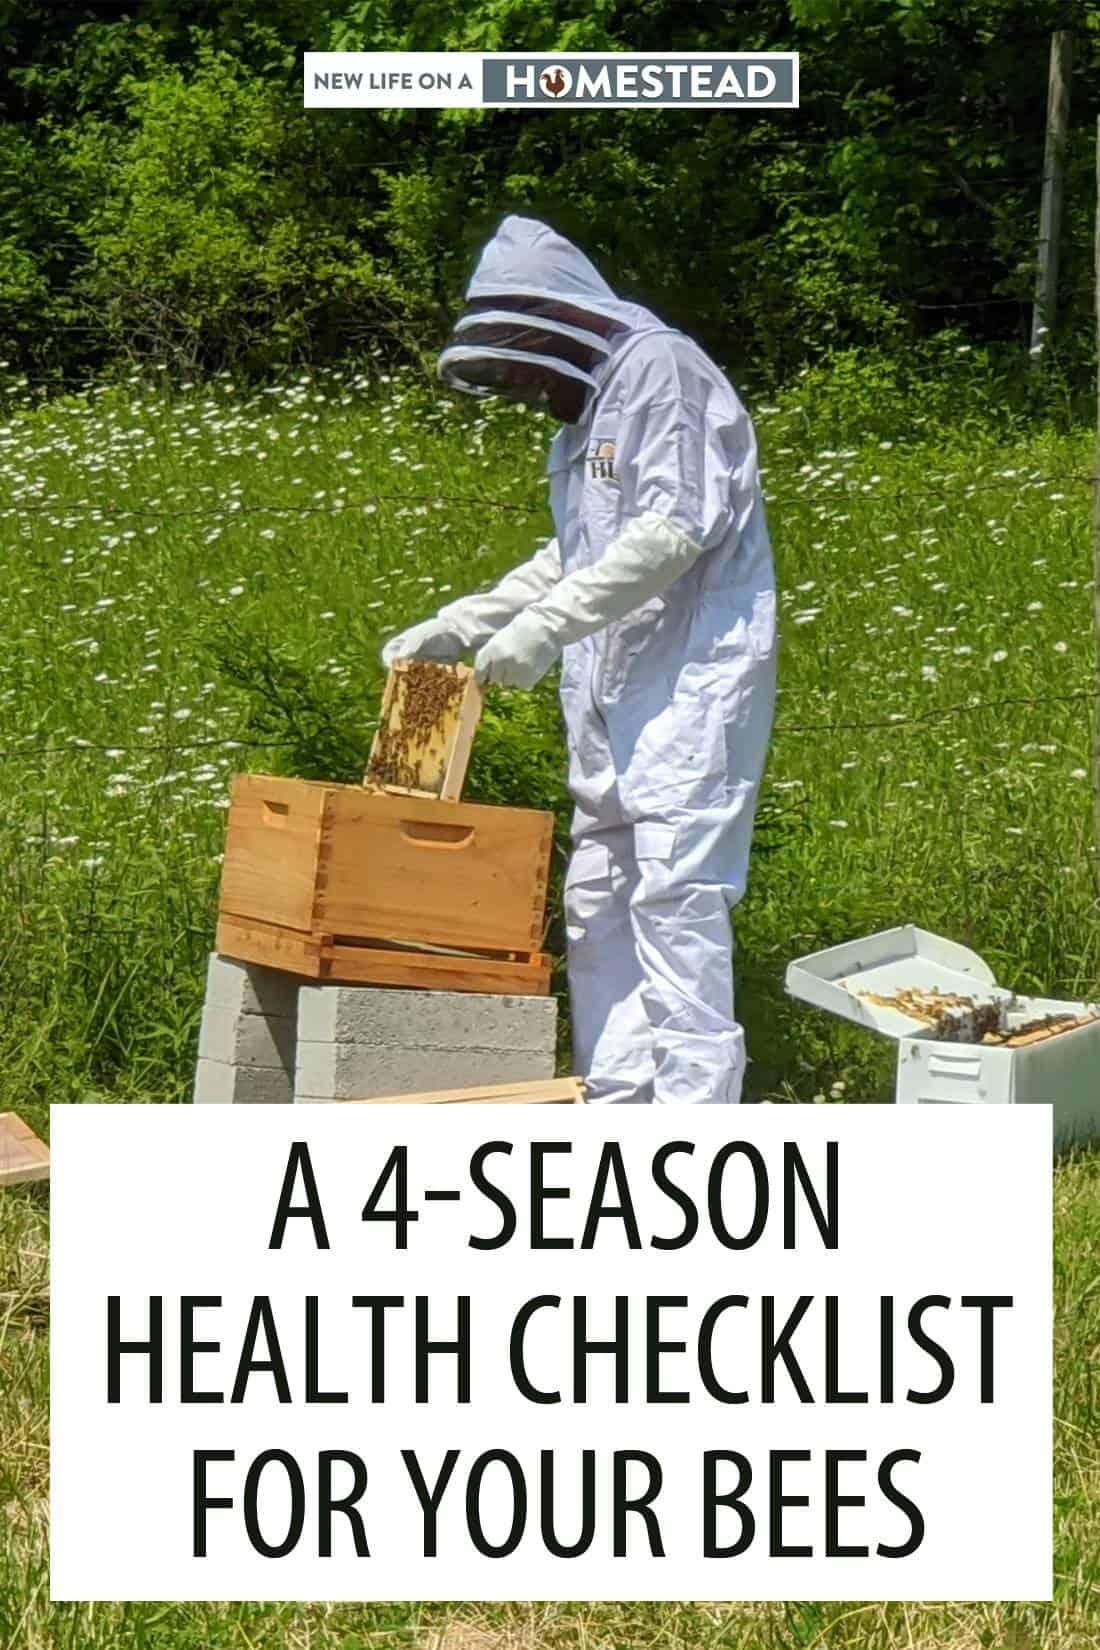
Beekeepers who want to keep their bees healthy will have tasks to complete all year long. Each season has a set of inspections, feeding requirements, and signs to be aware of, to keep bees safe and healthy and prevent problems from growing to the point that they threaten the hive.
It should be noted that there are many variables that come into play when beekeeping, such as the climate, native plants, and local weather conditions.
While this article provides solid advice for maintaining your bees all year long wherever you live, you should still routinely contact your local agricultural extension office when you become a beekeeper.
The office will be able to provide expert advice, as well provide you information such as insecticide spray alerts and beekeeping guidance specific to your region. Local beekeeping organizations are great resources as well.
So, here are the key activities you should undertake during each season to keep your bees in working shape.
Spring Hive Health Tasks
Inspection – In spring, the first inspections of the year (barring no infestations or problems warranting a mid-winter hive opening) should be done when temperatures reach 60 degree F (15 C) or higher and should occur on a little-to-no wind, sunny day.
The bees will take this as their spring wake up call, so expect hungry and grouchy bees that are slow in movement.
The top priorities during this inspection are:
- finding the queen
- confirming a growing brood
- examining if there is a honey presence so you can begin weaning off the supplements
- any signs of disease or pests
When opening the hive for the first time, be sure to keep in mind this is like your annual wellness check; it should be kept short, simple, and sweet, but thorough enough to catch any issues early on. While examining your hive, be sure to check for eggs, or sign of a laying queen to ensure your colony is growing.
You should also attempt to confirm that capped brood, nectar cells are present, as well as honey. An overly high amount of capped brood can be an indication your queen bee has died, and worker bees are laying eggs to raise drones (males), which is not a healthy hive state.
When inspecting brood, look out for pin holes, which may indicate American Foulbrood (AFB) or European Foulbrood (EFB) is present, which are highly contagious forms of brood diseases that are spread from infected bees.
Feeding – depending on when flowers start budding in your area, it will be safe to start weaning your bees off supplements when the first round of buds are in bloom. Hives will let you know they no longer need the extra sugar water or pollen by leaving the syrup alone, making it easy to spot during your semi-weekly inspection.
Simply remove the jar or bag (as mentioned in winter feeding below) during an inspection that suggests no withdrawals have been made. If you want to track the number of feedings, simply mark a line on the jar or bag, or snap a picture, and track for a few weeks before removing.
Signs of honey flow – ahh the first harvest is glorious! But keeping hives healthy means knowing when to make that first harvest to avoid depriving recuperating bees.
Look for capped honey, pollen or uncapped nectar that would indicate the bees have ventured outside and found a food source. Once you have several frames of capped honey, it could be time to make your first harvest.
Never take all the honey supply though! Your workers need to be fed in order to maintain a healthy hive with continued growth.
Overall, here is your spring hive health checklist at a glance:
- Do your first spring inspection on a sunny, non-windy day that is over 60 degrees F (15 C)
- Inside the hive, must-haves include queen, eggs, and honey
- A few dead bees is normal, but dozens is cause for an early inspection
- Check for pinholes in your brood – a sign of AFB or EFB
- Add frames as your colony continues to grow
- Once capped honey is present, it may be time for harvesting
Summer Hive Health Tasks
Inspection – hives should be getting opened and evaluated every 2-3 weeks during the warmer months because it can be easy for pests to get out of control or lose a top producing hive to swarming.
Look for signs of growth during your next inspection that may give you indication of the hive needing an additional brood box, or that swarming may occur.
Summer inspection at a glance
- Look for brood eggs but also keep an eye for any queen cells.
- Honey but no eggs could mean your hive has lost its queen, so be sure to locate eggs and honey.
- Make sure insecticides are not being used around your beehives.
The gravest moments a beekeeper will experience is coming home to hundreds, or thousands, of dead bees laying around the hive due to an exposure to pesticide. Summertime is, of course, known for mosquitoes and other flying creatures, causing households to call in exterminators.
But nothing kills a hive faster than an unplanned spraying of chemicals near your hives. You may also notice a phenomenon called bearding during summer’s hot days. Bearding refers to when bees will group outside the hive entrance in a calm manner to make room inside the hive for cooler temperatures.
The biggest difference between bearding and swarming is your bees behavior; in most cases, calm and grouped movement is typically just bearding. On the other hand, fast flying and large numbers of bees buzzing is a sign of your colony swarming.
Feeding – supplementing your beehive with sugar water is not required during the summer because of the available sources of buds. Honeybees will travel up to 5 miles to look for food in natural wooded areas, just as much as flower or garden beds.
However, you may need to consider a bee bath, or shallow tray of water that is consistently sourced so bees can depend on the water source during hot summer days.
As a general rule of thumb, when it comes to leaving a supply of honey to overwinter your hive, it’s good practice to leave one full super of honey, with limited supplementing. Any less and you will need to supplement with sugar syrup.
Signs of swarming – the most obvious sign your hive is about to swarm is a queen cell, which looks like a small mushroom-shaped honey cell. Hives that are splitting will sometimes leave the new queen behind in her cell, taking the mature queen within the swarm.
Be sure to give ample room for your growing colony to avoid bees feeling confined and trying to swarm. Do this by inspecting that honeycomb is not touching between frames, as this is an indication of combing you don’t want.
Also, look for capped honey, and the presence of brood all over a frame before adding any more frames, or a super. Too much space can go to waste since bees don’t feel they have the needed numbers to carry out tasks all over the hive.
Here is your summer hive health checklist at a glance:
- Inspect hives every 2-3 weeks to ensure the queen is consistently laying
- Continue to look for the stages of brood, nectar, and capped honey for harvesting
- Check for cross comb that may indicate the hive is getting ready to swarm or hatch another queen since space is getting tight
- Add additional frames or supers as your colony grows to reduce the risk of swarming
- Keep insecticides away from hive when spraying your yard or garden; better yet, forego chemicals altogether on your homestead and keep your bees really safe!
Fall Hive Health Tasks
Inspection – the fall harvest is a wonderful time, but also a critical time for beekeepers to be on their toes as well. You do not want to be a keeper who is caught off guard by the cold.
Starvation and cold will be the biggest concerns for your hives from now until spring, so be sure to have supplies like sugar syrup (more on sugar water in winter), a hive wrap and maybe even a reducer.
On days that are above 40 degrees F (4 C), lift the lids on your hives and inspect to see if bees are in all parts of the hive boxes, or if they are beginning to group in a lower box. Remove any extra supers that bees are not occupying.
Fall inspection at a glance
- Conduct inspections on warm days of AT LEAST 40 degrees F (4 C) or higher; take advantage of the heat when you have it!
- Look for signs of bees abandoning a super.
- Begin supplementing if your hive is light.
Feeding – it’s unlikely that you will need to start supplement feeding at first but checking your hive’s weight is a great way to check food supply without having to open the box. Simply lift the box from the back and gauge how light or heavy the box is.
A heavy box is an indication of a good food supply, while a lighter one means it is time to supplement. Most boxes are around the 75-pound mark, depending on the type of honey box you are using.
When conducting the lift test be sure to use your judgement for whether your hive is hungry; don’t be afraid to give the bees a jar of sugar water just to be sure, either.
Signs it’s time to winterize – The first cold spell for the fall is a good time to start winterizing your hive. When temperature begins dropping below 50 degrees Fahrenheit, be sure to keep an eye on your hive. Freezing temperatures, (or anything below 40 degrees, really) are dangerous for your hive and may be an indication it’s time to winterize.
Fall hive health checklist at a glance:
- Look for signs your hive is shrinking, and remove any extra supers that are unoccupied to ensure heating can be more efficient over winter
- Unpack the hive wrap and reducer to prepare for cold nights
- Tie down your hive if you live in windy areas that may suffer from winter gusts
- Prepare sugar syrup in quart jars or plastic gallon bag to be ready for supplementing
Winter Hive Health Tasks
Inspection – Hive inspection is vital no matter what time of year it is, and winter is no exception. no matter the season, is vital. In the winter you want to limit opening the hive to avoid the cold killing of bees. Instead, there are some other signs you can look out for.
You should definitely check to see how many dead bees are at the hive’s entrance; significant quantities of dead bees may indicate a serious problem.
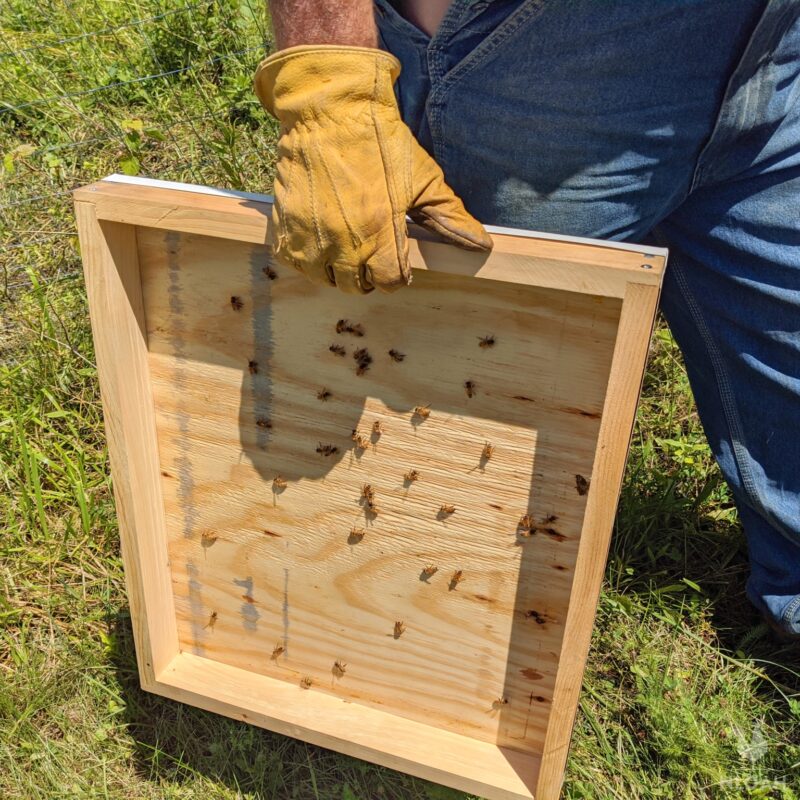
Make sure the queen is not within the dead bee pile, either. In terms of pests, check the varroa tray for varroa mites. Additionally, if you see any missing heads on dead bees, it could indicate a vole problem. You should also check for any water or moisture that is coming in your hive that shouldn’t be.
Bees are most vulnerable during the cold, and wet AND cold are a recipe for disaster. Remember, bees are happy to keep a clean, tidy home with propolis but supplies and energy are running low, so help them out with repairs.
Winter inspection at a glance:
- Make sure your bees are getting sun still (something you should have already thought about when placing the hive in its home)
- Find the balance between offering a windbreaker and adding a reducer for the front door, but don’t lock bees in their hive.
- Is it time to downsize that hive body? Colonies will naturally start thinning themselves out by kicking out drones when cold weather comes knocking. Ensure the hive is able to keep the area cozy and warm. Remove any extra boxes as the hive shrinks.
- Bring out the hive wrap if you live in harsh winter environments. This is like adding the extra winter blanket on your bed. So, if you are cranking the heat up, or adding layers in your own home, odds are your bees could use some extra love as well.
Feeding – late winter is when your hive is most vulnerable to starvation. As a beekeeper, you MUST do check ins by opening up your hive. During these colder months when little to nothing is blooming, you may need to give your hive a solution of sugar water.
Pollen can be added but is not necessary. Bees need carbohydrates during the winter, so sugar water is a beekeeper’s winter staple for their hives.
But how do you know if you need to feed your hive? Do the lift test. When a hive is full of honey, it’s heavy. But when the hive is running on empty, it will be light.
Do a quick wintertime test by avoiding opening the hive (and letting in the cold) by lifting the hive in the back to see how heavy or light it is. A light hive means it’s time to give your bees a winter supplement.
There are several types of feeders you could consider, including a boardman feeder, a division board, or a plastic food bag.
The simplest feeding method is with a gallon sized bag that has been filled with sugar water and placed on the top of the trays. The bag is given a small slit in the top so that bees can crawl on the top, gather food, and never have to leave the hive.
This method is good for colder regions, but you must take care when opening the hive to place a bag! The most common method is the boardman feeder that utilizes a mason jar so the beekeeper can add supplements from the top, or front without ever having to open the hive.
If your use a food supplement in your hive, make sure you check the jar or bag often during the first few days because it may need refilling several times to get the hive back up to a healthy feeding level.
If using pollen, you can purchase the powder and mix it with sugar water until dough forms, and then place it in the hive on a wax sheet. Depending on your area you may need to supplement your hives until spring blooms are back.
Because of the intense winter months some parts of the country face, you will be ensuring a healthy hive, but also a healthy colony of workers, ready for the spring.
Signs of warmth – during the cold your bees will move to the center of the hive and huddle to keep the queen alive and well.
Bees will also keep close to preserved honey or the sugar supplement to limit calories expended. It’s actually quite remarkable how the worker bees will move around the queen and shiver to create warmth. When the queen is too hot, they open airways to cool her down.
All that warmth can potentially produce condensation (aka sweating) which makes a wet hive very dangerous if not well ventilated, so be sure to check for signs of moisture during your inspection, as previously mentioned.
What’s on the to-do list – For the beekeeper your winter to-do list includes inspection for dead bees, supplement monitoring and close watch on any wind or snowstorms that may block sun or knock over the hive. The bees are busy preparing in late winter by helping the queen lay eggs for the upcoming spring reinforcements. So, this time of year is the MOST critical to monitor supplements to ensure the bees are getting enough food to build their numbers back up.
Winter hive health checklist at a glance
- Conduct a weight test by lifting hive to see if it’s time to supplement with sugar syrup
- Do daily checks on the sugar syrup levels to ensure bees have a constant food supply
- Only open the hive if you have a reason – the cold can stun tender bees
- Remember bees winter is the greatest risk for hives
- In late winter expect your colony to start growing in preparation for the spring gathering
A Healthy Hive is a Happy Hive
Beekeeping is busy work that doesn’t end with the summer season. In fact, the colder months pose the highest risk for your colony to starve or freeze, and your bees need more attention during these season’s than ever.
So, follow the guidelines provided here, and consult your local agricultural extension office and beekeeping organizations as well, and you’ll be on the right track to keep your bees happy and healthy all year long.
When Tom Harkins is not busy doing emergency repairs to his 200 year-old New England home, he tries to send all of his time gardening, home brewing, foraging, and taking care of his ever-growing flock of chickens, turkey and geese.