If you’re a chicken owner, then you know that keeping your coop clean is essential for your birds’ health and well-being. But cleaning a chicken coop can be challenging, especially if you don’t know where to start.
Well, don’t worry – I’m here to help! In this blog post, I’ll share some tips on how to clean your chicken coop like a pro.
So read on for all the info you need. (Psst – bonus points if you bookmark this page for future reference!)
Why Should I Clean My Chicken Coop?
A clean chicken coop is important for both the chickens and the people who handle them.
Chickens can carry Salmonella, which is transmitted to people when they come in contact with the chickens or their droppings. Cleaning the coop helps to prevent the spread of this disease…
In addition, a clean coop is more comfortable for the chickens and can help to prevent other illnesses. Regular cleaning also allows you to inspect the coop for damage and make any necessary repairs.
By taking the time to clean your chicken coop, you can help keep your flock healthy and reduce the risk of illness for yourself and your family.
Steps To Cleaning Your Coop
Here’s a quick guide to help you clean your chicken coop like a champ!
1. Get Your Gear Ready
This goes without saying but you to have all the right supplies on hand before you start. A dust mask and gloves are a must to prevent getting dirt or dust in your face.
You’ll also need a scoop shovel and a hose. As far as cleaning solutions go, a vinegar-based cleaner or a solution of water and bleach will work well. Once you’ve gathered everything you need, you can begin the cleaning process.
2. Take the Chickens Out
This may seem like an obvious step, but it’s actually critical for ensuring the safety of your birds.
Chickens are very curious creatures, and often like to investigate anything new that’s going on in the coop…
If you’re not careful, they may end up getting covered in cleaning products or becoming tangled in cords.
By taking them out of the equation, you avoid any potential accidents, and make the cleaning process easier.
Once the chickens are out of the way, you can start scrubbing down the coop. Let them free-range while you work – they’ll love it!
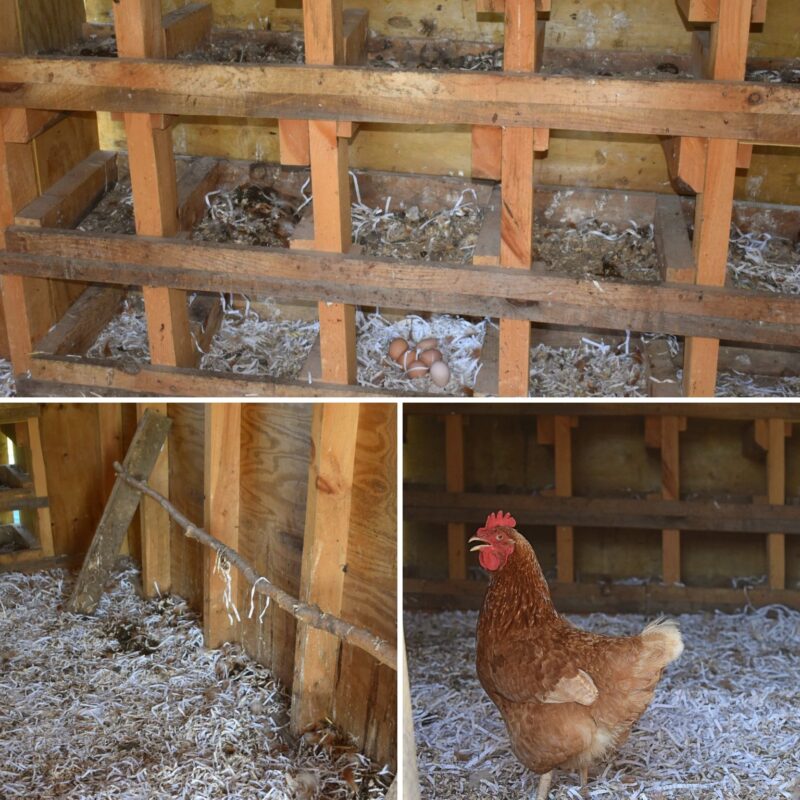
3. Remove Everything That Can Be Removed
One of the first steps in cleaning a chicken coop is to remove everything that can be removed, such as waterers, feeders, roosting bars, and nesting box trays.
This will give you a chance to clean all of the nooks and crannies, and to get rid of any built-up dirt and debris.
4. Give it a Good Scrape
Your next step is to give it a good scrape. Use a stiff brush for the nooks and crannies and a scoop shovel for the floor.
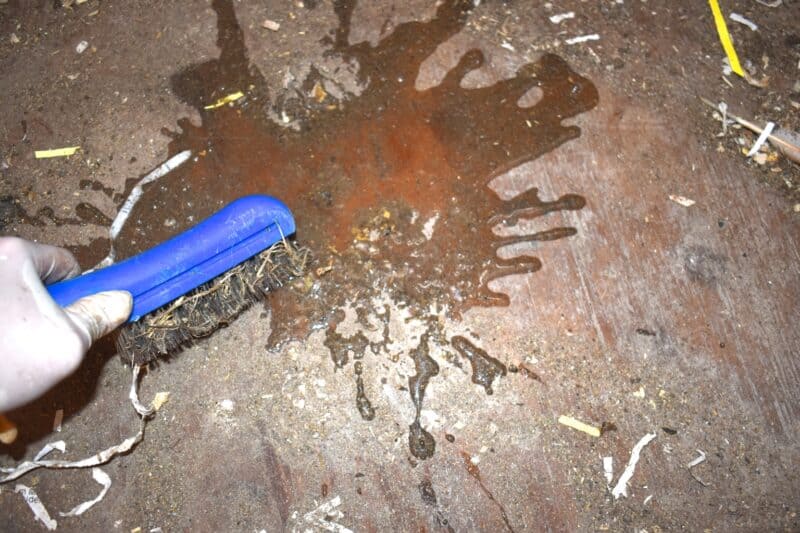
It’s also a good time to do a thorough inspection. This involves removing all the bedding and inspecting the walls and floor for any signs of damage or drafts.
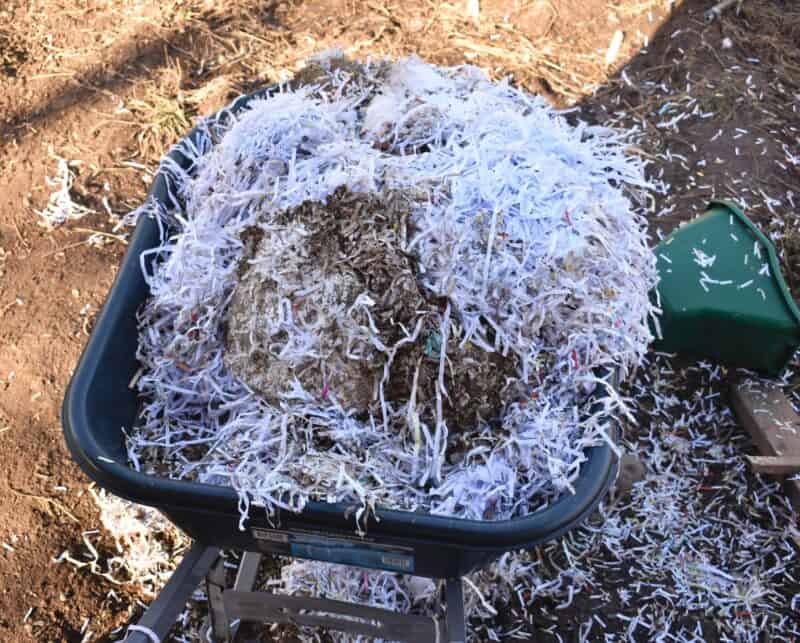
After scraping everything out, the bedding can go in the compost or if it’s deep litter, it might be ready to go right in the garden.
5. Hose it Down
Your next step is to hose down the coop. Be sure to also clean any perches or nesting boxes.
Once this is done, you can disinfect with a solution of bleach and water, or vinegar and water. This will help kill any remaining bacteria and prevent future outbreaks.
Just be sure to rinse again after applying any chemicals or cleaning products.
6. Disinfect the Nesting Boxes
While it’s important to clean the coop on a regular basis, it’s equally important to disinfect the nesting boxes.
This is where the chickens lay their eggs, and any bacteria or contaminants can easily be transferred to the eggs.
The best way to disinfect nesting boxes is to use a mixture of vinegar and water. Vinegar is a natural disinfectant that will kill any harmful bacteria, and the water will help to rinse away any dirt or debris.
Be sure to let the mixture sit for at least 10 minutes before wiping it away.
7. Scrub the Drinkers and Feeders
One of the key things to keeping a coop clean is to scrub the feeders and drinkers. These should be cleaned on a weekly basis using hot, soapy water.
Any build-up of grime should be removed to prevent the spread of disease. In addition, the drinkers and feeders should be rinsed with clean water before being refilled.
8. Scrape the Roosting Bars Clean (Or Let Them Soak)
Next, you’ll need to clean the roosting bars. You can scrape them clean with a shovel, or let them soak in a bucket of soapy water (if they can be removed – mine can’t, but many styles can).
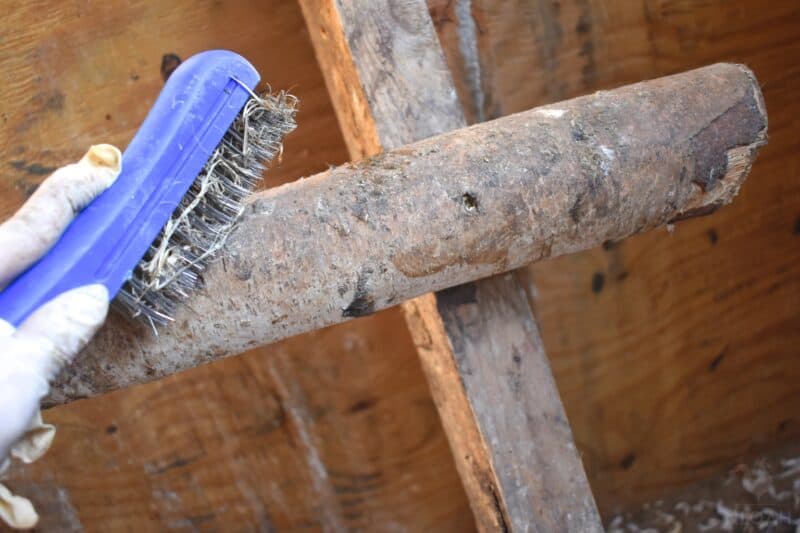
Once the roosting bars are clean, you can move on to scrubbing down the rest of the coop in one final pass.
Pay special attention to areas where chickens typically sit or sleep, as these are likely to be the dirtiest parts of the coop.
9. Let It Dry
Next is letting to let the coop dry out. The sun’s UV rays are great at killing bacteria, and the heat helps to evaporate any moisture that may be present.
In addition, this method is relatively easy to implement, as it simply requires opening the doors and windows of the coop to allow fresh air to circulate.
10. Repeat if Necessary
If the coop still has some grimy-looking areas, don’t be afraid to repeat any of the steps described above as needed!
11. Check For Anything That’s Damaged or Broken
After you’ve finished sweeping out the chicken coop, the final step is to check for anything that’s damaged or broken and mend as needed.
This step is important because it ensures that your chickens have a safe and comfortable place to live.
First, take a look at the chicken wire. If any of it is loose or damaged, repair it with some new wire. Then, check the nesting boxes.
If any of them are cracked or broken, replace them with new ones. Finally, take a look at the roosts. If they’re splintered or broken, fix them as well.
12. Move Everything Back In
After the coop is clean and dry, it’s time to move everything back in. Obviously!
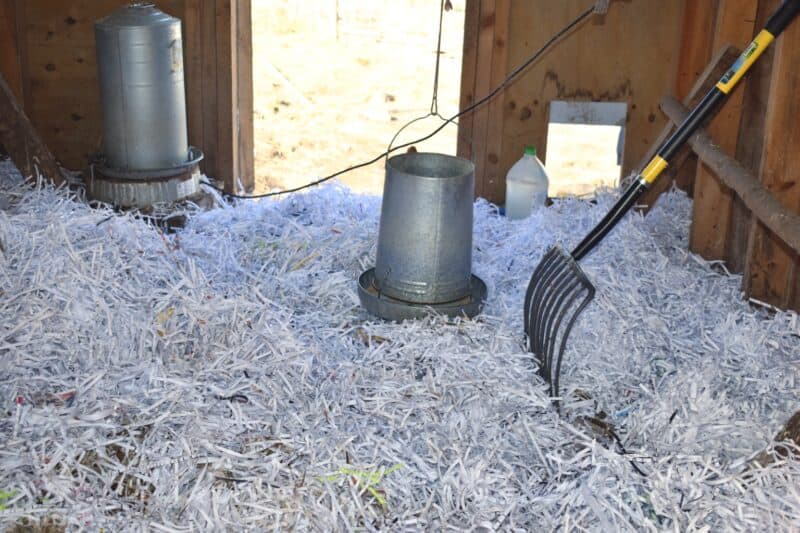
13. Add New Bedding
Last but not least, add fresh bedding on the floor for your girls. This looks MUCH better, doesn’t it:
How to Keep The Coop Clean in the Future
Here are a few tips to keep your chicken coop sparkling (okay, maybe not sparkling, but adequately!) clean in the future.
Give it a Monthly Clean
A chicken coop can quickly become dirty if you have a large number of birds. Hopefully you can fit this into your busy homesteading schedule
Use the Deep Litter Method
The deep litter method involves adding a layer of bedding material (such as straw or wood shavings) to the floor of the coop.
As the chickens walk around, they help to break down the bedding and create a composting effect. The bedding will also act as an absorbent, helping to soak up any moisture and keep the coop dry.
Over time, the bedding will break down into a rich, fertilizing mixture that can be used in your garden.
Clean With Vinegar and Water Once a Month
When cleaning with vinegar, be sure to use a ratio of one part vinegar to four parts water. For stubborn areas, you may need to increase the amount of vinegar. In addition to vinegar, water is also an important part of keeping your chicken coop clean.
Use the Tarp Method
Cleaning the coop can be a time-consuming and dirty task. One way to make the job easier is to use the tarp method.
Simply place a tarp under the roosting area, and then remove it when it’s time to clean out the coop.
The tarp will catch any dropped feathers or other debris, making it easy to sweep or hose out the coop. In addition, the tarp can be quickly removed and replaced, saving you time in the long run.
Refresh Nesting and Bedding Materials Regularly
One way to keep your coop cleaner is to replace nesting and bedding materials regularly. This means removing soiled material and replacing it with fresh straw or wood shavings.
Not only will this help to keep the coop cleaner, but it will also provide a comfortable environment for your chickens.
Use a Droppings Pan Under the Roosting Bars
A droppings pan is a great way to keep your chicken coop cleaner. By placing it under the roosting bars, you can catch the chicken droppings before they hit the ground. This will make it easier to clean the coop and keep the chickens healthy.
The pan should be made of a sturdy material that can be easily cleaned. A metal pan will work, but you can also use a plastic or rubber one.
Make sure the pan is large enough to catch all the droppings from the chickens. You may need to empty it several times a day, depending on the number of chickens in your coop.
Use Herbs for Added Freshness
Some herbs, such as lavender, rosemary, and mint, have strong aromas that can help to mask any unpleasant smells. Additionally, these can also help to repel pests, such as mites and fleas.
Put Down Some DE
Diatomaceous earth is a natural product that can be used in many different ways on the homestead. One of its most popular uses is as a chicken coop cleaner.
This is because it effectively absorbs moisture, odors, and toxins, while also killing harmful bacteria and viruses.
In addition, it also provides other benefits for chickens, such as improved digestion and stronger bones and feathers if you decide to feed it to them (feed them food-grade DE, not filter-grade, though!).
Improve Ventilation and Air Flow
Chickens are fairly clean animals, but their living quarters can quickly become unsanitary if the chicken coop is not properly ventilated.
Ammonia build-up from chicken droppings can cause respiratory problems in both chickens and humans, so it is important to ensure that there is adequate airflow in the coop.
One way to improve ventilation is to install a fan near the ceiling of the coop. Or, you can add more windows or vents, although this will also require adding screens to keep out pests.
Let Your Chickens Free-Range More Often
One way to help keep your coop cleaner is to let your chickens free range more often. When chickens are free to roam around, they naturally spread their droppings over a larger area.
This will help to keep the concentration of droppings in any one area from getting too high, making it easier to keep the coop clean.
In addition, free-ranging chickens are also more likely to eat insects and weeds, which can help to keep the coop area tidy.
How Often Should I Clean My Chicken Coop?
A chicken coop will easily get smelly and dirty if you don’t clean it on a regular basis. The frequency of cleaning will depend on the size and layout of the coop, as well as how many chickens are using it.
In general, you should provide fresh food and water every day, and clean out the bedding once a week to once a month. And, if you use the deep litter, you may be able to clean it out just once or twice a year.
Although it may not be the most pleasant task, cleaning your chicken coop is essential for the health and well-being of your chickens.
So, there you have it! Everything you need to know in order to clean your chicken coop. It may seem daunting at first, but with a little preparation and some elbow grease, you can easily get the job done.
Be sure to give your chickens plenty of fresh air and sunlight while you’re cleaning – they’ll appreciate it! And don’t forget to tell us how it goes in the comments below.

Rebekah is a high-school English teacher n New York, where she lives on a 22 acre homestead. She raises and grows chickens, bees, and veggies such as zucchini (among other things).