Sheep shearing is an important part of caring for a flock of sheep. It’s also a skill that can be relatively difficult to learn. It requires a great deal of practice and know-how.
If you want to learn how to become better at shearing sheep, you’ve come to the right place.
In this blog post, we’ll go over the basics of how to shear a sheep correctly and safely. We’ll also touch on some of the benefits of sheep shearing. Keep reading to learn more!
Why Do Sheep Need to Be Sheared?
Before I start walking you through the process of how to shear a sheep, it’s important to understand why this process needs to be done in the first place.
Let’s face it – shearing sheep is sweaty, time-consuming, dirty, and sometimes, unpleasant.
However, if you want to keep your sheep healthy, you’ve got to make it part of your yearly (or twice-yearly) routine.
Shearing is done for several reasons. If you’re selling or otherwise using the wool from your sheep, then the most obvious reason to shear is because you need the wool!
However, shearing is necessary even if you raise sheep for meat or milk.
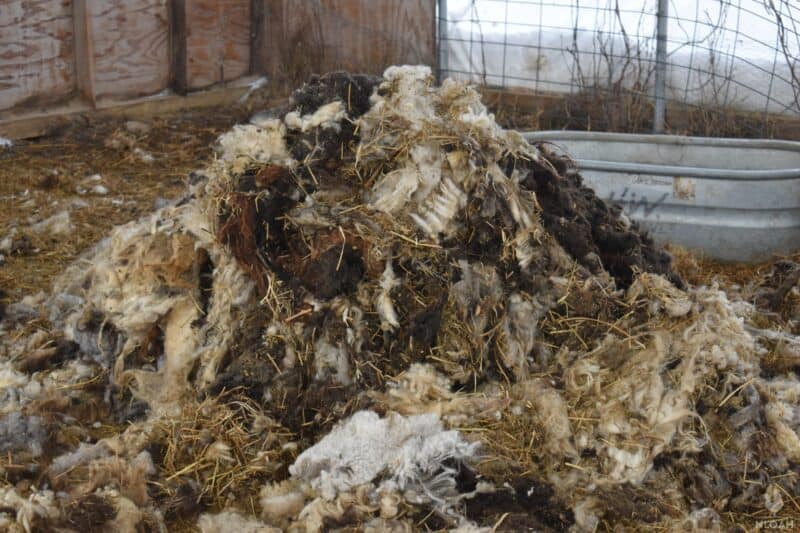
When you raise most breeds of sheep, the wool will become cumbersome, dirty, and prone to flystrike if you allow it to remain on the animal. Removing the wool is a simple matter of hygiene.
You also need to shear at certain times of the year, like around lambing. Shearing around the back end and udders of a sheep – a process known as crutching – makes it more hygienic and safer when it comes time for the ewe to lamb.
You’ll be able to see what’s going on and whether you need to provide assistance during the lambing process.
The Most obvious reason to shear is that it makes your sheep more comfortable. You need to get rid of the heavy wool, which can cause our animals to become overheated in the summer.
If your sheep aren’t sheared, they can become uncomfortable and unhealthy – dirt and manure becomes matted in the wool, attracting flies and other pests.
When Do I Need to Shear?
Most people shear their sheep once a year, but some breeds that have faster-growing wool need to be sheared twice (you might also shear twice or more per year if you plan on selling the year).
If you’re only going to shear once, do so in the early spring. This should be done before lambing season but with enough time before lambing so that you don’t stress ewes in the latest stages of pregnancy.
Shearing in this print is ideal because it will allow you to get the hot wool off the sheep before the summer weather sets in – but it’s not so early in the season that you have to worry about them getting too cold.
Shearing before lambing will help your animals stay cleaner during birth and make it easier for the lambs to find their mothers’ teats.
If you can, plan to shear the sheep about one month before they give birth.
Now, if you have sheep that have fast-growing wool (like Lincolns), you may want to shear twice per year.
Again, this is also true if you plan on selling the wool, because if you leave it on for a full year, it can become dirty and matted. You can shear this second time in the fall.
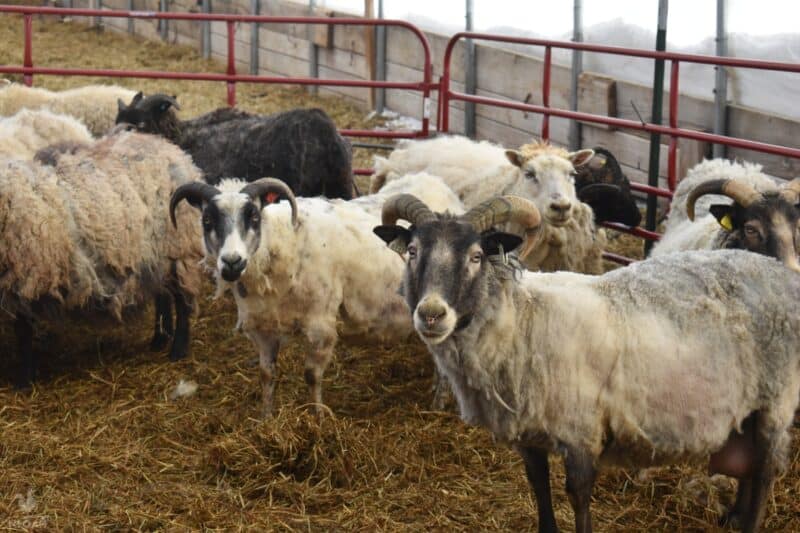
Believe it or not, some sheep don’t need to be sheared at all. These are called hair sheep. They shed their hair (just like dogs do) and don’t require any maintenance in that regard.
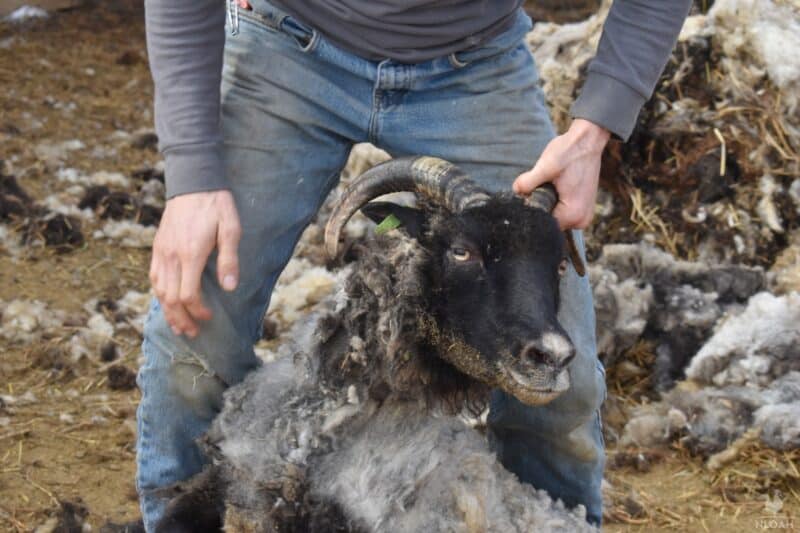
There are other breeds, like Icelandic sheep, that “roo” their wool. This means they lose it in clumps or large sheets, somewhat like a cross between wool sheep and hair sheep.
You may or may not need to shear these animals, depending on your management needs.
Can You Shear a Sheep More than Once a Year?
Sometimes. Most sheep will generally require shearing once a year.
It usually takes about this long for the wool to get long enough to be worth sharing and it’s also about this time that letting it go any farther than that will start to cause problems for the sheep, like wool binding.
However, there are some breeds of sheep out there that have particularly fast-growing wool and they might need to be sheared as much as twice a year although once every 8 to 9 months is more likely.
For instance, Icelandics, Lincoln and Cotswold sheep are all famous, or sometimes infamous, for their fast-growing fleeces. In some cases, their fleece might grow as much as 1 inch each and every month!
You’ve got to be prepared to deal with this rate of rapid growth if you own these breeds.
Should I Shear Sheep Myself?
Some people call a professional sheep shearer to help them shear their sheep. I would recommend this for people who are new to raising and shearing sheep.
While it might not seem like it, sheep shearing is incredibly hard work. You need the confidence and strength not only to hold the sheep still, but to move precisely without cutting the animal.
Sheep have lots of folds in their skin that make it tough to see where the wool starts and the skin ends.
It’s incredibly easy to injure a sheep – even with just a nick or two – and that’s never a great idea.
If you’re only shearing once per year, the wool is often matted and tough to cut through. The harder you press with the shearing clippers, the more likely you are to injure a sheep.
If you’re planning on selling the wool, it’s even more challenging – you’ll need to pull it off the animal in just a few swaths, known as “fleeces”. Knowing where to cut is extremely difficult and requires some training.
You can learn the skills necessary to shear your shape by taking a class. I can’t recommend this enough.
Attend a sheep shearing school and make sure you know what you’re doing before you attempt it for yourself.
What Equipment Do I Need to Shear Sheep?
Don’t skimp on quality when you’re preparing to shear your sheep. You really want to have the best of the best equipment.
Invest in some quality electric shears. The comb, cutters, and handpiece will cost you quite a bit – up to $500 – but don’t settle for a bargain pair.
You want shears that have a higher number of teeth on the comb, as they’ll cut closer to the skin.
These are electric-powered, so you’ll need a power outlet in the barn or wherever it is you plan on shearing your sheep.
Each year, before you start shearing, you’ll need to make sure the cutters are still sharp on your shearer.
Dull cutters are difficult to use and could injure both you and the sheep. You can send your cutters out for sharpening and it will only cost a few dollars.
If you need to trim just a few odds and ends of wool here and there, you may also want to invest in a set of hand shears.
These are more laborious to use but are more convenient if you’re only doing a little cutting.
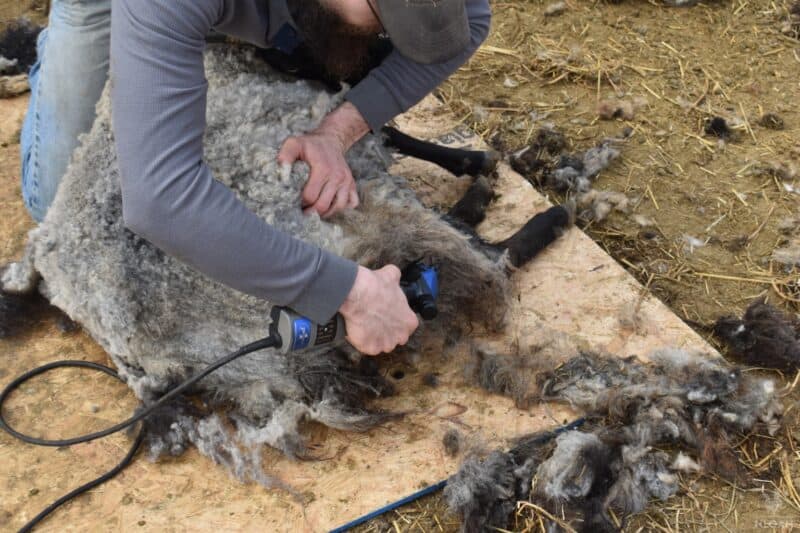
We always trim hooves, administer CDT boosters, and deworm (if needed) our sheep on the same day we shear.
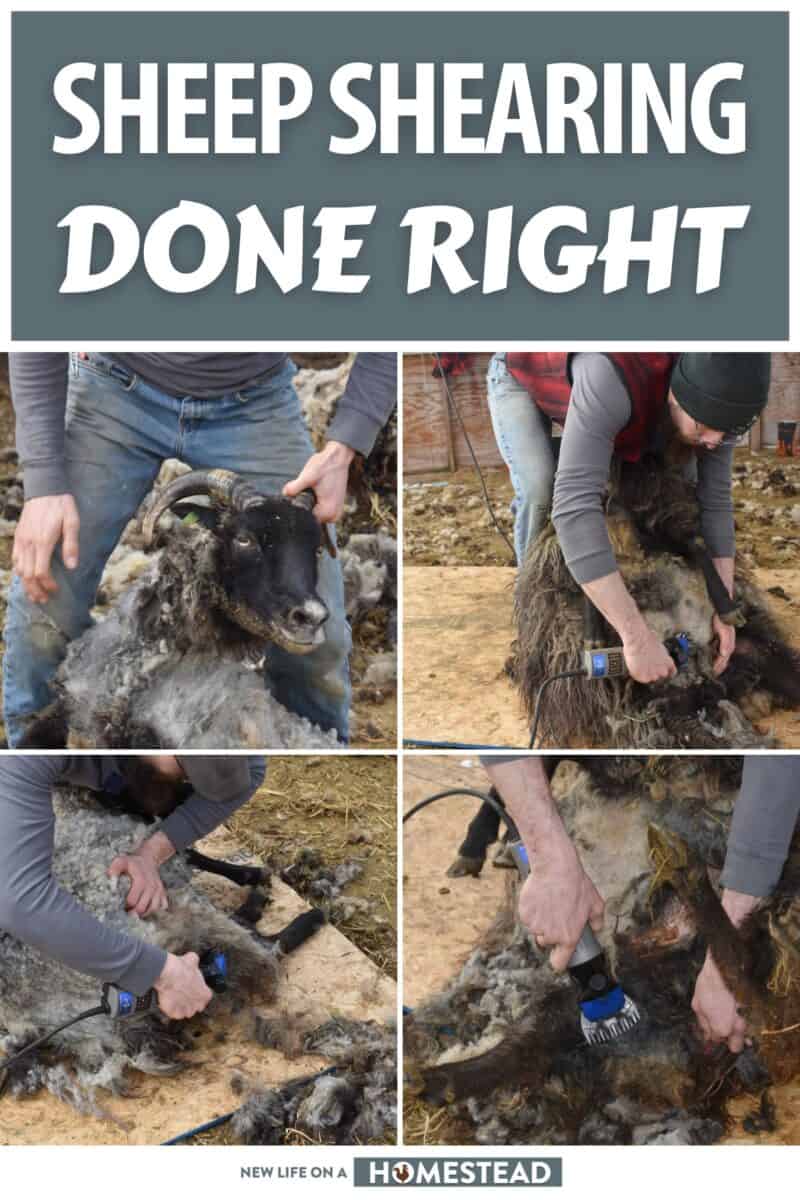
Because we have Icelandic sheep, we aren’t doing a full shear – just crutching around the teats and back end – so it isn’t too stressful to do all of this in one day.
If you are doing a full shear, it’s okay to trim hooves, but you may want to hold off on the medications to make sure they’re effective and that you don’t add even more stress on your sheep.
Sheep Shearing: How To Do It Right!
Again, I recommend having a professional sheep shearer come to visit so you can watch them work the first few times the sheep are sheared.
This will give you an idea of what needs to be done. Don’t dive into shearing without having some practice first!
Once you do have a solid grasp of what you’re doing, though, these are the steps you will follow.
1. Herd and Corral the Sheep
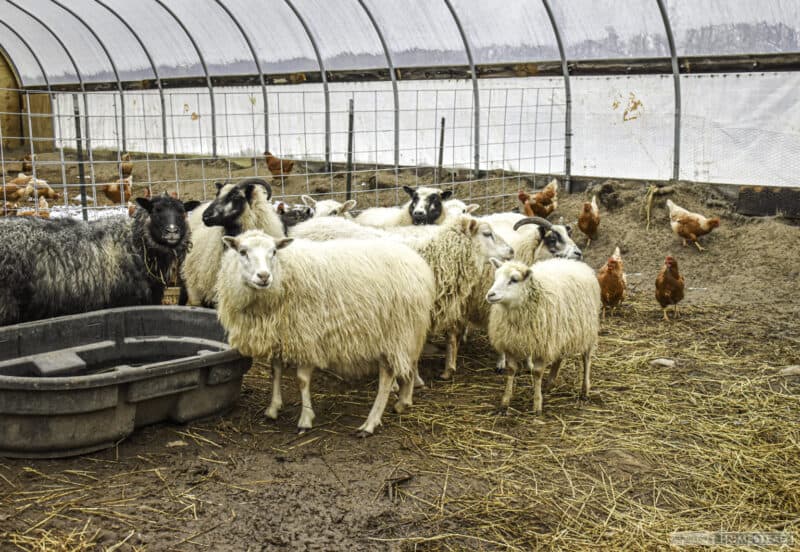
Your first step is to get your sheep corralled where they need to be. Ideally a few days before you shear, get the sheep into a pen and make sure they aren’t allowed out into the rain.
You want to keep them as clean and dry as possible. Get them all herded indoors a few days before you plan to shear.
You can’t shear wet sheep – they could get an electric shock from the shears. Plus, wet wool can’t be stored and sold reliably.
Consider fasting your sheep for a day before you shear. This will reduce the waste they produce (minimizing the mess) and also reduces their discomfort when shearing, since they’ll be on their rump and in an awkward position most of the time.
While you’re getting the sheep ready for the big day, you should also take the time to get your area prepared.
You’ll want to practice good biosecurity measures when you’re shearing so you don’t contaminate your sheep with any diseases.
It is also a good idea to separate sheep out by fiber quality, if you plan on doing anything with the wool.
That way, you can keep similar wool in similar areas so there’s no mixing or contamination.
When choosing your shearing location, pick a spot that’s clean and dry. You can work outside if there’s a shaded spot or even in the barn, if you have enough room.
You’ll need an electrical outlet to plug in your clippers, so keep that in mind.
You can use an extension cord but you don’t want to have to drag it too far, as this could pose a tripping hazard while you are working.
If you decide to shear outside, be mindful of the temperatures. If it’s a cool day, you don’t have much to worry about, but if it’s hot and sunny, keep a close eye on your animals to make sure that they aren’t suffering from heat stress.
If you can, choose a location that’s away from other distractions like other livestock, dogs, or children.
Shearing requires a lot of focused attention and the sheep need to be kept as calm as possible. Keep everyone out of the way!
Put together a few boxes or bags to collect the wool. When you’re planning for shearing day, it is helpful to have as many hands on deck as possible.
Recruit at least three or four other helpers to help you corral animals, position sheep, shear, handle wool, prepare food for the helpers, and so on.
When you’re ready to start working with the sheep, I recommend keeping any animals with known diseases or injuries separate from the rest of the flock.
For example, if you have any with foot rot or foot scald, you’ll want to shear them in a separate location and only if you sterilize your shears.
This is extremely contagious and you don’t want to run the risk of making other animals sick.
2. Get Your Sheep Into Position
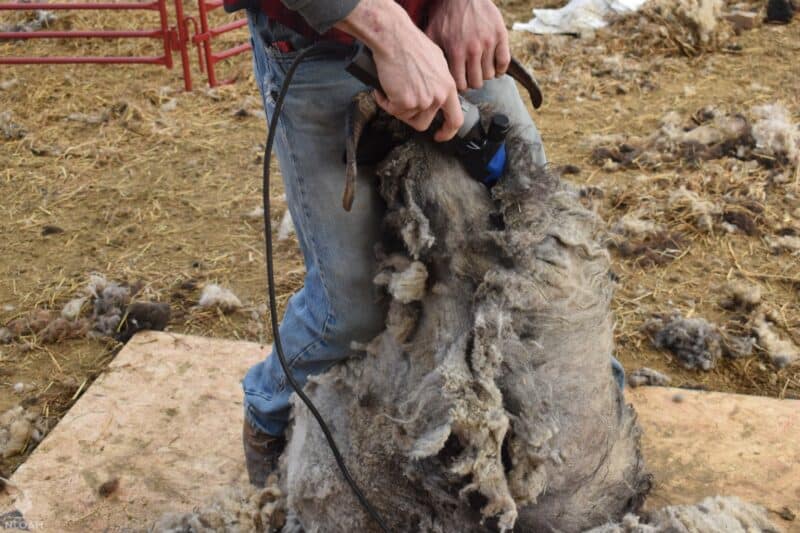
When you’re ready to get started, roll the sheep into position. There are a few ways to do this, but I prefer the method known as “rumping”.
This involves tipping the sheep onto her back and then propping her body between your knees for support.
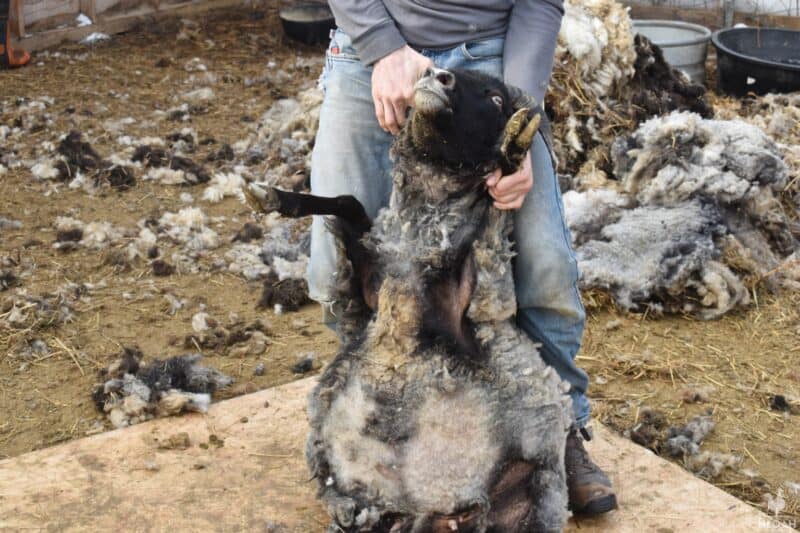
The belly will be exposed with the four legs facing out. You can turn her head to the side so that she doesn’t get leverage to move the rest of her body.
3. Shear the Belly First
Most shearers start by shearing the belly. That’s because this is the dirtiest and won’t hold any value for selling – so you’ll be discarding it.

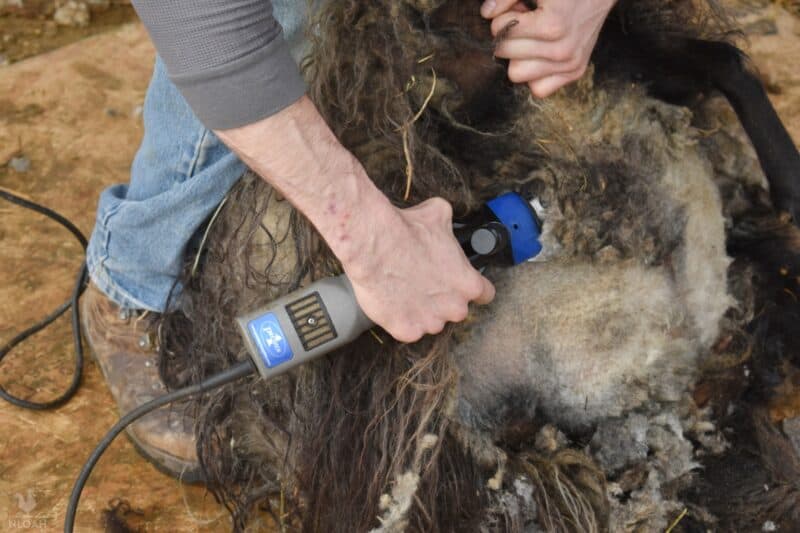
Make long, confident strokes (also known as “blows” in the sheep shearing world).
Shear the wool from the breastbone to the open flank. Be mindful of the teats while you’re shearing – these are easy to miss.
The first blow should be on the right and the second on the left. Then shear off the wool in between.
When you shear, try to make strong, long, confident blows. If you second guess yourself or get shaky with the shears, it’s a recipe for disaster – you could make a mistake and cut the sheep.
Try to avoid making second cuts whenever possible, as they can’t be included in the rolled fleece and take more time.
4. Do the Crotch and Hind Legs
This is my least favorite part of the sheep to shear, since it involves some technical work around the sensitive bits of the animal!
To do this, you’ll lean forward and bring your shears along the inside of the right leg.
Pass the shears across to remove the wool around the crotch. You may have to do this several times.

Then you can do the rest of the inside of the right leg. Again, watch the teats.
Then, switch positions and shear the left hind leg. You’ll also do the tail.
You’ll need to reposition your knees so that your right knee is in front of the brisket and the right foreleg is between your legs. This will expose her left side.
Start at the toe and work your way up to sheer the left hind leg. You’ll finish on the near part of the backbone.
You may have to move your leg back a few inches to get to the tail. Again, shearing the tail might take a few separate passes.
Once you’re in this position, you should have a pretty clean shot at the sheep’s head.
You can shear the top of the fleece from the sheep’s head, if it’s overgrown, or leave it be. Some breeds of sheep don’t accumulate a lot of wool here, so it’s up to you.
5. Shear the Neck, Chin, and Chest
You’ll need to switch positions again for this next step.
Put your feet between the hind legs with your left foot at the base of the spine. Position the sheep’s body firmly between your knees and use your left hand to grasp the sheep beneath the chin.
Stretch her head back, then bring your clippers toward the neck, finishing the strike just below the chin.
A lot of shearers love this part of the shearing process – it’s incredibly satisfying since most of the fleece will come loose at this point. It’s called “unzipping” the fleece.
You’re not done yet, though! Keep making passes in the form of long parallel blows along the left side of the neck.
End beneath the eye and then beneath the ear on the other side. Be careful shearing around the ear so you don’t nick it.
6. Shear the Shoulders and Back
Shift your weight and maneuver the sheep so you have better access to her shoulder.
The skin on these shoulders is tough to navigate around since it can be pretty wrinkled. Therefore, you’ll stn to use your hand to pull the skin taught.
Start with the left knee, then shear up toward the left shoulder. You should only need a couple of passes to do this.
Switch position so that the sheep is lying on her right side, along your shin. You’ll want to keep one foot between her hind legs and one beneath her shoulder as you do this.
You’ll then make long blows all the way up the sheep’s back. Do this for the entirety of the left side, then switch positions.
Just swing your right leg around to be upright again, with the sheep’s nose between your knees.
Shear along the sheep’s head, shoulders, and neck on the right side. It will take a few blows. Keep the skin taut by holding it back with your fingers.
After you’ve created the neck and shoulders, you can clean up the forelegs.
7. Shear the Right Hindquarter and Leg
The final step involves shearing the wool from the right hindquarters and leg.
Shift your right foot forward so that you can apply pressure to the right flank with your left hand. It will force the sheep to keep her leg straight and stretch the skin for you.
Shear the final few blows, working from the flank to the hind leg.
8. Roll Up the Fleece
If you’re discarding the wool, you can skip this last step. Get rid of the wool and make sure your sheep have plenty of food and water. That’s all there is to it!
However, if you plan on using or selling the fleece, you need to ski and roll it. Skirting involves removing any dirty wool that’s not valuable for selling.
To do this, lay out the fleece with the fleshy side down on a flat table.
Cut away any dirty wool, tags, or mats. Roll up the fleece by folding the long sides toward the center, then from one end to the other.
Don’t just toss the fleece in a corner. Make sure you bring it indoors and get it in a clean, dry location so your efforts aren’t ruined.
Sheep Shearing: An Essential Part of Raising Sheep
The most important tip for shearing a sheep? Know your sheep!
Sheep don’t like being sheared, but despite what some people may believe, shearing does not hurt a sheep – and it’s actually beneficial to their health.
However, for you to be successful in shearing, you’ve really got to understand what makes your unique sheep unique!
Is your sheep fat or skinny? How many teats does she have (some have two, others have four)? How much lanolin does she produce?
All of these factors are good to know, since it determines the techniques you’ll use (and how much time it will take for you) to shear your sheep.
Another detail that’s important to remember is that healthy sheep will produce lanolin that lubricates the blades on your shears, making it easier for the wool to be removed.
If your sheep aren’t as healthy, the lanolin will remain thick and can clog your shears.
In any event, it’s important to remember to take the time to pause and oil your shearers. We lubricate our clippers after every sheep or every other sheep to make sure they don’t overheat.
Sheep shearing is an important process when it comes to caring for your sheep’s health.
Whether you plan on selling or using the wool you’ve sheared from your sheep or not, you need to know how to shear them correctly so that you can ensure the safety of your animals.
Not only that, but if you plan on selling the wool, you need to make sure you’re shearing properly to ensure that the wool is preserved.
Whether you’re new to sheep shearing or just needed a refresher, hopefully, this guide has been helpful in making sure you don’t get fleeced!

Rebekah is a high-school English teacher n New York, where she lives on a 22 acre homestead. She raises and grows chickens, bees, and veggies such as zucchini (among other things).