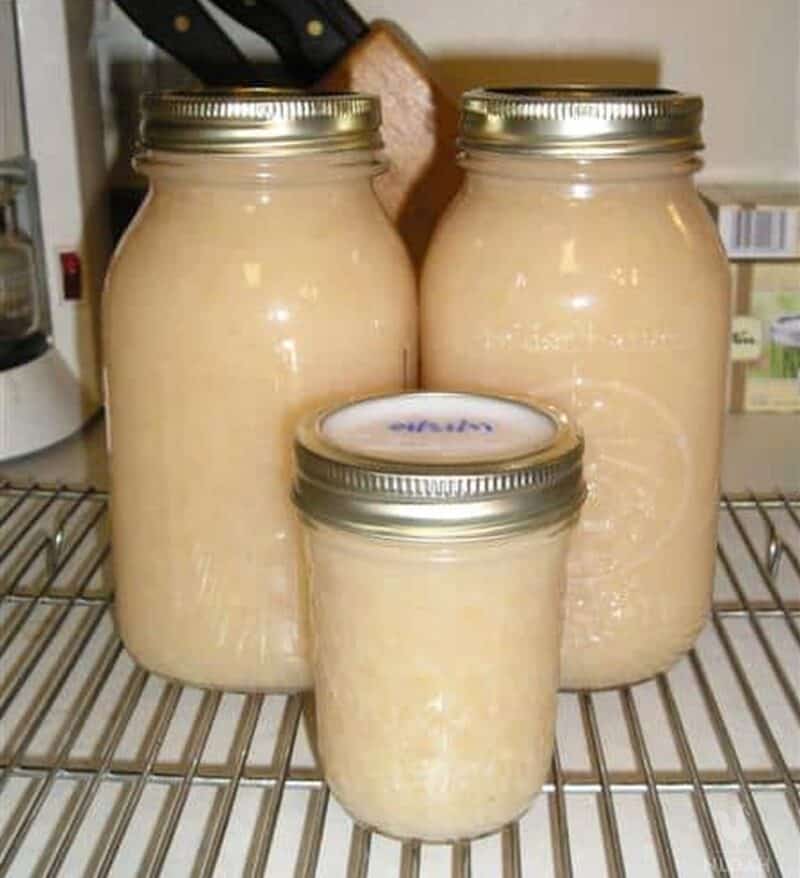
Making Pear Sauce is a great alternative to applesauce when you have an abundance of pears, and tastes just as sweet even with no sugar added! My guys actually prefer pear sauce to apple sauce, so I try to make a lot of it.
The procedure is similar to canning sliced pears, with just a couple of key differences. Here’s my favorite pear sauce canning recipe. You may sweeten it to taste, though I never need to add any sugar.
What Kind of Pears to Use For Pear Sauce?
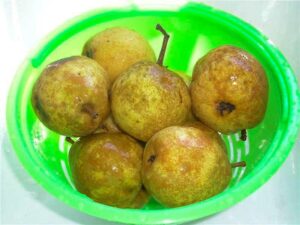
When it comes to pear sauce, Bartlett pears are the perfect type of fruit to use. They are naturally sweet and have a smooth texture that makes them easy to puree. Plus, Bartlett pears are widely available and relatively inexpensive, so you can make pear sauce without breaking the bank.
While bartlett pears are the ideal choice for pear sauce, you can also use other types of pears with good results.
Just keep in mind that some varieties of pears, such as bosc or d’Anjou, can be a bit tart, so you may need to add a little extra sugar to the recipe. Ultimately, the best pear sauce is made with the fruit that you enjoy eating the most.
No matter the type of pears you use, know that pears are a great fruit for canning because they are high in pectin, which helps the sauce to thicken and set up properly.
In addition, pears have a delicate flavor that is enhanced by the canning process. If you are using fresh pears, be sure to select ones that are ripe but still firm.
Avoid pears that are bruised or overripe, as they will not hold up well during the canning process.
Once you have your pears, give them a good wash and then peel and core them.
Can You Make Any Modifications to This Recipe?
Pear sauce is a great place to start if you’re new to canning, as it only requires a few ingredients, and is relatively forgiving if you make a mistake.
The most important thing to remember when making pear sauce is not to alter the ratio of lemon juice to pears, as this can affect the safety of the canned product.
Other than that, feel free to experiment with different spices and flavorings. Cinnamon, ginger, and nutmeg are all great choices for pear sauce.
Cleaning The Jars
You can use pints or quarts, wide mouth or regular, whatever suits you best. I can pear sauce in quart jars. My four kids will kill a whole quart of sauce in a single snack break, so it’s best for me to save the lids and go with the bigger sized jar.
You can also wash the jars by hand, and then submerge the jars into a large pot of boiling water to keep hot and sanitized.
Sometimes I will also put clean jars into a hot oven (set at around 250 F / 121 C, then turn off) and let them sit in there to keep hot until I’m ready to use them.
How Many Pears Do You Need to Make Canned Pear Sauce?
A bushel of pears weighs about 50 pounds and will yield between 20 and 24 quarts of canned pear sauce. You will need 3 pounds of pears per quart jar, so a full canner load of 7 quart jars would be 21 pounds.
Pear Sauce Recipe
Equipment
- 1 stock pot large
- Canning jars
- canning lids
- Jar lifter
- lid lifter
- Funnel
- knife
- peeler optional
- melon scooper optional
- melon scooper or food mill
Ingredients
- 3 lbs. pears or 21 lbs. for a full canner load
- 2 tbsp. lemon juice
- 1 tsp vanilla extract
- ½ cup water
Instructions
- First, wash your pears.
- Then peel the pears.
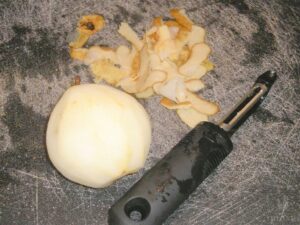
- Remove any bad spots from the fruit.

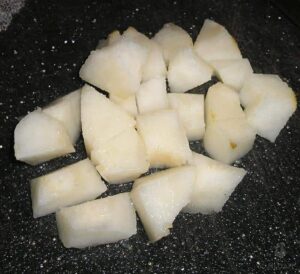
- Slice, cut out the hard pit section, then chop into small-ish pieces.
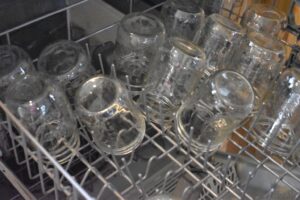
- In the meantime, make sure you have some mason jars cleaned, sanitized and HOT. The easiest way to do this is to run them through the dishwasher.
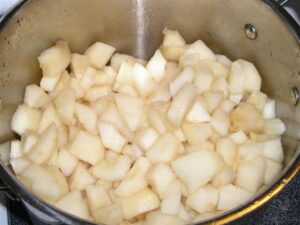
- Once you have all of your pears peeled and cut up, put them into a large pot along with the vanilla.Fill it with just enough water to keep the pears from scorching (an inch or so in the bottom of the pot), then cover and cook over medium or medium/low heat, or a simmer, stirring occasionally, until the pears are thoroughly soft.
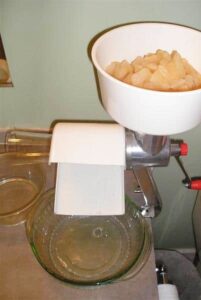
- The next step is to puree the pears. I use a food strainer but you could also use an immersion blender.
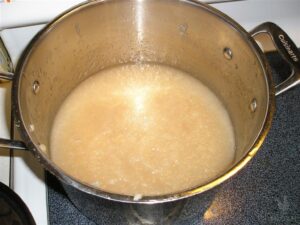
- Return the pureed pears to the pot. Taste to see if you need to add any sugar, though like I said I never have to sweeten it at all. Bring the pear sauce to a gentle boil.
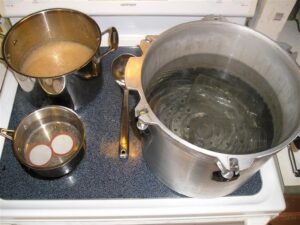
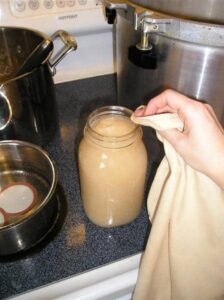
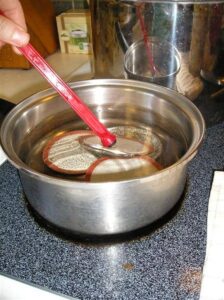
- While that’s heating, have your lids simmering in a small pot of water (not boiling!). You can see I have some jars in boiling water here as well, waiting to be used.
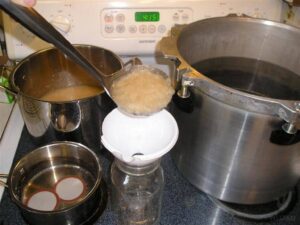
- Once the pear sauce reaches a light boil, continue boiling as you fill the hot jars one at a time. Stir the sauce every now and then to prevent burning.
- Start filling the jars with a ladle, and leave 1/2 inch headspace (fill the jars to within 1/2″ from the rim). After adding the pears, add the lemon juice and hot water.
- Use a wet rag to wipe the rim of the jar clean. It’s important to wipe rims to make sure the pear mixture didn’t get all over the outside of the jar, which can affect canning safety.I usually dip a clean paper towel in the simmering lid water and run it over the rim after wiping, just to make sure there isn’t anything sticky still there.
- Remove any air bubbles.
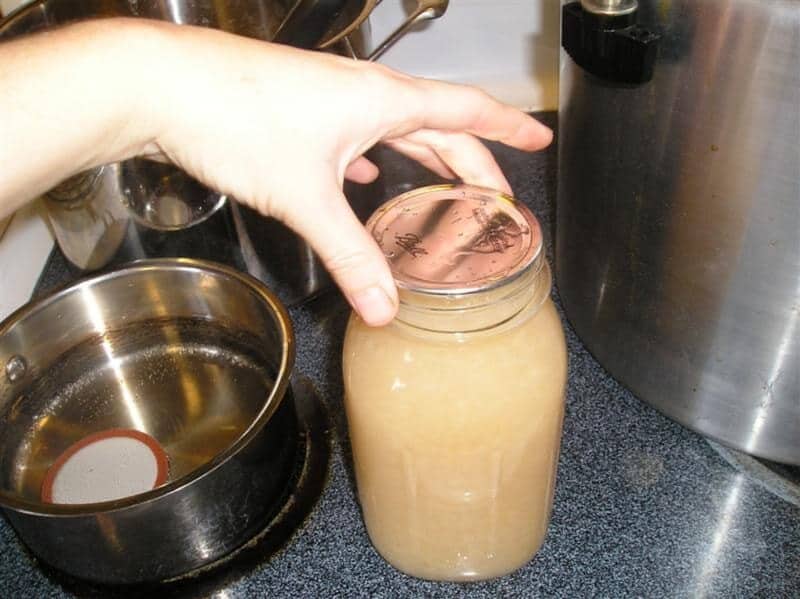
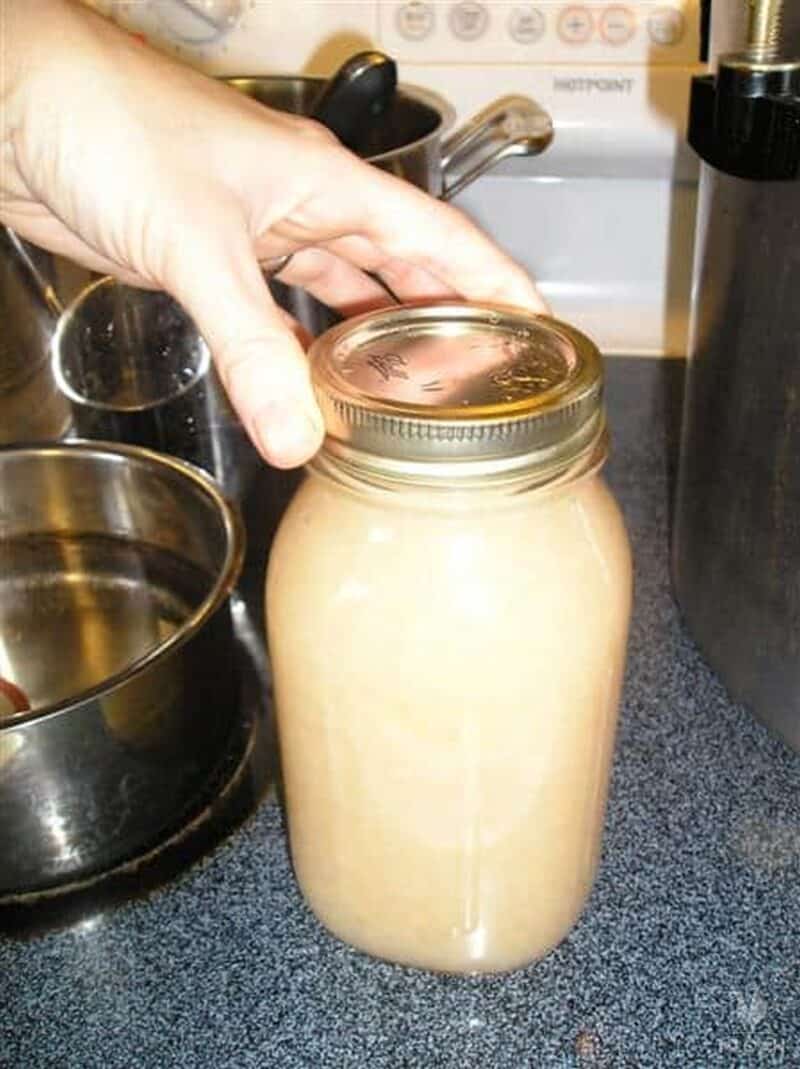
- Now you’re ready to put the lid on. Using a lid lifter, retrieve a hot lid from the simmering water.
- Next, place the lid on the jar…
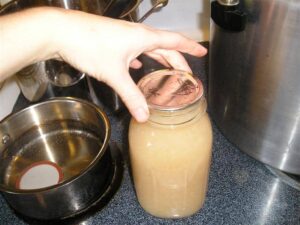
- Now screw on a clean ring to tighten down the lid…

- Once all of your jars are filled and sealed, place them in a water canner . Fill the canner with enough water to cover the jars with 1-2″ of water. Put the lid on the canner, and bring to a steady rolling boil.
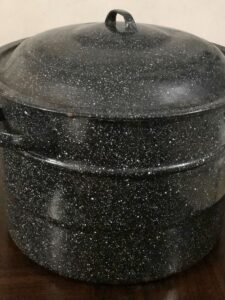
- Continue to process pints or quarts at a steady boil for a processing time of 20 minutes. Once the time is up, use a jar lifter to remove the jars from the water bath canner.
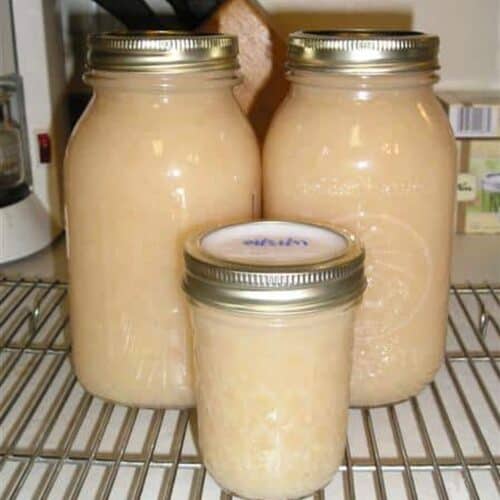
- Allow the jars to cool overnight, preferably on a rack.
- After about 24 hours, remove the rings from the jars and try to pry the lids off with your fingers. If they do not come off, they’ve sealed and are safe to store.If a lid does come off you can either put the jar in the fridge to be eaten soon, or if you really want to store it up, you can pour the sauce back into a pot and put it over again in a new jar, with a new lid.
Notes
- You can save the peels and cores (those without insect damage or bad spots) to use to make pear jelly!
Don’t forget to write the date and contents on the lid with a sharpie. Pear Sauce will stay fresh for up to a year before the taste, texture and nutrients begin to diminish. That is not to say they won’t be safe to eat, they just won’t be as good as they were within that first year.
Before putting your jars up, remove the rings from the lids. Over time, these can corrode and become hard to remove, so it’s best to store jars without them.
If at any point a lid unseals on its own (not likely to happen, but possible), the contents have been compromised and are no longer safe to eat.
Could You Make This Pear Mixture in a Pressure Canner?
While you could make pear sauce in a pressure canner, it’s not recommended. The high pressure and heat can cause the pears to become mushy, and they may also froth and block the canner vent. If you’re looking for the best results, stick to water-bath canning.
What Else Can You Do With Extra Pears?
Not sold on pear sauce – or looking for other recipe ideas?
If you find yourself with a surplus of pears, one option is to make pear butter. This dish is similar to apple butter, but it has a unique flavor that is perfect for the fall season. To make pear butter, simply simmer pears in water until they are soft, then puree them and add sugar and spice to taste. Once you’ve prepared your pear butter, it can be enjoyed on toast, used as a filling for pies or pastries, or simply eaten on its own as a delicious treat.
Other ideas for using up extra pears include baking them into pies or cobblers, using them as a topping for yogurt or ice cream, or cooking them down into a jam or preserves. The possibilities are endless, so get creative and enjoy your extra pears in new and delicious ways!
How to Use Your Homemade Pear Sauce
There are many ways to enjoy your homemade pear sauce. Here are a few ideas to get you started:
- Serve it as a dip with crackers or veggie sticks.
- Stir it into oatmeal or yogurt.
- Use it as a topping for pancakes, waffles, or ice cream.
- Add it to PB&J sandwiches.
- Spread it on toast or muffins.
- Mix it into cake or cookie batter for a fruity twist.
- Enjoy it as a healthy snack straight from the spoon!
FAQ
The answer is that it depends on the recipe. Some recipes will call for lemon juice, while others won’t. In most cases, like with this recipe, adding lemon juice is a smart choice because it will ensure that the pear sauce is adequately acidic for canning.
Pears can be stored in a cool, dark place such as a cellar or pantry. If you have ripe pears, they can be placed in a plastic bag with a little moisture, such as a damp paper towel, and stored in the refrigerator.
Pears will continue to ripen after they are picked, so if you want to enjoy them at their peak of sweetness, it is best to wait a few days before eating them. Once pears are ripe, they can be stored in the freezer for up to six months or they can be canned.
Canning pears with the skin still intact can help to retain the fruit’s flavor and nutrients. The key is to use a light hand when peeling the pears.
A thin layer of skin will help to protect the fruit from bruising during the canning process. When making homemade pear sauce, it’s recommended that you peel the pears for a better texture, however.
Canning pears is a relatively simple process, and they can be canned in either water bath or pressure canner. Water bath canning is the most common method and is preferred by most home canning recipes.
Have you ever tried pear sauce? Have a tip to share?

A city girl learning to homestead on an acre of land in the country. Wife and homeschooling mother of four. Enjoying life, and everything that has to do with self sufficient living.
I am curious how other people do with the suggested pear to lemon juice ratio. I found that even adding half the required amount made a sauce that tasted overpoweringly of lemon, rather than pear. Adding some sugar helped counteract this, but could still taste the difference between my sugary lemon pear sauce in comparison to the sweet goodness of canned pear sauces in the past that did not taste of sugar and lemon!
So are you supposed to put half a cup of water in the jar with the lemon juice after you have already measured out the head space…? I’m confused on that part? Why are we adding water to the jar?
Your don’t add water to jars,, once you shopped pears add about 1/2 cup water 2 tsp vainilla 4 tbsp lemon juice , and cook and simmer for 20
minutes , then used blender or immersion blender, then add to hot jars, is very delicious and so easy! Read all the instructions at the top!
Maybe I missed it…but at what point do you add the vanilla? Doesn’t seem to say in the instructions. Thanks
You mention vanilla as an ingredient but don’t mention in the directions when to add it. Please advise.
Sorry about that, I updated the instructions.
I fixed it, thanks!
I used my apple peeler and corer without the peeler to prepare my pears. After they were soft I used an immersion blender to blend them. It made pear sauce incredibly easy.
Is peeling the pears essential? I’m doing a full canner load and my pears are quite small. I just don’t have the extra time for all that peeling, plus I do prefer to get the extra fiber from the skin. Would this make the recipe unsafe in any way?
Having made a great batch of applesauce last year without peeling them–the skins vanished while cooking–I tried the same with pears. When tasting the pear sauce, however, I felt like I had a mouth full of sand. Would peeling them this year produce a better result?
I steam cut pieces of pear with skin-on (no seeds), using a large collapsible steam basket, let cool and put them through my Kitchen Aid fruit mill. I run the skins through one more time. I cook the water in the pot down to about half to make a thick or thin syrup to sweeten the sauce, and then can the sauce.
What is the purpose of peeling the pears? With the food mill you have doesn’t it take the skins off?
The food mill takes all skins and seeds.
That is what I’ve always done. Cuts down on processing time. I do cut off stems and ends. I cut each pear in half to make sure no critters. Makes the best sauce, eaten hot with ice cream or cold with fresh whipped cream!
The mill does handle all the peels and seeds, but you have to clean it more often than if most of the pulpy peels are removed first. I have a Foley Food Mill and the holes get plugged up so you have to clean it as you run a lot through.
When making a large batch you might want to divide it in half or thirds. This allows you to make regular, cinnamon flavored or add a hint of ginger to the third batch. Good luck and I hope you like my suggestions.
This tutorial is superb! You covered every detail clearly.
I would like to pressure can my apple pear sauce instead of BWB. Do i process for the same amount of time as apple sauce (5lbs for 10 min for quarts)?
If you put the pears in boiling water for a minute or so and then ice water (just like tomatoes) the skins come right off. Actually, I have used just cold water and had success. This is sooooooo much easier the peeling.
I have some pears that are already soft – can I just puree them and cook the puree?
Of course, the ripest pears are the sweetest.
I want to share a variation of this that I have made several batches this week of. I am currently canning the last batch and making fruit leather out of what’s left. I cut pears (leaving the peel on)in half and half again, cut off the core, seeds and stem. Filled that crock pot as full as I could. Added a bit apple juice as a liquid. Cooked on high for 3-4 hours. Cooled slightly and scooped into the vita-mix on high for about 45 seconds, poured back into crock pot and added cinnamon and pumpkin pie spice. Followed your canning recipe. Leaving the skins on made a huge difference in prep time and more of the vitamins. They were all puréed and is amazing how good it tastes.
Wonderful! Thank you for sharing that with us, Kelley!
That sounds good. I would like to avoid peeling my fruit as well. I just never liked the graininess of the pear peels!
I also have a Vitamix and it would probably blend those skins up really well!
Thank you for the recipe!
My pear sauce is not at all thick- my daughter had hoped to use it for baby food but it is to runny. I did not add additional water when cooking them. Does it thicken as it sets in the jars?
It might have needed to cook down a little more? It will still taste good, even if it’s a little runny.
Could you add a thickener like Xanthum Gum? You can with jelly.
Thicken with Clear Gel. It is made specifically for thickening and canning at a high heat.
If it isn’t as thick as you’d like, try putting it in a blender when you want to feed it to baby. Before I canned mine, I blended it and I had to keep adding liquid back in because it was so thick. Also, letting it sit in the jars for a bit might allow it to separate and you could drain off some of the juice when you open them. Good luck! Pears make awesome baby food! 🙂
Quick question about your water bath canner. I see that you are using it on a glass cooktop. I just got mine and have a glass cooktop as well. When reading the directions, it mentioned not to use it on a glass cooktop. Have you ever had any problems?
As long as you are careful not to drop or slide the canner on your flat top stove, you shouldn’t have any trouble. I’ve been doing it for 7 years now, no problems ever.
I don’t know if I might have missed something but I didn’t read anywhere if I drain the cooked pears before I puree. I’m in the process of cooking my pear chunks to soften but don’t know if I’m suppose to drain the water or use it to puree before I cook it. Well I hope to hear from you. Thank you for the great recipe.
Vee,
If there’s a lot of water I’d drain it a little. But some liquid will help the pears puree better. Good luck!
Can I make pear sauce from the sliced pears I canned last year and can it? Thanks!
First time making pearsauce. Can I cook them down to the sauce and make tomorrow.
Yes. Just refrigerate overnight. 🙂
I love this recipe! This was my first time canning alone and only my second ever! I was given a bunch of pears and wasn’t sure what to do with them. I was searching on Pinterest to find recipes for canning pears and I saw your recipe and “how-to” on pear sauce. I am making it right now! Thank you for the pictures. I can go step by step and know that what I’m doing is correct.
Enjoy, Jessie!
When time is short, how about canning pears with the peels on? How about adding cinnamon candy hearts(you see them around Valentine’s day) to each jar. It adds a yummy taste and festive color.
I did add hot cinnamon candies to a small batch because my granddaughter wanted it roast red. Super yummy and she’ll be so happy!
Thank you for the canning tips as well as the recipe…extremely helpful!
Thank you so much for this!! Your instructions were very easy to follow and it turned out delicious:) I added cinnamon, nutmeg and cloves right before the final boil and it tastes heavenly! I am very excited to exchange this sugar-free sauce for the applesauce the kids normally request. Thanks again!
If you have a lot of pears on hand, you can make mincemeat for pies.
Peel & core pears, then cut up into chunky pieces. Place in large pot. Add about a cup of water and squeeze a little lemon juice onto them. Then, add sugar or honey, plus cinnamon, cloves, ginger and allspice to taste. Throw in some raisins and/or currants.
Simmer on low heat until pears are thoroughly cooked – mushy, but still chunky. Stir occasionally to prevent sticking. While still hot, place into hot, sterilized quart jars and seal.
For the pies – Simply dump a jar of mincemeat into a pastry pie shell and bake until crust is golden.
Being an exhausted working wife, i peel, quarter and core my fruits, apples or pears then let them cook on low in the crockpot for the day. When i return home i mash then process like above. Seems to give a deeper flavor. Happy Canning.
I like my apple or pear sauce chunky, so I use a potato masher. It takes longer, but is worth it.
In answer to Robin’s comment, I’ve made pear sauce for many years and thought I had a brilliant idea to strain out the seeds and skins with my Victorio strainer, like I do for applesauce. The skins were too thin to be caught by the strainer and ended up making brown bits all over the sauce. Maybe it depends on the type of pear and how thick the skins are. I get my pears from my Dad’s tree and I’m not sure of the variety, but they are very sweet–and thin-skinned. : )
Er…won’t your food mill separate out the peels and seeds? I just chop the pears coarsely, cook, and run them through. MUCH faster than peeling each pear!
New grandbaby arriving soon, so I made applesauce in tiny jars yesterday. Then this morning I stumbled onto your site. Needless to say, I had a case of pear sauce in tiny jars before I knew it. To tell you honestly, I had never heard or tasted this sauce before. You got me hooked on it now! Thank-you so much!!
So glad you tried it and love it, Diane. Congratulations on your new grandbaby!!!
Kendra, I made the pear sauce and it tasted wonderful. the next day though some of the jars had turned slightly brown on the very top layer of the sauce. Is this anything to worry about?
Virginia,
As long as you followed the directions, and canned for the correct amount of time, there shouldn’t be anything to worry about 🙂
I’m making stuff out of about 100 lbs of pears. Wish me luck on getting most of them processed before they go over ripe and the chickens get a treat. Alot of them are real small and lots of waste. Next is my pear sauce. I add cardamom, ginger, clove, and nutmeg. Use have to play with it to get it to taste like you want. Basically for my sized pot of sauce I use 1 tsp cardamom (ground), 1 tsp of ginger (ground), 1/4 tsp of clove (ground), and 1/4 +1/8 tsp of nutmeg (ground)Add sugar to taste depending on ripeness of pears. Cardamom and ginger work well with pears.I also use this combo when making pear butter.
Wow, what a blessing to have, Maryann!!
Hi,
I made pear sauce and it was awesome! The only question I have is that there is a layer of water on the bottom of some jars why is this? Is it ok to store for the winter this way? Thanks, Matt
Hi Matt,
If you followed the directions, then it should be fine. Sometimes liquids and solids separate in the jars after processing. It’s nothing to worry about 🙂 Enjoy!
Do you have to use a bath if you are boiling the pears down. Can you just turn the upside down on the counter and let them cool through the night?
Thanks.
Barb,
If you do not process the pears in a boiling water bath canner, you are taking a risk of serious food poisoning. I wouldn’t try it. If you have a large stock pot you can use that as a water bath canner. Just be sure to put a dish cloth or rack in the bottom of the pot to keep the jars off the bottom, and cover the jars with 1-2″ of water. Hope that helps!
Thanks! My grandpa dropped of a 10lb bag of pears today, and I whipped up this sauce this morning with my 2.5 year old and 10 month old underfoot.
I do agree – invest in an immersion blender! You’ll never have to strain over the potty again 🙂
Thanks for the tips!
Hi. I tried your recipe this weekend. We have a pear tree with lots of ripe pears and were trying to figure out what to use them for. You step by step instructions were very easy to follow. We made plain pear sauce and cinnamon pear sauce. Taste great. Thank you!
Yay! That’s so great Sally 🙂 Enjoy!!
This looks so good! I will do this with some of the pears I will be canning today. Is processing time in the water bath (20 minutes) universal or does it depend on elevation??
Hi Lori,
Sorry I didn’t get to answer your question sooner! Processing time does vary depending on elevation. When water bath canning at altitudes 1,001-3,000 ft add 5 min. to the processing time. 3,001-6,000 ft add 10 min. 6,001-8,000 ft add 15 min. And at 8,001 to 10,000 ft add 20 min. to the processing time. Hope that helps!!
I just got through putting up the last of my pearsauce and am getting ready to put up pear slices. I make my sauce in the crockpot. You can put it on early morning and it is ready by afternoon. I do pull a lot of liquid off it and am going to use that in my pear slices.
I tried this today it turned out so good Thank You for posting this. AWESOME
Wonderful, Debbie!
I make pear sauce that same way! The last couple of years, though, I puree it (as well as applesauce) by using an immersion stick blender right in the cooking pot once the pears are cooked. It is quick, and you don’t have to pour hot sauce back and forth out of the pot and then back in. I think mine is an Oster that I paid not much more than $20 for. They are well worth the price and so convenient for these types of tasks. We just picked our Bartlett pears, and they’re spread out in the garage to finish ripening. We’re getting a couple of bushels of apple seconds from someone, too, so my canning jars will be filling up soon, too!! That’s great how you posted your photos–they should definitely make it less intimidating for people to try who haven’t done canning before. 🙂
Pam,
I’ve got to get an immersion blender. One thing I hate about using the strainer is all of the parts I have to take apart and wash when I’m done!! A stick blender is a great tip 🙂
I never bother with the pear/apple processor. I just puree my boiled-to-softness pears or apples in the blender. Smoooooooooooooth.
Great post. Never thought of making pear sauce. Looks easy and sounds good. Thanks.
I have not tried pear sauce. I have put up applesauce. And it was good. I will have to try the pear sauce. Thanks for sharing.
Thank you so much for this! I have never had pear sauce but am willing to try it and do something useful with any pears we find!
I havent tried pear sauce, since they are expensive and I dont have an outlet for them. I have made pear butter from some organic pear baby food I got from someone. It was beyond good! Enjoy your pear sauce.
Great tutorial, Kendra! We use pearsauce all the time, as it helps keep gluten-free baked goods moist. Thanks for sharing in easy-to-follow steps!