Get more milk than you can handle from your cows? Don’t let it go to waste, learn how to powder it yourself. This simple act of preserving milk often needlessly intimidates folks who have never seen it done before.
Powdering milk is yet another way to preserve the milk garnered on your homestead. It is equally simple to can or freeze milk. Approximately 13 teaspoons of powdered milk will yield about 1 cup of reconstituted milk.
Powdering (or “drying”) your own milk will not only save you money, but it will also ensure constant access to dairy products on the homestead even if your favorite milk cow or goat suddenly dies or a potentially long-term disaster strikes.
Powdered milk does not taste quite as good as fresh milk, but it doesn’t taste bad either – and will still be free of the ills that can come from commercially pasteurized and processed milk.
Dried milk typically has a shelf life of about 20 years, making it one of the most shelf-stable food items you will be able to stockpile in your homesteading pantry.
The two types of powdered milk most often made at home are regular non-fat powdered milk and instant non-fat powdered milk.
The latter has smaller flakes than the former, making it easier to either blend or spoon mix. Instant powdered milk typically dissolves in water more easily and some folks believe has a better taste when simply drinking it out of a glass.
Regular non-fat powdered milk must be chilled in the refrigerator after it is reconstituted and before it is served.
When reconstituting regular non-fat powdered milk, you will probably have to use a whisk or put it in either your food processor or blender to mix it thoroughly enough for either drinking or baking.
The heat process used to powder milk should not be confused with pasteurization. Drying milk does not destroy the iron, vitamins, beneficial fiber, and minerals found in milk.
What you eliminate during the powdering process is excess moisture and fluid. No chemicals, preservatives, or additives of any type of necessary when powdering milk.
Any type of milk can be powdered. Skim milk seems to be the easiest to powder because of its low-level fat content.
It is recommended to strain or at least, home pasteurize milk before drying and not use raw milk in the powdering process.
I have known other homesteaders who just love raw milk, drink no other type of milk, and powder it without any problems.
But, when consuming raw milk, the risk of bacteria being present in the liquid does exist and can cause illness or death if consumed.
To powder milk, you can engage in the drum drying process, spray drying, or the freeze-drying method.
Spray Drying
This is often considered the simplest way to powder milk. It generally generates more particles than either of the other two powdered milk methods.
There is nothing wrong with either of the other two methods, as far as nutrient count and effort and energy used to complete the process, spray drying is merely often deemed the simplest and most effective method – because the end result has such longevity and takes up little space to store.
Proper drying and storage of powdered milk, and all other dried food stuffs, is crucial. Mold, bacteria, and fungus cannot grow in the absence of moisture.
The dehydrated milk must be 100 percent and thoroughly dry before being stored and MUST be kept in an airtight container – preferably vacuum-sealed glass or plastic container.
Dried foods preserve really well because bacteria, fungus or mold cannot survive where there is no moisture. So, it is imperative that you ensure that all the moisture has been removed.
Consult the recipe to see what texture or consistency the final product should be. Let the pieces cool off because assessing their dryness.
After pouring the milk into the dehydrator trays, set your machine on the fruits and vegetables settings – or 135 degrees.
I recommend never using more than four trays in a standard residential dehydrator, no matter how many trays you have or machine capacity noted in the instruction manual.
The more trays you have, the longer anything will take to dehydrate, running up your electric bill in the process. I have found that it is actually less time-consuming to dehydrate four or fewer trays in two separate sessions than to put too many trays on the machine at any single time.
Dehydrating Milk Using a Dehydrator
Equipment
- 1 Dehydrator
- Dehydrator tray liners often referred to as fruit roll up sheets
- Food processor or blender
- 1 Bowl
Ingredients
- 2 – 3 cups milk regular, skim, or lactose-free
Instructions
- Remove milk from the fridge, and let it warm to room temperature.
- Put dehydrator inserts into each tray being used to powder milk.
- Pour one cup of milk into each tray.
- Turn your dehydrator to130 °F to 135 °F (55 °C to 57 °C).
- Leave the milk in the dehydrator for 10 to 12 hours.
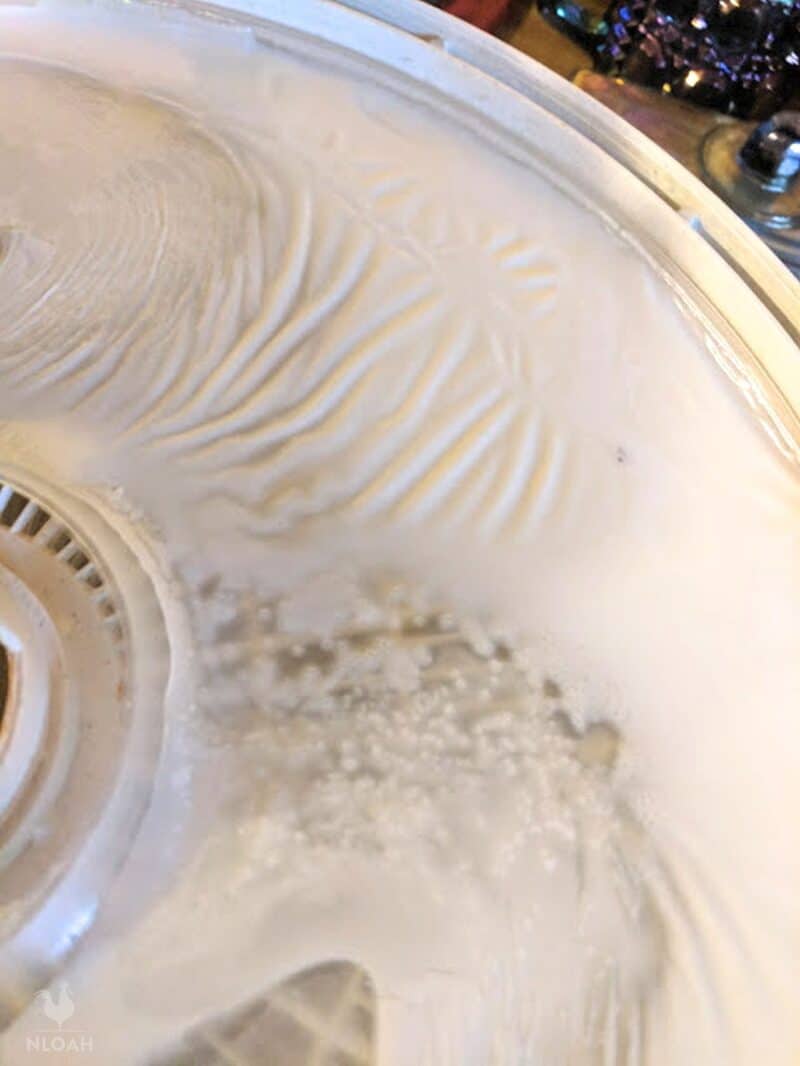
- Check the milk from time to time. if it's turning brown, reduce temperature by a few degrees. if it's turning into a thick white paste, you're doing well.
- Check the milk. If it is mushy, pour and scoop out the mixture, and place it into a bowl. The dried milk should have the same peanut brittle consistency as other dehydrated dairy products.
- Clean the tray and start the process over again until the desired flaky powder texture is achieved. The dried milk should be thoroughly dry and crumble when you pick it up.
- Pour the dehydrated milk flakes into a food processor or blender, and condense it down to a small powder.
- Pour the powdered milk into a Mason jar, and vacuum seal it.
Notes
- Use only two or three trays of milk while learning the process. If you have an epic homesteading fail the first few times, you won’t waste too much money and electricity because you only filled a couple trays of milk.
- Before pouring milk into the trays, fill one with water to make sure the spot where the dehydrator is sitting is entirely level. The slightest incline can cause you to spill your milk.
- Remember, the more trays your have in the dehydrator when drying anything, requires the process to take more time because of the restriction in air flow.
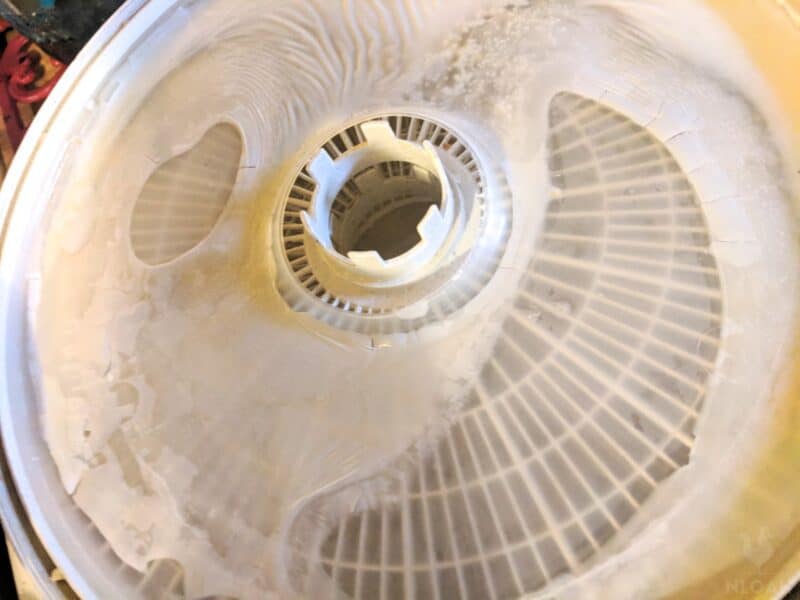
You will quickly learn if your kitchen counter is 100% level when pouring milk into a dehydrator tray.
You can tell by the spaces that show portions of the plastic tray liner, that my counter is not as level as I thought. Test the levelness of your counter by pouring a little bit of water in the tray first, to avoid spoiled milk.
If you cannot find a good level spot on your counter to dehydrate liquids, consider using an extension cord to connect the machine to an outlet and placing it on the kitchen table instead.
I would have gone this route, but far too often a dog or grandchild runs around the kitchen table, and not only spilled milk, but a broken dehydrator surely would have occurred.
Note: Solar dehydrating of milk is not possible. The milk would spoil long before the drying process would be complete – and foster the growth of bacteria.
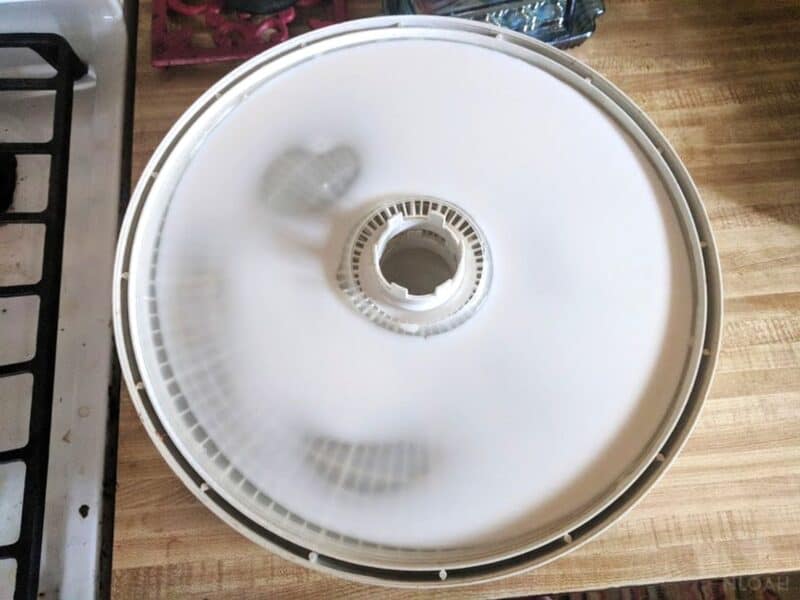
The tray closest to the top of the dehydrator sometimes causes scorched milk, hence the yellow cast on the dehydrated milk in this tray:
There’s nothing wrong with the milk, it is still dehydrated and safe to use, it just boasts an unattractive hue.
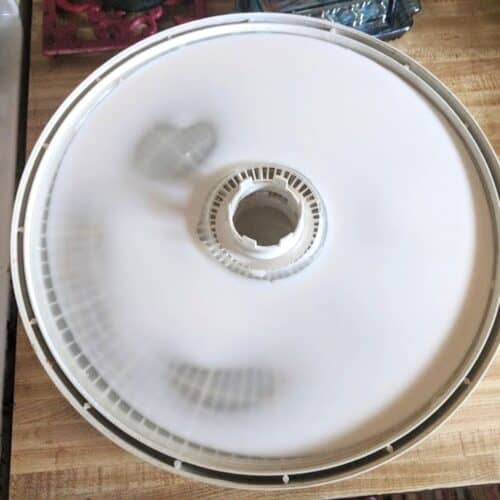
Because I routinely fill my dehydrator trays only halfway full with milk, the flakes are fine enough to crinkle in my hand to turn into a powder:
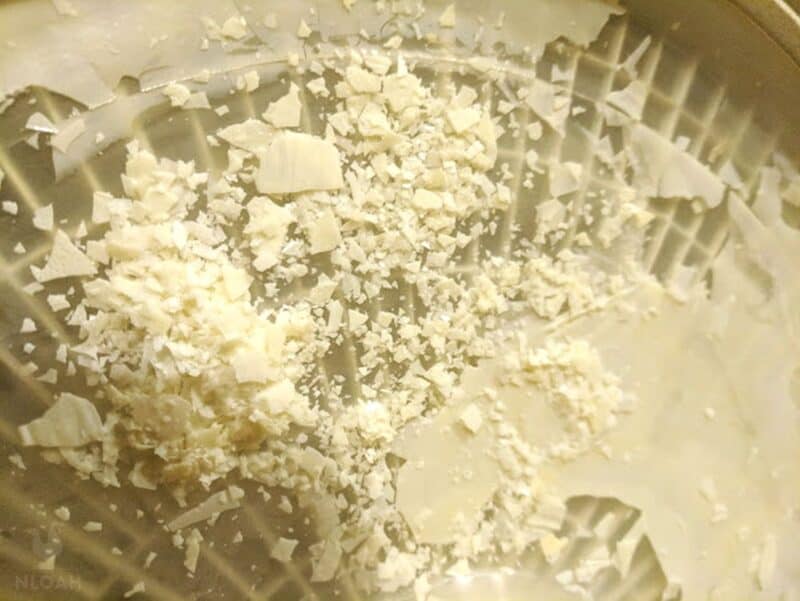
You can use your food processor or blender to grind the dehydrated milk into powder if the dried milk is too thick to crumble.
Once you have flakes that resembled manufactured powdered milk, simply put them in a Mason jar or vacuum-sealed bag, and store them until you are ready to use.
I use the attachment that came with the vacuum sealing machine to also seal the Mason jars as extra protection against moisture.
Dehydrating Milk in an Oven With the Help of a Double Boiler
Instructions
- Preheat the oven to 150 °F (65 °C). Many ovens will not go down to a temperature this low.
- Pour up to two gallons of milk into a double boiler
- Simmer the milk for about two hours – stir occasionally to prevent scorching and add a little bit of water if necessary
- Once the milk develops a visibly creamy texture, pour it into a deep pan.
- Place the pan in the oven – leave the door slightly ajar to allow excess moisture to evaporate.
- Once the milk is thoroughly dry, remove the pan and allow it to cool to room temperature. The drying process will take approximately as long as it would in a dehydrator – perhaps just slightly shorter.
- Run the dried milk through your food processor or blender and store it as noted above.
Reconstituting Powdered Milk
When reconstituting dried milk, you only need two ingredients:
- powdered milk
- water
A 2:1 two parts water and one part milk ratio should always be used as a rule of thumb, regardless of the type of milk or the chosen drying method.
However, some folks use different ratios, such as 1, 2 or 3 tablespoons of dried milk for every cup of water. definitely experiment to see what works best for you and the type of milk you used.
Add milk slowly, about 1 teaspoon at a time, to help ensure you don’t end up with far too watery of a milk product – and risk ruining your recipes.
So there you have it! It tastes just like regular milk. You can even add a dash of vanilla extract or powder into the mix for some extra flavor!
Reconstituted Milk Conversion Chart
| Powdered Milk | Water | Milk Yield |
|---|---|---|
| 3 Tablespoons | 1 Cup` | 1 Cup |
| 2 ¼ Tablespoons | ¾ Cup | ¾ Cup |
| 2 Tablespoons | 2/3 Cup | 2/3 Cup |
| 1 ½ Tablespoons | ½ Cup | ½ Cup |
| 1 Tablespoon | 1/3 Cup | 1/3 Cup |
| ¾ Tablespoon | ¼ Cup | ¼ Cup |
Reconstituted Powdered Milk Tips and Recipes
Reconstituted milk can be used pretty much anywhere you would use regular milk: in smoothies, baking, with your morning cereal, sauces, in puddings, soups, and anything else you can think of!
With Cereal
When using reconstituted powdered milk with cereal, add about 3 tablespoons for each ½ cup of either dry cereal or oatmeal – and the same amount of water.
Add up to ½ of a cup of reconstituted powdered milk or ¼ of a cup of powdered milk flakes per each 1 cup of water or regular milk used when making gravy, pasta sauces, pudding, broth, or custards to give them additional flavor and to help them thicken.
In Coffee
To infuse your coffee or tea with more calcium, substitute non-fat dry milk for your usual creamer.
To make a thick and deliciously nutritious protein milkshake, add 2 tablespoons of dry milk per recommended recipe serving.
For a more rich meatloaf, use 2/3 of a cup of powdered milk for every pound of ground beef used in the recipe. The flakes also add a rich flavor to meatballs.
When making canned soup or casseroles, add up to ½ of a cup of powdered milk flakes to give them more flavor and a thicker texture.
To make bread, cookies, biscuits, pancakes, cakes, and muffins brown a little bit more quickly and become firmer, add up to ¼ of a cup of powdered milk flakes to the recipe.
Powdered Milk to Evaporated Milk Recipe
Mix together the following ingredients:
- 1 tablespoon and ½ cup of powdered milk
- 1 and ½ cups of water
Powdered Milk to Buttermilk Recipe
Mix together the following ingredients:
- 1 cup of water
- ¼ cup of powdered milk
- 1 tablespoon of distilled white vinegar or 1 tablespoon of lemon juice. If using the vinegar, it must be allowed to stand for about 10 minutes after being added to the powdered milk and water.
Powdered Milk to Sweetened Condensed Milk Recipe
Mix together the following ingredients:
- 1 cup of powdered milk
- 1 tablespoon of buttermilk
- ½ cup of hot water
- 1 cup of sugar
Pudding Mix Recipe
Mix all ingredients together and store all but the reconstituted together and store in an airtight container until ready to mix with the reconstituted powdered milk to cook. This recipe will make about 24 servings.
- 1 teaspoon of salt
- 1 and ½ cup of sugar
- 1 ¼ cup of flour
- 2 and ½ cups of reconstituted powdered milk
Simply follow the baking instructions in your favorite pudding recipe (or the back of an instant pudding box).
Powdered Milk Cocoa
Ingredients:
- ¾ of a cup of sugar
- 2 and 1/2 cups of powdered milk flakes
- 12 cups of cocoa powder
Instructions
To make hot chocolate, mix four tablespoons of the mixture with 1 cup of boiling water. For chocolate milk, place the hot mixture in the refrigerator until it chills.
Powdered Milk FAQ
Powdered (or dry, or dehydrated) milk is simply pasteurized dehydrated milk with its water contents removed through evaporation. When reconstituted, water is added again, and the milk can be drunk or used in recipes.
In case you were wondering, no you shouldn’t dehydrate breast milk at home due to the health hazards the process may pose.

Tara lives on a 56 acres farm in the Appalachian Mountains, where she faces homesteading and farming challenges every single day, raising chickens, goats, horses, and tons of vegetables. She’s an expert in all sorts of homesteading skills such as hide tanning, doll making, tree tapping, and many more.
Is it possible to do this in a non-electric kitchen?
Loving the blog! Homestead is a great lifestyle. The article is about spray drying milk but then it goes on to be about not spray drying milk though. Dehydrating is very different from spray drying. For that much trouble you could just freeze dry it and it might even be easier, certainly less heat applied at least.
How do I make powdered milk by spray drying?
Hi, loved the easy read and how informative you are. I live in Phillips and lack many stateside convenience items… such as pudding. I want to make ranch dressing dry mixture and the recipe calls for dried buttermilk. What she your thoughts on making my own buttermilk and the dehydrating it? Have you done buttermilk? Any tips or warnings wouldn’t be great. Thanks in advance!
I have tried to dehydrate Breastmilk and it seems to come out super oily. I keep placing back in the dehydrator but can’t seem to get it to where it will powder or be white. It always comes out yellow and sticky when I grind it. I have been using a unwavering instead of a dehydrator. Would that make a difference? How would I dehydrate high fat milk? Any ideas?
I would also love to know this process.
Could this also be done with store bought milk ? I don’t have access to fresh milk at this time.
Judy,
It sure can! I dehydrated store bought milk many times before we moved onto our dream homestead – well, the patch of dirt we turned into our dream homestead. It is the exact same process and works just as well on store bought as freshly milked. Have you thought about talking to a local farmer, homesteader, or Amish community members about entering into a herd share to get fresh milk? It is legal in most states now for both dairy cows and goats.