It is that time of year again, fellow homesteaders – chick days at agriculture supply stores. When the cold winter finally gives way to spring, Tractor Supply, Rural King, and many stores like them capitalize on our eagerness to get outdoors growing and raising our own groceries.
I don’t blame them one bit. But I also don’t see the need to spend extra money to complete a homesteading task you can do on your own…perhaps even better and cheaper.
Learning how to incubate your own chicken, duck, and turkey eggs not only furthers your self-reliance goals, but allows you the ability to further your own strong and healthy line of birds.
When incubating poultry eggs, you know exactly what goes into the food you will be eating from start to finish. The birds that produce your chicks were never subject to factory farm husbandry techniques, have developed a natural immunity to common pest and environmental conditions on your homestead, and were never exposed to antibiotic injections or growth hormones.
I have never personally had bad luck with any chick, duckling, turkey, or even guinea that was purchased at Tractor Supply, Rural King, or a local agriculture store. But, I would rather save money and cultivate my own line of robust poultry birds breeds than buy those raised, possibly entirely indoors in a cage, cultivated by someone else.
Why You Need An Incubator
When you have “good sitters” maybe you do not think investing in a poultry egg incubator is worth the machine cost, electricity used, and all the bother.
But, your good sitting hens can get killed by a predator or simply become ill and die suddenly. Depending upon the ratio of good sitters to layers, one maternal hen may not be able to keep up with the egg demand – no matter how determined she is to try.
Some poultry bird breeds simply are not good sitters in general. Not a single one of my heritage breed Buckeye chicken hens or Pekin duck females have even the slightest interest in sitting an egg.
The Bantam hens and Silkie hens I used to raise were all excellent sitters and would even take in duck eggs. But once I decided to raise only Buckeye chickens, adding Banty hens back into the flock would have caused breeding issues since I free range and everyone share the same coop at night.
During a long-term disaster you will not be able to go to a local agriculture store or order chicks online from a hatchery. Hatching your own chicks will be the only way to ensure you flock does not dwindle when both eggs and birds are eaten at a far greater rate.
Incubator Cost
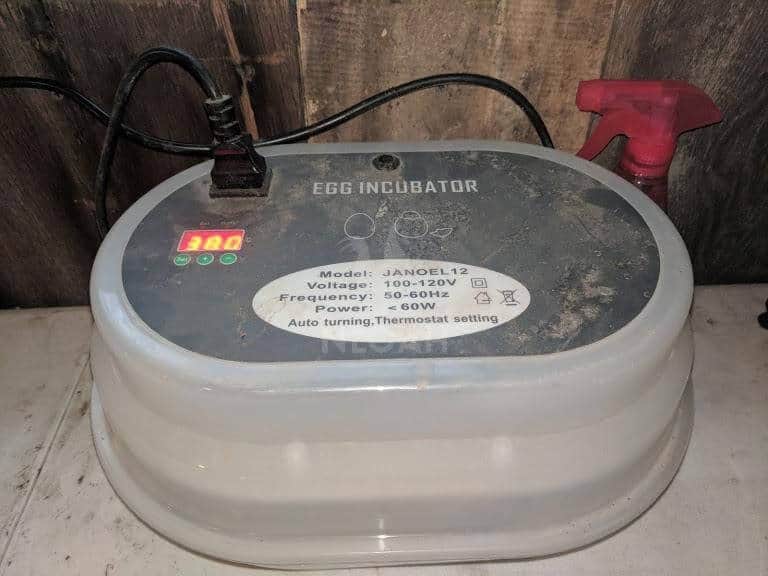
Investing in a small incubator, like my starter one, shouldn’t cost too much. A large model like I use now, typically runs anywhere a little higher, but it may better suit your needs.
Yes, there is a start up cost that might need to be saved over the course of a few paychecks, but once you have the machine there will never be a need to buy hatchlings from a store again.
If you are hatching eggs as part of a homesteading business venture, it is likely you can deduct the cost of the machine and a percentage of the household electric bill covering the time it is used from you taxes as a farm expense.
You only have to buy one incubator to hatch chicken, duck, turkey, quail, guinea, dove, and goose eggs. The amount of eggs you can incubate at one time will vary depending upon the type being placed inside.
It is not recommended to incubate eggs from different poultry in the same machine. Even the a one degree temperature deviation from the recommended heat setting can cause eggs to become rotten, and kill the growing embryo in the process.
Poultry Incubator Components And Buying Tips
Purchasing an incubator with an automatic turning arm or tray that is moved via a mechanical device will not only be a great timesaver, but likely vastly increase the chances of the hatching experience of being a success.
If the incubator does not turn the eggs automatically, someone will need to physically turn the eggs a minimum of three times per day – often many more, to ensure the chicks develop properly.
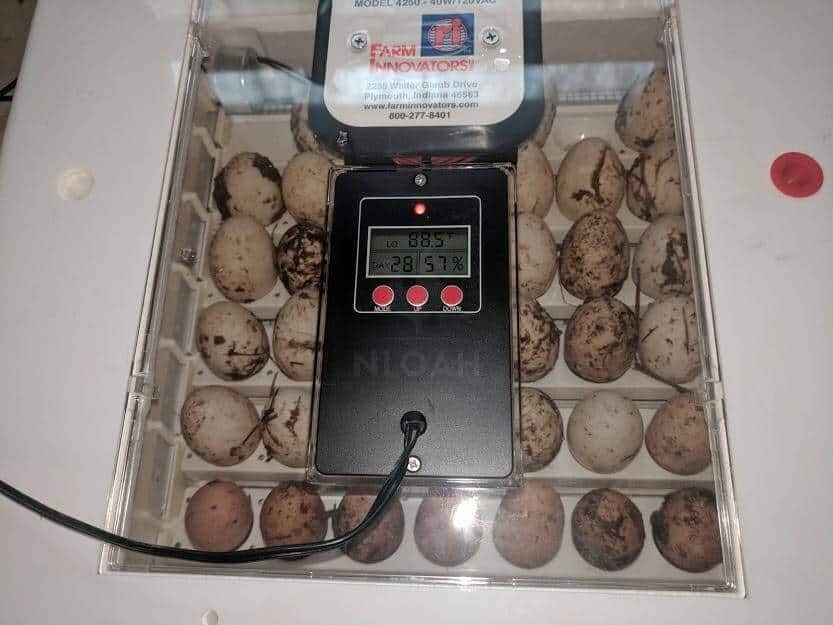
Nearly all incubators include a built-in thermostat, but not necessarily a humidity gauge. Purchasing an incubator with both types of interior readers will make the process easier and far more successful. If you incubator does not have a humidity gauge, it is worth the few dollars it will cost to purchase one from a pet store or online.
Incubators with an LED temperature display screen and a push button heat change function are highly recommended.
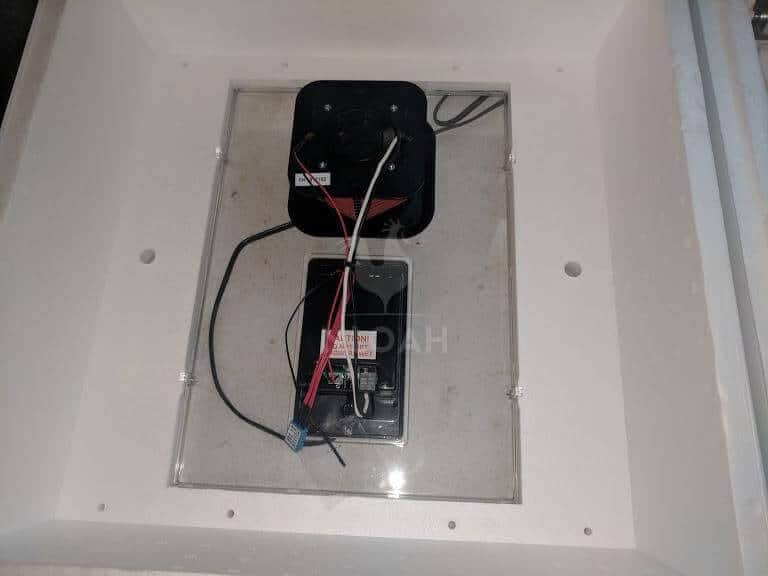
Typically, incubators feature either a bottomless tray with dividers to hold the eggs and decrease the chances of them trundling or knocking into each other and cracking – or a tray with individual egg holders for the wide bottom portion of the egg to gently rest inside.
Some more advanced large incubators also include a “days to hatch” read out to help you track the days to hatch for the entire batch of eggs.
Candling eggs is an old-fashioned (and usually highly accurate) way to check the progress of the developing embryo. If you hold a candle flame too close to the egg or for too long, you can damage the embryo.
I am not a fan of tech gadgets in general, but either built-in or added handheld battery powered candling gadgets can come in quite handy during the egg incubation process – and a great way to make the hatching process more of a hands-on learning experience for children.
Water will need to be added to an incubator to create the desired amount of humidity.
Some smaller and low cost incubators simply instruct the user to pour some water into the base of the machine below the elevated trays, or to squirt the eggs with a spray bottle.
Larger and more expensive models often feature easy to fill water channels along the sides of the machine so water can be added without lifting the lid.
Every time the lid of the incubator is removed for manual turning or the addition of water, the interior heat will fluctuate rapidly. Incubators with fill channel style features also typically boasts a built in heater that warms the water nearly instantly to a factory preset 100 degrees.
And this is the large incubator:
Egg Hatching Guide
The temperature and humidity figures are the average recommended amounts, always defer to the settings recommended on your particular machine when hatching any type of egg.
The temperature needed for incubation is typically slightly higher in a still air incubator than in a forced air incubator. Some breeding experts recommend increasing the temperature inside of a still air incubator hatching chicken eggs to between 101 and 102 degrees.
| Poultry Bird | Temperature | Humidity | Duration |
| Chicken | 99 to 100.4 | 50 % to 65 % | 21 |
| Duck | 98.6 | 55 % | 28 |
| Turkey | 99.5 | 55 % | 28 |
| Guinea | 99.5 | 35 % to 45 % | 28 |
How To Incubate Eggs
I recommend not cleaning the eggs before putting them in the incubator. Just like with collecting eggs, it is best to leave all of the “goo” from the chicken on the egg to prevent bacteria from getting inside the egg.
This means you should leave all but any big chunks of dirt or chicken poo that can easily be knocked away, on the egg as well. Some folks believe the total opposite of what I learned and what has always worked well for me, and wash their eggs and have successful hatchings.
If you ordered fertile eggs from a hatchery, they will most likely have already sanitized. Poultry breeders who believe differently than I do about the whole cleaning of the eggs thing, generally use bleach to wash the collected eggs before incubating.
If you want to go this route, the typical recipe for the egg wash is 1 gallon of water that has been heated to 110 degrees mixed with 1 capful of bleach. Each egg is then fully immersed in the mixture for just a few seconds and then placed on a towel to air dry. You can also buy a commercially manufactured egg sanitizing wash from most agricultural supply stores.
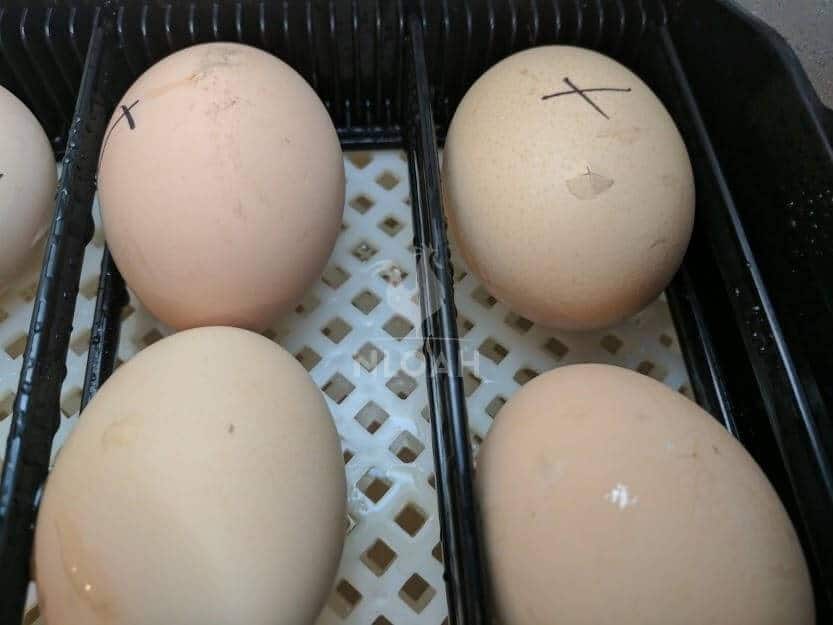
Using a permanent marker, place an “X” or a number on each egg. This will allow you to determine if the automatic turning mechanism is working properly by glancing at the angle of the “X” or number during the incubation period.
Do not attempt to incubate eggs that are older than 7 to a maximum of 10 days. It would be rare for such an egg to still be viable. Only a slight lifting of the incubator lid will quickly alert you to a rotten egg being toasted inside.
Start counting the incubation days hatched not on the day the eggs were placed inside (unless you did so very early in the a.m.) but the first full day the eggs have spent inside the incubator.
If you are saving eggs for several days to get enough to make running the incubator worth the effort, store them at room temperature to increase the chances of viability. When storing eggs, place them in an egg carton or soft basket with the narrow and pointy side down to better protect the air bubble on the wide end that keeps the developing hatchling alive.
Some seasoned poultry bird breeders recommend keeping the humidity in the incubator slightly lower than recommended during the first several days before increasing it to the recommended setting.
The reason for this deviation is based on the premise that the developing embryo needs time to adapt to the sudden change of environment if it has not been nestled beneath a momma hen prior to moving indoors.
If the humidity in the incubator is too low, especially during the final days of the process, the developing baby bird can essentially become shrink wrapped inside of the egg and not be able to break its way out. I have never adjusted the humidity down and have never had more than one egg fail to hatch, but perhaps if I had followed this tactic, I would have had a 100% hatch ratio.
Increasing the humidity level up to 10% during the final three days of the incubation period is also a fairly common practice by some breeders – especially those who stop turning the eggs during the same expanse of time.
In a natural setting, a momma hen rotates her eggs constantly and not just the three to five times a day an incubator will turn them. Some breeders recommend stopping the rotating of the eggs during the last few days before they are due to hatch, to allow them to better orient themselves before trying to peck their way out of the egg.
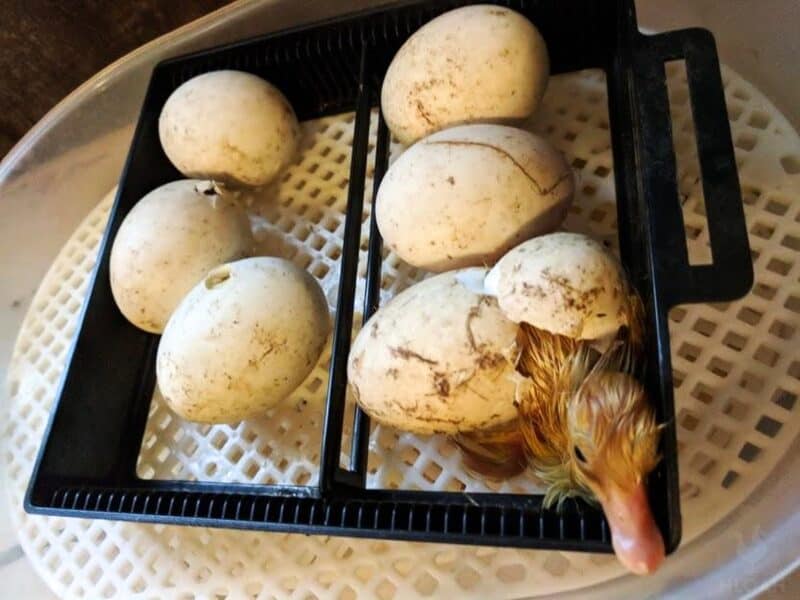
Chicks “pip” the air bubble to start breaking their way out of the egg. Resist the urge to aid the chick in this labor intensive and energy draining process. It can take a chick an entire day to break out of the egg and it is best that they do it naturally.
Well-meaning humans can actually harm a hatching bird when trying to speed up or help a struggling baby. Only gently and carefully help a hatchling break the rest of the way through the egg if it cannot get past the pip stage after 24 hours.
And then, only break a small hole in the opening the hatchling has started and give it the opportunity to break the rest of the way out on its own, stepping in again only if the bird is showing signs of distress. Sometimes, the air sac will develop on the wrong end of the egg, causing the embryo to suffocate.
If you are going to candle the eggs to check for the progress the embryo is making, wait until the seventh full day of incubation. There will not be any real signs of change until then, and the embryo in the egg is still very fragile and should not be handled.
If you are hatching brown eggs, you may have to wait 10 full days before being able to see through the egg enough to note any change. You should be able to see the veins of the embryo and movement inside of the egg. If all you can see is a yolk 1 days in, the odds are you are not going to hatch the egg and it will become rotten as the incubation period goes along.
As long as the hatched birds can stand up and move freely inside of the incubator, they can remain inside for up to 3 days while consuming the contents from the inside of the egg. You can move them from the incubator to a heated brooder on day one, if you prefer.
Incubators should be washed out, and the trays sanitized after each batch of eggs has been incubated. You can use the same 1 cap of bleach to 1 gallon of water ratio, but I prefer to use only distilled white vinegar and sometimes a wiping down with rubbing alcohol.
Whatever method of sanitizing you choose, allow each component to air dry separately and all of the fumes to dissipate, before putting the parts to the incubator back together for storage.
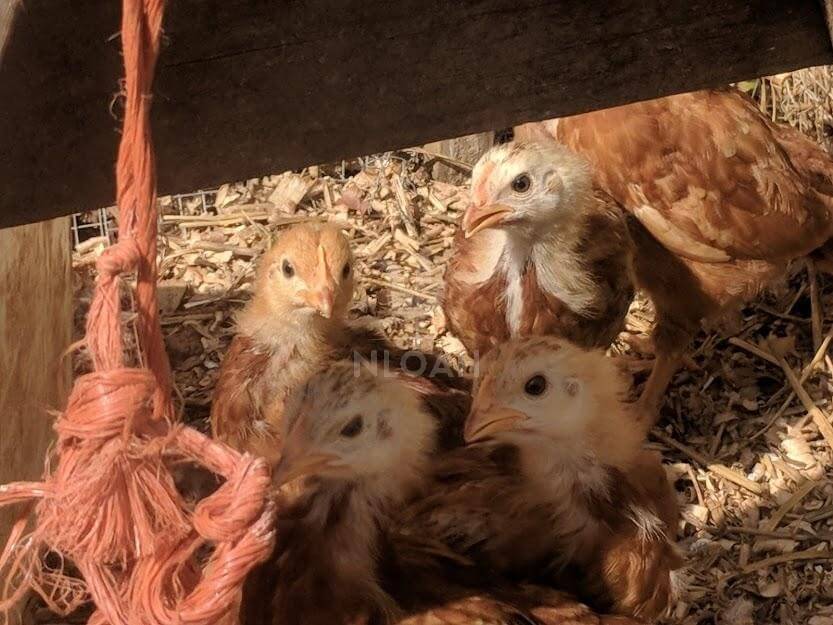
Brooder Relocation Tips
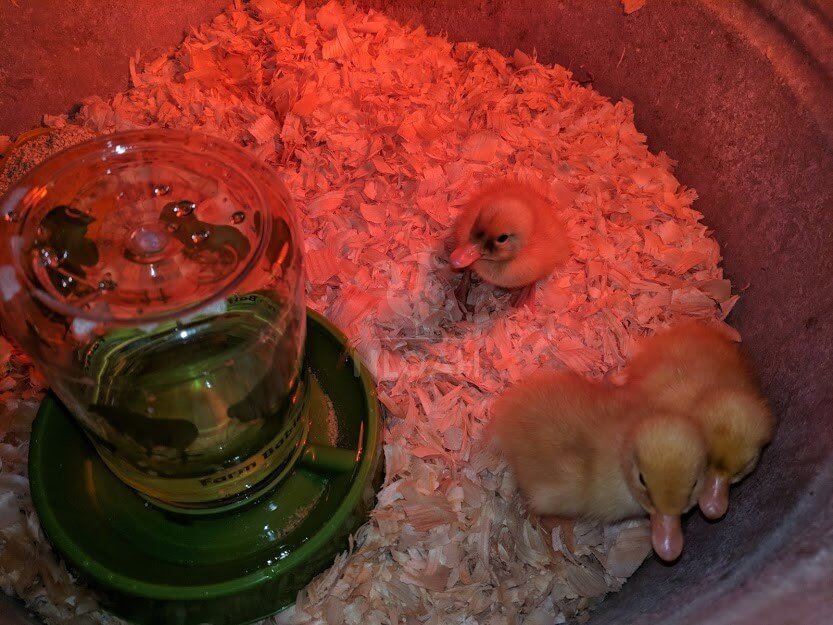
The temperature inside the incubator or brooder (for any type of young poultry bird) should be kept between 95F to 100F (35C to 38C).
The food and water containers should be housed away from the heat lamp so the hatchlings do not congregate there and get overheated. Make certain to use a shallow water container to prevent the chances of the baby birds drowning or become chilled from getting inside the water.
Ducklings should not be permitted to play in water for at least several weeks until their oils come in, and allow their feathers to dry quickly.
Use a red heat lamp and not a white light to curtail the pecking of any blood spots on the birds by its brooder mates.
I have always kept my chicks and ducklings in the same brooder without a problem. Starting the flock out together since they will be sharing the same living quarters and free range area has always worked successfully for me, but not everyone has had the same experience.
Never keep poults (baby turkeys) goslings (baby geese) or keets (baby guineas) with other breeds of birds. The poults an goslings are too large and sometimes volatile to be with smaller birds. Guineas are incredibly small, and often accidentally smother or literally squish each other when piling up to sleep.
If they are placed in with even small chicken breeds, you will most likely lose far more guineas than you would if the birds were placed in a brooder with only their own kind.
I highly recommend putting several pinches of oregano, cinnamon, black pepper, and dried calendula flowers either on top of the feed or in the waterer placed inside the brooder.
These spices should act as a probiotic, and help protect the just hatched poultry birds from pasty butt and Coccidiosis – the top killers of poultry hatchlings. It would be incredibly upsetting to complete the incubation process successfully only to watch the young birds die within days of hatching due to conditions and diseases you could cheaply and easily help prevent to a substantial degree.
Coccidiosis presents as either an intestinal or cecal infection caused by E. necatrix or E. tenella bacteria. Young birds are more prone to contracting Coccidiosis than their elders due to their still maturing and fragile immune system.
Pasty butt occurs when soft solid waste from the hatchlings sticks to the vent (anal area) of the young bird to such a degree that it seals the vent shut and prevent waste from being removed from the body. Simply inspecting the hatchlings daily and gently washing away the paste will allow the vent to open and resume proper function.
A home video of our first chicken egg hatching in my first small and inexpensive incubator. Everyone gathered round cheered the eggs on, so please pardon the excited background noise:
Note the “pip” holes in two eggs in the far left and far right corners of the incubator. It took many, many hours for these two Bantam chicks to peck their way out of the eggs.
While the average hatching time for chickens is 28 days, I have found my more robust hatchlings begin hatching around 21 days into the incubation period. One of the eggs in this first batch never showed the first signs of trying to pip through the air sack.
I had candled the eggs and know the embryo inside had shown adequate signs of both growth and movement. We allowed the egg to incubate up to 35 days, giving the bird inside every last chance possible to break free.
In the end, my husband disposed of the egg, but first made a small crack around the air sac area to give the chick a helping hand and to inspect the embryo. The hatchling was dead, but looked as fully developed as all the others than made their way out of the eggs. Even after hatching numerous poultry birds since, I still have no clue what went wrong.
When you have hatchlings struggling to go further than the pip hole when trying to break out of the egg, talk and whistle to them. I swear, this really does seem to help. Once at least once hatchling has made it out of the egg entirely, it will (should) become quite vocal, which encourages its siblings or flock mater, to join it out in the world.
As you can see, the incubator was jostled by those eagerly gathered around to watch all of the excitement – especially the kids. Avoid movement of the incubator at all times, from the beginning to the end of the process.
As the embryo grows, the chances of its beak or feet piercing the air sac increase. I fully encourage children to be a part of the incubation process. It is one of a multitude of homesteading skills they should learn early, but the little hands and bodies can do extensive albeit unintentional, damage to the baby birds they so much want to watch coming out of their eggs.
Do not despair if the hatch rate of your first batch of eggs is around 50%. Such a hatch rate is not abnormal for folks who are just learning how to use their machine and the incubation process. The average hatch rate of a batch of eggs is around 80%.

Tara lives on a 56 acres farm in the Appalachian Mountains, where she faces homesteading and farming challenges every single day, raising chickens, goats, horses, and tons of vegetables. She’s an expert in all sorts of homesteading skills such as hide tanning, doll making, tree tapping, and many more.