While many novice gardeners or homesteaders may look at growing ornamental gourds as a daunting challenge, these delightful plants are actually quite easy–and enjoyable!–to grow. If you’re interested in growing enough of these colorful beauties to decorate the homestead with this fall, consider the following tips to maximize your harvest.
What are these Ornamental Gourds?
Gourds have been grown and preserved for thousands of years. As a variety of squash, gourds are not so different from plants like butternut squash, winter squash, and pumpkins. However, they are less palatable than these types of squashes, and as a result or more valued for their decorative appeal than anything else.
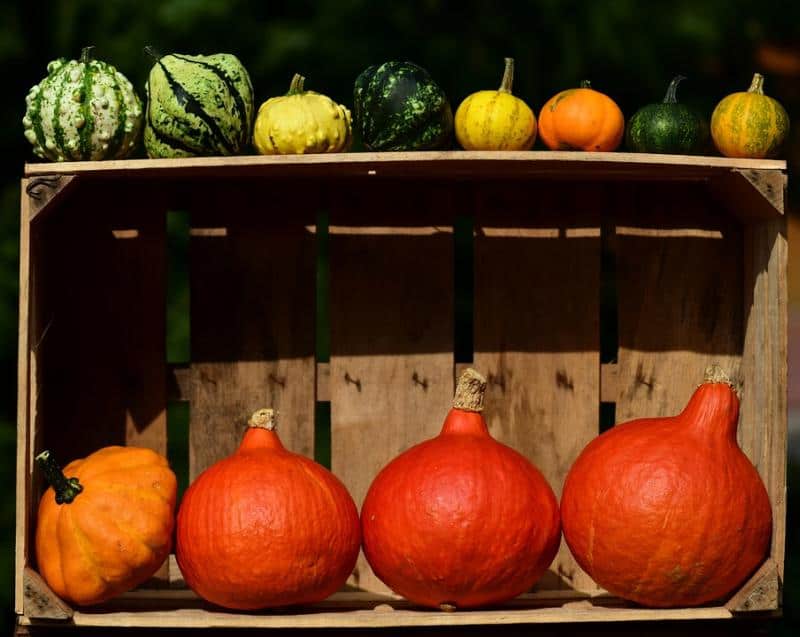
There are a variety of gourds available to grow, including those that have hard shells, and those that have soft shells. Soft shell gourds are typically more misshapen than hard shell gourds.
Hard skinned gourds tend to start out as a mild shade of green or white, but then turn brown upon drying. Hard-skinned varieties tend to be a bit larger, an usually sport long, spindly necks.
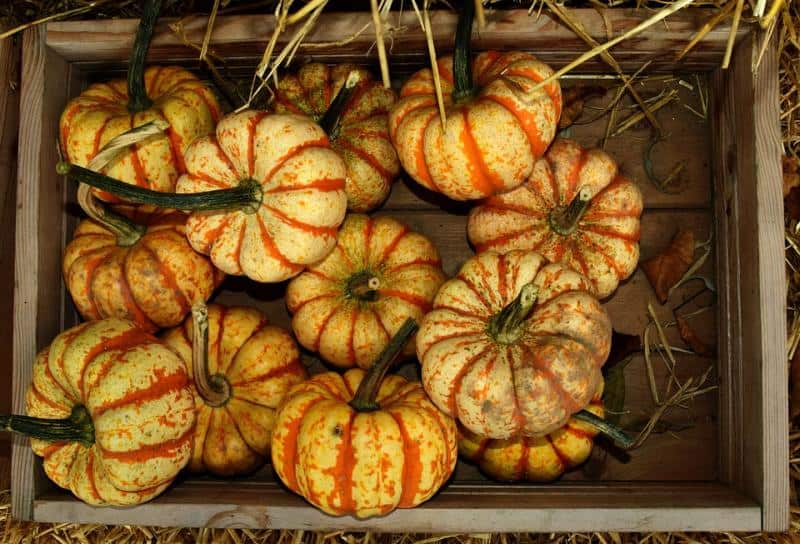
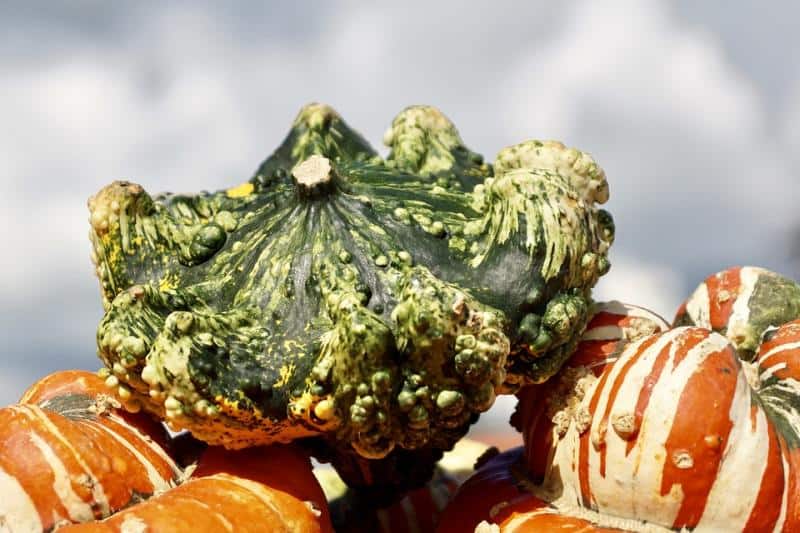
Soft-skinned gourds come in all the colors of the rainbow, such as orange, blue, yellow, and green, but are also covered in quirky bumps. These types of gourds are usually smaller, ranging from fist-sized to a bit larger than a pumpkin.
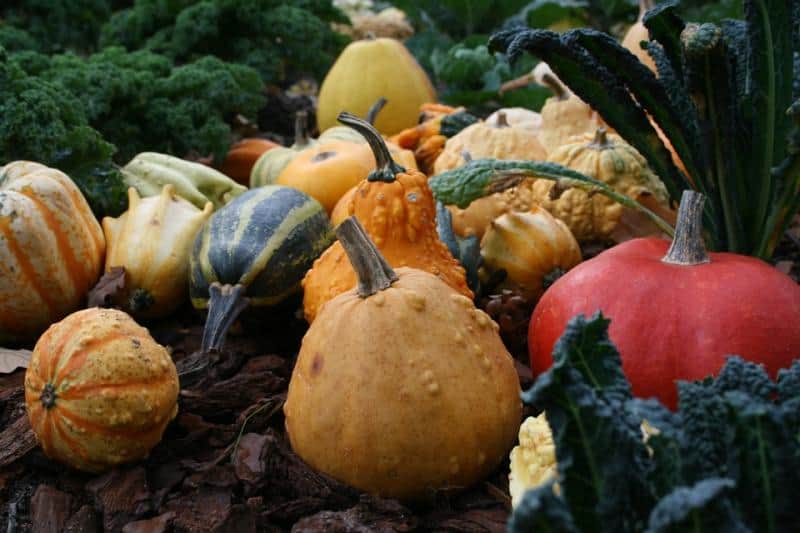
Common varieties of gourds include birdhouse gourds, bule gourds, and gourd mixes. Birdhouse gourds are commonly used to make hanging bird houses, while the bule is a French heirloom that produces hundreds of bumpy waters. This gourd works well in a centerpiece. If you’re undecided about which type of gourd you’d like to plant, consider growing a mix so that you receive a wide variety of attractive gourds.
Preparing for Growing Them
Gourds can be grown just about anywhere in the world, and in any hardiness zone. Ornamental gourds prefer growing in full sun, as well as in fertile, well-drained soil. Several weeks before you plant, giving yourself as much time as possible, make several additions of organic material to the soil.
Although you can start gourds from seeds indoors, sowing directly from seed outdoors tends to work best. However, if this is something you’re interested in, start seeds at least five to six weeks before you plan on transplanting (after the last frost in areas with short growing seasons).
Planting
Sow gourd seeds as soon as all danger of frost has passed. If you’d like, you can warm the soil up ahead of time by laying down a thick sheet of black plastic. This will help speed up the warming of the ground underneath, and also help to deter nasty weed seeds from penetrating through the soil.
You can even plant your gourds directly into the black plastic, if you’d prefer. They like warm soil, and the plastic will prevent you from having to weed around the spiny vines of the developing plants.
Regardless of whether you direct plant or overseed atop holes cut in plastic, sow seeds about one or two inches deep in groups or mounds of four. Each group should be spaced about five feet apart, with rows seven or eight feet apart.
Maintaining
Gourds need very little care besides minimal weeding (not necessary if you’ve chosen the black plastic method) and thinning. Once your seedlings have emerged, it’s important that you thin them to one or two plants per mound to avoid overcrowding.
Gourds can also easily overwhelm other garden plants with their crawling vines. To prevent this, consider planting them in an isolated area, or provide a trellis upon which you can train the vines.
Although gourds, like other squashes, appreciate warm weather, they will need extra water during exceptionally arid conditions. Watering is especially important when the plants are in the process of setting fruit, as well as immediately afterwards.
Fertilizing is not necessary, but can be a helpful way to speed, and improve gourd growth and the number of pumpkins per plant. It’s a good idea to feed heavily before planting, but you can also add compost or other fertilizers after the vines have begun to bloom. While you don’t necessarily need to mulch, as the vines are somewhat “self-mulching,” it’s not a bad idea to help control weeds. Gourds have shallow roots, so it can be tough to weed without pulling out the gourd plant itself.
Gourds, like other squash or vine crops, can have a tough time setting fruit if they aren’t being pollinated effectively. If pollinators are in short supply, consider hand-pollinating them. To do this, remove the male blossoms and dust them onto the female blossoms (the ones that look like tiny immature fruits). Usually, plants produce more male blossoms sooner than they produce female blossoms, with hard skinned gourds blooming at night with soft-skinned gourds blooming during the day.
Insects, Pests, and Diseases
Mature gourds aren’t typically affected by pests, as their tough rinds become too thick for most insect or mammalian teeth to penetrate. However, small, unripened gourds can may be eaten by hungry mice or beetles.
Common gourd pests include cucumber beetles, squash bugs, aphids, and vine borers. While these can be difficult to control, adding a floating row cover and staying diligent about checking for signs of pest infestation can help keep their numbers in check.
Small plants are also more susceptible to other diseases that tend to affect squash plants, such as cucumbers and pumpkins. To avoid this, don’t plant in the same spot every year. This will help circulate unpleasant diseases out of the soil and minimize the spread of disease. Common diseases include bacterial wilt, mosaic virus, and powdery mildew. Try to water the roots of the plants, instead of the leaves, whenever possible, and space plants out so that they have good air circulation as well.
Harvesting
Gourds are ready to harvest when they develop their full coloring (consult your seed packet for an exact image of what that will look like, as this will vary depending on the type of gourd you have planted). Consult your seed packet for specific harvest date, as this will vary depending on the variety. They usually take between one hundred and two hundred days – similar to pumpkins.
When the stems have dried and turned brown, this is usually a tell-tale sign that your ornamental gourds are ready to be harvested. Cut the stem, leaving a few inches attached to the plant. If you don’t, this can cause breakage and leave an opening for disease or rot to infect your plant. Try not to keep any bruised gourds, as they will deteriorate more quickly than pristine ones.
Preserving
Most small gourds will dry easily and preserve well, as they won’t have as much “filling” inside, but larger gourds should be used right away, at frost time, as they will not preserve well. Wash and dry the gourds, and then let them cure in a warm, dark spot. If you’re worried about any lingering bacteria, feel free to brush them with rubbing alcohol.
While the gourds are curing, make sure you turn them every few days so that air can reach all sides of the fruit. This process will take several weeks, but you will know they are dry when you can hear the seeds rattling inside the gourd.
Soft shell gourds may need extra time to ripen before harvesting, and they might also take more time to cure. As the gourds are drying, make sure they are in a shaded but ventilated spot. Some people like to prepare a surface with cardboard or newspaper to reduce moisture first. Others swear by keeping a fan going to increase air circulation in rooms with poor ventilation.
If any of your gourds begin to show signs of rot during the drying process, make sure you throw them away.
Uses for Ornamental Gourds
Dried ornamental gourds are most commonly used for decorative purposes, such as crafting or autumn decorations. While a stack of gourds will look pretty outside your door, there are many other ways to use these beauties instead of just as porch decorations.
However, if you choose to use your gourds as decorations, you must first prepare them. Most gourds have rough shells, but these can be sanded down with sandpaper or steel wool to get the shell to its desired texture. If you’re having trouble getting in all the nooks and crannies of the gourd, consider using a wire brush, toothbrush, or toothpick to get into the crevices. It also helps to soak the gourds in warm water for a few minutes.
Once you’ve thoroughly cleaned and polished the ornamental gourd, sterilize it with a ten percent bleach solution and let it dry. This will help slow the decomposition process and also remove any surface bacteria. Then, you can apply any decoration or design to the gourd, such as paint, stain, or wax, or you can carve it. Or, if you’re easygoing and naturalistic, you can simply let it remain as-is.
You might also consider making a birdhouse from, as the name implies, the birdhouse gourds. All you need to do is drill a hole in the stem to hang a wire, and then cut out a circle from the main body of the fruit. You can also make bowls out of gourds, as the texture of the interior wall of a dried gourd is similar to wood. These aren’t exactly dishwasher safe or functional for eating, but they make nice decorative bowls or camping bowls in a pinch.
Gourds can even be wood burned, carved, painted, or stained. You can make jewelry or even fibers out of gourds!
In a pinch—for example, if you got carried away with your gourd-planting and have dozens of leftover gourds after the autumn decoration season has passed–you can even feed them to livestock.
Squash, melons, pumpkins, and gourds are all members of the Cucurbita genus of plants. This means that the seeds of these plants are all coated with something called cucurbitacin that is a natural dewormer. This makes ornamental gourds a safe, healthy feed option for animals such as pigs and chickens.
Ornamental gourds are easy to grow and produce prolifically. Consider investing in a packet of seeds this spring to try your hand at growing these ornate, decorative gems.

Rebekah is a high-school English teacher n New York, where she lives on a 22 acre homestead. She raises and grows chickens, bees, and veggies such as zucchini (among other things).
These are a homestead must have you gotta do these the only thing I recommend is grow a few edible squash to go with your display then you have good food. But all these can be interplanted with your corn after you harvest your corn you have loads of these fall treats. Happy growing