It can be tricky to make a garden on a slope. Many problems may arise if the land has an incline, mostly because the unevenness of the land can dry the soil. This dry soil can then lead to problems with watering, pruning, and more.
Sadly, many don’t have a choice about where they garden. You can’t change the slope of your land that easily. As a gardener working with sloping land, you need to take certain measures in building and caring for your garden.
One of the biggest problems you’ll face when trying to garden on a slope is that of the growing conditions of the soil. You might have dry soil that erodes easily or distributes nutrients poorly.
By following a few simple steps, you can easily create a garden that addresses these concerns and maximizes its yield.
Table of Contents:
Can You Have a Garden on a Slope?
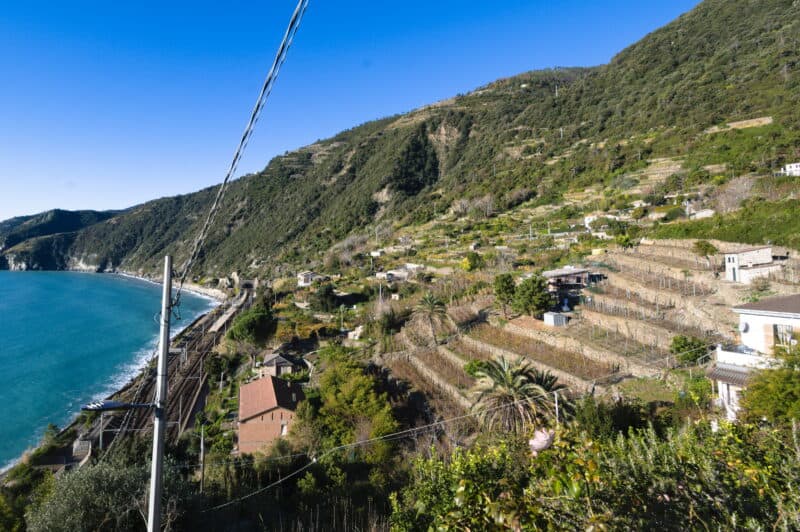
Gardening on a hillside can provide a range of benefits, but it also comes with a host of challenges. A hillside vegetable garden requires additional preparation to ensure proper drainage and soil composition in order to keep plants healthy.
Because of the raised angles associated with a hillside garden, moisture tends to drain away quickly, leading to soil erosion if left unchecked.
As a result, you have to plan ahead and consider strategies for constructing terraces or applying vegetable-friendly amendments to improve the quality and water-holding capacity of the soil.
What Vegetables Grow Well on a Hillside?
Veggies that do well grown on an incline include:
- potatoes,
- bush beans,
- squash,
- peppers,
- carrots,
- okra
- beets,
- melon,
- radishes,
- sweet corn.
With a little extra love and attention to ensure adequate water drainage, leafy greens like:
- lettuce,
- kale,
- spinach,
- mustard greens.
Hillside gardens provide an excellent opportunity to grow vertically with trellised support such as tomatoes and cucumbers or other vining annuals like cantaloupes or pole peas that require some height!
Step 1: Analyze The Site
Before you start your garden on a slope, you obviously have to inspect the land. This is good practice no matter where you are gardening, by the way.
First, you need to consider sunlight, shade, soil erosion problems, standing water and other sources of dampness, wind conditions, obtrusive plants, weeds, and compacted areas.
When you inspect the site for these things, there’s another one that requires immediate attention. How will you maintain the garden? You’ll need to set up hardscape elements.
Hardscaping is simply the use of non-plant landscaping to create decorative structures to improve appearance. It can be done with things like fences, driveways, benches, sculptures, rock walls, or anything else that is a fixed, permanent structure.
Measure The Steepness: When you are planning on gardening on a slope, site investigation is a crucial step in the process. The amount of steepness on a slope is a key player, so it’s important to measure the exact steepness of your slope. The steeper the slope, the more difficult it is to grow plants.
To do this, you need to determine exactly how inclined the surface is. Start by dividing the rise with the sun with this equation. Consider this ratio: Rise/Run=Slope %.
First, measure exactly how much slope your raise has, and then write it down. Take measurements of how far it runs before it levels out, then divide the two readings using the equation above to determine the specific percentage of your slope. The lower the percentage, the easier it will be to garden on your property.
If your slope is above 40%, you’ll have substantial problems when you start gardening. It will be hard to run a lawn mower down the slope and you will have difficulties watering, mulching, weeding, trimming, and harvesting.
It will be difficult for you to walk up and down the slope, and you’ll also be unable to use any machinery on it. If your slope is that high, you might be better off growing a garden somewhere else.
Step 2: Factors To Consider When Gardening On A Slope
Light
You can’t grow a high-yield garden without enough sunlight. If the lighting conditions aren’t ideal, your plants will not thrive. Too much sunlight will not produce optimal growing conditions, nor will too little. The duration of sunlight is also important.
Most plants, like perennials and most fruit-bearing plants, require a minimum of six hours of sunlight in order to grow and develop properly, while other plants may have more or less sunlight requirements.
Also consider the intensity of sunlight, because too much intense sunlight can pose problems, as can too much dim sunlight. If the light conditions aren’t in your favor, you can make adjustments so that the sun will still be appropriate for the plants you are growing. If these arrangements are too challenging, you can always move to another site.
Dampness
Slopes often have dry soil, as moisture quickly runs off or evaporates, meaning it can be difficult to maintain adequate moisture. These kinds of growing conditions may cause soil erosion.
It’s also important that the water be allowed to soak adequately into the soil, or the plants won’t grow healthily or even, in some cases, at all. You can install certain irrigation measures to help your plants grow. A trickle water system is a good option, as it will promote a good water supply that constantly and consistently provides your plants with enough water.
Testing your soil is easy. Simply place a few cups of soil in a clear glass jar, and then fill the jar with water. Watch for the particles that rise to the top. If the soil tends to clump together and has difficulty rising, it is likely heavier clay soil. If it disperses and the water passes through easily, it is likely sand.
You should also test the nutrient content of your soil, as soil that is on a slope tends to have lower nutrient content than that on a flatter surface.
You can test it at home yourself by using a home pH test and nutrient test kit, or you can take a sample and send it to the local cooperative extension, which will often do it for free or for a very minimal fee. Test your soil long before the growing season begins, so that if you need to amend it in any way, you will have plenty of time to do so.
Step 3: Clear The Ground
Again, this is the case for regular gardens, but before you can begin planting, you need to clear the ground. This can, however, be a bit more challenging on a slope, because using machinery might be a challenge. Start digging or consider taking a newspaper to smother sod. You can also use materials like black plastic or landscaping fabric to suffocate the existing plants.
Obviously, using a rototiller or tractor to turn the soil is ideal. However, on a slope, you might have difficulty using heavy equipment.
You also run a greater risk of erosion from overtilling. Therefore, some of these non-mechanical methods of tilling (or really, “no-tilling”) systems work much better and won’t damage the soil or the beneficial microorganisms that live within it.
Avoid using any chemical methods of elimination, as these will contaminate your soil and make it a challenge to grow healthy crops from there on out.
When you start, make sure you remove any debris, including rocks, mud, and branches. You want the slope to be as clear as possible so that you can start planting as soon as the conditions are right for doing so.
Step 4: Deal With Weeds
Weed can become a huge problem for your garden and destroy it before your plants even start to bloom. They soak up nutrients from the soil, and leave nothing for the plants which start to die. They also use up precious water, sunlight, and space, causing dehydration and compaction within a short matter of time.
Therefore, eliminating weeds from the ground is essential before you begin to make a garden. We’ll talk about how to get rid of weeds in a future article.
Step 5: Determine The Soil Type
Your soil plays a critical role when it comes to garden, as we already discussed. Learn about the specific type of soil you might have before starting out gardening. Different soils behave differently when it comes to retaining water and nutrients, as well as supporting plants’ roots and overall growth and development.
I covered the different types of soils here, but keep in mind that regardless of what kind of soil you have, slopes tend to dry it out and promote erosion.
Most Importantly, All Slopes Tend to Have Dry Soil
One of the main problems of a slope is that the soil stays dry at all times. This is because all the water runs down from the slope and doesn’t get the chance to get soaked deep into the soil. It can be troublesome for plants that are growing since they don’t receive water from the soil and won’t be able to prepare food properly.
In contrast to normal slopes, south-facing slopes are even harder to do gardening on because they are open to intense sunlight which can be dangerous for plants. Intense sunlight dries the plants out even more, and also opens them up to wind erosion and drying out from the elements as well as from natural runoff.
Other than that, fast run-off of slopes doesn’t distribute water and nutrients evenly. This affects the plants and can even lead to desiccation and scorching.
How To Solve The Problem
To solve the dry soil problem and promote water regulation evenly, a drip irrigation system can be used.
A drip irrigation system supplies water directly to the roots of all plants. This is essential because it keeps the plants healthy and will make your garden look more alluring.
The biggest benefit of using a drip irrigation system is that when you connect it to a timer, it supplies water on its own without you having to operate or enable it. This way your garden will receive the right amount of water and on time. You don’t have to worry about going out to garden at a certain time of day.
This is ideal because it allows you to provide water to your plants at the optimal time for them, and not just when it is convenient for you.
For ideal watering, you need to provide your plants with water early in the day, right before the sun comes up. This will allow for minimal evaporation and maximum water use by your plants.
Here’s a video that will walk you through the process of installing a drip irrigation system on a hillside:
Step 6: Choose the Ideal Plants for a Garden On a Slope
As you probably figured out, not all plants are suitable to be grown on a slope There’s a list of specific plants that will not only grow well on a slope but will also reduce soil erosion.
These shrubs, groundcovers, and other foliage plants to consider in your sloped garden design include:
- Forsythia
- Little bluestem grass
- Shrubby cinquefoil
- Catmint
- Hardy ferns
- Ornamental grasses
- Creeping juniper
- Purple coneflower
- Rattlesnake master
- Prairie dropseed
- California lilac
- Rosemary
- Russian sage
- Sedums
- Rockrose
- Rockspray cotoneaster
- Snowberry Star jasmine
Ideally, you want to grow plants that do not require a lot of water. Because you will always face the challenge of providing adequate moisture (even if you install a drip irrigation system), growing plants that are drought-tolerant or merely drought-hardy is the best way for your slope garden. Alpines tend to be a good choice…
Step 7: Position Plants The Right Way
The rule of thumb is to plant a variety of plants, especially the ones that vary in size. Start by choosing plants that grow tall and have them planted at the highest point of the slope. This will not only provide a more striking visual appearance, but it will also prevent overcrowding and competition by plants that are large and overshadow their smaller counterparts.
Plants that are of normal height, such as bushy plants, should be planted at the middle of the slope. Plants that are smaller in size should be planted at the base of the slope.
Planting your plants with such a variety will broaden your field of vision and make it easier for you to keep an eye on all the plants in your garden. Tall plants at the back of the garden will be more visually appealing and will also help to shelter and nourish the lower, shorter plants.
At the bottom of the slope, your plants will get a bit more water, so plan for plants that like a bit more moisture in these garden beds.
If you’re really struggling to figure out which plants to grow in your sloped backyard garden, remember that you can grow just about anything if you take the time to install a retaining wall or tiered garden that creates more level areas. Rock gardens can also do quite well in this kind of setting.
Step 8: Sow The Seeds
Once the ground is clear, it’s time to pick the seeds you want to grow and sow them into the ground.
Seeds need three things to germinate properly: oxygen, water, and heat. When these three things are supplied in the right proportions, the seeds germinate properly. Other than these three things, light or shade are also differing requirements for some plants.
Here’s how you can sow the seeds into the ground when you have a slope…
Prepare trays or pots first. Use trays that have tiny holes at the bottom so the water can drain. You can even use a regular old household tray and poke holes in the bottom of it yourself.
Next, you need sterile seed compost. Buy it from the store and avoid using any manual dug-up soil, because it may contain pests and bring along with it many diseases that can negatively impact your fledgling plants. Using the right compost is essential if you want the seeds to germinate properly. The tray should be completely filled with compost, up to the mouth.
Take a spray bottle and fill it with water. Avoid every other means of pouring water, such as cans or bottles, because you might wash away the seedlings or flatten them. Spray water from the sprayer and ensure the surface is evenly and fully moist.
Now, begin sprinkling the seeds. If the seeds are larger, place them one by one into the trays and sprinkle some compost over them. If the seeds are extra large (6mm), such as corn seeds, then you need to bury them deep into the compost.
As for smaller seeds, sprinkle them over the compost at a distance randomly. You will likely need to thin these seeds later, but when you are planting, the distance doesn’t matter so much as that they are spread evenly throughout the seed container.
Once you’ve placed the seeds on the compost, cover the tray with a sheet so that the compost doesn’t dry out. The sheet also helps in the germination process as it keeps the seeds in the dark. The covering material can be anything: plastic, glass, magazines, slate, wood etc.
You need to keep the covered tray in a warm place now. Seeds are likely to germinate at their best when the temperature is 64 F (18 C).
If you’re willing to germinate seeds in the summertime then temperature won’t be a problem but if the climate is cold then you need to place the tray somewhere where the temperature is hot, such as close to a hot water tank or boiler, etc.
You can place them by the window so that they receive sunlight, but be careful because windows also tend to produce a draft during the colder months. Check the seeds after a few days, as some may germinate quicker if they are getting too much heat.
Also, watch the moisture in your containers. It is possible for them to develop mold or other fungal growth if the conditions aren’t ideal.
Once the seeds begin to germinate (after about a week), take them out and put them under the light. If you don’t they may become straggly.
If there is sunlight falling on the windowsill, the tray can be kept there. Once you put the tray under the light, keep checking on the compost and make sure it stays moist at all times.
This is vital because once the seeds germinate, tiny roots begin to sprout. These roots can dry up rapidly when kept under the sunlight, which is why you must make sure to keep the compost nicely moisturized. Never keep the tray outside if it is too cold, as frost may affect your seeds.
A few days later, when the seedlings begin to sprout tiny leaves, transplant them into individual trays or pots. Do not move them until you moisturize the compost first.
Don’t pluck the seedlings out from your hands, use a popsicle or a teaspoon instead. This part should be performed with extra care so that you don’t damage the tiny roots while transporting them. The more compost attached to the seedling when you tease it out, the better. This will help insulate the plant and also prevent transplant shock.
Next, pick the pot you’re about to transfer the seedling to, and make a hole with your finger in the compost. Dip the seedling into the hole you made, and put the compost back around the roots. Now pour water at the edges of the container very gently.
Should the compost get washed away while transferring the seedlings, put the seedlings under shade for about a week to grow the roots into the compost. Otherwise, the plant won’t grow well.
Keep checking the bottom of the pot or the container you used for roots emerging from underneath. This is the time when you need to take the plants out and move them to their final location.
When you are ready to transplant, make sure you do so on a day with ideal conditions. Plant on a warm, windless day, ideally one that is cloudy so that your young, immature plants aren’t shocked by a harsh sun or driving wind.

Step 9: Install Hardscapes, Steps, and Access Paths
Gardening on a slope is no child’s play because accessing the garden becomes troublesome when the land isn’t flat. To make it easier on yourself, you can install steps, carve paths at the side, and even install hardscape elements such as rocks, wood, etc.
Building Steps: One of the easiest and most reliable ways to gain easy access to a slope garden is to build steps. You can choose from a variety of materials, such as:
- Flat rock boulders
- Stepping-stones made out of natural stone
- Pressure-treated timbers
- Rot-resistant logs or lumber
- Concrete blocks or slab
If your budget allows it, flat rock boulders are best because of their durability; however, they are costly. Boulders will stand the test of time, and are easy to walk on.
Stepping stones can serve as a great choice as well. You’ll need to dig stepping stones deep into the slope, stack and mortar them to make ‘risers’.
Timber can help create accessible paths. You can make a stairway using pressure-treated timber to make way to your garden. However, due to rainfall and soil erosion, it may not last very long and may begin to rot. To prevent this, use rot-resistant logs (locusts).
You can carve them according to your needs, and fill them with gravel and dirt to fixate them into the ground. To make it more usable, place skipping stones behind every locust to improve the climbing experience.
Paths: Now that you have planted steps, it’s time to make a path ideally 4-5 feet wide.
Terrace Paths: Terrace paths provide extensive space to make your garden look nice. You can also use wall retainers to hold the slope.
Goat Paths: They are not as wide as terrace paths, but will give you easy access to the garden. Goat paths are typically 1 – 2 feet wide and can be cut and leveled according to the slope.
Use dirt to level the path and place skipping stones, small boulders, and mulching grass around it to give it an attractive and functional final touch.
Footholds: Carving paths and building steps is not an easy task, and many gardeners hire a professional to landscape their garden, especially when it’s on a slope.
To avoid the hassle that hardscaping presents, place footholds in the form of large boulders, grass tufts, timber pieces and tree stumps to act as footholds and to help you climb up and down the slope.
Additionally, you can install a fence or a wall at the edges to protect your garden from animals and other predators.
As for pests and insects, use pesticides to keep them at bay and preserve your garden. If you prefer not to use chemicals in your garden, an easier way to keep pests at bay is to plant pest-repelling plants like marigolds, basil, and lemongrass.
Step 10: Deal With The Soil Erosion Problem
Soil erosion can become a huge problem when you garden on a slope. Here are some effective techniques that you can apply to reduce it:
Improve Water And Planting Practices: Pile up soil at the down-edge of the slope. This will act as a well for the plants and will help retain water for longer time periods. This way, the roots of the plants keep getting a good amount of water underneath.
Apart from that, watering deep down into the soil also reduces soil erosion because penetrated water encourages the roots of the plants to grow, support the plant and hold water. Again, drip irrigation is the best way to water plants on a steep slope.
If you aren’t able to install a drip irrigation system, make sure that when you are watering, you are doing so deeply and briefly. You don’t necessarily need to water every day, but make sure you give a good soaking to each plant’s roots to ensure a good distribution of moisture.
Soil Amendments: Use compost, mulch, rotten manure, or other good sources of compost to protect soil from eroding. Heavy rain can destroy your garden and wash everything away. Adding 3 to 4 inches of any of the above-mentioned composts or natural fertilizers can help prevent erosion.
Step 11: Water The Plants
When you’re building a garden on a slope, you need to take serious measures to water the plants accurately and in the right manner. Here’s where gravity can pose threats to the water levels and the plants might not receive the amount of water that they require.
Choosing A Sprinkler System: Certain factors need to be considered before you choose a sprinkler system for watering your plants. These include:
• Angle of the slope (which we already discussed above)
• Dimension of your slope
Once you know the angle and dimension of your slope, it will help you pick a sprinkler system that fits best for your slope. If the dimension of your slope isn’t too big or broad, then a rotor sprinkler will work just fine. If your dimension is bigger, then go for a drip irrigation system.
• Timer: Slope garden plants require water from time to time which is why a sprinkler system with a timer is your best bet. Go for the one that comes with four start time options and water distribution options as well such as: soak and cycle etc.
A sprinkler system with four start times will require the gardener to do the math and determine the number of run times needed.
Determining run time: Divide the watering time with water runoff time to figure out the needed run times.
For example, if the plants need to be watered for 30 minutes and the runoff time is 10 minutes (the time after which water begins to run off), then dividing 30 by 10 will give you the answer (3). Hence 3 is the run time, and you will need to have 3 run times in a single program.
Avoid Erosion and Flooding: Flooding and erosion can be prevented by installing valves in your garden. Flooding may also happen when a pipe or sprinkler system gets damaged. Here’s where you can use two valves.
Master Valve: Install a master valve in the mainline to decrease the pressure through which the water is running. This can help in case of a damaged pipe or sprinkler.
Reverse Flow Valve: Sometimes, a diaphragm can break and allow continuous water flow and contribute to erosion. A reverse flow valve can help in this regard as it can hold off the water until the diaphragm is repaired.
Installing Lateral Lines:
Controlling Pressure: Installing lateral lines vertically is a bad idea when you want to water your garden on a slope because it can disturb the pressure level on the nozzles and supply water irregularly. Instead, go for horizontal lines as they maintain the pressure.
Adjusting The Sprinkler: It is vital to adjust your sprinkler properly so that it can distribute water and cover all the plants.
To do this, make sure that the middle and the bottom lines are closer compared to the lines that are at the top and the middle. Also, ensure that the middle and bottom lines are adjusted a bit above the hill so the bottom line does not align with the slope ground.
Sprinkler Tips
To supply water uniformly, install a pattern sprinkler in every zone of your garden, and set runtimes. Use nozzles that have a low-angle projection. Make sure all of your plants are receiving the right amount of water.
Finally, if your garden is big, use a drip irrigation system or seeker hoses to water your plants frequently. Both of these water systems can work with timers, and they will ensure that the right amount of water is served to the plants.
These watering tips will help you water your garden in the right manner and will make gardening on slopes easier.
The Verdict
Gardening on a slope sure is difficult, but it’s definitely not impossible. If you follow these steps, you can prepare a lavish garden on a slope with minimal hassle – and for minimal expense. No uphill battle required.

Michael is in love with nature and loves to spend his weekends with his pet dog at his farm where he grows organic fruits and vegetables. He’s a single parent who loves the idea of simple living.
Nobody should be planting bluestem grass! It has proven to be incredibly invasive and leads to biodiversity wastelands. Please don’t suggest this plant!