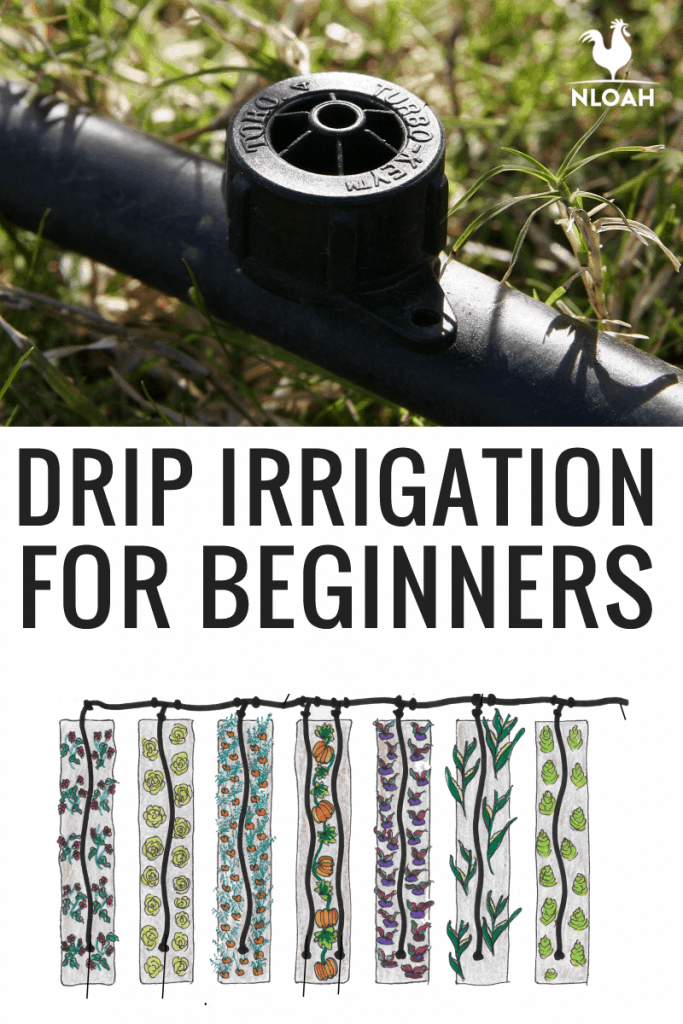
Drip irrigation, sometimes called trickle irrigation, has become popular with many gardeners as an easy way to conserve water without sacrificing plant growth.
Drip systems use less water than sprinkler systems and can also help prevent some plant diseases. How hard is it to install a drip irrigation system?
The simple steps for installing a drip irrigation system are:
- Measure the garden to get good dimensions for the irrigation system layout.
- Plan the system on paper first, including lengths of tubing and specific fittings needed.
- Lay out the system on the ground
- Connect the parts of the system together
- Turn on the system and test it
Installing a drip irrigation system is mostly a matter of laying it out on the ground and connecting pieces together. One special tool is needed, a pipe punch.
This is an inexpensive hand tool that can be bought at the same time you buy the rest of the parts. Using the punch is just a matter of poking a hole in the plastic pipe.
Table of Contents:
How Drip Irrigation Works
Drip irrigation systems use small fittings called emitters to release water very slowly into the soil. Since they provide water straight to the ground around plants instead of throwing it up into the air, no water is lost to evaporation.
These systems don’t move the water very far from the irrigation line, so the water only goes to desirable plants.
Because of the reduced evaporation and limited area irrigated, drip systems use 30% to 50% of the water that sprinkler systems use.
They reduce weeding by limiting the water available for weeds away from the garden plants. They also promote plant health by reducing fungal and bacterial infections transmitted through wet leaves.
Looking at a drip irrigation catalog can seem overwhelming because of the great variety of parts available. However, there are only four kinds of parts used in a drip irrigation system.
Drip Irrigation Parts
Drip irrigation systems consist of a main line that carries water from the source to emitters in the garden that put out water for plants.
The major parts of the system are the main line, fittings to connect lines, emitters to distribute water in spots, and t-tape for watering long rows.
Main Line
The main line, also called the header line, is polyethylene tubing that carries water from the source to the irrigation fittings. Polyethylene tubing is cheap and easy to install. It is lighter and more flexible than PVC pipe, but it is also not as strong.
Half inch pipe is a good main line for systems where the main line is less than two hundred feet long. A three-quarter inch pipe is needed for bigger systems.
Fittings
Fittings are used to connect pieces of main line together, to make turns with the tubing, to split lines, and to connect emitters to the main line.
Common fittings include straight connectors, 90-degree elbows, and t-fittings to split one line into two. Other fittings are used to connect tubing to faucets or to smaller emitter lines.
- Compression fittings are used to join pipes of the same size. They have sleeves that fit into the ends of the lines to be joined. Some require hose clamps on the outside to fix the fitting in place, while others have built-in screw clamps to hold the pipe ends in place.
- Adapter fittings have a compression fitting on one end and threads on the other. They are used to connect the main line to faucets, hoses, and other water sources.
- End clamps are placed at the end of the main line to close the end of the hose. The simplest end clamps just hold a kink in place so that water can’t escape from the pipe.
- Barbed fittings are used to join small pipes that branch off larger ones. Barbed fittings are poked into small holes in the mainline. They are held in place by small barbs on the fitting that go inside the line.
- Goof plugs are used to fill holes for barbed fittings if the fitting is no longer needed, or if you accidentally put a hole in the wrong place. They are just barbed plastic plugs that go into the hole and stay there.

Emitters
Emitters are small nozzles that are attached to the header line to distribute water. They may be attached directly to the main line, or they may be attached to short lengths of quarter-inch lines. There are several different types of emitters.
Disclosure: if you visit an external link in this post and make a purchase, I may earn a commission. Read my full earnings disclosure here.
- Drippers just emit a steady drip, drip, drip of water. Single drippers are good for container plants, while several can be strung together around the base of a tree to keep it moist. Drippers are the most common type of emitter in a drip system.
- Sprayers shoot out a fan of water over a short distance, usually about two feet. Sprayers are available to cover quarter, half, or full circles. They are good for watering trees, shrubs, and small raised beds.
- Misters put out a fine mist of water. They are good for delicate plants or plants that like high humidity. Misters are also used to keep seedlings moist in greenhouses.
- Shrubblers are similar to sprayers, but shoot out six or eight discrete streams of water. They are good for raised beds.
T-Tape
T-tape is lightweight polyethylene tape that has emitters built in every six to twelve inches. When the system is running, t-tape delivers a steady drip of water along the length of the tape.
It is easy to lay out in garden rows or in long raised beds. T-tape will be the main type of emitter used in large gardens.
Irrigation Manifold
The irrigation manifold is the name given to the equipment at the start of the main line. This equipment guarantees that the system will operate safely and effectively. The manifold can be configured to inject liquid fertilizer into the irrigation water as well
Vacuum Breaker
Also called a backflow preventer, vacuum breakers prevent water from flowing from the irrigation system back into the faucet.
These are required by law if you connect to a public water system, and strongly recommended if your irrigation system is connected to your home water system. You don’t need one if you are using a rainwater harvesting system or using surface water.
Pressure Reducer
Drip irrigation works best at pressures between 20 and 30 PSI. If you are using public water systems or a home system that has enough pressure to provide good showers, your pressure is too high for drip irrigation.
Pressure reducers limit the amount of water flowing from the faucet to a pressure that works with the drip system. Pressure reducers aren’t needed for gravity-fed rainwater collection systems.
Filter
Drip irrigation systems are very sensitive to debris in the water and are easily clogged. Placing a filter at the head of the main line prevents this.
If you are using water from an outdoor source, a good filter is necessary to keep your system running right. It is not necessary for water from public systems since those are filtered at the treatment plant.
Timer
Gilmour water timers can be installed on your system to automatically open the valve and run water for a set time period even if you aren’t home. This guarantees that your garden won’t dry out.
Timers are nice to have, but not necessary. So long as you meet the plants’ water requirements with approximation, the actual time doesn’t really matter. But this can save you some hassle, particularly if you have a large garden or not a lot of time on your hands.
You do have to put some thought into this. For example, you’ll have to choose between a timer on batteries and one that plugs in. If you choose the former, you’ll have to measure to see how long they will typically last.
If you don’t want to use electricity, you can use mechanical timers, which are just as good, though not all brands are reliable, so you have to do your due diligence and thorough testing when you get yours.
Fertilizer Injector
Fertilizer injectors can draw liquid fertilizer from a bucket into the irrigation system. This is an easy way to spread things like fish emulsion or compost tea into your garden. Injectors let you fertilize without any extra effort.
Other Irrigation System Tools
There are a few other tools that make installing a drip irrigation system easier. Other than the punch, these aren’t absolutely required, but they are helpful.
Punch
Punches make holes just the right size for barbed fittings to plug in. You really need to buy a punch. It is possible to make holes for barbed fittings without a punch, but they are likely to leak.
Punches are available from the same source that provides the rest of your equipment, and they are very inexpensive.
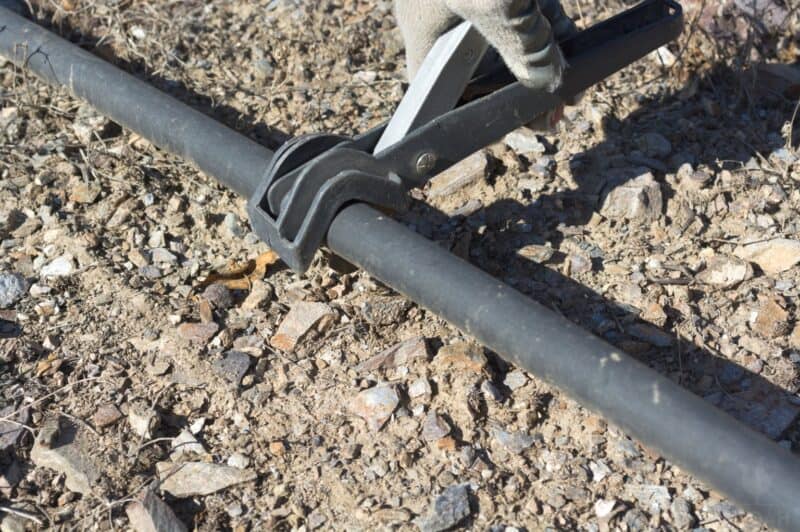
Tubing Cutter
Tubing cutters are tools designed to slice polyethylene tubing easily. They make it simple to get a smooth, square end for joining to a fitting. You don’t have to have a tubing cutter, but it is nice to have. You can also purchase a combo tool with both a tubing cutter and a punch in one.
Staples and Pins
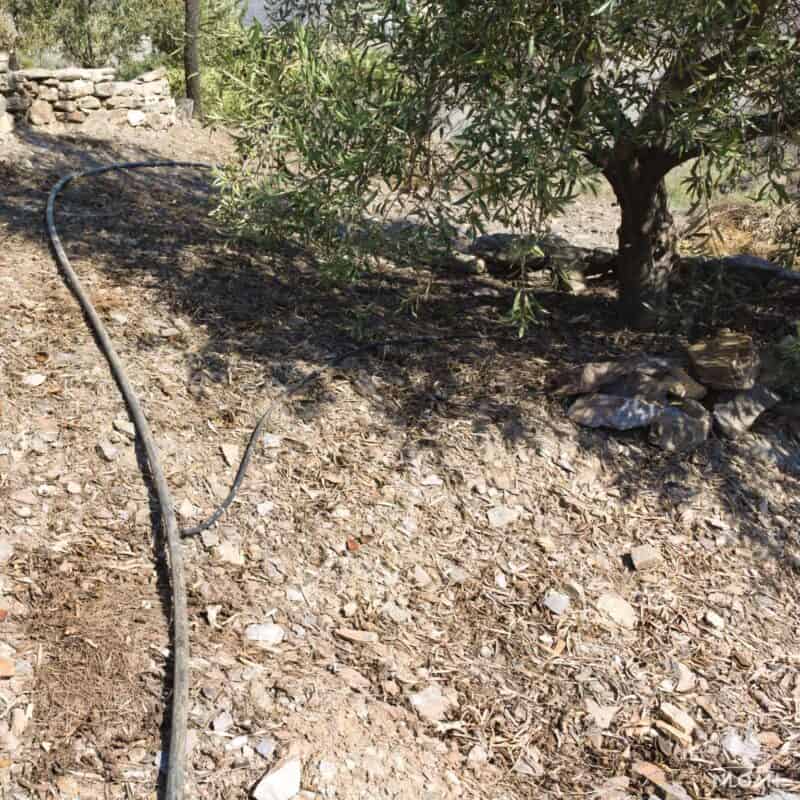
You can purchase landscape staples and pins to hold the irrigation line in place, but it is not vital. Plants growing next to the line also keep it in place.
Many gardeners cover the lines with mulch to hide them. That also prevents the lines from moving.
100 Foot Measuring Tape
A long measuring tape guarantees that you will know the distances involved in laying out your drip irrigation system. Measuring everything first assures that you will buy enough tubing to complete your system without any left over.
Hundred-foot tapes let you measure long runs easily, and the tape is flexible enough to handle curves smoothly.
Drip Irrigation Kits
Drip irrigation kits are available from many sources. These kits contain everything you need to install a complete irrigation system, including a plan.
These kits are a good way to get into drip irrigation and understand the basics. All you do is unbox the kit and install it according to the directions.
The drawback to kits is that you don’t get as much flexibility from a kit as you would from a scratch-built system. You have to install the kit according to the plan and you can’t customize it for your garden.
Plan First
The first step to installing a drip irrigation system is planning. Measure your garden beds and the distance between other plants. Sketch everything to scale using graph paper, then draw in the irrigation system. Identify sharp corners or forks that will require fittings.
Row Garden Layouts
For a row garden, the system looks something like a comb. The header line runs along one edge of the garden perpendicular to the rows. This is the back of the comb. The t-tapes run down the center of each row like the teeth of a comb.
My garden uses t-tapes on three-foot spacing. This is a compromise for different plant types. Small plants like lettuce, carrots, and greens could be on much closer rows.
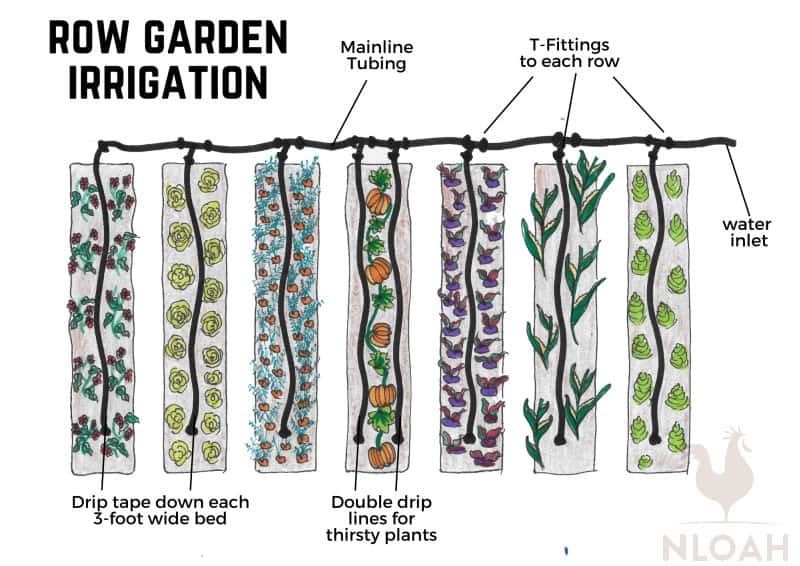
Large rambling plants like corn, squash, and sweet potatoes would be easier to manage on four-foot centers but do fine with three.
Really aggressive vines like pumpkins get double rows. Three-foot rows are a good compromise.
Raised Bed Layouts
Raised bed layouts are similar to row crop layouts with one difference. Run the main line along the beds. For each bed, use a T-fitting to send a short branch of the main line along the edge of the bed.
Run emitters or drip tape off the branch line. If you are using emitters, use enough sprinklers to get full coverage of the bed.
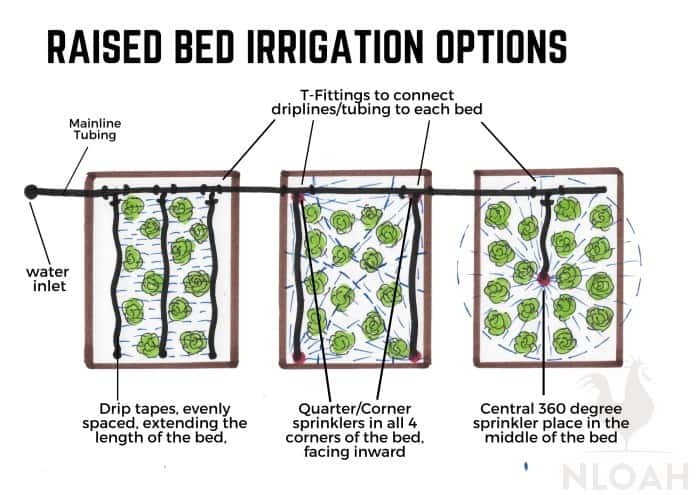
For drip tape, you will need one line of drip tape for every 1.5 to 2 feet of bed width. For example, beds three to four feet wide need two rows of drip tape. A six-foot bed needs three or four lines.
You can also use sprinkler emitters in small beds. Place a single emitter at the center of the bed to cover a small area, or put quarter-circle emitters in each corner. That will give coverage to a larger bed.
Orchard and Vineyard Layouts
For orchards and vineyards, run the main line along the row of trees or vines. For small plants, you only need one or two emitters per plant.
For larger plants, run a short piece of ¼ inch tubing from the main line around the base of the plant and put drip emitters every twelve inches in the line.
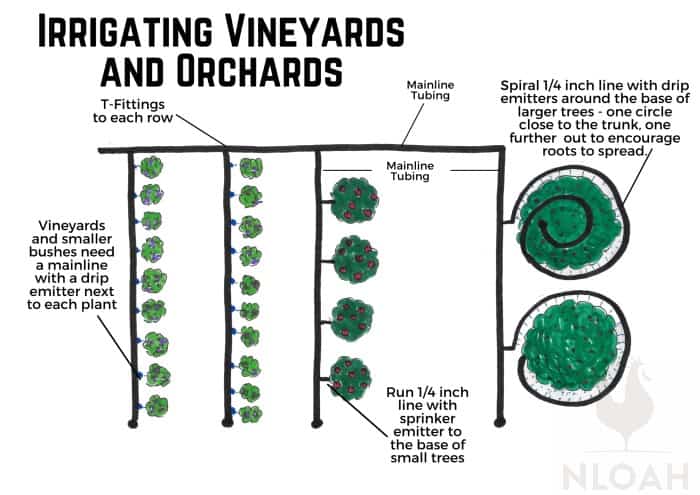
For really big trees, you may need to circle the base with emitters twice, once close to the trunk and once farther out.
Greenhouse Layouts
If you are installing drip irrigation for a greenhouse and for outdoor applications, you may want them on different main lines so that you can water independently. Tender seedlings in the greenhouse need light, and frequent watering, while established plants prefer deep soaks performed less often.
For starting seeds in a greenhouse, run the main line above the seedling trays. Install misters or overhead sprayers along the main line. The spacing should equal the width of the spray pattern so that you get full coverage with minimal overlap.
Water seeds and seedlings frequently, as often as every day, for a few minutes. You want the soil moist but not soaked.
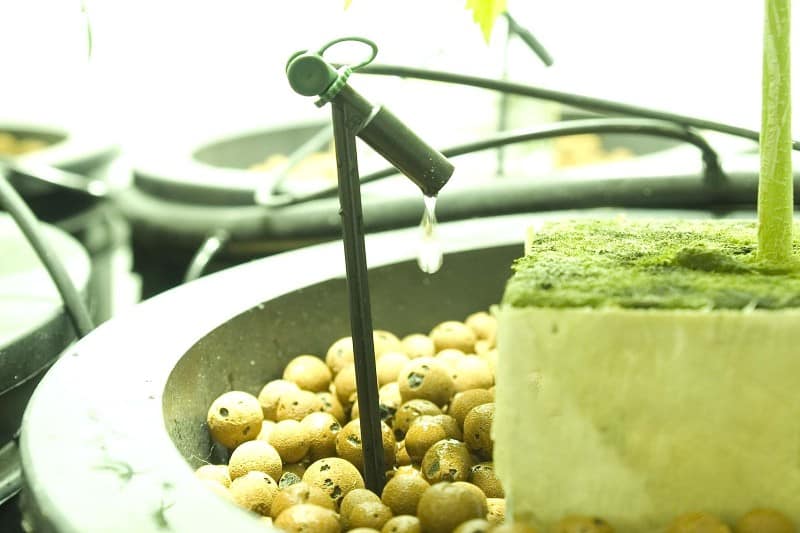
For established plants and containers in a greenhouse, the mainline can run overhead or along the base of the plants.
Place a single sprinkler emitter or one or two drip emitters at the base of each plant. For container plants, put a single drip emitter in each container.
Parts Needed
Once you have planned your system, make a list of the parts you need. Identify all the fittings, the total length of main line, and the total feet of drip tape needed.
Also identify where you need vacuum breakers, pressure reducers, or filters. It’s a good idea to order some extra straight fittings as well. Straight fittings allow you to correct a piece of mainline or t-tape that was cut too short.
Spread Out
Start the installation of your drip irrigation system by laying out all the parts in the correct location. Choose a warm, sunny day to lay the main line. It is sold in rolls, and the line will “remember” this shape.
Lay the roll in the sun for a while to heat up and soften. This will relax the line and make it easier to unroll and stretch out. A warm pipe is also easier to punch and install barbed fittings into.
Get some helpers for laying out your drip system. Set up rolls of main line and spools of drip tape with an axle that lets them spin freely.
One person can hold the axle and roll in place while the other pulls the end out to the right length. The holder then cuts the piece off the roll and moves to the next spot while the puller comes back to the roll to start again.
Connect
Once everything is laid out, you can start to make connections. Emitters and t-tape connect to the main line with barbed fittings. To connect the barbed fittings, start by making a hole with the punch where the fitting goes.
Work the barb into the hole so that hole in the mainline stretches around the fattest part of the barb. This takes some force to do. It is easiest to do when the main line tubing is warm.
It may seem odd to create a water-saving irrigation system by punching holes in the pipe, but barbed fittings work well. The main line tubing will contract a little when the barb is through. It will contract more when cool water flows through, and this kind of fitting doesn’t leak at low pressure.
If you are using t-tape you will need to cap the end of each run of tape with a plug or a flat-end fitting. To use the flat fittings, slide the fitting up the tape a little from the end of the hose.
Fold the hose over itself two or three times, then slide the fitting up over the folded tape. That will keep water from running out at the end of the tapes.
Use compression fittings on the main line to build in bends using elbows and splits using t-fittings. Make sure that the clamps or screws on the fittings are nice and tight so the joints don’t come apart. Put an end fitting at the end of the pipe so water doesn’t run out at the end of the system.
Assemble the Manifold
The manifold is the set of parts that connect the irrigation system to the water source. If you are connecting to a potable water source, start by connecting the vacuum breaker to the water source so no irrigation water flows back into your drinking water.
Connect the pressure reducer next, then the timer if you have one. If you include a fertilizer injector, put it at the end of this set of equipment.
The start of the main line should have a tubing-to-hose connector that screws on to the end of the manifold. This is usually a female hose end, but not always. Check your manifold parts to make sure you have the right connector.
Check for Leaks
Once all the setup equipment is in place, connect the main line tubing to the manifold. When the main line is connected to the water source, turn on the water and watch the system work.
It takes a few minutes after water starts flowing for the system to be fully engaged. Once everything is working, walk through the whole system to check for leaks or missed connections.
Fix It in Place
Once everything is in place and working correctly, you can fix it in place. If you don’t like the way all the plastic lines look, use mulch to cover them up.
Otherwise, use staples or just big rocks to fix the drip tape in place. As your garden grows, the plants will cover up the drip tape so that you don’t see it anymore.
Using Your System
If you have a timer, program it to run the drip system at appropriate intervals for the season and your climate. Once or twice a week is usually enough.
If you don’t have a timer, you will have to keep an eye on your garden to determine when to irrigate. You may need to water more often if you have just set out transplants or during extreme heat. When the weather is wet, you don’t need to water at all.
Be careful around your drip irrigation system. Power equipment like rototillers and lawnmowers will grab t-tape and turn it into a ball, requiring you to spend time removing the tangle and also replacing the tape.
Hoes and other sharp hand tools will also cut t-tape and main line if you aren’t careful. This is where extra straight-line fittings come in handy—they make it simple to fix cut lines.
When to Water
There are many different ways to decide when to run your drip irrigation system. The simplest method is to install a timer and let it run based on the schedule. This works well if you aren’t concerned about conserving water, but it can be wasteful.
Another way to decide when to water is based on rainfall. If you haven’t had at least half an inch of rain in the last week, run the irrigation system. If it has rained recently, skip the cycle. This will keep your garden in good shape without wasting too much water.
You should definitely check the average rainfall in your area, and research any recent droughts that may have occurred.
If conserving water is a high priority, you should check the moisture in your soil to determine when to water. An easy way to check moisture levels is to poke your finger into the soil around the base of a plant.
If your finger comes out with soil stuck on it, the moisture is adequate. If the soil won’t stick, it’s time to water.
The most sophisticated way to check soil moisture is with a soil moisture meter. The moisture meter gives you accurate and repeatable measurements of how much water is really in your garden soil.
Most soil moisture meters include directions on when to water based on the reading. Using a meter guarantees that you use the minimum water necessary for your garden to thrive.
Winterizing Your System
In cold climates, you will need to drain your system before winter. Polyethylene pipe will split if water freezes inside it.
The easiest way to drain it is to remove the end fitting from the main line and let it drain. You may need to lift the line in the middle to drain all the water from the line.
Aaron Cummins operates a small farm in the Cross Timbers region of Texas. He raises pastured pigs, grass-fed cattle, and vegetables. He cures pork and makes his own sausages. He enjoys hunting, fishing, and raising his three sons.