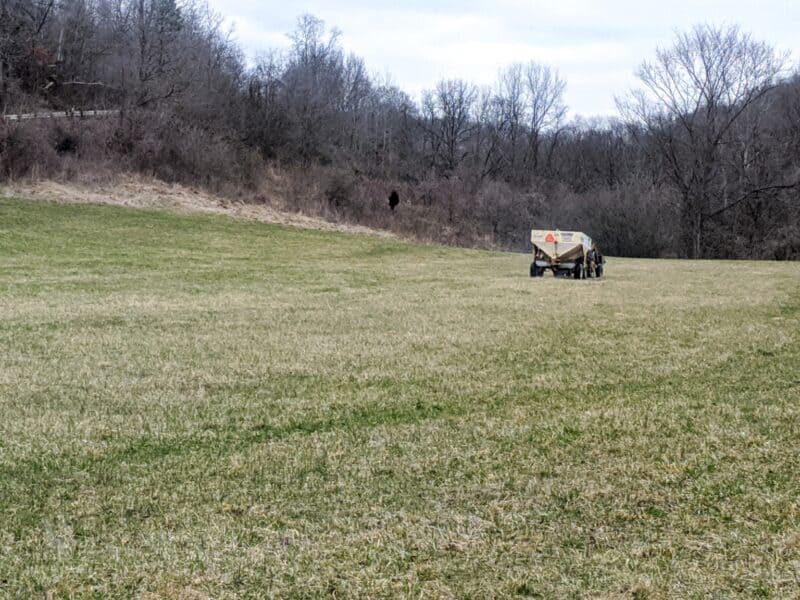
Adding fertilizer to a pasture or hayfield can help infuse nutrients back into the soil and bring about robust growth of highly nutritious hay or field grass for the livestock to eat … if you do it right.
Making mistakes when fertilizing livestock areas can not only bring about a vastly disappointing hay or straw yield, but could also prove deadly for the animals themselves.
Solid hayfield and pasture management practices begin with soil testing. If you do not know what nutrients the soil lacks or has an overabundance of (or the pH balance), it would be impossible to choose the right fertilizer for the area or know how much should be applied.
Adding more nitrogen to a patch of dirt that is already high in nitrogen can cause far more damage to the hay crop, straw crop, or pasture than would have occurred if you had simply left the area alone, and did not apply any fertilizer at all.
Following timing, amount, and location safety guidelines when adding fertilizer to a field can drastically help protect against waterway contamination, livestock poisoning, and waste of expensive fertilizer and any rental equipment used to spread it.
What Do All Those Numbers on the Fertilizer Bag Mean?
The labels on fertilizer bags can be quite confusing, especially for newbie homesteaders.
Breaking down what the three numbers in bold print actually mean will help you understand not only what you are buying, but what you need to give your hay fields and pastures both before the growing season starts and after each harvest.
- The label on a fertilizer bag is known as the “grade” and is set as a national standard of measuring the contents of the mixture inside.
- The first number on a fertilizer bag refers to the amount of nitrogen (N) container in the bag.
- The second number pertains to the level of phosphate (P205) in the fertilizer mix.
- The third and final number details the amount of potash (K20) in the fertilizer recipe.
- Together, these three numbers reference all of the primary nutrients the soil needs: nitrogen, phosphorus, and potassium.
Example: 12-12-12 fertilizer grade is composed of 12% nitrogen, 12% phosphate, and 12% of potash.
A 50-pound bag of 10-10-10 fertilizer contains 15 actual pounds of fertilizer nutrients, and the rest is composed of natural filler materials like limestone and sand.
The lightweight fertilizer material clings to the filler and helps in the dispersal process.
The pounds of nutrients in the bag are directly related to the number of nutrients and formulated via a math equation based upon multiplying 50 by the first number in the recipe. In a bag of 10-10-10 the math problem would be 50 X .10.
Fertilizer grades are made by combining at least two soil nutrient sources into a single blend that is referred to as “mixed fertilizers.”
The particles of nutrients inside the bag can be of a single color, or they can include more than one color.
A fertilizer recipe sometimes has more of one ingredient than another or even zero percent of the third ingredient.
Unless you are guessing at what your dirt needs and buying off the shelf (which is strongly recommended against) the staff at the agriculture store will mix the fertilizer to meet the specific needs of the soil being treated.
The most common fertilizer mix recipes for pastures and hayfields often include:
- 12-12-12
- 10-10-10
- 19-19-19
- 5-10-10
- 8-0-24
How Often Should You Test Your Soil?
The soil does not need to be tested just once a year in the early spring when the first dose of fertilizer is applied but before each application in all areas.
A hayfield soil test may have called for 12-12-12, 15-15-15 or a 19-19-19 mixture in March definitely does not mean the soil composition will call for the same recipe mix after months of grazing, growing, and harvesting.
In addition, a single fertilizer recipe mix might be perfect for one hayfield, but be entirely wrong for an adjacent one or a nearby pasture. Soil types can vary greatly within only a short geographical distance.
Legumes and grass hayfields need a different mixture and quantity of fertilizer than hayfields that grow oat-based hay, for example. Legume hay crops need less nitrogen than grass plants.
For every ton of legume or tall grass hay harvested from a hayfield, roughly 50 pounds of potassium and 13 pounds of phosphorus is removed from the soil.
The ideal ratio of fertilizer for this type of hay-producing field would be one part phosphorus to four parts potassium.
Applying fertilizer just once, annually, would not add essential nutrients back into the soil at the necessary ratios after the hay has been harvested or the pasture grazed clean after a livestock rotation into it.
On average, you can harvest around four tons of hay annually from each acre – in a decent growing year. This means 52 pounds of phosphorus and about 200 pounds of potassium would be depleted from the dirt on every acre.
Adding in 275 pounds of a 19-19-19 fertilizer mixture recipe would still leave the field roughly 148 pounds shy of the level of potassium that has to be replaced to achieve optimal soil contents.
This is why soil testing after each harvest and before buying more fertilizer is so necessary.
Only then you’d be able to tell the guys at the agriculture store that you need a 0-0-60 potash mix recipe to get the extra 250 needed to apply an adequate mixture to the soil.
Timing Matters
So, testing is super important if you’re going to grow hay, but also when you test matters nearly as much. To be clear, you can’t just test your soil once a year and then use that data to inform your fertilization for each crop. That just will not work.
You’ll notice that your soil levels are different in different seasons, after different plantings, and depending on the health of the planting that you just harvested. Likewise, if you were letting your animals roam or graze on that same parcel between plantings that would dramatically affect soil levels later on in the year.
My personal policy is to test the soil prior to planting, after harvest, and then before the subsequent planting. You don’t need to test after the last harvest unless you want to amend the soil for other purposes between then and your next planting.
How Much Fertilizer Should You Be Using On Your Hayfield?
The amount and type of fertilizer used will depend on the soil’s nutrient levels, the types of species grown in the pasture, soil fertility levels, average hay production and removal rates, and climate conditions, among other things.
Knowing these factors can help you determine which form of fertilizer will work best for your hayfield and ensure it continues to thrive.
The general recommendation is to apply 40 lbs N per ton of expected hay yield.
Pounds N is the most important variable to look at for a hay field regardless of your expected yield; although other you’ll need to track other nutrients and variables (like the soil pH, p level (phosphorous), potassium, calcium, sulfur, etc), nitrogen is the most major nutrient to focus on.
That said, you’ll want to pay attention to the other nutrients and levels in your soil test (more on this below) because overfertilizing with nitrogen can cause other problems, like nitrate toxicity, and the availability of other nutrients can impact how well your soil uptakes the nitrogen you’re providing it.
Nitrogen-use efficiency is significantly increased by P fertilization, so it’s a good idea to make sure phosphorus levels are relatively high at about 46 lbs. per acre.
How to Maximize Growth
Making multiple fertilizer applications before and during the growing season should help keep the soil at an optimal level of nitrogen – the nutrient that most often tends to be eliminated from the hayfield or pasture.
If you have sandy soil in all or part of your fields, consider using split percentage levels of nitrogen to avoid infusing too much of the nutrient into the soil and increasing the possibility of leaching.
When surface volatilization happens at least some of the nitrogen in the fertilizer has broken down to form ammonia gasses.
How much and how quickly this type of surface volatilization occurs will depend on several factors: the pH balance of the soil, moisture levels, and temperature.
If the fertilizer is spread onto ground that is already wet and rain is not in the forecast for a few days, the evaporating water can attach to the ammonia gases released, and risk losing the urea content of the fertilizer.
Urea is the crystal and colorless compound in nitrogen that breaks down the protein in the urine excreted by animals.
If it is warmer than 50 degrees F (10 C) and the pH balance is higher than 6.5, the rate of urea conversion to ammonia gasses is substantially enhanced.
If the hayfield or pasture has had agricultural lime applied to it in the past 90 days, fertilizer that is urea-based should not be used. You also need to be mindful of this during a drought.
Stopping ammonia volatilization from urea can occur if the crystals have direct contact with the dirt and enough rain falls soon after the fertilizer is applied, the urea content will wash from the residue of plants in the field down into the dirt.
If there is little to light residue it should only take one quarter to half of an inch to dissolve the urea into the dirt. If the plant residue in the field is heavy, it will take more than half an inch of rain to get the job done.
Using nitrogen that is not urea-based but is composed of ammonium nitrate or ammonium sulfate may also help decrease volatilization.
This type of fertilizer would likely be a customized mix or special order, and not something that would typically be found on a store shelf.
Pasture Fertilizer Basics
Legumes and grass hayfields probably don’t require the same amount of fertilizer to grow. When livestock grazes they return significant amounts of potassium and phosphorus to the soil. Cows feed back 92% of the potassium they consume and 66% of the phosphorus.
How uniformly the nutrients are fed back into the soil depends on the amount of livestock grazing in the pasture and how many acres they are free to roam – as well as how effective your pasture rotation plan is at allowing the animals equal access to the grounds.
Manure is more evenly distributed when livestock is confined in a designated space for small amounts of time, then rotated to another space to do the same.
When livestock free-range over a large space, the manure droppings tend to accumulate in what is known as the “loafing area” where the grass is most prevalent and sweet tasting, or beneath a nice big shade tree or around a water hole where the animals spend most of their non-eating time on hot days.
When fertilizing a pasture the application dates should coincide with the increased or decreased grazing needs for the upcoming season.
Sometimes, dividing up a pasture into quarters or thirds and fertilizing is the best way to keep the soil in a grazing area continually infused with nutrients.
Legume and grass-style hay will nearly always flourish in the spring without the need for any fertilizer because it has had all winter to rest and build up nutrients.
Fertilizing in the spring can be a huge waste of money and time unless the hayfield or pasture has not been well tended to, or has been overworked.
When the “spring flush” growth occurs after winter finally subsides, adding fertilizer to bolster the ample sweet grasses in pastures even more could actually be harmful to the livestock.
Grass tetany is a livestock metabolic disease that is related to magnesium deficiency. Grass tetany happens when livestock grazes too heavily on the quickly-growing spring grass.
It especially seems to impact ruminant animals like sheep, as well as both beef and dairy cattle.
The beginning or middle of June is often the optimal time to add fertilizer to a pasture. This gives the grazing area a solid nutrient boost before the dry heat and incredibly intense temperatures start to appear.
Adding fertilizer to the pasture again in the late fall (once the animals are relying far more on hay than grazing) may also help infuse nutrients back into the soil before winter hits so the ground can settle properly in preparation for the new growth of spring.
Hayfields are often best fertilized AFTER the first harvesting of hay or straw. The soil will be depleted of nutrients, and need a little help for the next cutting to grow tall and healthy – especially if the fields are cut three times a year when weather permits instead of the standard two.
Should You Use Liquid or Granular Fertilizers for Hay Fields?
Liquid fertilizers offer several advantages over their granular counterparts, including immediate availability and rapid uptake by plants. This makes them great for farmers who need quick results, as the nutrients in liquid fertilizers can become available to plants within hours of application.
Not only that, but liquid fertilizers are highly soluble, which means they can more quickly reach the depth of root zones that may otherwise take weeks or months with a granular fertilizer.
These advantages make liquid fertilizers ideal for use during hot summer months when hay fields require extra nutrition due to increased evaporation rates.
Granular fertilizers are made up of dry particles that slowly release nutrients into the soil over time. This slow release means nutrients can be absorbed at a steady rate until all have been utilized, making them ideal for prolonged growth periods such as those experienced in hay fields.
Unlike their liquid counterparts, granular fertilizers don’t leach away quickly with rain or irrigation water—ensuring your hay field gets maximum nutritional benefit with minimal waste.
Plus, they tend to be less labor-intensive than liquid fertilizers since they don’t require special equipment like sprayers or spreaders to apply them properly.
Fertilizing Quick Tips
- It takes roughly 20 to 40 pounds (9 to 18 kgs) of fertilizer per acre to foster legume and grass hay growth.
- Legumes actually help add nitrogen back into the soil during the growing process. The hay from this type of field also often produces more protein than hay bales composed of straight grass.
- “Cool season” grasses typically do not thrive until the latter part of spring instead of the early spring. Not knowing what type of grass a hayfield or pasture is growing can cause some new homesteaders to think a field is not growing well and apply fertilizer unnecessarily. Common cool-season hay grass varieties include wheatgrass, brome, Timothy, and bluegrass.
- Some homesteaders and farmers with warm-season grasses choose to apply just a little bit of nitrogen fertilizer in the early spring to help bolster late spring growth before baling – but doing this without a soil test could increase the chances of grass tetany. Infusing the nitrogen just prior to the spring flush could also increase toxins in tall fescue grass that has been infected with endophyte.
- Don’t be afraid of organic fertilizers! While many farmers use synthetic fertilizers on their hay fields because they’re faster and absorb quicker, you can add something as simple as 1 to 4 gallons of liquid fish emulsion or seaweed per acre as well. Manure and compost also make wonderful fertilizers for hay fields and can offer a good yield with minimal effort.
Soil Sample Tips
Taking a soil sample is not a difficult task but to get results you will need to take it to be analyzed. The local water soil and conservation district office or a 4-H Extension should be able to process or send the test away for you. A nominal fee may be charged for the service.
The time (about two weeks during a busy time of the year) and money spent on soil testing can save you far more money and wasted time if the wrong fertilizer mixture is applied to a pasture or hayfield.
Typically, one soil sample may adequately address the type of dirt over a 20-acre patch of land if the area is similar in drainage capacity, soil type, and topography.
How to Collect a Soil Sample
- Walk in a “W” or “M” shape in a section of pasture and take about a 2 cup sample at each point in the letter shape you are making.
- Use either a soil probe or an old-fashioned shovel to dig six inches down into the soil to get the sample.
- Place the dirt in a clean bucket with a firm-fitting lid.
- Stir the dirt in the bucket and cover it with the lid.
- Take the bucket to the agriculture-related agency or business that is going to conduct the soil sample for you.
These steps will need to be repeated if the hayfield or pasture being tested is comprised of varying environmental attributes like those noted above.
Simply spreading fertilizer on the ground without knowing what type of mix that you need or when it is really needed is like driving without headlights down a dark and curvy country road… you will eventually get somewhere, but a lot of damage will likely occur along the way.
Looking at agriculture like the science that it is and following best practices as dictated by what the ground, weather, and livestock habits is truly the only way to cultivate robustly productive hayfields and pastures.

Tara lives on a 56 acres farm in the Appalachian Mountains, where she faces homesteading and farming challenges every single day, raising chickens, goats, horses, and tons of vegetables. She’s an expert in all sorts of homesteading skills such as hide tanning, doll making, tree tapping, and many more.
Tara
Nice article of good information, I will need to read couple of time to catch all you have said.
Thank you