Nothing says summer quite like sweet, homemade canned tomatoes. Canning tomatoes always makes me feel a little bit bittersweet.
On one hand, I love being able to enjoy the delicious bounty of a summer’s hard work in the garden. On the other hand, the time in which it is time to can tomatoes marks the end of the summer and the beginning of a long, cold winter.
However, there’s something to be said about canning your own tomatoes. Not only are they delicious and versatile, but they’re also much better for you than the varieties you would buy in-store.
To get started, all you need is the tomatoes (ideally those that are ripe and juicy and not mushy or black-spotted in any way) as well as fresh herbs. For equipment, you should have a water bath canner (which you can purchase inexpensively at any home and garden store), some mason jars, lids, and bands, and a jar lifter or tongs.
That’s it! Gather your equipment, harvest your tomatoes, and let’s get started.

What Kinds of Tomatoes Work Best for Canning?
You can truly make any kind of tomato a canning tomato. You can find tomatoes in all kinds of colors, shapes, and sizes, and when you’re canning plain tomatoes, you don’t have to worry about checking them for moisture quantity like you do when making canned sauce.
Sauce tomatoes need to be low moisture to preserve the consistency of the , but they tend to be lacking in flavor. Therefore, heirloom tomatoes or larger varieties are the best for canning.
You can use Roma tomatoes, which are high yield and low moisture. They tend to keep better at room temperature, meaning you can store them for several weeks while you wait to have enough for canning. These tomatoes will be best for making sauce later on. You might consider Roma varieties like:
- San Marzano
- Big Mama
- Amish Paste
- Golden Mama
Alternatively, you can use slicing tomatoes or beefsteaks for canning. These will have lots of moisture and won’t be great for sauce. They contain more seeds. Here are some of the best varieties for canning:
- Ace 55
- Marglobe
- Rutgers
- Black Krim
- Mortgage Lifter
You can even use cherry tomatoes to can, although they will take a bit more time to process! Here are some good options to consider:
- Supersweet 100
- Yellow pear Cherry Tomato (keep in mind that these will make your resulting product yellow, though!)
- Sungold Cherry Tomato (these will make the canned product orange)
When you are selecting tomatoes to be canned, only use those that are completely ripened. If they aren’t ripe, they will be more difficult to blanch, peel, and process.
You will also want to use fruits that have no damages from pests, weather, or disease. Remember, a tasty tomato is a healthy tomato, and the quality of your canned goods is only as good as the quality of your ingredients.
Pressure Canning Versus a Water Bath
Some people like to add other things to their canned tomatoes, like spices or more salt or sugar. This is fine, and shouldn’t alter the quality of your canned tomatoes.
However, if you add any kind of vegetable, no matter how small the pieces, you need to be careful. Vegetables alter the acidity of your recipe and can make the resulting canned tomatoes unsafe to eat.
Not sure whether your tomatoes will be safe after you have added new ingredients? There’s a foolproof way to make sure you are safe. Simply use a pressure canner.

Many people prefer tomatoes in water bath canners, and I frankly don’t blame them. Water bath canners are easier to use and require less know-how and vigilance than pressure canners.
Pressure canners have a bad reputation for being somewhat unsafe, and this can be untrue if you aren’t careful about monitoring your canner as you work.
However, if you are familiar with canning in a pressure canner, it can be a great way to make sure your canned tomatoes are not only tasty but also free from any potential risk.
Canning Tomatoes in a Water Bath Recipe
Ingredients
- 9 lbs tomatoes
- Several sprigs of oregano and basil
- Bottled lemon juice
- Salt or sugar to taste
Instructions
- Prepare Your Tomatoes
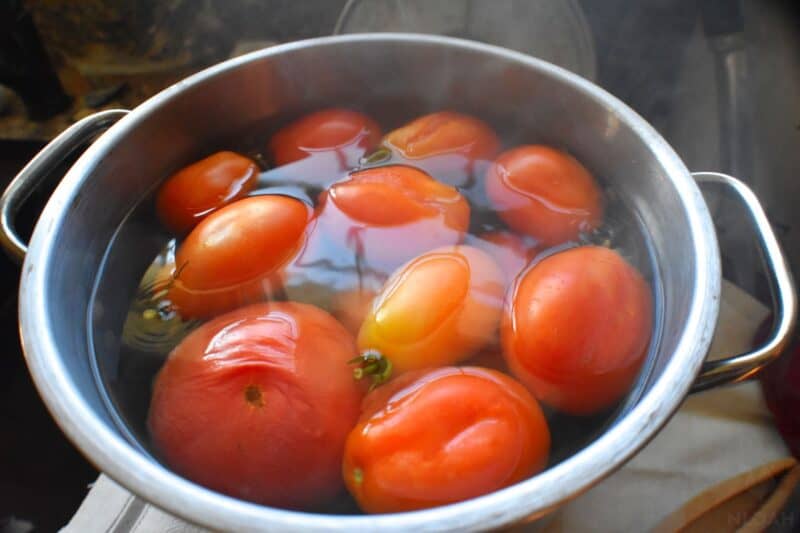
Begin by bringing a large stockpot of water to a boil. You should wash your tomatoes while you are waiting for the water to boil. If the tomatoes have any bad spots, you can cut them out now or wait until after you have blanched them.
Place your tomatoes in the boiling water and allow them to cook for one minute – or when you notice the skin peeling off. Put the tomatoes in an ice bath to cool. Wait for them to cool down completely so you don’t burn yourself!
- Prepare Your Jars and CannerI always prepare my jars while the tomatoes are still being heated, blanched, chilled, and peeled. If you have a partner to help you out during your canning, this is a serious plus. One person can sanitize and heat the jars while the other works on processing the tomatoes. You need to heat your jars by warming them either in a hot water bath or running them through your dishwasher on hot. You will need to do the same thing for your bands. Remember, you can reuse jars and bands for an unlimited number of uses between seasons – but you cannot reuse your lids. Always start with brand-new lids to avoid any issues with them sealing. While your jars are being warmed and cleaned, you should also prepare your canner. A water bath canner is the best type of canner to use for tomatoes, but you will need to make sure you have enough water simmering in the canner. You will need enough to totally cover the jars once they are submerged.In this article, I will give you instructions on how to can in a water bath canner. You can also choose to can tomatoes in a pressure canner, but I don’t recommend it – it will take longer and is not necessary. However, if you choose to can in a pressure canner, you will adjust your processing times to match the system. Look up another recipe for canning tomatoes in a pressure canner because you will need to adjust the recipe as you can fit more jars, too.
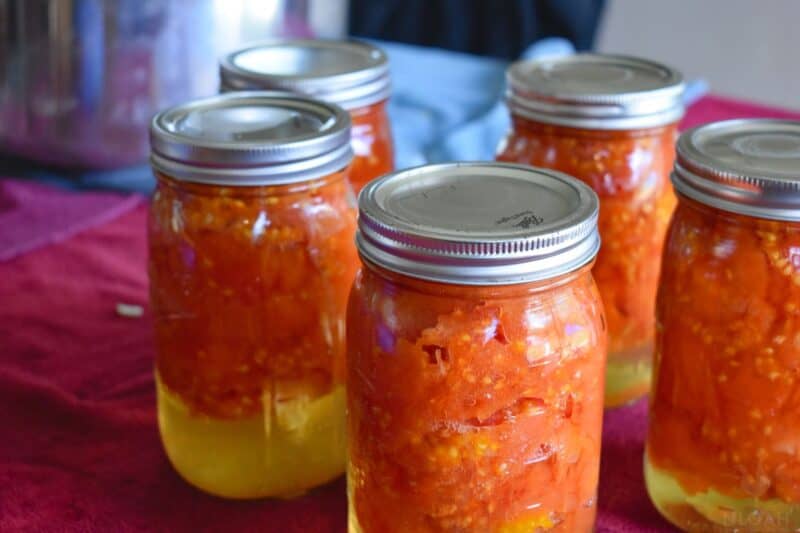
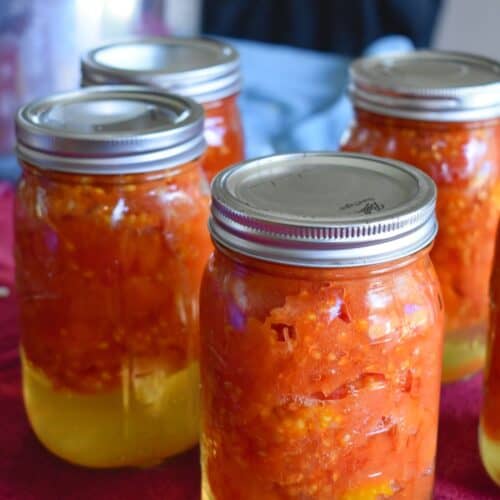
- Fill Your Jars Once your jars are ready and your tomatoes are cooked, peeled, and quartered, it’s time to start canning. Make sure your jars are hot and clean. Fill each jar. Start by adding a tablespoon of lemon juice and some herbs, salt, and sugar (again, to taste) to each jar. I usually recommend about a teaspoon of each, but this is a matter of personal preference. Add your tomatoes, leaving about ½” headspace. Use a plastic remover tool to get rid of any air bubbles you see in the jars. Try not to press the tomatoes down too far, but remember that you don’t want any air in there. You should adjust for headspace if there are too many or too few tomatoes. Once the jars are filled, wipe the rims to ensure that there are no food particles on the outside of the jars. Center your lids on the jars and screw them on until they are adequately tightened.

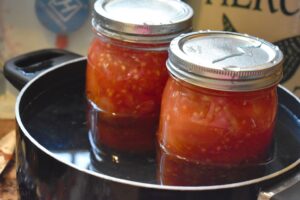
- Process Your Jars Bring your water to a boil. Once it’s boiling, process your jars for 45 minutes. Make sure the jars are not touching and add additional water if you lose some during the boiling process.
- Remove the Jars
Let the jars cool in the canner. Use tongs to remove the jars as soon as they are done being processed.Put the jars on the towel somewhere where they will not be exposed to a cool draft – this can cause the jars to crack. As they cool, you may hear occasional popping noises. This is nothing to worry about- it simply means the lids are forming a seal.
Store Your Jars
Allow your jars to cool for about twelve to twenty-four hours (longer is better).
You want to make sure the jars have totally cooled before you go ahead and cool them. Inspect each jar for any kind of canning failure, ensuring that your lids have sealed.
Make sure there is no built-up residue on the jars. If you notice white residue on the outside, don’t worry – this is usually caused by hard water.
Store your jars in a cool location like a pantry or a basement. They should last for quite some time when stored correctly, but make sure you rotate your stock and check for signs of spoilage before using each jar.
Some Final Tips
- This recipe will yield about seven pints, but you can adjust it for more pints or to process into quarts instead. I like canning in pints, personally, because I find that I use the entire jar and don’t have any leftover that I need to store in the refrigerator.
- These canned tomatoes are super good for you, with one pint yielding only 105 calories and a gram of fat. They’re tasty and have much less sodium and sugar (even if you add your own to taste) than the storebought varieties. Plus, they’re packed with antioxidants!
- If you’re canning at an altitude of 1,000 feet or less, you can follow this recipe directly. However, if you are at an altitude up to 3,000 feet, you will need to add five minutes. At 6,000 feet, add 10 minutes, and at 8,000 feet add 15 minutes. At 10,000 feet you will need to add a whopping 20 minutes.
Wrap Up
Canned tomatoes are incredibly versatile. I like to keep several dozen jars on hand for using them in my homemade tomato soup, pizza sauce, and pasta sauce. They even taste great eaten right out of the jar on a fork!

Rebekah is a high-school English teacher n New York, where she lives on a 22 acre homestead. She raises and grows chickens, bees, and veggies such as zucchini (among other things).