Thinking about getting into canning? If so, you’re going to need to invest in a pressure canner. Even though lots of people swear by water bath canning for all of their garden produce, the reality is that many kinds of foods (including most vegetables and meats) can only be safely canned using a pressure canner.
But don’t worry – learning how to pressure can is not hard, nor should it be intimidating!

Pressure canning can be done virtually anywhere, by anyone. I’d HIGHLY recommend everyone to get a pressure canner, and learn how to home-can their own fresh garden produce! There’s nothing like stocking your shelves with food you’ve grown yourself or picked locally.
Table of Contents:
What is Pressure Canning?
Pressure canners are needed to can low acid foods, such as meats, seafood, and most veggies. If you are going to make a combo of high-acids and low-acids (like a soup or stew), you’ll need to pressure it.
Your recipe will tell you whether you need a pressure canner or a water bath canner. Water bath canners just don’t get hot enough to kill the bacteria present in low acid foods.
If you want to can any kind of vegetable that is not pickled, a soup stock, beans, or foods that are non-acidic, you have got to pick up a pressure canner. Some examples of foods that need to be pressure canned include:
| Corn | Mushrooms |
| Onions | Potatoes |
| Asparagus | Green beans |
| Lima beans | Carrots |
| Pumpkins | Winter squash |
| Meat | Stock |
A pressure canner is essentially just a regular-looking canner, except it has a locking lid and either a weighted or dial gauge to help you regulate the pressure of the steam that builds up inside the canner. It is the steam that scans your food, as it gets much hotter than just boiling water.
Pressure canners can heat jars to 240 degrees Fahrenheit, meaning they can kill microorganisms in low-acid foods much better than a water bath canner, which can only heat to 212 degrees. This is not warm enough to destroy the spores that cause botulism.
Difference Between Water Bath Canning and Pressure Canning
When you can with a water bath canner, you will be canning and preserving your food with temperature alone. As I mentioned, the water can get up to 212 degrees F. While this is plenty hot enough for some foods, it’s not a hot enough temperature to kill botulism spores (the most dangerous pathogen when it comes to home-canned foods) for low-acid foods.
A pressure canner heats with pressure, as the name implies, so that the temperature can get much higher and kill those dangerous pathogens.
While water bath canning is admittedly easier to learn, it is simply not safe for many kinds of foods. Lots of people gravitate toward water bath canning because there is very little special equipment required – you just need a large pot with a tight-fitting lid.
Sure enough, you can can a lot of things this way, such as pickles, jellies etc. With pressure canning, though, you need an actual pressure canner, but you can increase the range of foods you can preserve.
What to Look For in a Pressure Canner
Every brand of pressure canner is slightly different, but ultimately, you can just pick one that matches with your canning needs and budget.
There is truly something out there for everyone. If you can, spring for a new pressure canner. I’m always a bit wary of used models, since you never know what they’ve been through or how well they have been cleaned.
I’ve spoken to a lot of older folks who are terrified of using pressure canners because they or someone they knew was once badly burned by one of these machines. While pressure canners do pose some risks (particularly if you don’t follow the instructions), for the most part, they have been extensively redesigned in the last 50 years or so.
Modern canners have automatic vents and cover locks, safety fuses, removable racks, and steam vents, all of which can help make your life a little easier while you’re trying to can – and safer, too. When you’re shopping for a pressure canner, only purchase one that has the Underwriter’s Laboratory safety seal to make sure you and your family will stay safe at all times.
Canners can be purchased so that they are deep enough for one layer of quart jars or two layers of pint (or smaller) jars. To be safe according to USDA standards, it’s recommended that you purchase a pressure canner that can hold at least four quart jars – I’ve honestly never seen one that’s smaller than this, anyway!
Regardless of the type of pressure canner you ultimately purchase or acquire, make sure you take the time to read through the manufacturer’s instructions. Every pressure canner is slightly different in terms of how it is used and what its capacity is, so make sure you familiarize yourself with the basics before you start canning.
For example, in the video, I mentioned that I thought the canner I have held 14 pint jars. It actually holds 19! See why it’s important to double-check?
You will also need to pay attention to the type of regulator on your pressure canner. Each pressure canner is equipped with a dial or a knoblike device known as a pressure regulator. This will help you maintain and control pressure inside your canner.
Essentially, there are three types of regulators – a one-piece pressure regulator, a dial-gauge regulator, and a weighted-gauge regulator.
Weighted gauge regulators jiggle a few times a minute or rock gently when they are the right pressure. These are made out of a disclike piece of metal that is set on the vent pipe. It can process at 5, 10, and 16 pounds. It makes a rocking noise, too.
Dial gauge canners have pressure regulators or counterweights to seal off the open vent pipe and pressurize the canner. It will not rock or jiggle. These are common in older pressure canners and less so in the more modern varieties. You’ll see the exact pressure inside and be able to adjust the heat up and down. You do need to inspect these kinds of regulators on an annual basis to make sure they are working properly.
The final type is the one-piece pressure regulator. It is the most common type of regulator you’ll find. You can add or remove weight rings to set your canner at 5, 10, or 15 pounds. You will set the regulator atop the vent pipe when you want to start building pressure and adjust the heat to control the rattling noise the canner makes as it gains and loses pressure.
With all types, your pressure readings will be registered on the dial, which will tell you when you have reached the desired pressure.
One more note – some people assume that pressure cookers and pressure canners are the same thing. That is not the case! You need a pressure canner and not a pressure cooker. The cooking times that are approved for pressure canners are not approved for pressure cookers.
Steps to Using a Pressure Canner
Step 1: Clean and Fill the Pressure Canner
I always start by cleaning my pressure canner first. Even though I clean it after each use, I like to give it, at the very least, a nice rinse before the next canning session. This gets rid of any built up grime or debris (or dust!). Keeping your pressure canner clean is key if you want it to last you a long time (and you want to stay safe while canning).
After you wipe down your pressure canner, your next step will be to take out the removable rack and wipe that down, too. Put the rack back in the canner before you do anything else.
Then, add some water. This can vary depending on the manufacturer, but most require about three inches of water to get started. Again, check with your manufacturer’s instructions before you proceed. Usually, you only need to fill with about three inches of water because you will be cooking with steam instead of with boiling water.
One caveat – if the food you’re going to process will need to be canned for more than 40 minutes (like with meat or other very low acid foods) you’ll want to add extra water.
Step 2: Turn on the Heat
If you are hot packing jars, you will want to turn the heat on beneath your canner. This will help get the water nice and hot. If you’re not hot packing, hold off on this. The reason why is that you don’t want your cold packed jars going into hot water, opr they might crack when you place them in the water.
Step 3: Clean and Fill Your Jars
Next, it’s time to fill your jars with whatever you are canning (make sure you are following a specific, tried-and-true recipe so you don’t get sick!).
If you’re familiar with the processes required for water bath canning, you probably already know the importance of sterilizing yoru jars before you start loading them up with all of your homegrown garden goodies. I prefer to sterilize my jars in the dishwasher, but you can also just wash them as you normally would ahead of time with hot, soapy water.
Whichever Method you choose, make sure your jars are nice and hot before you put them in the canner. That way, you don’t have to worry about them shattering inside the hot water.
You will also need to sanitize your bands. The bands should be washed just as you would wash and sterilize the jars.
When it comes to lids, you need to replace these every season. You can’t reuse the lids, as they will not form an appropriate seal once they have already been used once. Buy new ones every time you can. Don’t worry, they aren’t expensive. I recommend sterilizing these, even though they’re fresh out of the box, in a pan of hot water (just at a light simmer) before you put them on your jars.
Once everything is sterilized, you can fill your jars.
Be sure to leave about half an inch to an inch of headspace and remove any air bubbles. Do so with a special air bubble removing tool or a plastic utensil. Avoid using metal, as this can etch the glass and affect your seal.
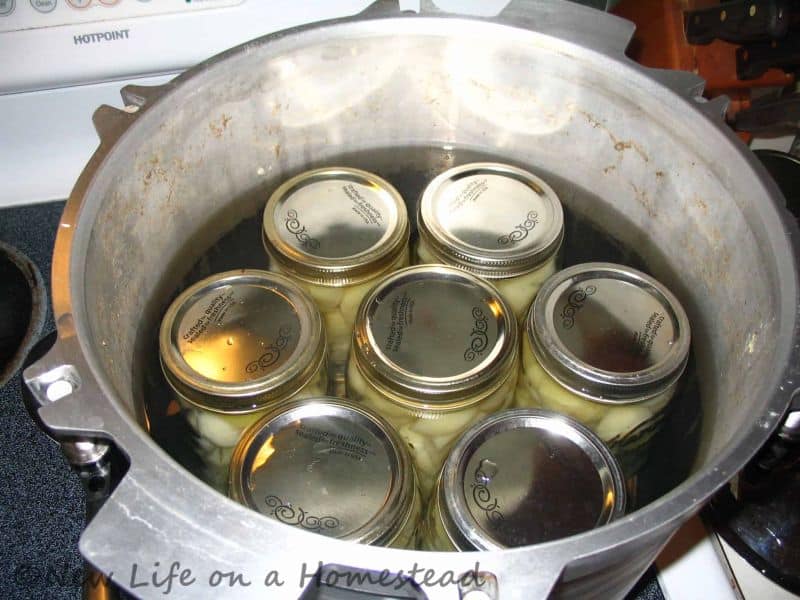
Wipe away any food particles and make sure the jars are nice and clean to prevent a poor seal. Screw the two pieces of your canning lids (lids and bands) onto the jars. Use a jar lifter to lower them into the canner. Keep the jars held upright so that food doesn’t stick to the adhesive ring inside the lids.
While loading your jars into the pressure canner, try to leave a bit of space between the jars. Things can really get rocking and rolling once the heat starts up inside the pressure canner! Leaving a bit of space will ensure that your jars don’t bump against each other and break whilst in the canner.
Step 4: Close the Canner and Vent
…not to your husband – not that kind of venting! Next, you need to vent the pressure canner’s steam.
Do this by fastening the pressure canner lid to the canner. The steps on how to do this will vary depending on the kind of pressure canner you own. Keep the petcock or vent pipe open, turning the heat on high if it isn’t dialed up already. As soon as steam starts to escape from the vent, start your timer. Keep an eye on the instructions for how long you need to allow steam to vent from your model of pressure canner.
If it doesn’t say, you’re usually safe to leave it for ten minutes or so.
Step 5: Start Building Pressure
Put on your weighted gauge or close the petcock (depending on the kind of pressure canner you have). You can watch the dial gauge, if your cancer has one, or wait for the weighted gauge to jiggle and hiss as the pressure rises.
You’ll need the pressure to reach the level specified in the recipe (usually, this is around 10 lbs of pressure) and then start your timer. The amount of time will vary based on the recipe you are using and what you are canning. You will need to adjust your heat to keep that level of pressure up for the entire time.
Now here’s a tip that you really need to pay attention to – if your pressure drops below the specified amount at all, you need to raise the heat to bring the pressure up and start your timer all over again. You can’t skip this step – it can compromise the safety of your canned foods. If the pressure gets too high, you don’t need to restart your timer, but you will want to drop the heat slightly and watch the pressure closely.
Step 6: Don’t Open Your Canner Right Away
Once your processing time has elapsed, you’re not quite done – you need to shut off the heat and let the canner cool down. I recommend not even touching the canner for at least an hour. Don’t slide it to another burner, don’t do anything. You’re Probably safe to do this, if you’d like, but I just get nervous!
Let the canner cool for at least five minutes after the gauge reads zero. The important thing to realize here is that your canner is not just cooling down – it’s depressurizing. Open the canner lid too soon, and you could be looking at a disaster inside your kitchen (or at the very least, get some bad steam burns). Not recommended!
Once the cancer has reached zero and stayed there for a while, you can slowly open the petcock or remove the weight. If you hear a hissing noise as you do this, the canner has not fully released pressure and you need to stop immediately. Leave it closed and give another five minutes, at least, before checking it again.
Step 7: Remove Your Jars
If you have another batch of canning you need to do, you can remove the jars as soon as the pressure canner has returned to zero and stayed there for a while. However, if you don’t have any more canning to do, I recommend just leaving the jars in the canner overnight. It won’t hurt anything.
Otherwise, remove the canning lid carefully, doing so by lifting the side away from your face so that any remaining steam will exit out of the back and not directly in your face.
Next, remove the jars with a lifter, taking care not to tilt them. Put them on a heat-resistant surface (such as a towel), allowing them to remain undisturbed until your jars are completely cooled. Keep them out of a draft, which can cause the jars to crack.
As your jars cool, you may hear popping noises. That’s not a bad thing – it just means your jars are sealing! Once they are fully cooled (I recommend waiting 12-24 hours) you can go ahead and label and store them in a place that is out of direct heat and sunlight.
Common Mistakes When Using a Pressure Canner
There are a few mistakes you need to avoid making when you are using a pressure canner.
For example, you need to adjust for altitude. This is something you need to do when you are using a water bath canner, too. If you don’t adjust for altitude, then you can’t make adjustments for pressure which is necessary because internal pressures inside the canner are lower at higher altitudes. Make sure you check instructions for whatever it is you are canning.
Make sure you vent the canner before you start using the canner, too. Air inside the canner will lower the temperature and can result in your food being under processed. Therefore, you will want to vent all pressure canners for at least ten minutes before you start building pressure. Don’t worry – I told you how to do this in the instructions above, so just go back and reread.
Safety Tips When Using a Pressure Canner
I know plenty of people who are terrified of using pressure canners because they were once burned or know somebody who was burned. Yes, it is possible to injure yourself using a pressure canner, but if you are attentive to the machine and exercise caution at all times, you should be just fine.
When you are using a pressure canner, all of the same safety tips you’d follow when using a water bath canner still apply. For example, you should avoid reusing lids for your jars, as these cannot safely be reused between canning sessions. You should always follow a tested and approved recipe to make sure you are canning at the proper pressures and times, too. Don’t forget to adjust for altitude as well.
Here are a few more safety tips when you are using your pressure canner:
- Check and clean your pressure canner before you start. Clean all parts and gaskets. If it’s the first time using your canner for the year and you are using a dial, be sure to have it inspected.
- Make sure the canner is centered over the burner on your stove as the level of heat must be evenly dispersed throughout.
- Pay attention to the water levels in your canner. You need about two to three inches of water if the recipe and your specific canner make and model do not specify otherwise.
- Watch your recipe and adhere to it when it tells you hot or raw packed. Hot packed foods are those that are cooked ahead of time, while raw packed are not. Often, raw packed recipes are recommended, as these will provide more consistent temperature control.
- Avoid buying a used pressure canner. While the prices can be attractive, you don’t know what these units have been through and whether they are safe.
- Make sure your jars have no cracks, nicks, or dents.
- Check the gasket under the rim of your pressure canner to make sure it doesn’t have any cracks, debris, or other issues.
- Release your pressure safely and slowly after canning. Don’t try to open the pressure canner until it has fully cooled down.
Don’t Be Afraid of Pressure Canning!
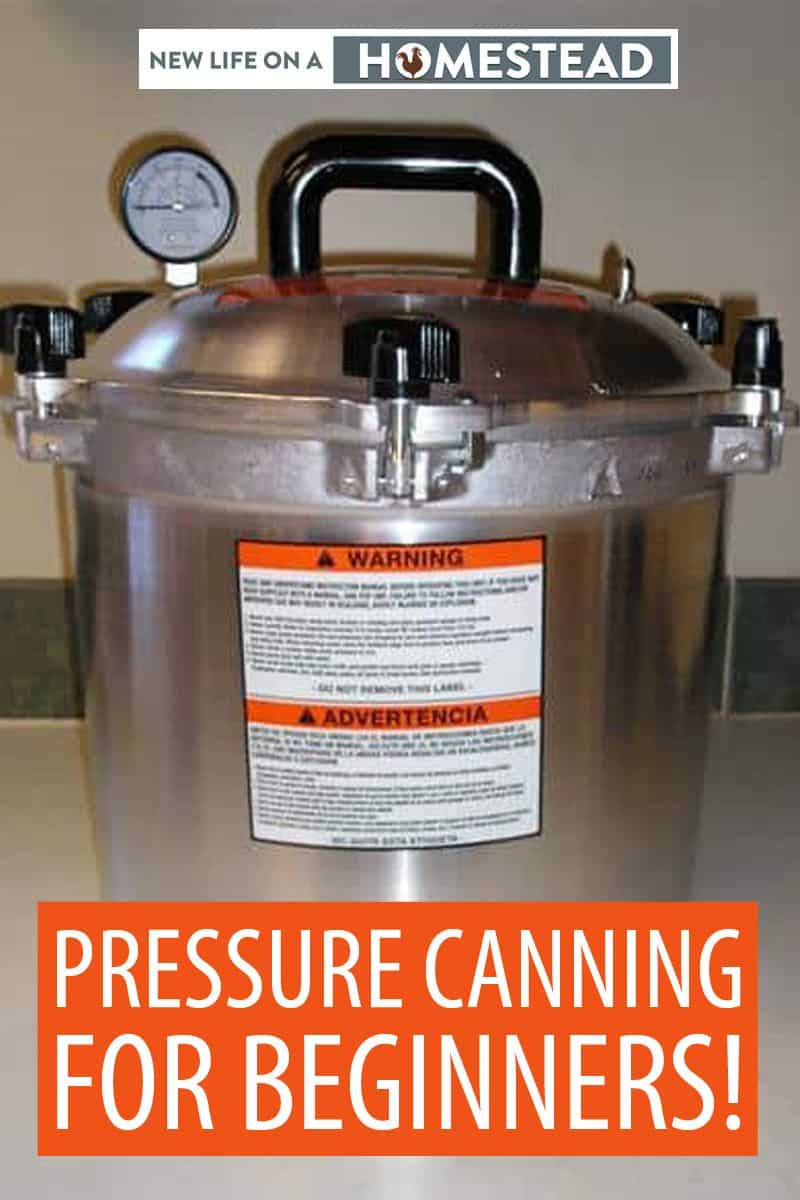
Although they might seem intimidating to begin with, pressure canners are safe and easy to learn to use. If I can do it… I know you can do it, too!! In this video I demonstrate using an All American 21 1/2 qt. pressure canner. I love this model because it does not require a gasket which would need to be replaced periodically, as other pressure canners use.
If you’re interested in learning how to use a pressure canner, or would like to watch somebody demonstrate how to use one before jumping into the world of pressure canning on your own, then this video is just what you’ve been looking for.
Here are some more resources (mostly pressure canning recipes) you can use to learn more about pressure canning:
- Canning Meat
- How to Can Potatoes
- How to Pressure Can Soup
- Pressure Canned Tomato Soup
- Pressure Canning for Beginners
- Pressure canning Bone Broth
- Canning Chicken or Rabbit
- Pressure canning Chili
- How to Use a Pressure Canner
Disclosure: if you visit an external link in this post and make a purchase, I may earn a commission. Read my full earnings disclosure here.
I also found these books helpful when I was first getting started:
- Ball Complete Book of Home Preserving by Judi Kingry
- The Homestead Canning Cookbook: by Georgia Varozza
I hope you find all of this information (and these resources!) helpful, too Please don’t forget to pin this for later on your favorite Pinterest board!
updated 11/03/2021

A city girl learning to homestead on an acre of land in the country. Wife and homeschooling mother of four. Enjoying life, and everything that has to do with self sufficient living.
Great video!
How tight do you need to put the lids on the jars before heating?
Thanks!
Jon,
You want to tighten them all the way, but don’t overdo it. Just as tight as it will get without any extra force is good.
Thank you for showing us what to do. I found your video instructions very helpful.
I know this is beside the point, but you are very naturally beautiful Kendra!!
Laurie,
Oh, goodness. Thanks, but I wish I could say it was all natural!! A little makeup goes a long way 😉
I’ve got the same canner, and I usually vent it for 10 minutes once it’s got the continuous steam column before adding my weight. My elevation’s around 2300ft though, so everything’s 15lbs of pressure. I know some folks [at lower elevations] tend to forget that particular detail sometimes (that it varies).
Oh, and the pint jar thing – that’s only using the regular mouth/skinnier ones. I haven’t been able to finagle more than 17-18 wide-mouth pints in that sucker. Maybe that’s just me, but I’m usually the master of packing stuff as tight as possible in whatever (rubbermaid totes, the car trunk, canner, whatever).
Thanks for the beef stew recipe for canning and the video. Did you have a chance to check out the “re-planting celery” information? Mine is growing like crazy, must be the heat in PA this week. P.S. My kitchen has roosters too. My 11 yr. old grand daughter says “Well, we know what to get you for special days … anything rooster”. A few weeks ago she went shopping with her other grandma and found a rooster apron on her own. They can surpise you with the sweetest things. Love that child!! Thank you again for all you share with us.
For new people learning to can it should be noted that the USDA recommends all canners steam for 10 minutes when venting for vegetables and for some meats and fish varieties 30 minutes of steam venting is recommended before placing the weight on the vent tube.
Thanks Angie. I wonder if it depends on the canner, ’cause my manual just says let it vent for 7 min. flat. Hmmmmm.