Is there anything better than the sweet taste of fresh carrots? I don’t think so. Except, perhaps, the taste of fresh carrots that you’ve just harvested from your own garden.
This year, I harvested over a hundred pounds of carrots grown in just two small raised beds in my backyard. I’ve never grown that many carrots before!
Faced with a sudden influx of these tasty tubers, I was left scratching my head as to what I should do with them.
In the past, I’ve been able to store carrots simply by putting them in cold storage, packed in dirt – but I knew I had way too many carrots to do that with this year!
Luckily, I had some old canning recipes to fall back on, and decided that I should be able to use all of my carrots so that I could enjoy them throughout the rest of the winter months.
If you have a pressure canner, there’s not a lot of skills required for carrots. In this article, I’ll walk you through all the steps to help you can carrots quickly, efficiently, and safely.
What is the Best Way to Preserve Raw Carrots?
There are several methods one can use to preserve raw carrots without canning, such as pickling, fermenting, dehydrating, freezing, and making carrot juice or vinegar.
Pickling involves submerging the carrots in a saline brine solution; while fermenting combines the salinity of a brine with the natural acids in the vegetable to create a flavorful and nutrient-packed condiment. Don’t worry – I’ll link to a great pickled carrots recipe later on in this post.
Dehydrating will strip away water content from the carrots without completely heating them so that they become crunchy and last longer; it is important to note that this method requires vacuum sealing to ensure food safety.
An interesting twist for those who wish to retain flavor in their carrots but still have them last is freezing. Blanching carrots prior to freezing might be necessary depending on the duration you want them stored.
Of course, you can always make carrot juice or vinegar, too! But ultimately, canning will always be my favorite method for preserving these veggies.
What is the Best Way to Can Carrots?
Carrots are staples in my kitchen. Not only are canned carrots great to have in the pantry for stews, soups, and sides, but I’ve also been known to go after a can with a fork and some salt, too!
Like most vegetables, carrots need to be processed in a pressure canner. Many people are daunted by the thought of canning in a pressure canner, thinking it requires a great deal of know-how and expertise. Once you get the hang of it, however, it’s really not that challenging.
Despite what some people might try to tell you, carrots absolutely must be processed in a pressure canner – you cannot, under any circumstances, attempt to do this in a water bath.
The reason is because the temperatures in a water bath canner simply don’t get high enough to eliminate the danger of harmful bacteria and toxins from forming in the food over time.
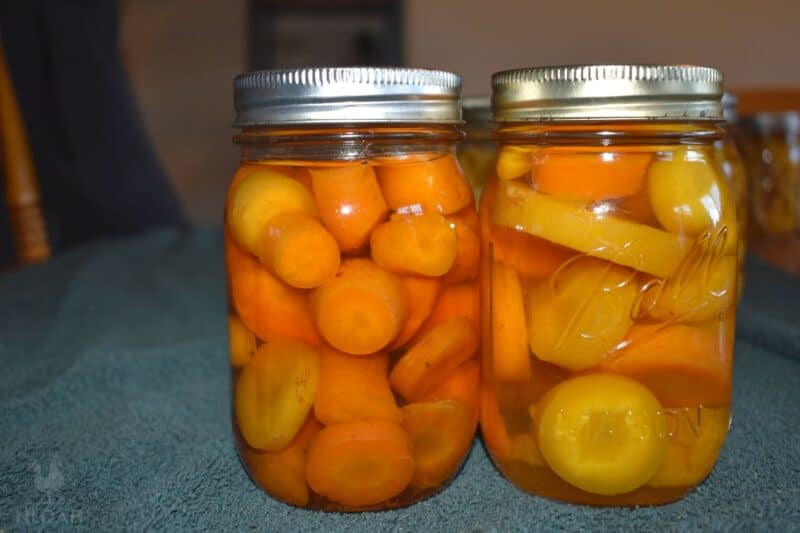
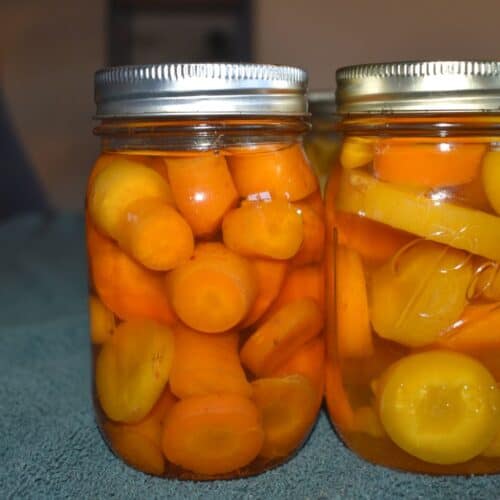
This recipe calls for canning carrots using the raw pack process. You can also hot pack carrots. No matter which method you choose or how you pack the jars, you may find that the density of the carrots will change and there may be some water at the bottom of the jar as the carrots rise to the top.
This isn’t necessarily problematic but you might find that hot packing affects the texture of your carrots, making them overly mushy. However, when you hot pack, you may be able to fit more carrots in each jar, so it’s a tradeoff.
What Size Jars Should I Use for Carrots?
You can pack carrots into other quarts or pints. I recommend pints since it’s tough to use up a whole quart jar of carrots if you’re just feeding two people, as is the case in my household.
Plus, when you use a pressure canner, it’s often more economical time-wise to use pints. The reason for this is that you can place 20 pints in a pressure canner, while you can only put seven quart jars in the same amount of space.
Remember, if you are canning at altitude you will need to adjust the pressures listed below. If you live higher than 2000 feet above sea level, you will need to increase pounds of pressure by half a pound for each additional 1000 feet.
Commonly Questions About Canning Carrots (and Recipe Variations)
Here are a few more tips to help you grow your own carrots!
How Long Do You Can Carrots?
When pressure canning carrots, you will need to process them for 25 minutes (pints) or 30 minutes (quarts). It’s important that you pay attention to the time difference required to process pints vs quarts and also that you check on the recipe provided for carrots by your specific canner manufacturer.
Sometimes processing times vary depending on the brand, whether you have a dial gauge canner vs weighted gauge canner, etc.
Do You Have to Blanch Carrots Before Canning?
Blanching carrots is optional. Blanching will soften the carrots a bit, and remember, they’ll soften up even more in the pressure canner. If you’re working with very tough or larger carrots, blanching is a good idea. Otherwise, I would skip this step.
How Many Pounds of Pressure to Can Carrots?
Based on the recipe below, you will process your carrots at 10 to 11 lbs. pressure, depending on what kind of canner you’re using and whether you’re canning at altitude.
This is based as well on recommendations from the National Center for Home Food Preservation as well as on my specific canner manufacturer (I have a Presto). Always double check based on your specific canner to be safe!
How to Can Pickled Carrots?
Another reminder – carrots are a low-acid vegetable, so it’s not possible to put them in a water bath canner. This is simply not a safe method of home food preservation.
There is an exception, though, and that is if you decide to pickle carrots. The addition of white vinegar at the proper ratio makes this recipe safe for a water bath.
There are lots of tutorials you can follow online, like this one, to make sure you do it right.
Can I Add Salt or Herbs to This Recipe?
It’s totally fine to add salt or even herbs (like basil or sage) to your carrots. Some recipes also call for additions of things like orange juice or brown sugar for added sweetness.
It’s totally up to you if you want to add them, but if you’re adding anything beyond salt or dried herbs, always consult a detailed step-by-step tutorial that has been demonstrated to be safe for home food processing.
Any additions can render low acidic foods unsafe for home canning if not done at the proper ratios.
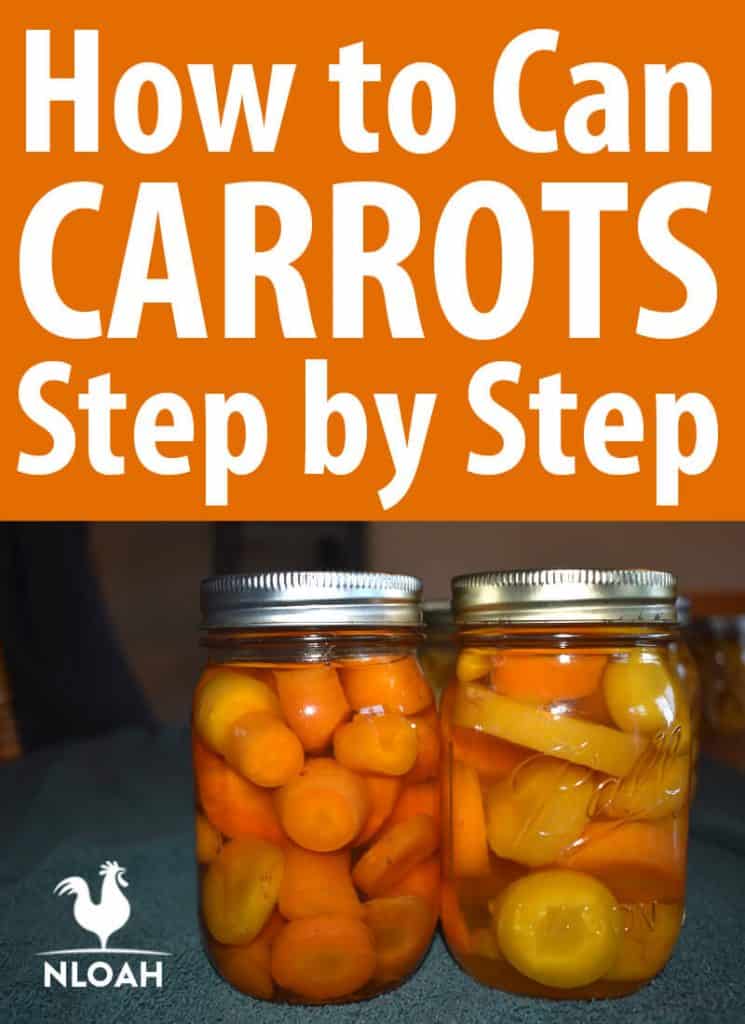
Canned Carrots Recipe
Equipment
- Cutting board
- Paring knife
- Pint jars
- Pressure canner
- Jar lifter
- Funnel
- Stockpots for boiling water
- Canning lids and bands
- Clean towel
- Oven mitts
- Bubble removing tool OR wooden utensil
Ingredients
- 2 lbs carrots per pint
- canning salt (optional, to taste)
- water
Instructions
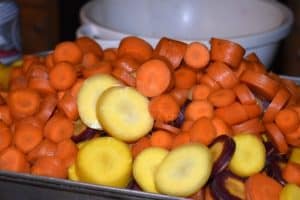
- Begin by thoroughly washing your carrots. The easiest way to do this, if you have a lot of carrots, is to dump them in a bathtub or large sink and then fill the tub up with water. Scrub all the dirt off the carrots. If they were not organically grown, I also recommend peeling them (I skipped this step, since ours are grown organically). This will get any last traces of pesticide off.
- Decide how you would like to cut up your carrots. You can leave them whole if they are small enough to fit into your canning jars, or you can slice them into rounds or diced pieces. I prefer to slice mine into rounds, as they’re easiest to can and to eat this way.
- While you are dicing your carrots, you should wash your jars in a hot rinse in the dishwasher. This will sanitize them. You should also sanitize your bands, but you do not need to do this for the lids. Instead, have a pot of water going on the back of the stove to heat up your lids and sanitize them, too.
- Once your carrots are cleaned and cut up, go ahead and start a pot of boiling water on your stovetop. After it has reached a boil, you can ladle it over your carrots as you pack them in the jars. You can also add a teaspoon of salt to the jars, too – this is optional and doesn’t impact the canning safety at all, just the flavor.
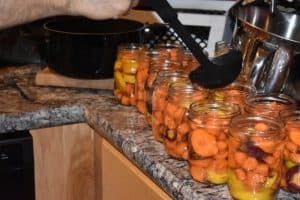
- After slowly ladling your water over your carrots, you can remove air bubbles with a bubble removing tool or a wooden spoon. Do not use metal, as it can etch the glass. Make sure you have about 1-inch of headspace between the top of the water and the top of the jar. Wipe the rims of the jars to make sure there is no food residue on the outside of the canning jars.
- Secure your canning lids and bands on the jars, tightening them until they are fingertip tight. Don’t overtighten. Fill your canner with three quarts of water.
- Load your jars into the canner, making sure that they do not touch. Put the lid on the canner and turn on your heat, allowing the canner to steam off before you add your weight. This usually takes ten to fifteen minutes to occur, depending on whether you preheated your canner before you loaded the jars. Once steam starts coming through the vent, you should wait for about ten minutes.
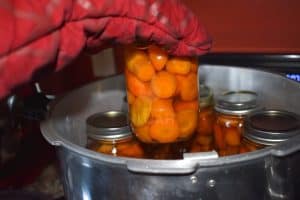
- Once you have steamed off your canner, you can add the weight (also known as the regulator). The air vent will pop up within a few minutes as pressure begins to build. Allow the pressure canner to build to a pressure of 10 lbs before you begin timing.
- Process your pints for 25 minutes. If you choose to do quarts, you will need to add an additional five minutes. You should process at a pressure of 10 lbs in your pressure canner.
- Once the jars have finished up in the pressure canner, you should turn the heat off and wait for the pressure to return to zero. Do not open the lid until the pressure has equalized, as you risk seriously burning yourself.
- After the pressure has come back down, you are safe to remove the lid and extract your jars using the jar lifters. Place the jars on a clean towel – don’t place them directly on your countertop. Not only can the hot jars leave unsightly rings on your counters, but the cool temperatures of the counter can cause the glass jars to break on contact.
- Leave your jars to cool overnight, or at least 12 to 24 hours. Try to let them cool in an area where you won’t risk bumping them or where there is a strong draft.
- After the jars have cooled, check to make sure they have sealed (you may hear popping noises as the lids seal). To do this, press down on the lids. If they flex, you will need to store the jars in the refrigerator and eat them within a week. If they stay put, you are good to go.
- Store your jars in a cool, dark location (such as a basement, pantry, or root cellar). You may remove the rings if you’d like, as your jars are perfectly sealed without them. This will reduce the likelihood of rust buildup on the bands.
Notes
Why Are My Canned Carrots Mushy?
When I first started canning my own carrots, I worried that they would be mushy. Definitely not the case! If you’ve ever had boiled carrots – which you probably have – then you know that when carrots are cooked in water, they take on a savory, soft texture that’s absolutely perfect.
I would recommend, however, that if you are adding canned carrots to a soup, you wait until just before you are ready to eat the soup to add your carrots.
If you still find that your canned carrots are mushy, take a look at your processing times – are you following the recommendations given in the recipe, and using only the freshest carrots? These are the typical culprits if your carrots are soggy after opening up the jars.
What Can You Do With Canned Carrots?
Canned carrots are versatile and delicious! You can use canned carrots just about any way you would use the fresh ones (including eating them fresh out of the jar).
I like to open a can of carrots and slow roast them in the oven, just to caramelize them up a bit. You can also use them in soups and stews (again, add them at the very end of the cooking process).
One of my favorite (and most unusual!) ways to eat canned carrots is to use them in my homemade carrot cake. All you do is open a jar of carrots and mash them up with a fork before adding them to your regular carrot cake recipe. The result is an amazingly moist and fluffy cake that will definitely have you going back for seconds.
Nothing wrong with eating your canned carrots with just a bit of salt, pepper, and butter, either!
How Long Do Canned Carrots Last?
In most cases, canned carrots will last on the shelf for at least five years. As a general rule of thumb, put your old canned carrots near the front of your pantry shelf and the new ones toward the back so that you can always eat up the old produce first.
It’s also helpful to check the cans each year to ensure there are no signs of spoilage, like leakage or failed seals.
So there you have it! Everything you need to know about canning carrots. Enjoy! If you liked this carrot canning recipe, please pin it to your Pinterest board for later!

Rebekah is a high-school English teacher n New York, where she lives on a 22 acre homestead. She raises and grows chickens, bees, and veggies such as zucchini (among other things).