Spinning wool or mohair does not require a huge investment of money. Spinning wheels are beautiful – but very pricey. A handheld drop spindle typically costs less than $25, and can spin beautiful wool or mohair that you have raised on your homestead into a skein just as well as a large spinning wheel that costs a bundle.
The minimal investment required to purchase a drop spindle makes the art of spinning wool and mohair well within reach for any beginner.
Not only are they readily available and inexpensive to buy, many folks could make a drop spindle spinning wheel on their own even more cheaply.
Once you have a drop spindle, you can start drafting out fibers and twisting wool and mohair into hand designed yarn to use or sell.
Drop Spindles
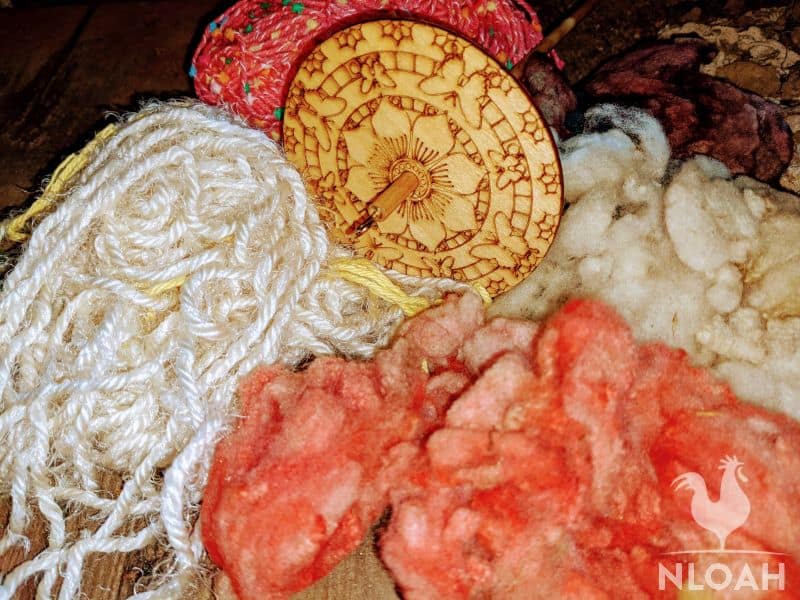
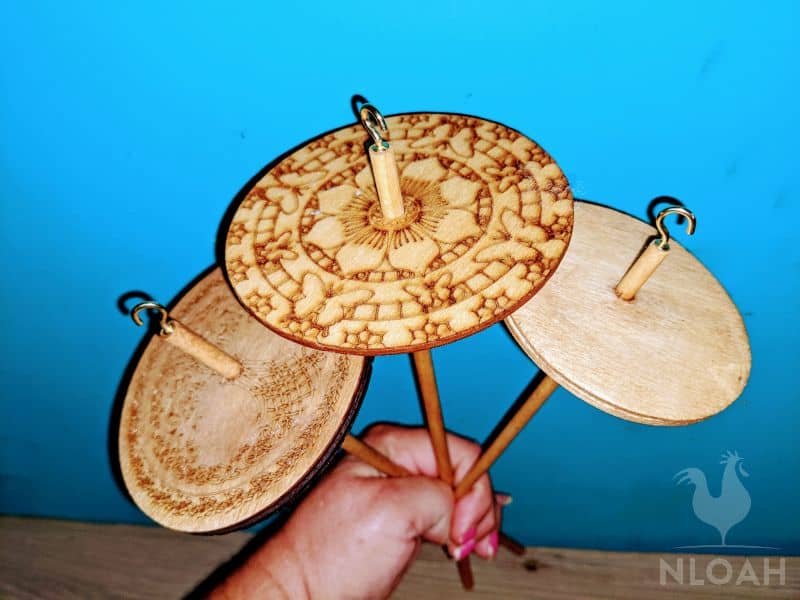
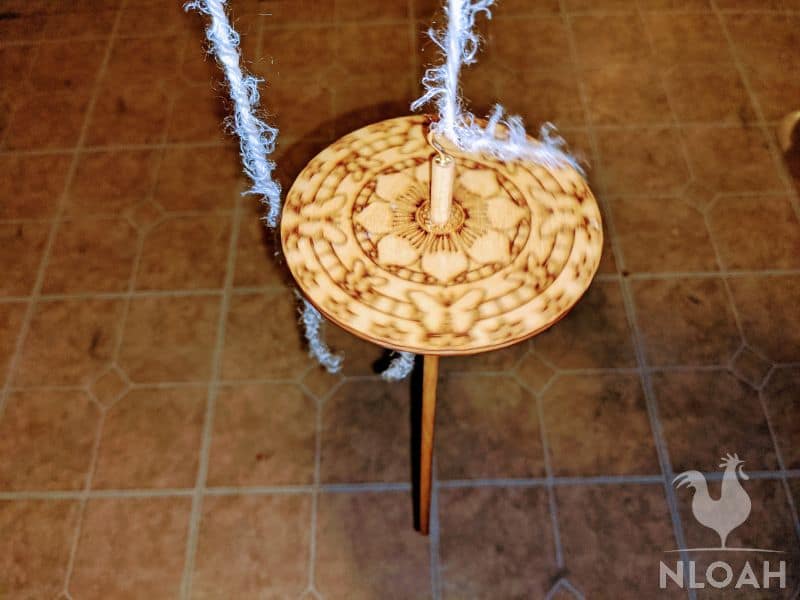
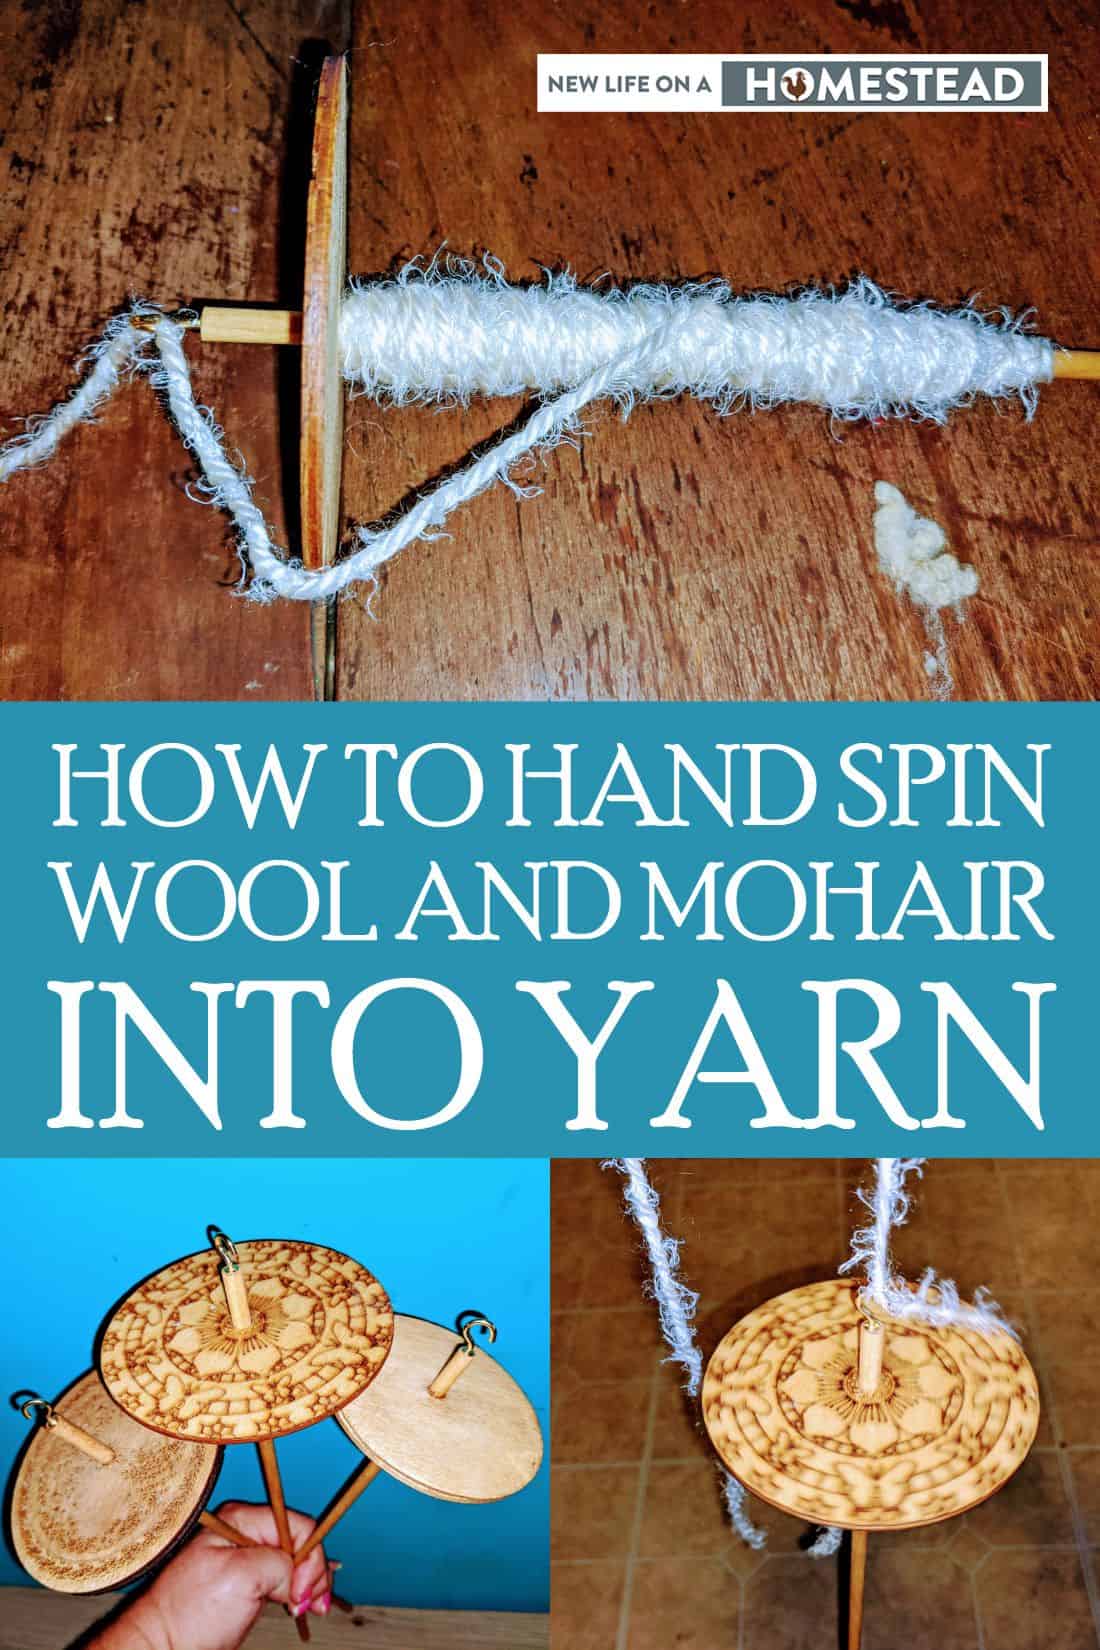
There are several different types of drop spindles. This device is simply a stick with a hook and a weight on it somewhere – the whorl. Some are made of wood, others of composite material, and some with a plastic whorl (disc) with slit style openings.
Drop spindles, regardless of what the whorl is made of or whether it is placed at the top or the bottom of the spindle, all have a hook and shaft (dowel rod) gripping area.
The whorl on the drop spindle typically ranges in diameter from about three inches to six inches – but the disc can vary more by brand or if homemade.
The weight also varies on drop spindles. A heavier weight wood drop spindle is used to spin heavy fibers and a less heavy drop spindle is used to spin thinner fibers – like mohair. The most common and versatile drop spindle weight ranges from 2 to 3 ounces.
What Fibers Can Be Spun On A Drop Spindle?
Nearly any fiber like substance is capable of being spun. The traditional fibers used in spinning include wool, mohair, alpaca fleece , silk, cotton, angora from rabbits, and llama fleece. The density and sturdiness of wool from sheep is a superb fiber for beginners to spin.
Preparing Wool For Spinning
Wash the wool to remove as much excess lanolin as possible. It should then be combed or carded into roving to get all of the fibers moving in the same direction – turning it into roving.
Fiber carders can be purchased at craft stores, or on Amazon. I simply bought two dog brushes at a local Dollar Tree store to use as carders to defray the costs associated with my new hobby.
Supplies
- Raw wool or roving
- Hand carders is using raw wool
- Drop spindle
- Yarn 12 to 18 inches long to use as a lead starter
- Scissors
Step 1: Preparing Roving For Spinning
- Use the hand carders to turn raw wool into roving.
- Pull off a piece of roving that is roughly 12 inches long to stretch or “draft” the fibers.
- Gently tug on either end of the roving to stretch it out to make it thinner by holding it in hand between 4 to 6 inches apart. If the roving breaks because you pulled it too hard, simply place it aside to use later once your spinning abilities have advanced a bit and you can “join” pieces of fiber together to make a single long strand.
- Continue to gently work the roving to make it stretch until it doubles to twice its original length – at least.
Step 2: Wrapping The Roving
Wrap the stretched roving around your non-dominant wrist somewhat loosely so it can unwind as you spin. The roving is referred to as “drafting” during the spinning process.
Step 3: Attaching The Leader
Simply use a piece of yarn that is 12 to 18 inches long as a leader. The leader helps to get the spinning process started by helping to pool the wool or mohair to the whorl.
You do not have to use a leader, but it is highly recommended for beginners and, because it makes the process start so much easier, many fiber artists use a leader decades after spinning their first few pounds of wool.

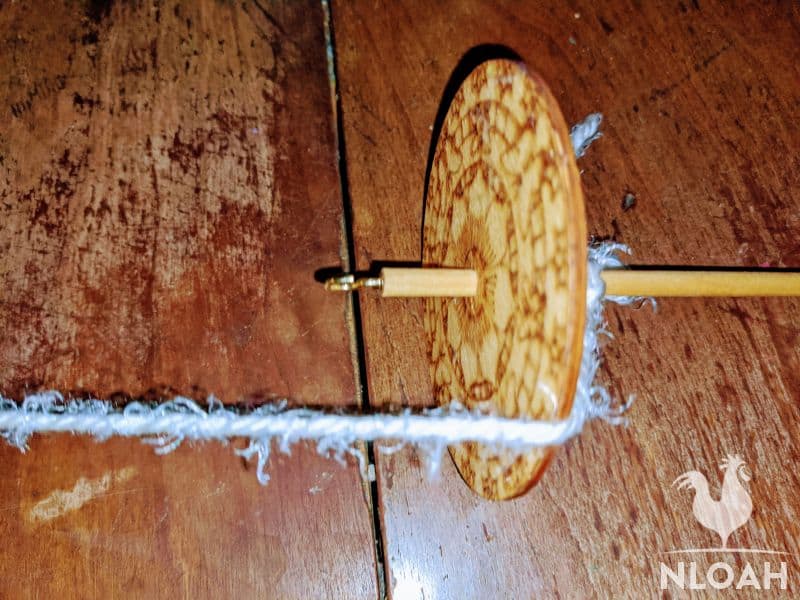
To attach a leader to the drop spindle to feed the wool or mohair on to the handheld spinning wheel tie the yarn onto the shaft right below the whorl.
Tie the leader under the whorl, I prefer using a half-hitch type of knot but any type of knot typically works.
Bring the untied edge of the leader yarn around the whorl’s edge and gently bring it up and under the hook at the top of the drop spindle:
Spin the drop spindle in a clockwise motion by using one hand to twirl the lower edge of the shaft and then releasing it from the hand so it swings free:

The spindle will keep spinning for a little while, while the leader yarn twists sufficiently around it and slows down the spinning motion:
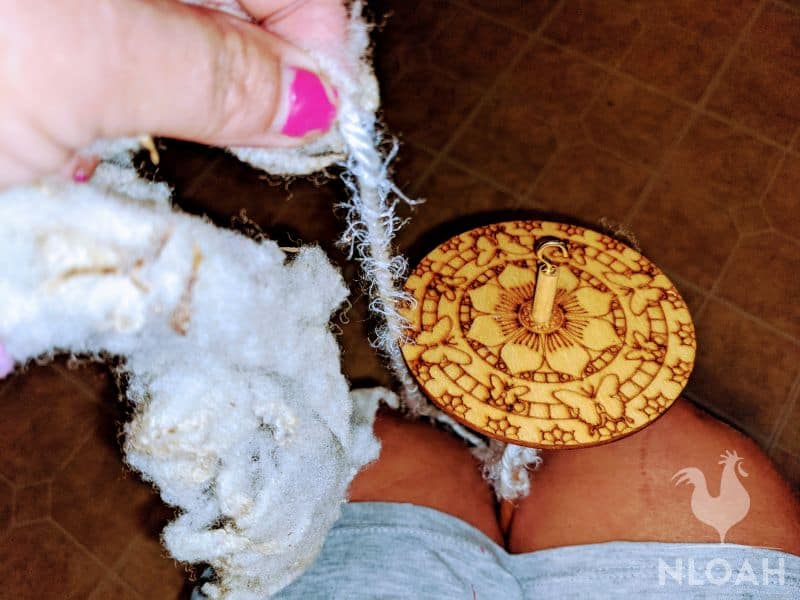
Step 4: Attaching Fiber To Leader
Hold the leader in your non-dominant hand, and the drop spindle in your dominant hand.
Spin the drop spindle in a clockwise motion.
Repeat the spinning motion until the leader starts twisting around the dowel rod.
Make sure that a small amount of fiber fluff remains at the end of the leader before each spin so that you can attach more wool to the leader.
Gently pull a little bit more wool from the roving.
Hold the tip of the leader and the roving together with one hand, and spin the drop spindle clockwise again in the other – as the drop spindle dangles loose to allow for the best freedom of movement. Keep pinching the roving and the leader together as it melds together.
Once the leader has a decent amount of twisted wool roving, “park” the drop spindle so the shaft is held firmly in place by your knees.
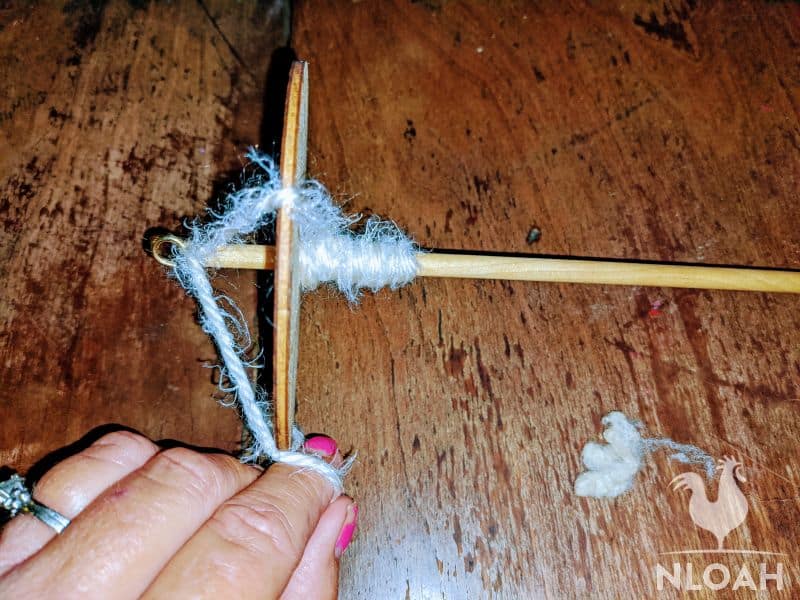
Step 5: Parking And Drafting
Parking the drop spindle means you need to stop the spinning motion. The best and easiest way to do so is by using the drop spindle when seated at a chair, and using your knees to halt the motion – leaving both of your hands free for manipulating the fiber.
To start the parking stage of the drop spindle process, pinch the leader wher the twisting stops.
Gauge the “drafting triangle’s” thickness. This term refers to the part of the roving being spun that is between your fingers as it is melded together onto the leader. The thickness of the drafting triangle directly determines how thick the yarn will be when you have finished spinning the roving.
If the yarn is thick enough and long enough, stop spinning. If the yarn is not thick enough it will typically pull apart easily. If the yarn is too thick, it will be difficult to continue spinning to the length you desire.
If you want longer or thicker yarn, keep moving your hand up to the top of the leader, add in more roving, and spin the drop spindle to twist the new fiber into the project.
Park the drop spindle to check the length and thickness of the yarn. Typically, it is a good idea to make one to two feet of yarn at a time before moving onto the final stages of the spinning process.
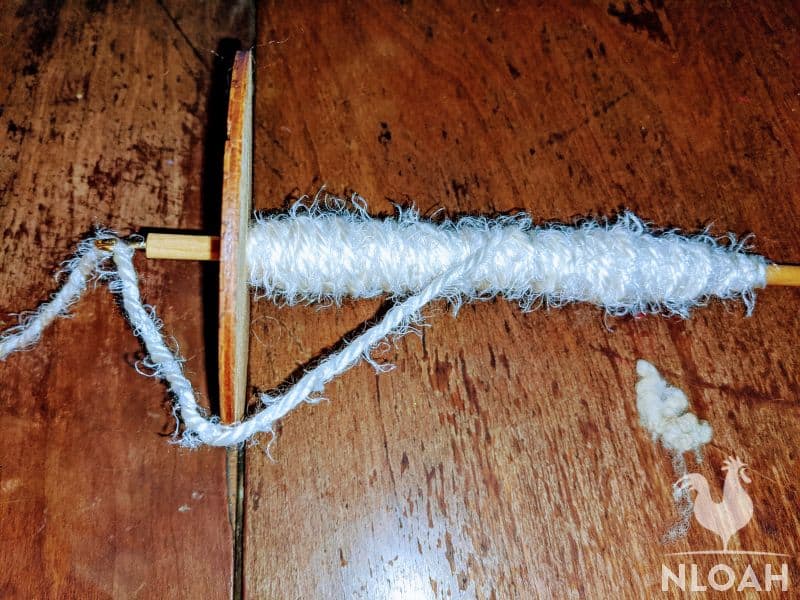
Step 6 Winding
Keep the tension on the yarn until you just finished spinning. If you release the tension, the twisted roving will not travel up the leader properly.
When the yarn you made is long enough to make the drop spindle touch or nearly touch the ground from a seated position, unhook the yarn from the top of the drop spindle, and wrap it under the whirl and around the spindle to make a skein.
Leave about a two inch tip on the yarn so it can be looped around the hook to keep the homemade skein of yarn from unraveling.
Step 7 Blooming
Once you are done spinning the yarn it must be taken off of the drop spindle so it can be washed. This process is referred to as blooming or blocking by fiber artists.
When the yarn is soaked in water it will “bloom” a little bit to make it fluffier.
Preparing Yarn After Spinning:
The yarn made on the drop spindle is a “single” ply yarn because you spun just one layer of wool. To make a plied yarn – the type you regularly purchase in a store, you must twist together at least two skeins of single yarn before blooming it.
Wind the yarn off of the drop spindle into loops wrapped around your elbow and thumb.
Tie together the ends of the yarn using a piece of scrap yarn to prevent each end from getting tangled.
Once the ends of the yarn are tied you have a “hank.” Yarn is kept in balls, skeins, or hanks. A hank is a wrapped portion of yarn – or twine.
Immerse the hank into a tub of Lukewarm water.
After a few moments, remove the hank from the water.
Squeeze out the excess water by hanging it up to dry or whacking it a few times on a hard surface.
You may need to add a little weight at the bottom of a hanging hank to get the kinks out of it. An empty spray bottle hooked around the bottom loop of the hank works well. If an empty spray bottle does not get the job done, add a little bit of water to it.
How To Unwind A Hank Of Yarn:
If you want to turn a hank of yarn into a skein, fold it in half after twisting the hank a few times. Pull one end of the hank through the to create a skein style shape of yarn.
How To Twist A Hank Into A Skein:
Joining Fibers
If you need to join drafting to existing leader fibers because of a rip, or to add in another section of roving, overlap the wool roving a couple of inches onto the end of the fluffy tip of the leader drafted fiber so it will catch onto the existing skein when spun.
Once you have more practice at spinning yarn, you may be able to stand up and spin to create an even longer section more easily. Do not expect perfect looking yarn right away (or maybe even ever) but you can expect our handspun yarn to look beautiful.
Turning single ply wool into traditional 3-ply wool is possible with a drop spindle. Chain plying may be a far quickler process when using the floor version of a spinning wheel, it can be accomplished – with practice, on a handheld drop spindle, as well.
To create a multiple ply wool you first need to make several single ply hanks of yarn, and then ply them together into a finished multiple ply yarn. Yarn is held together by the twist.
So, when you turn singles into multiples, twisting more yarn into the mix in just one direction will hold the multiple ply yarn together only as long as the tension in the yarn holds.
The free end of single ply yarn must be anchored either in your hand or around a spindle when chain plying, or it will simply twist apart and essentially turn back into mere fiber instead of a finished product.
Chain plying or twisting multiple strands of single ply yarn together in opposite directions will negate the untwisting problem. Attach two or more strands of single plyyarn to the drop spindle and hten twist them around each other in the opposite direction from the way the roving was originally spun.
Spinning Wool With A Drop Spindle While Standing Up:
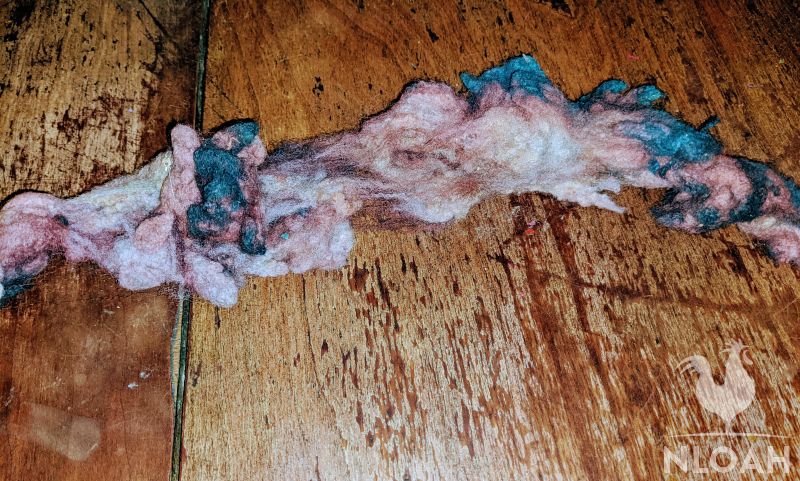
It is not uncommon to wind up with soft and fat areas in your handspun yarn. Imperfections like this are called “slubs.” You might be able to correct these imperfections by punching the slub sections of the yarn together tightly with both hands.
If that does not work, consider making a funky type of yarn out of what you made by adding fun adornments, ribbons, etc. You could use the yarn for fairy doll hair, hats and mittens for children – or even a lighthearted hat for yourself.
Spin the new fibers onto the leader several clockwise turns, and then gently tug on the joined area to make sure it is thick enough to hold. This process is similar to when you initially attached the roving to the leader piece of yarn.
Wrap-Up
Fiber spinning is merely the act of using a controlled twist to wrap fibers together. If this process sounds like a simple thing that you can master in mere moments, try patting your head while rubbing your belly.
There is no huge mystery to the fiber art spinning, the process is very straight forward. But, you must follow the directions carefully, have a little patience with both the fiber and yourself, and do not expect perfection immediately.

Tara lives on a 56 acres farm in the Appalachian Mountains, where she faces homesteading and farming challenges every single day, raising chickens, goats, horses, and tons of vegetables. She’s an expert in all sorts of homesteading skills such as hide tanning, doll making, tree tapping, and many more.
This is really cool, thank you for the lesson! Haven’t tried it yet, but it seems really fun, especially with the prices of even ‘cheap’ big box store acrylic yarn out there.
My first spindle was made with an old CD, a dowel rod, and a tea cup hook.