I must say I never cared much for spinach. If it hadn’t been for my mother’s garden, and her amazing recipes, I may have missed out on this tasty vegetable. She said it was good for my brain, she also mentioned it’s good in terms of minerals and vitamins and she made sure I ate lots of.
Was my mom right about spinach being a nutrient packed vegetable? Are you ready for it? Well spinach is packed with protein, vitamin A, C, E, K B6, thiamin, copper, manganese, and it is low in both fat and cholesterol.

As I am getting older and the waistline begins to slowly expand, I now understand why my mother wanted me to eat it.
In this step-by-step guide on spinach, I have taken some of the best growing tips out of mom’s garden and added in a few from the experts.
Pick a winning team
Like with anything else, choosing the right variety is the first thing you should do. Spinach comes in a number of varieties and some of them can be purchased easily from amazon. Here are a few favorites.
- Tyee: a variety that can be planted in both spring, fall, and is resistant to certain diseases like mildew.
- New Zealand and Malabar Spinach: are best for people that are in a warm to hot climate as they are heat resistant varieties.
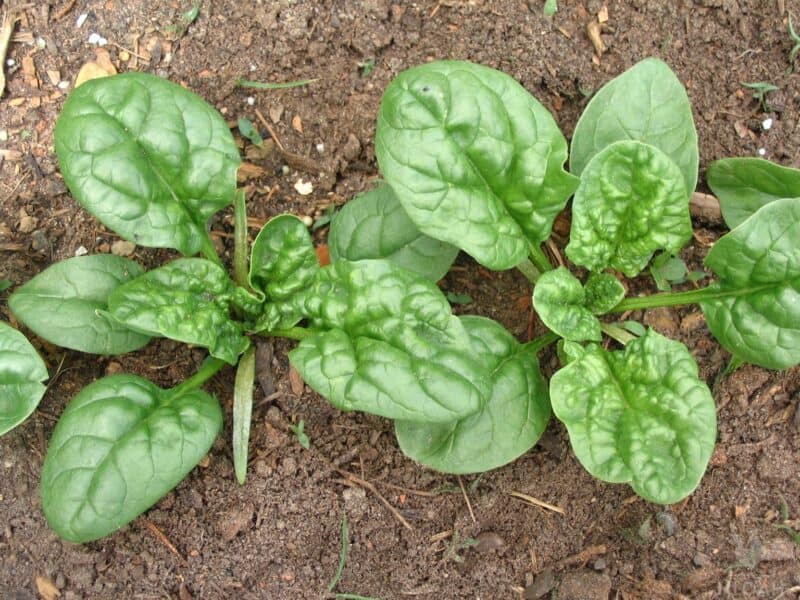
- Winter Bloomsdale: a variety resistant to mosaic viruses and can be identified by its crinkly leaves.
Finding a variety that is suitable to your area is important. You will be able to benefit from consulting your local nursery or agronomist on the best variety to plant.
The information at the back of the seed pack will also give you some tips, including how many spinach seeds per hole and guidelines on how to properly grow your vegetable.
If you want to enjoy spinach through mid-summer, you need to pick out a heat resistant variety like New Zealand or Malabar.

You can also interplant spinach with similar plants from the same group of plants known as brassicas. There are cauliflower, cabbage, Kale and broccoli. Planting these together should give you a wonderful variety of vegetables to choose from all season long.
Plant in the right place
About 7 days before you plant, mix your soil with some compost or organic matter to ensure it’s packed with vital nutrients. Mixing it early will ensure that you don’t burn your seeds.
Compost can easily be made by following the instruction in the video below. It is a combination of decomposed organic matter and other material like food scraps. A great video on how to make compost at home can be found below
Planting in well-drained soil is a winning strategy for spinach as well as most crops in your garden. This type of soil that is mostly referred to as loam allows the plant to fully develop its root structure and also allows for the efficient uptake of water as well as other minerals and nutrients.
Since spinach puts down one taproot and several roots then grow from this step. It is imperative to have at least a foot of good garden soil for it to grow in.
Well-drained soil can be identified in several ways. When it dries after being watered, it does not form a hard cracked crust like surface on the top. It easily allows water to drain while its particles still stick together.
A nice sunny spot with moderate shade especially in a hot area is the ideal place to plant your spinach, so you need to ensure it gets enough sunlight.
Plant correctly
Getting it right with spinach requires adhering to several planting techniques and these are conducted timely and correctly. Follow the below steps to make sure you do it right.
Plant directly in to the main patch where your plants will grow. While you can transplant them, it is a difficult task and they do not recover very well after transplanting.
For this reason, avoid planting them in seed trays like you would plant tomatoes. If you do decide to transplant doing this in the late afternoon when the heat has decreased will give your plants a cool night to recover.
Plant you seeds about 0.6 in (1.5 cm) deep and cover it with soil. Make sure that your soil is lightly packed over it and it stays moist not wet during the germination period.
You should see germination in 7 to 14 days. Ensure you keep your soil moist.
You will do well if you maintain a plant population of about 15 seeds per foot of row that you plant. This will give you optimum plant population. It will help you when you decide how much to thin your plants as is discussed later on.
To enjoy spinach all summer long make sure you plant every 2 to 3 weeks for continual supply. For heavy consumption and shorter seasons plant every 10 days. Follow the planting techniques mentioned above and you will never run out of spinach all season long.
A nice short clip on how to plant spinach from seeds:
Planting in a pot
You can sow spinach in a pot indoors and then transplant them 4 weeks later. Ensure your pot is a minimum of 12 inches in width and ensure you space your seeds about an inch apart to ensure you do not have trouble transplanting.
If you want great spinach from a pot kept indoors, use a combination of potting soil and bat guano. Add about ½ to ¼ of a cup to your average 12-inch pot.
Varieties such a baby leaf and melody are varieties that are favorable to grow in containers.
Here is a link to a video explaining how to grow spinach from pots:
Do the Right Thing at the Right Time
If planting in the spring, do it as early as you are able to till the ground. It takes about 6 weeks from seeding to harvest. Some later varieties will take up to 8 weeks. Knowing this can help you plan to have a crop or harvest every week or two weeks.
The best time to thin your plants is when they get to about 2 inches tall. This allows them to spend sufficient time in the soil and when you pull out the weaker plant. It will also not destroy the roots of the one that you want to keep.
Ensure you plant before your daytime temperatures exceed 70F for germination to take place. Optimum temperature for germination is in the 60’s about 60-65 and anything over 70F will result in little or no germination.
For a fall crop, ensure that you plant in mid-august and cover your spinach during the winter with hay as discussed in “putting your plants to bed”
Planting in Cold Weather
Dutch light
A Dutch light is a mini greenhouse that can be placed in your garden. It has the advantage of being portable. Used together with cold frames you will be able to maintain a decent winter crop
Cold frames
Usually used for helping plants that have been sown indoors to adjust to outside temperatures, a cold frame is generally an incubator for plants. It plays an important role in helping gardeners to be able to grow crops in cold temperatures when they otherwise would not be able to survive.
Build your cold frame facing south or southeast to make maximum use of the sun. Controlling the temperature throughout the day is helpful to your plants. This can be done by opening and closing the hood.
During the day, you can open the hood slightly and close it early enough for your plants to retain some heat overnight. As the days get warmer, open your cold frame for longer period of time during the day. Observe you plants for any sign of impaired growth as they grow.
With a wood frame and a roof covered in plastic, a cold frame should be made in such a way that it is lightweight in order to be able to be moved to different part of your garden when needed.
Disclosure: if you visit an external link in this post and make a purchase, I may earn a commission. Read my full earnings disclosure here.
While a cold frame can be made easily with tools in the house, you can buy one cheaply from amazon.
The best varieties for a winter crop are cold resistant savoy and Tyee.
If you would like to learn more about building and using a cold frame, watch the video below for demonstration.
Look after your spinach, and it will look after you
Thinning and spacing
Since you would have planted about 15 seed per foot of row, you will then to thin them and space them about 2 to 4 inches apart.
You rows should be about 12-14 inches apart to allow you enough room to maneuver in the patch as well as harvest. Giving your crop sufficient ventilation will allow them to grow and avoid disease.
Some tips on weeding and thinning:
By keeping a correct plant population, you will have very few problems with weeds because the shade from your plants will ensure that they do not get enough sunlight to grow.
It is important to mention that you will have a few stubborn weeds under the foliage of your plants. All you need to do in this case is water you plants well and when the soil is moist pull out the weeds. This will cause the least disturbance to your plants root structure.
Fertilizer
Carrying out a soil test is essential for success in growing spinach. A good tool for the garden can be found in the link below and will help you to check your soil’s PH and temperature.
Make sure you test your soil as this will determine whether you need to fertilize your soil or not. Generally spinach does not need fertilizer in order to grow.
As your first batch of spinach grows and the leaves are pale green, that’s a sign you need to fertilize, as this is a symptom of nitrogen deficiency.
In this regard, the optimum PH of your soil should be 6 to 6.5. Anything above or below this will result in less vigorous crop.
If you do need to fertilize (apart from a fertilizer high in nitrogen) you can also use liquid seaweed. This can purchased cheaply from the link below. A fertilizer high in nitrogen is always best for this crop. Nitrogen encourages leaf and foliage growth.
Alternatives to this are also compost tea and fish emulsion applied when your plants have about 4 leaves or when you experience the first spring heat wave.
For maximum growth, apply 2-3 lbs of compost tea per 100 square feet of soil; just make sure you mix well into the soil.
Mulching
Mulching spinach is important for several reasons.
- It helps with suppressing weeds and
- It helps with the retention of water especially for hot summer days.
- Mulch tilled into the ground at the end of the season will decompose and aid in improving the drainage of your soil.
The best mulch for spinach is hay and this can be picked up from your local garden center and applied lightly over the soil around your plants.
Other material like straw, grass clippings, woods shaving and plastic can also be used as mulch. It is best to use as natural material as possible and that is available in abundant supply cheaply.
Mulching can also be done with plastic, but it is not advisable, as it tends to attract heat to the soil. Since spinach doesn’t grow too well in hot conditions it is better to use mulch instead of plastic.
Temperature
Spinach is a hardy plant, and can survive temperatures as low as 15F. This is good news for those in colder and cool climates. Spinach thrives in temperature of between 35F and 65. Once is goes beyond 75F this will result in it starting to flower making the spinach bitter and inedible.
This usually happens when your daylight hours reach 12 to 14 hours and the temperature increases above the 75F level. Cool weather is ideal for spinach and the hotter it becomes the less favorable it is for it.
Unfortunately, there is really nothing that can be done about your spinach flowering a process that is also known as bolting. Your only remedy to this is to purchase and plant a heat tolerant variety, such as Indian summer, Bloomsdale and steadfast.
A clever technique is to plant varieties that thrive in the cold very early in spring while you plant the heat resistant varieties later on in the season. This helps with maintaining a steady supply of spinach all season long.
If your crop goes above a temperature of 80F, you may need to cover it with a shade cloth as this will result in it flowering and this will entail the end of your growing season.
Shade cloth can be purchased easily from your local garden center, hardware store or online. Make your covering by erecting metal or wooden poles and tying your shade cloth to the four corners of the poles.
Planting in an area that enjoys a relative amount of shade in the afternoon is also helpful to areas that have hot climate. You can also buy shade cloth from the amazon link below.

Keep away pests and diseases
Mildew
A disease that thrives in warmer weather, mildew can be a problem if not taken care of. It is normally caused by not having enough air circulation around the plants.
This can be remedied by following correct planting and spacing practices and desisting from watering the leaves but rather the base of the plant. It is also important not to splash soil while watering your plants to prevent soil organisms spreading.
You can also choose a variety resistant to mildew. This can be confirmed by looking at the back of the seed packet. A good one is Palco AGM and also takes longer to flower in the summer making it a variety of choice for warmer summer regions.
Identifying and treating mildew:
Leaf miners
Leaf miners are a tiny type of fly that lay eggs on the underside of spinach leaves. They cause damage to your leaves making them inedible and impairing further growth. These can be prevented by planted radishes next to your spinach. While radish attracts miners it will not distort there growth.
Carefully checking your plants can help you detect and destroy affected plants early before much damage is done. If you detect leaf miners, you can spray your plants with an organic homemade spray like garlic and soap.
Birds and Chickens
Birds and chicken love your green plants. They are a big threat to your garden. Larger animals like goats and cattle will also eat your plants. If you have a lot of animals on your homestead its advisable to considering fencing the area.
You can consider several types of fencing but inexpensive fencing can be picked up from your local nursery or hardware store.
You can also use a scarecrow to scare birds and chickens away though it is more useful to the former rather than the latter. A scare crown can be made using simple material found in your house.
Pick up a spot in your garden that is easily visible from both the ground and sky. Use old trousers and shirts and dress them onto a frame. A frame can easily be made from old wood or one-inch bamboo poles.
Make your frame by tying a cross-higher up on the stick to form a cross. Tie two diagonal poles to form the legs.
Secure the clothing to the pole and use an old plastic plate as a face and simply draw a moth and eyes with a marker or even attach a large enough face from a magazine. If you fear this will get wet simply laminate.
Yield
You will need to grow approximately 15 plants per person for the season for season. In a 10-foot row you should harvest about 4 to 7 ½ pounds at most of fresh spinach leaves.
Your usage of spinach will therefore determine how much you should grow. How quickly you get through the first batch will also give you a good guide of how much to plant especially for your late summer/fall garden.
Harvesting
Harvesting spinach is extremely simple. All it requires is your hands and a basket or dish to put your leaves. Once you notice a couple of well-grown leaves go ahead and harvest them by breaking them of a few inches from the stem.
Harvesting early increases the plants productivity and allows inner leaves to grow freely once the outer ones have fully developed.
Some people would rather cut spinach with a knife but metal blades could bring in unwanted organisms and this could cause the spread of diseases in your garden.
It is always good to remember that the larger the leaf the less tasty and more bitter it becomes. Do not wait until your leaves have grown to their maximum size. Medium to large leaves are perfect for steaming and stir-fry while smaller ones are good for salads. Knowing what you want to use your spinach for is also a big decider in when to harvest.
Before storing or cooking your leaves it is important to wash them carefully as they could have picked up dust and small dirt particles from outdoors.
A big mistake that people make is storing with other fruits and vegetables in the fridge. Storing your spinach with other fruits like apples and tomatoes will spoil is at these emit a gas called ethylene.
You can store spinach for 3 to 6 months by freezing them. Place them in a freezer bag and microwave them on high for about 60 seconds. Allow them to cool and then freeze.
For more tips on how to harvest and store spinach you can watch the videos below
Putting your plants to bed
Yes, spinach can be put to bed. You can do this by simply covering them in hay at the end of the season and uncovering them in late spring. This will give you a very early harvest, maybe earlier than all your neighbors will.
You can also plant just before the onset of the cold weather and then cover your plants with hay or with cold frames. When the temperature gets to 40F in spring, you can uncover them. You will need to ensure that these plants are watered well to “wake them up” and help them to recover from cold nights.
Wrap-Up
As well as being a nutrient packed vegetable and a brain booster, spinach is also a relatively easy crop to grow. It gives you a very long harvest of vegetables if successive crops are planted and allows for an early start if put to bed the right way.
A great additional to your garden and certainly a crop of choice for people that live in areas where the weather is cold, spinach is therefore one of my favorite vegetables, especially because it bring fond memories of my beloved mother and her garden!