Are you interested in learning how to make a rack for sun-drying produce? If so, you’re in the right place.
But first, why bother sun drying at all?
Dehydrating food like fruits and vegetables to save for later use is one of the oldest and simplest ways of preserving food.
It allows you to save the bounty of your garden’s harvest so that you can continue to enjoy its flavors and nutrients long into the winter months.
Dried produce can be consumed on its own, in things like trail mix, or even on its own for a pleasant snack, or it can be reconstituted with some water and left to stand overnight.
The only downside to dehydrating food is that you need some sort of equipment to do so. A common misconception is that you must buy a commercial dehydrator in order to safely and effectively preserve your excess produce, but the reality is that it’s simply not the case.
You can easily harness the power of one of our most abundant natural resources – the sun! – to make a food drying rack that will allow you to sun dry your own produce at home. No special skills or equipment required!
It’s easier than you might think. In this DIY tutorial, we will tell you everything you need to know.
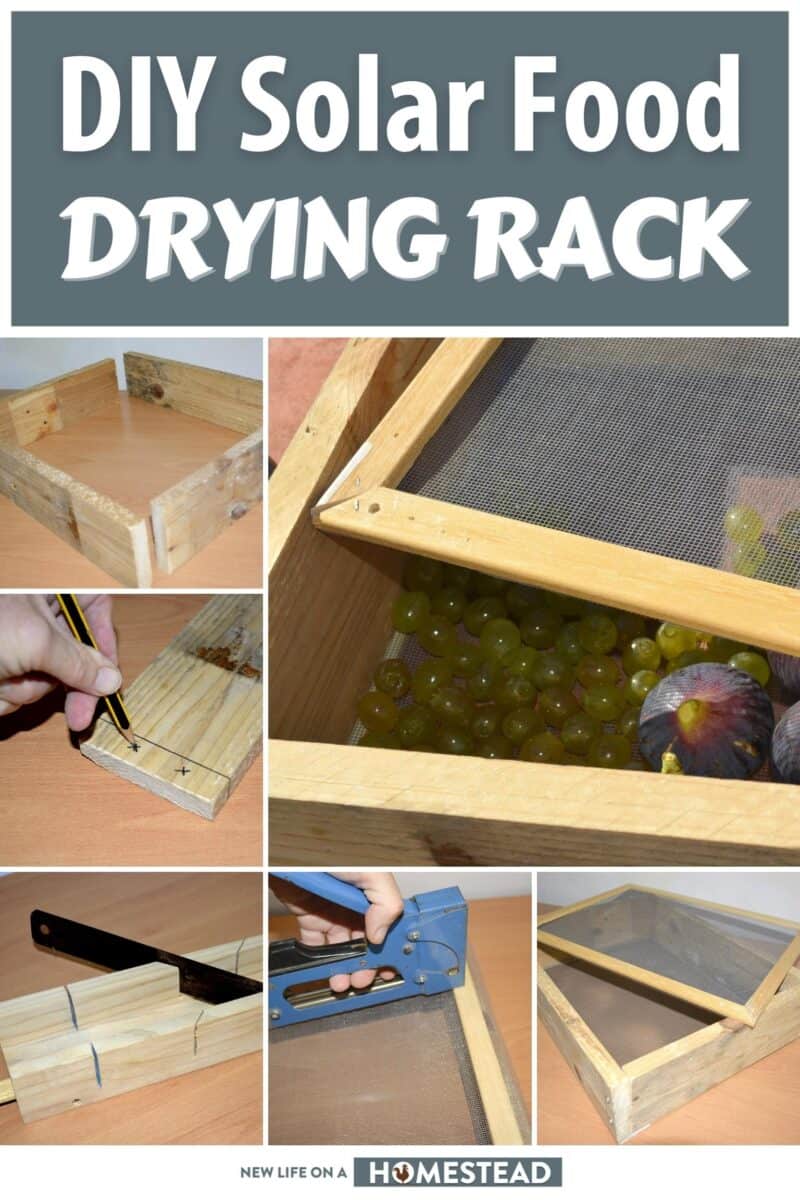
How Do You Make a Food Drying Rack? Detailed Instructions and a Step-by-Step Guide
This is a simple sun-drying rack that can be made from items that are available in most workshops. It can be made to whatever size you desire based on the size of the materials you have on hand.
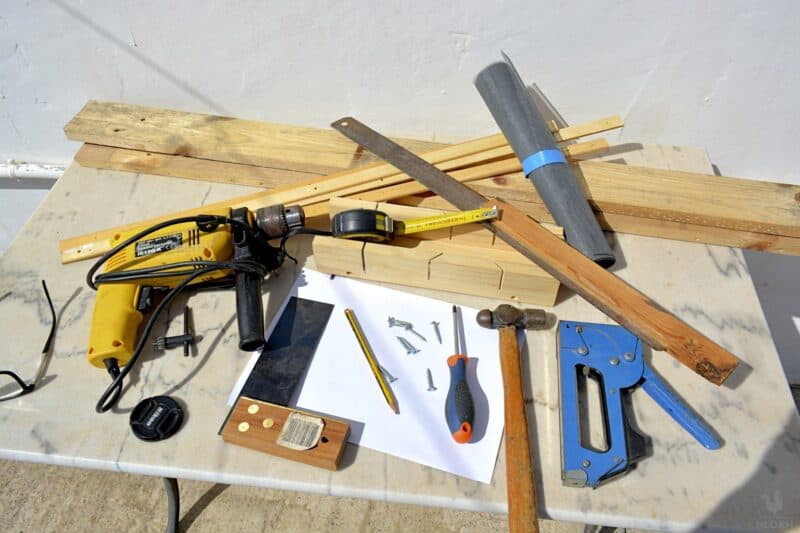
Materials Needed
For this project, you should have:
- An offcut of mosquito netting (any size should do)
- 2 strips of pallet wood 8cm x 1.25cm
- 4 strips of thin trim 2cm x 4mm
- A fine-toothed saw
- Mitre angle block for cutting wood at angles
- Try-square
- 8 screws
- Staple gun
- Drill with a small wood bit (size according to screw size)
- Screwdriver
- Craft knife
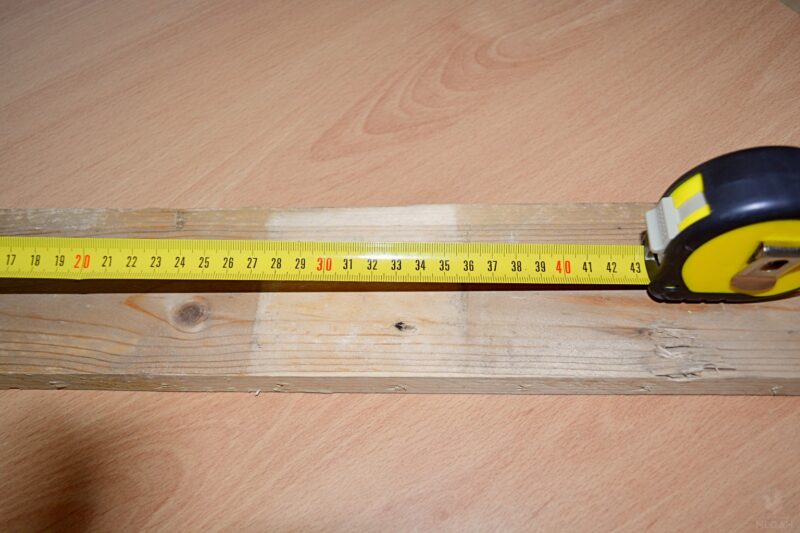
- Tape measurer
Cost to Build a DIY Solar Drying Rack
Despite other DIY solar projects that can cost you some money, you can build this DIY solar drying rack with materials you already have on hand, and it could virtually be built for little to no money at all.
However, I would budget around $50 in case you need to buy things like trim, mosquito netting, or any screws or staples. Depending on what you have on hand, your actual costs might vary.
How to Make a DIY Solar Drying Rack Instructions
The first step is to decide what size we are going to make. The deciding factor for this is the size of the mosquito netting you have available.
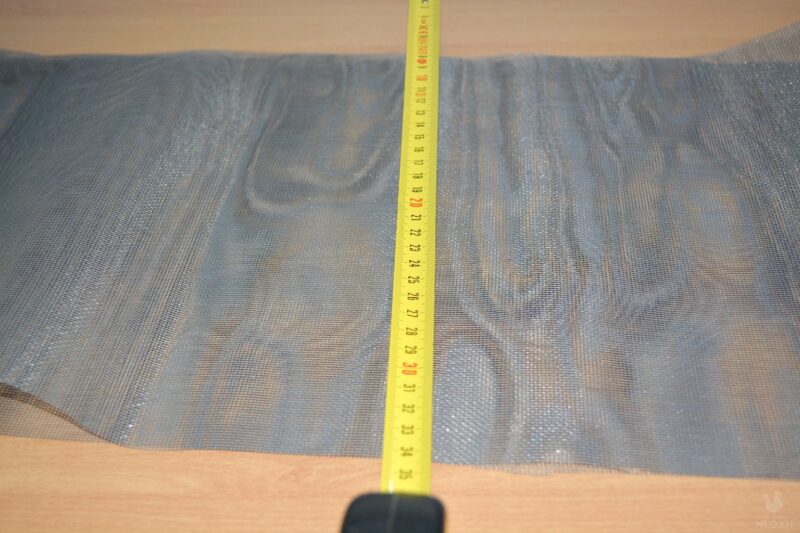
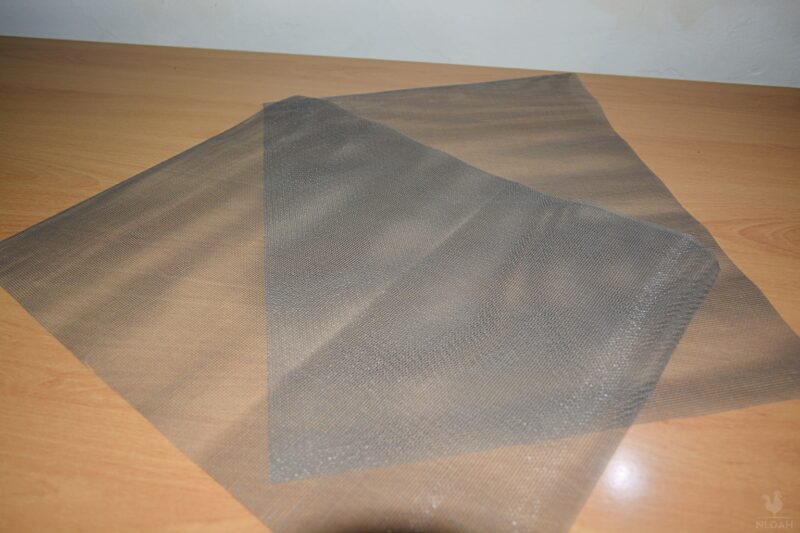
You will need two pieces of the same size. If you don’t have mosquito netting, you can really use any type of screen.
I recommend using a material that’s safe for contact with food and not made out of hardware cloth, since this is a material coated with zinc or cadmium that can oxidize in the sun and leave harmful residues on the food.
Also avoid materials like copper and aluminum, which can increase oxidation, destroy vitamin C, corrode, and discolor. Good options include mosquito netting, as I already mentioned, plastic Teflon-coated fiberglass, and stainless steel.
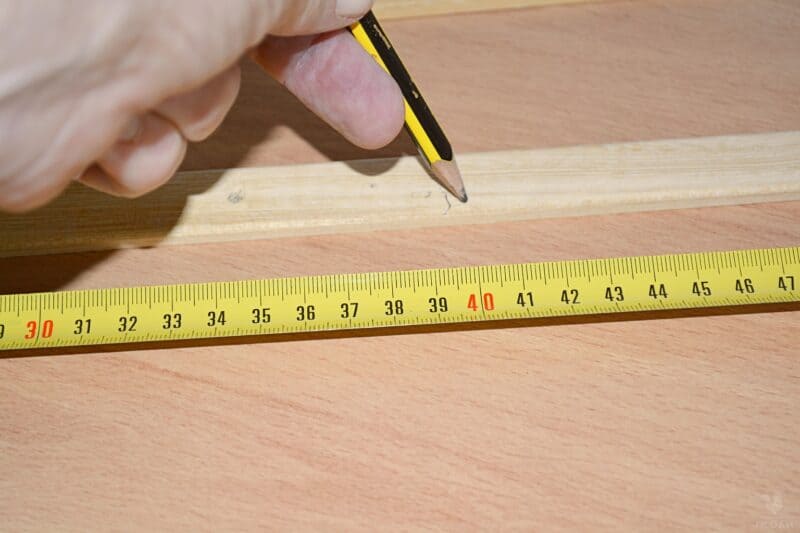
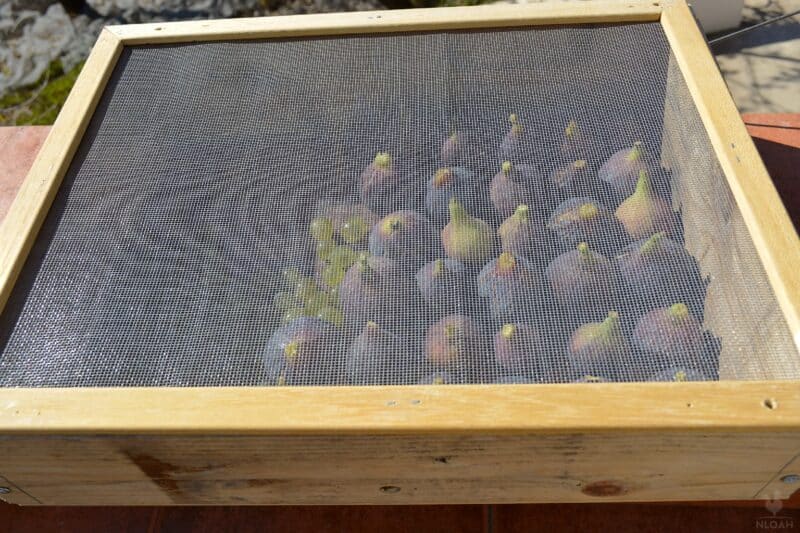
After measuring I have decided that the rack will be 40cm x 30cm. This rack can be made to whatever size is required by following the same steps whilst amending any dimensions that are stated.
1. Cut the mosquito netting to size, ideally slightly larger, like 50cm x 40cm. The extra material will make it easier to attach the netting and can be trimmed after completion.
2. Measure the pallet wood and mark the size that will be required to create the main part of the tray.
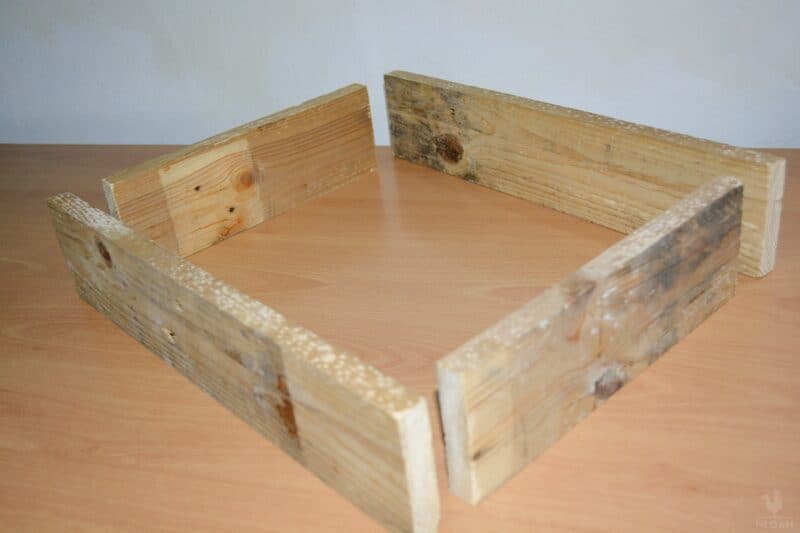
3. You will need 2 pieces to be 40cm for the sides and 2 pieces for the ends. Since these will fit inside the side pieces, you should measure the width of the 2 sides and take that measurement from the 30 cm. In this case, it is 30-3.5=26.5cm.
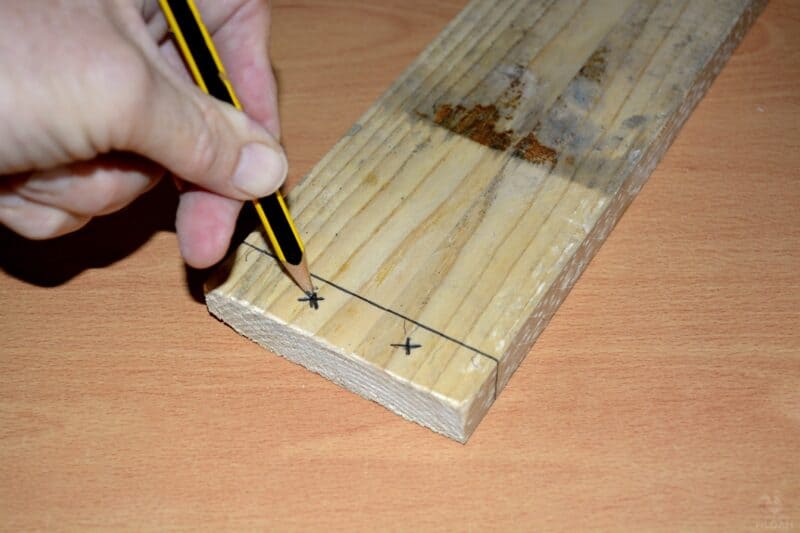
4. Mark the width of the end pieces of the frame onto the ends of each side to indicate the position where the screws will need to go when joining the sides to ends.
5. Mark the screw positions.
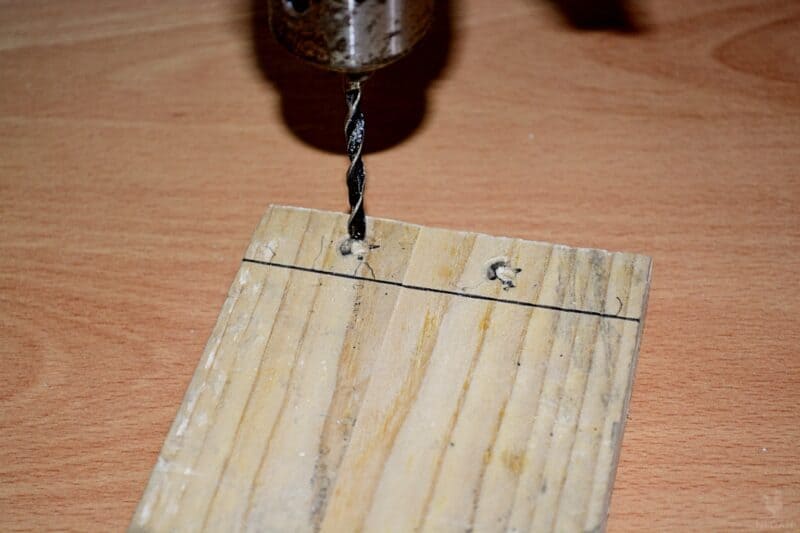
6. Drill pilot holes at the intended locations for the screws. This helps to prevent the wood from splitting when the screws are inserted. This also makes it easier to install the screws.
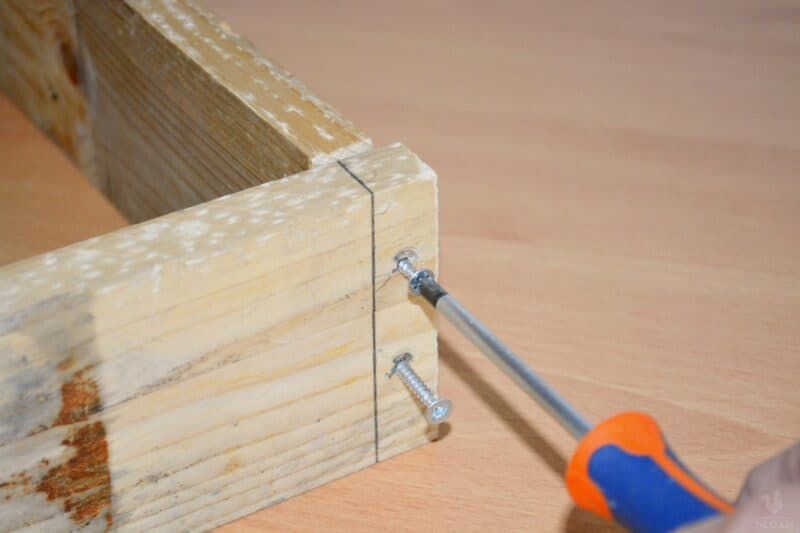
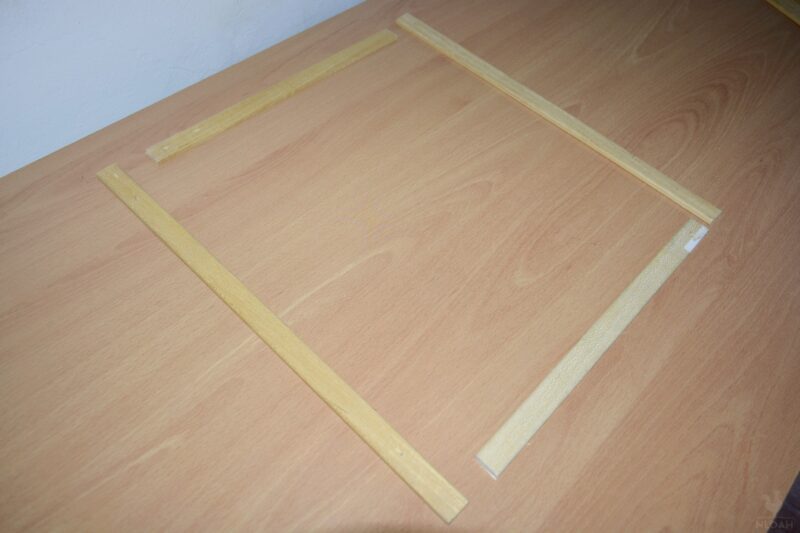
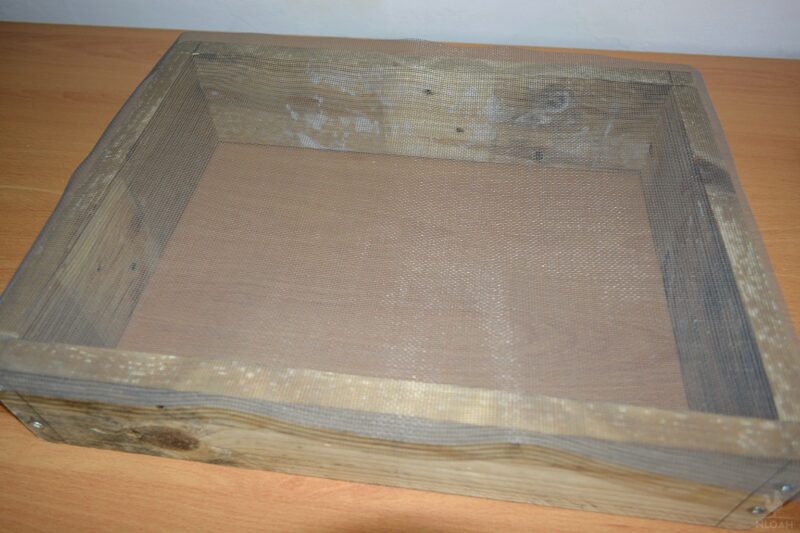
7. The sides and ends of the frame can now be assembled and screwed together.
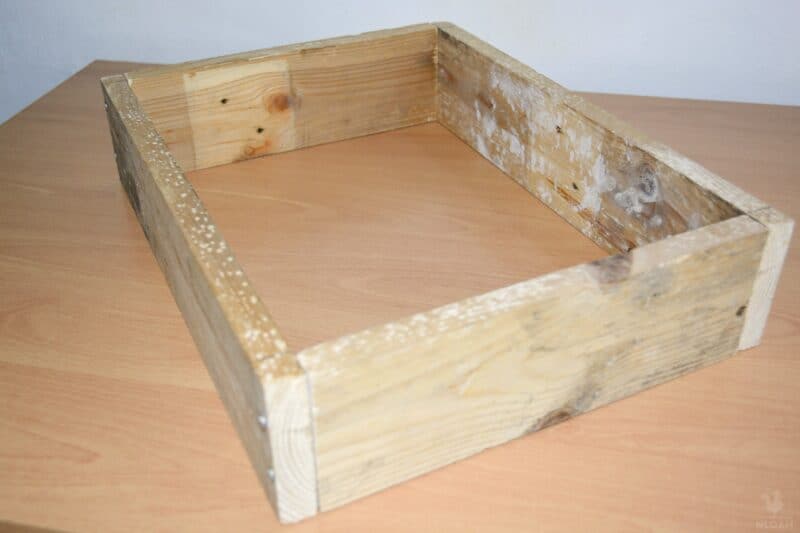
8. The main frame of the sun drying tray is complete.
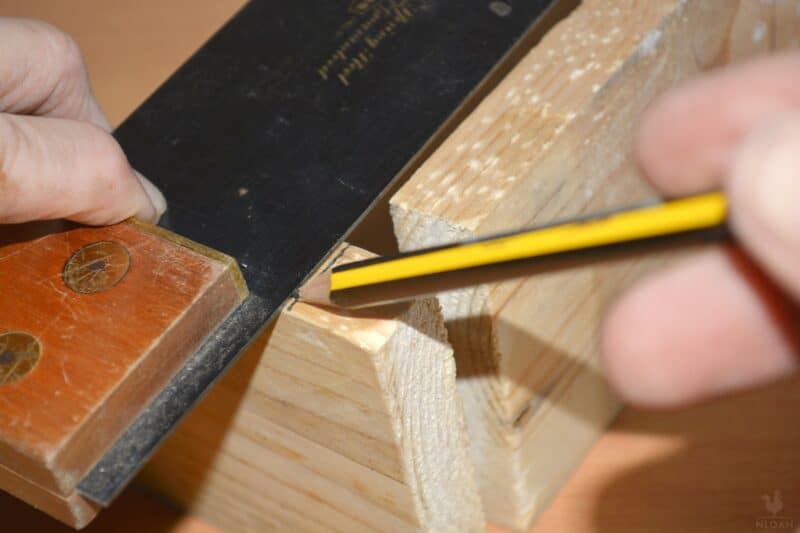
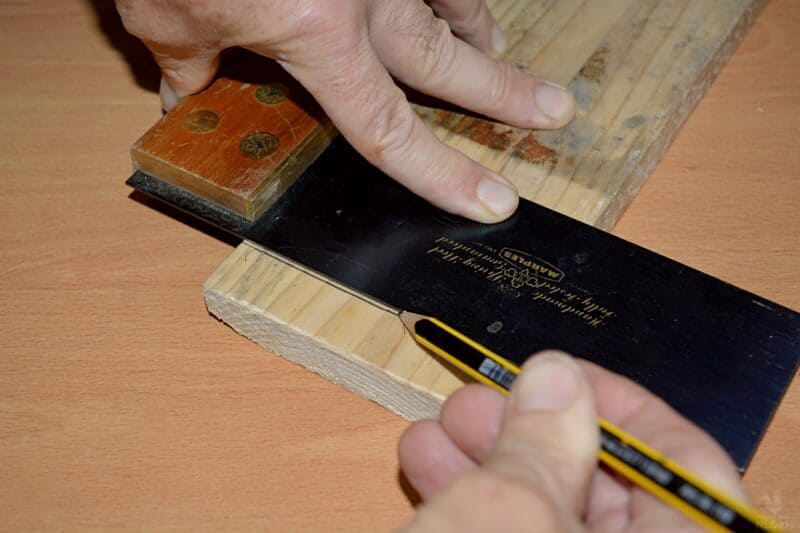
9. Two frames need to be made from thin pieces of trim. Measure 4 pieces to 40cm and 4 pieces to 30 cm.
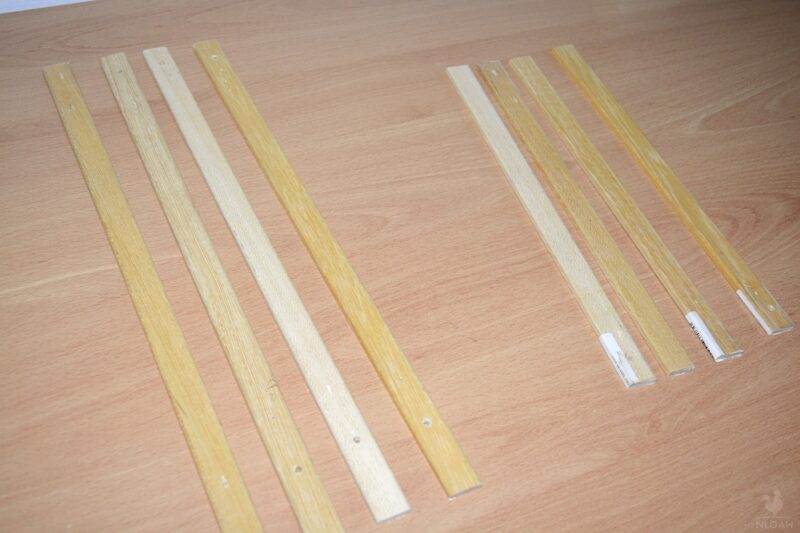
10. Cut the frame pieces to size.
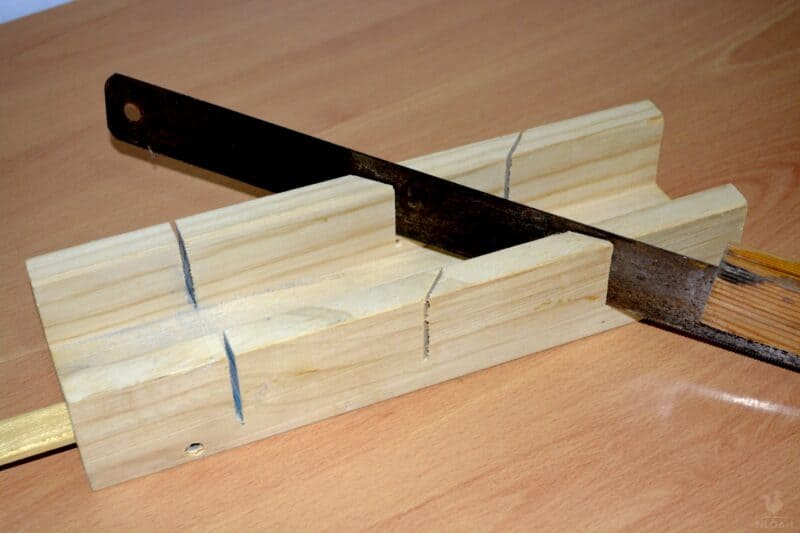
11. Using the Mitre block, cut the ends of each of the trim pieces to 45 degrees. Each end needs to be cut in different directions to allow the pieces to fit together and to create a square in the process.
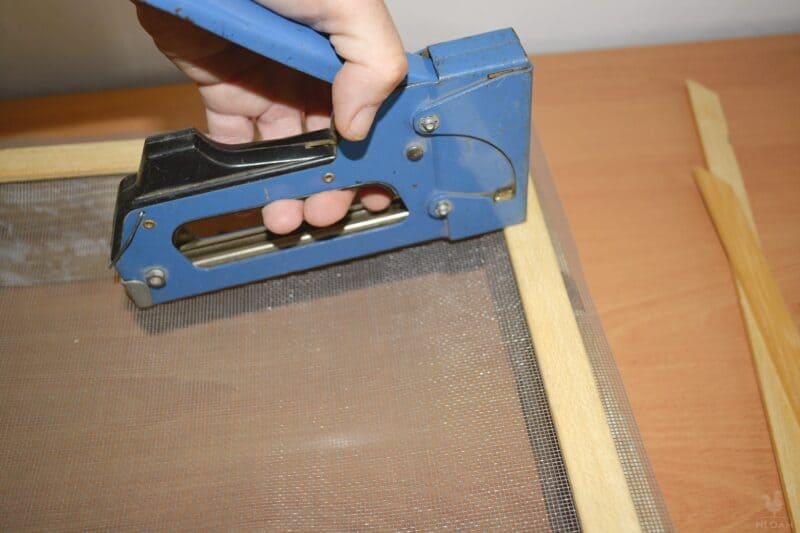
12. Place one piece of the netting onto the main frame.
13. Attach the trim frame and the netting to the larger frame using the staple gun while keeping the netting tight.
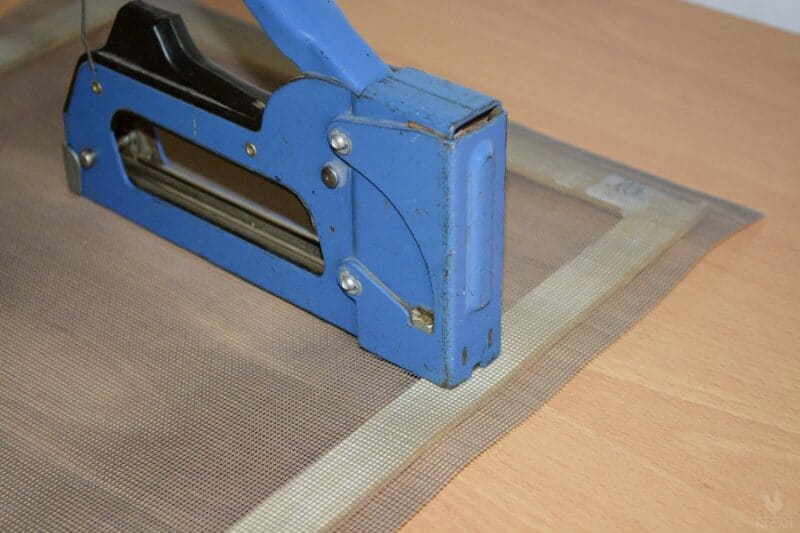
14. Position the other pieces of the trim frame together and fix the second piece of netting over them with the staple gun.
15. Trim the excess netting from the large frame with the craft knife.
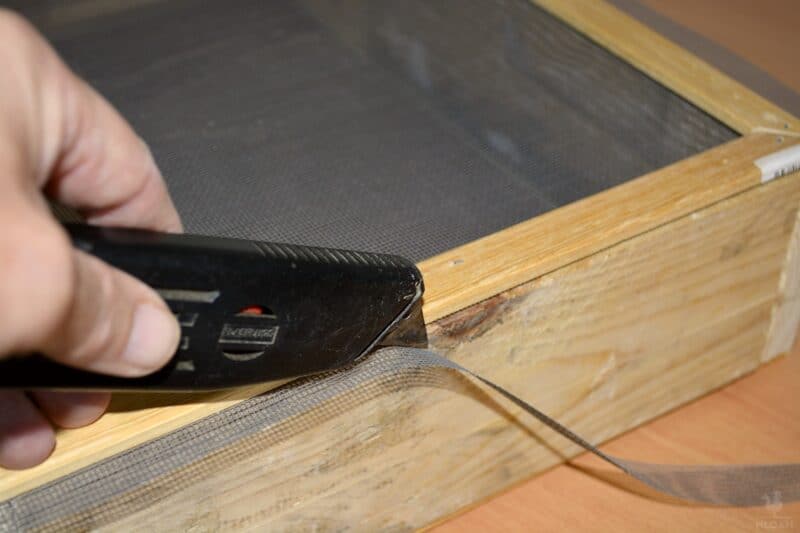
16. Trim the excess netting from the small frame using the craft knife.
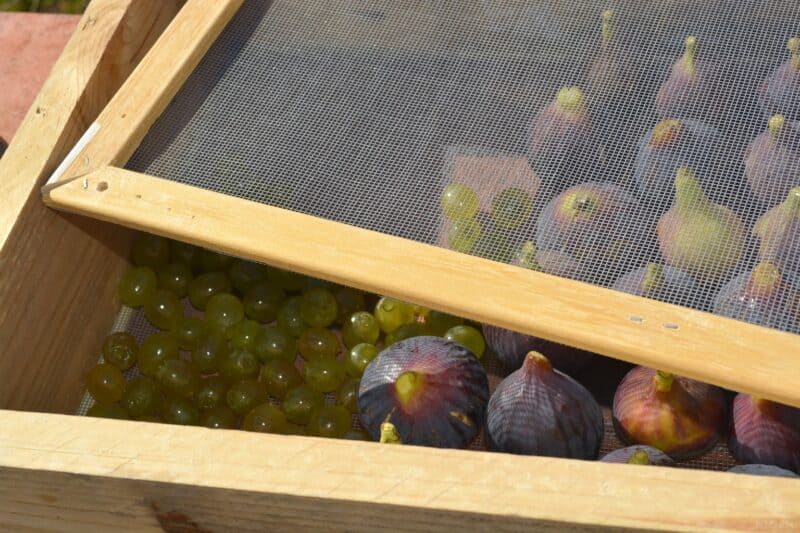
17. The rack is now complete! The fruit or vegetables can now be placed in the rack and placed in the sun.

Tips for Sun Drying Food
One of the easiest ways to preserve foods is to dry them. Food dehydration is a technique that has been occurring since the time of the Egyptians, and it’s a great way to make food more lightweight, portable, and shelf-stable.
Sun drying can be used for many types of foods but it is not possible in all areas, even with a specialized rack like the one we’ve described above.
In order for sun drying to be safe and effective, you need to have the proper weather and humidity levels to do so. Places like California offer the ideal environment for sun-drying food.
For food to be successfully dried outside, you need foods to be kept at a minimum temperature of 85 degrees Fahrenheit with minimum humidity and a light breeze.
The San Joaquin Valley of California is a perfect example of ideal weather conditions. Here, grapes are regularly dried to be made into raisins using commercial sun-drying racks like the one we’ve created above.
Choose the Right Foods
Although just about any type of food can be dehydrated, you will want to play it safe if you’re using the sun to dry your food.
Consider only sun-drying fruit, since it has higher levels of sugar and acid, making it safe to dry outdoors.
While you can often dry vegetables and even meat with the power of the sun, too, these types of foods offer conditions that are ideal for microbial growth and can be difficult to dry outside.
Add a Reflective Surface
A simple way to build upon the effectiveness of the rack we’ve described above and to make it usable for just about anyone is to add some sort of a reflective surface.
By adding a layer of aluminum foil to the sun rack, you can dry produce and other foods just about anywhere. That’s because the reflective surface increases the temperature by about 20 to 30 degrees.
You can then add vents to each end of the dryer so air movement is more effective or cover the dryer with plastic if there’s any precipitation.
Protect Your Produce
When you put your fruits and vegetables out to dry in the sun, you will want to take a few steps to ensure that they stay fresh.
For example, you should only dry fruit on sunny days with zero chance of precipitation. That sounds obvious, but it’s important to note.
Bring the food inside at night even if it’s not done drying. This will protect it from intruders and from the dew in the morning.
Finally, you may want to cover your produce with cheesecloth or muslin to protect it from insects who may want to lay their eggs in the fruit.
Dry Your Own Food Stash with a DIY Rack for Sun Drying Produce
Remember, the goal is to dry your produce – not to cook it! The beauty of the rack we’ve described in the tutorial above is that it allows you to keep your fruit at the appropriate temperature.
If it’s going to be extremely hot for a prolonged period of time, you may want to give your fruit a bit of shade. This will help prevent it from being exposed to direct sunlight, which can cause it to cook, turn a dark color, and develop a jam-like taste.
Make sure your produce has plenty of air circulation. Otherwise, you may have mold to contend with.
It can take some time for your produce to dry so don’t rush things! You’ll know when it’s ready to bring inside when most of the moisture has been removed.
Some foods dry faster than others, so it might be wise to only place foods of the same type on each rack rather than mixing them together. That way, it will be easy to tell when your food is done.
Store your dried fruit indoors in paper bags. It should last indefinitely for you to enjoy all winter long!

Gordon is a British homesteader established in Spain, growing large amounts of veggies and fruits. He also has a high degree of self-sufficiency as he is procuring his own water, wood, and solar energy.