Whether you are trying to stretch your grocery budget or you just want to preserve every piece of your hard-earned garden harvest, at-home food preservation is a must-have skill for the savvy homesteader.

There are lots of ways to preserve food at home, including tried and true canning or freezing, but my favorite method is dehydration.
Dehydrated foods will keep for a surprisingly long time at room temperature, and they take on a new and unique texture and intense flavor that makes them perfect for snacking or as special ingredients.
Best of all, dehydrating is a lot easier than you think, and you’re probably ready to get started right now with no special equipment. If you are just getting started, the A to Z guide below will get you off on the right foot.
These foods are increasingly popular, and this is a good thing for preppers both because they are long-lasting, and because they are generally very healthy compared to other methods of preservation.
However, the loss of water weight does nothing to impact the calorie load of a given item and it is easy to overindulge on dehydrated foods.
Plus, some need to be reconstituted through the use of boiling water and depending on the situation this may not be practical or convenient. Despite this, dehydrated foods remain an excellent option for general preparedness.
Why Dehydrate?
You might be asking yourself why you would choose to dehydrate food instead of using one of those other methods of at-home preservation I mentioned.
Dehydrating isn’t the only way, just one of many ways, but in my opinion, it’s a great way to preserve food.
Compared to canning, drying food at home is straightforward, simple, and requires a lot less effort and attention. It does take more time, but once you have the food prepped and in the oven or dehydrator, you can walk away from it and will only need to check on it every few hours.
Unlike freezing, dried foods will keep at room temperature, and they can keep for a surprisingly long time. Stored in an airtight container like a jar or freezer bag, you can get anywhere from four months to a year in storage as long as it’s kept in ideal conditions.
Lastly, most dehydrated foods are ready to eat as is, and they are perfect for snacking. If you like beef jerky, you’re only going to get it through dehydration!
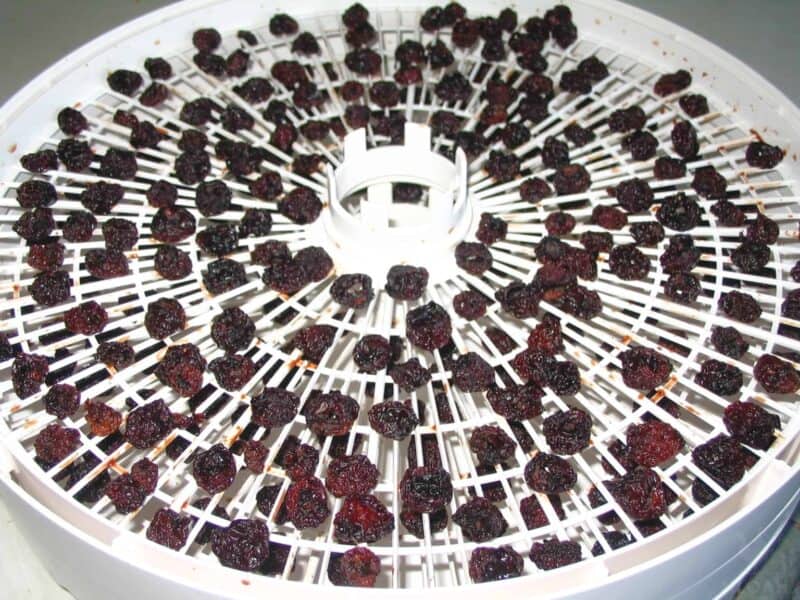
Dried fruits are perfect for adding to oatmeal, trail mix, or breakfast cereal, or for nibbling just as they are. Dried veggies make a great, long-lasting soup mix that can be prepared in moments with boiling water. And the list goes on!
Plus, dehydration is really cost-effective, requiring very little in the way of specialized equipment. In short, it has a host of advantages, and is the perfect way to maximize your harvest or prevent waste.
They Have More Calories by Weight
Dehydration produces a unique texture on the foods we all know and love, and it does this because water, or rather moisture, is removed from the food in question. After this process is completed, our food seems shrunken and either turns light, crispy, and flaky or becomes very dense and wrinkly.
At any rate, the food that went into the dehydration process comes out lighter because moisture is removed.
What is not removed, however, is that given portion of foods calorie content. Now when you go to consume that food the food feels lighter and less bulky, but contains the same payload of calories.
This can be kind of dangerous with certain food items because they are so eminently snackable that is easy to wolf down these small, light portions while really packing in the calories.
This can be an issue mentally and practically because the weight and bulk of a food and in particular it’s moisture content play a significant part in reaching satiation when eating.
Most people could not eat three or four bananas before they declare themselves full, or at least tired of bananas. However, I can assure you it is no trouble at all to sail through that same amount of bananas when they are turned into light, crispy banana chips!
This means that folks who are on a diet must be wary when consuming dehydrated food in any quantity, and it also means you might have trouble feeling full when subsisting on dehydrated offerings that have not been reconstituted.
It Also Preserves More Nutrients Compared to Other Methods
Another great thing I love about dehydrating food is that it preserves significantly more nutrients compared to other “hot” methods of preservation.
Minerals, vitamins especially, and other nutrients can be degraded or even destroyed by exposure to light and high temperatures. Canning, for instance, significantly reduces the nutritional profile of many fruits and veggies, with delicate ones suffering the most.
Since dehydration is conducted at a far lower temperature, fewer nutrients are destroyed overall. The drying process also removes moisture in the food, obviously, and in tandem concentrates both nutrients and sugars, making a given portion even tastier and healthier!
OK, But Is It Safe?
Indeed, dehydrated food is usually safe for long-term storage, even when eating as the primary source of calories. Especially when compared to heavily processed foods or shelf-stable snacks and meal replacement options, these foods prove themselves much better nutritionally.
But – there is a but – dried foods pack in significantly more calories, salt and sugar by weight compared to non-dehydrated equivalents. This means you must watch your calorie intake closely when subsisting predominantly on dehydrated foods.
All Kinds of Foods Can Be Dehydrated
Nearly anything you can think of can be safely and successfully dehydrated at home. The two most obvious categories of food are fruits and veggies. But it’s possible to dehydrate all kinds of lean meats like beef, venison, lamb, chicken, turkey, and fish, among others.
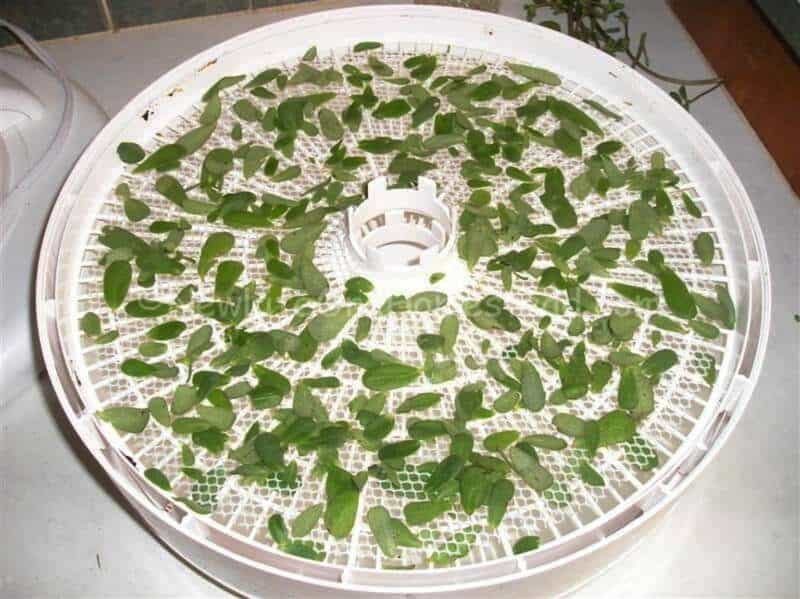
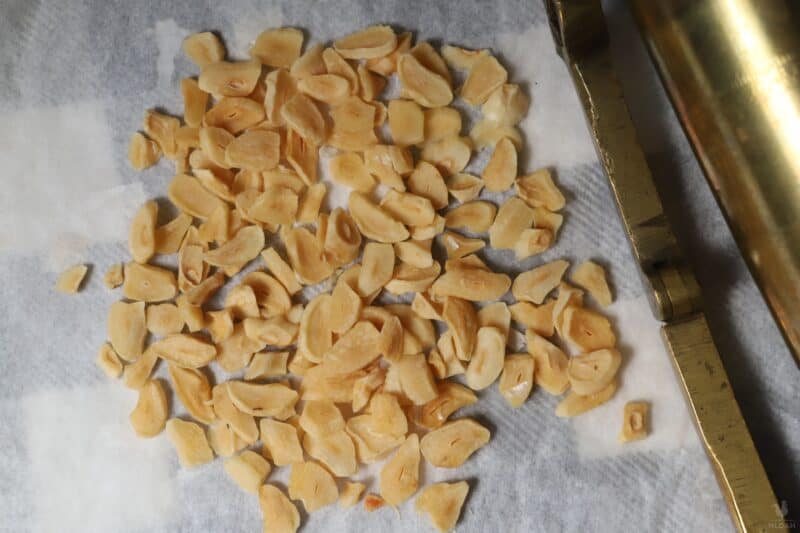
Herbs are another great choice and are extremely easy to do. Home-dried herbs are far superior to the usual grocery store varieties and intensely aromatic! Nuts and seeds may also be dehydrated if you don’t mind doing the shucking and shelling yourself…
And if you like flowers, you can preserve their beauty with either a dehydrator or an oven for a really long time. You can even dehydrate honey!
Two Best Options for At-Home Dehydration
So what do you need to actually do the dehydrating yourself? There are many ways to dry foods, including using air or sunshine, both of which are ancient and traditional methods. But for convenience, safety, and reliability, you should stick with the following:
Food Dehydrator
The first and best choice in at-home dehydration technology. Food dehydrators are basically enclosures that will circulate gently heated air over multiple trays of food that you have loaded inside.
They are extremely easy to use, affordable, have low energy requirements, and convenient options like temperature or food selectors with timers, indicators, and a lot more.
If you want to make the process as easy and straightforward as possible, and if you plan on making lots of dried food yourself, these are well worth the investment.
Oven
Another approach and a good one if you want to get started right away. All you need to dry food is hot air, that’s it. Any oven can provide that, but unless you have a sophisticated oven that has a drying option built-in, there are some drawbacks.
For starters, many ovens can’t be set low enough for ideal drying temperatures, all of which are under 200°F / 93°F.
This will necessitate that you crack the door and experiment until you figure out a setting and position in the oven that will work, and your oven will use a lot more energy than a countertop dehydrator. Still, it is a viable and effective option if you’re willing to put in some extra work.
Helpful Tools for Dehydrating
Aside from the appliance that will actually dry your food, you’ll need a few other common kitchen tools to make your prep work easy.
Peelers: a handheld veggie or fruit peeler will make short work of removing skins and rinds. If you already have them or plan on drying lots of a specific fruit or veggie, specialized kitchen tools that will peel, remove cores, and perform other functions can be a worthwhile investment.
Paring Knife: no surprises here. A good, sharp paring knife will let you do nearly everything needed when prepping produce or meat for drying.
Grater: for making soup mixes and ingredients for other recipes, a box grater or handheld grater can come in handy. Not strictly necessary if you are just making snacks, but useful for other purposes.
Mandoline: mandolines work wonders for processing all kinds of fruits, veggies, and other foods into perfectly sized and consistent slices. Again, not strictly necessary but super handy for ensuring maximum consistency when drying, and consistency is a virtue during this operation!
Food Processor: not always needed, but a food processor can help you roughly chop or pulverize food for specific recipes. It comes in really handy for making fruit leather!
Cutting Board: any kind of cutting board you want for trimming, peeling, slicing, and dicing.
Steamer Basket: blanching food prior to dehydration is important for quality and greater shelf life. You can use a steamer basket to gently steam it or boil and then dunk in a bowl of ice water to accomplish that task.
Proper Prep is Essential
I mentioned earlier that dehydration, done right, requires a lot less attention and effort compared to canning, but where you’ve got to put in your effort is in the prep.
Fail to prep your food properly, whatever it is, and the results aren’t going to be as good. The process might even fail entirely, and you don’t want that!
Always go through the following procedures for any fruits and veggies that you plan on dehydrating, but keep in mind that meat, seeds, nuts, and mushrooms might have their own recipe-specific procedures.
Always Wash
As a general guideline, you always want to thoroughly wash any food prior to processing and dehydrating. Don’t wash mushrooms because they will absorb too much moisture and this will interfere with the process.
For fruits and veggies, even if you plan on peeling them, washing them will reduce contamination chances from any germs or chemicals that might be on the skins or peels.
Blanch
It’s not strictly necessary, but I urge you to blanch all fruits and veggies prior to drying. This will deactivate enzymes and eliminate bacteria that can cause degradation while in storage, extending shelf life and, just as importantly, improving taste and appearance.
If you don’t blanch your foods, you’ll notice they darken more quickly and won’t taste as good.
Like we talked about above in the tools section, this can be done by steaming or by properly blanching; a light boil followed by a dunk in ice water.
Peel if Desired or Needed
Some fruits and veggies might benefit from peeling prior to drying, but again, this isn’t always necessary. Stone fruit like peaches and apricots should be peeled as a matter of course, as should any fruit with a tough, hard, and inedible skin like pineapple.
Apples and pears can be peeled at your preference, but the dried skins are still tasty and certainly edible. Citrus fruits may or may not be peeled depending on your purpose for them.
Cut, Slice, Grate or Cube
Immediately prior to drying, it’s time to portion your food. The rule of thumb is that any piece of food you plan on drying should be no thicker, in cross-section, than one-quarter to one-half inch. Thinner pieces will dehydrate more quickly and more reliably, but they might dry out too much and become brittle.
Thicker pieces might not dry out enough, which will set the stage for spoilage! In any case, they will take longer. Most recipes you find in books or online will specify how thick your pieces should be.
Dip in Preservative, if Needed
The very last step, and one that is only needed for light-colored fruits and veggies, is a quick dip in a preservative bath. Typically this is a citric acid or ascorbic acid solution. The purpose of this dip is to prevent the marked discoloration that always happens once these foods are cut.
You know how apples and peaches always turn an unappealing brown shortly after they are cut? That’s what we’re trying to prevent!
The drying process will naturally result in darkening, but without a dip in preservative, they might wind up looking like a piece of old leather!
Always Dry Foods in a Single Layer
Here’s a golden rule that you should never forget: always load your baking sheet or dehydrator trays with a single layer of food. No overlapping!
This applies whether you are drying fruit, veggies, nuts, meat, or anything else. If your food overlaps, it will slow the drying process, leaving the touching places containing more moisture than the rest.
This means the chances of spoilage will be greatly increased, and even a single spoiled piece can ruin an entire batch when it goes into storage!
Always take the time to place your pieces in neat, tidy ranks on the tray, and if you need a larger quantity simply load up a second tray. Most at-home food dehydrators have the capacity for multiple trays.
Different Foods are Dried at Different Temperatures
Depending on what food you are drying, you’ll need to set your oven or your dehydrator to a different temperature.
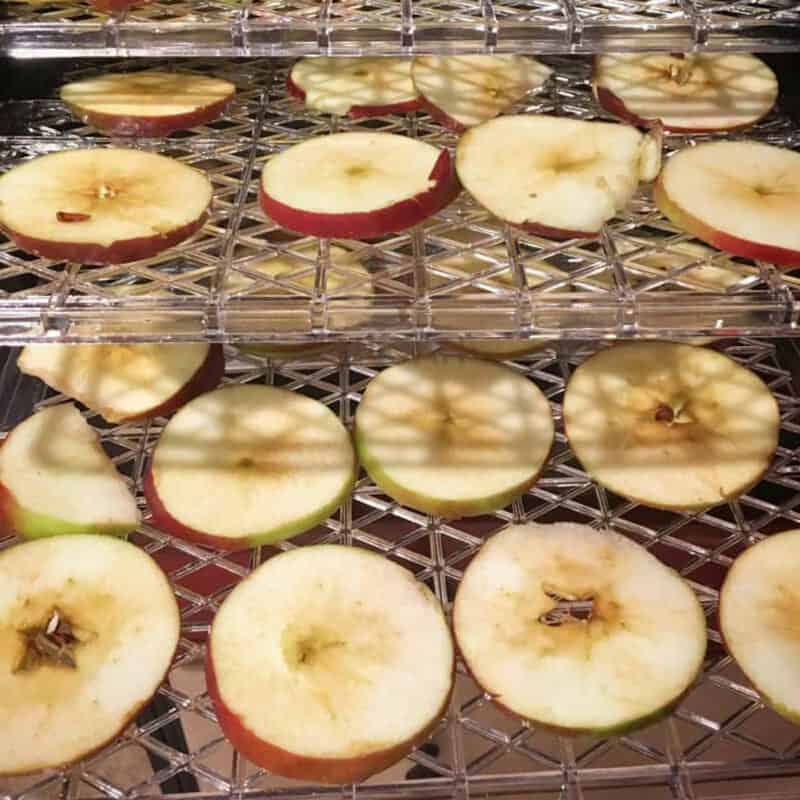
Fruits
Most fruits, sliced thin, will dry perfectly fine at between 130 and 145° F (between 55° and 62° C). Depending on the thickness and the type, this process will take anywhere from 6 hours to as long as a day and a half.
Thicker, denser fruits like apricots, figs, and grapes take longer. Thinly sliced apples and bananas won’t take nearly as long.
Veggies
Vegetables typically dry more quickly than fruit, and some can be successfully dried at an even lower temperature. Your typical temperature range for dehydrating them is between 125° (52° C) and 145° F (62° C). Most won’t take longer than 12 hours.
Herbs
Herbs are a great way to get started with at-home dehydration, but they require even lower temperatures to avoid destroying the aromatic compounds that give them their flavor.
This makes them a poor candidate for oven dehydration. 95° F to about 105° F (35°C to 40°C) for a few hours is all that’s needed.
Meat
Meat requires higher, consistent heat for proper drying, and leaving it in too long or at too low a temperature can be disastrous. Correct sizing is critical.
Dry meat at 145° F (62°C) if cooked, or 160° F (71°C) if making jerky from cured, raw meat. The time required is anywhere between 6 and 24 hours.
Nuts and Seeds
Once cracked, shelled, or hulled, all kinds of nuts and seeds can be dried perfectly at 145° (62°C) Fahrenheit. Larger pieces or types may take up to two days.
Typical Shelf Life of Dried Foods
It depends on the type of food and the storage conditions. Many veggies typically go bad quicker, lasting anywhere from 4 to 6 months. The same goes for meat, which might last only three months in storage.
Various fruits will last around 6 months or a little longer. Storing dried food in vacuum-sealed Mylar bags can produce a shelf life of up to one year.
Helpful Tips
Cut Pieces in Roughly the Same Size
As mentioned above, consistency is a virtue when you are drying food. Use a specialty slicer or step up your knife skills during prep to keep each individual piece as identical as possible.
This will give you maximum control over the drying process, and when one piece is done you can be confident that all pieces are done.
Check Food for Doneness
Don’t trust that the food is done when the timer goes off. Take a piece that’s representative of the batch and check it for doneness by bending it.
Some foods will feel tough and leathery but will split, like jerky. Others, like banana and apple chips, should snap cleanly. Learn what “done” looks like for different kinds of food, and check accordingly.
Store Dried Foods in Cool, Dark, Dry Places
Moisture, light, and elevated temperatures are the enemies of food stored at room temperature. No matter how good your container is, store your dried food in a dark, cool, and completely dry spot. This might not be your pantry!
Choose the Freshest Foods Possible
You’ll get the best results when dehydrating at home by using the freshest meats and nuts and the ripest fruits and veggies. Fruits and veggies that aren’t quite ripe won’t taste good, and it will usually take longer to properly dry them.
Mistakes to Avoid
Don’t Dehydrate to Extend Shelf Life of Stale Foods
Do not make the mistake of trying to save food that is past its prime or close to going bad by dehydrating it. That’s not how it works. Even if the process succeeds, the finished product will be of poor quality and will spoil very quickly.
Thick Portions are More Likely to Fail
Whatever your plans are for your food, don’t mess around with thicker cuts. Even if you try to dry thicker slices of food for much longer, it’s still no guarantee that they will be uniformly dry or even dry enough to avoid rotting and molding.
If you want to preserve larger or thicker pieces of food, look to a different method of preservation.
Never Dehydrate Milk, Eggs, or Fatty Meats
You can dehydrate most foods, but not all. I recommend you avoid trying to dehydrate dairy products, eggs, and fatty cuts of meat.
You can draw the moisture out of these foods, but not the fat itself, which is prone to going rancid in storage. Again, look to a different method of preservation for safety.
Use Preservatives to Avoid Unsightly Darkening
There’s an old saying in culinary circles that we eat with our eyes first. This means that the appearance of food greatly informs the person eating how good it is.
Your peaches and apples might be incredibly sweet and delicious, but if they look brown and half-rotted, no one will be eager to try them. Don’t hesitate to use ascorbic acid or citric acid to help prevent this darkening during drying.
Reconstitution
Just because a food has been dehydrated does not mean it’s palatable, or even ready to eat, as it is.
Most of your typical snack or trail mix offerings like fruits, veggies, meats and even specialty or novelty items like ice cream are ready to eat as is, but other items like beans, soups, casseroles and the like must be rehydrated through the use of boiling water and patience before digging in.
Now, this might be an issue for you or it might not depending on your circumstances and your plan, but it is something you must know about before you decide to go all in on stockpiling dehydrated food.
In a situation where both time and fuel are plentiful, you shouldn’t have much in the way of worry. However, if you are relying on dehydrated food in a situation where water is scarce or precious and fuel is something you cannot afford to waste unnecessarily, it probably won’t be much of a bargain.
Think through your plan and the likely situation before committing to a large quantity of dehydrated food, and keep in mind that there are always certain options that are worthwhile in the form of snacks and trail food, items that need no preparation before eating while affording you all the advantages of dehydrated food discussed above.

I’ve taken over this blog from Kendra Lynne around 2018, and turned it into one of the best an most comprehensive homesteading website out there. I was raised partly in the countryside living a very frugal life ever since I can remember.