Canning is a great way to preserve the foods you harvest, forage, hunt, or buy. Once you learn how to can, you will be able to keep your pantry stocked all year long.
If you sell foods at a farmers’ market or run a community supported agriculture (CSA) program, foods like canned jams and pickles are very popular sellers as well. And canning is a just plain fun activity that your whole family can enjoy doing together on the homestead.
If you’ve never canned before, no worries; it is not hard to learn. However, you will have to buy some equipment prior to getting started. Here are the top canning supplies you will need, and others equipment that is nice to have, if you want to get started canning your own foods right away.
Reference Materials
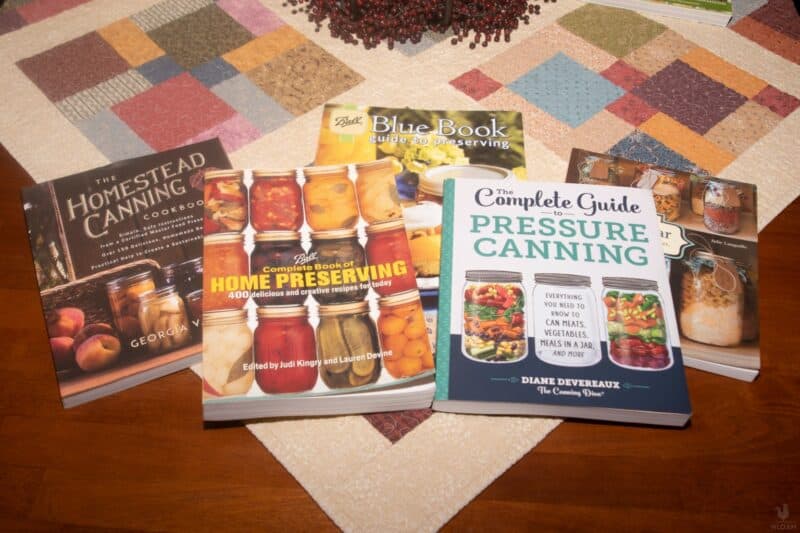
Great references will help you become a better canner. A well-worn book indicates you always have your book handy while canning!
Canning is a preservation technique that allows you to store foods in mason jars (the “cans”) at room temperature for up to one year.
While it is easy, it is important for safety reasons to practice proper canning techniques; failing to do so could prevent you from effectively killing all of the harmful bacteria in the food, or lead to jars not sealing properly.
Try to find a trusted expert to help you learn canning basics. An experienced canner can show you all of the basics, and help you learn how to can foods safely and efficiently. Some community colleges have classes on food preservation; that is a good place to learn how to can safely as well.
Additionally, you should ensure that you have good canning reference materials on hand. Good references can provide terrific step-by step instructions on canning safely; many also have delicious recipes you can try as well.
Here are some canning references that all homesteaders should have at their fingertips:
Good Canning Books
Disclosure: if you visit an external link in this post and make a purchase, I may earn a commission. Read my full earnings disclosure here.
There are hundreds of canning books available. Here are three great ones that can get you canning in your kitchen in no time:
- Ball Complete Book of Home Preserving. Ball is a leading manufacturer of mason jars and other canning supplies and products. This book offers a great primer on canning processes and procedures, and safety tips. It also has hundreds of great recipes to make jams, jellies, pickles, relishes, and many other items. The book includes information and recipes for pressure canning as well.
- Canning and Preserving for Beginners. This is another great canning guide for people that are just starting out as canners. The book is very straightforward, and clearly explains canning terminology and processes. It is well-illustrated, and is another great source for simple, easy-to-follow canning recipes as well.
- The Prepper’s Canning Guide. This guide is another excellent resource for canners. Like the previous guides before it, Preppers Canning Guide provides a great overview of canning basics. Additionally, this book has great tips for preserving foods to support your homestead in the event of a major disaster or other contingency. It discusses strategies for stocking your pantry for emergencies, as well as making the most of the food you have available. This book is a must-have reference for anyone who wants to have all of their food preserved and prepared when a disaster strikes.
You should always be on the lookout for new books on canning; they are fun and informative to read, and you can often find great new recipes to try in your own kitchen.
Online References
There are hundreds of canning references online. Here are two government-sponsored sites that are worth bookmarking:
- The National Center for Home Food Preservation. The Natural Center for Home Food Preservation is a tremendous online resource for all things related to preserving foods in your home. Its canning information is first rate; all canners should review it as you prepare to can foods on your own. Before you consider doing anything related to canning or preserving foods, you should always search this website for the most current information.
- The USDA Guide to Home Canning. The United States Department of Agriculture puts out an outstanding guide to canning at home, and it is entirely free online at the link. The USDA Guide covers the basics of preserving foods using water bath or pressure canning techniques, and provides the most up to date, authoritative information about canning safely in the home. And hey, it is absolutely free too, a real plus! You can reference it on your smartphone or tablet while you’re working in the kitchen, or print it out and place the pages in a binder. However, if you feel you must have a hard copy, however, you can always purchase one.

The Basics – Boiling Water-Canning
Most homesteaders start out boiling water-canning. This straightforward process involves boiling mason jars (the “cans” in canning) of foods that are high in acid in a pot of water – the “water bath.”
The boiling water, along with the food’s acid content, help to kill all of the bacteria; immersion in the boiling water also helps to create an airtight seal on the jars to preserve the foods as well.
Canners use the boiling water-canning process to preserve the majority of foods we all associate with canning. Jellies, jams, pickles, salsa, and many pie fillings are made through this simple canning process.
You need a few basic supplies to start preserving foods using the boiling water-canning process. These supplies include:
Jars and Closures
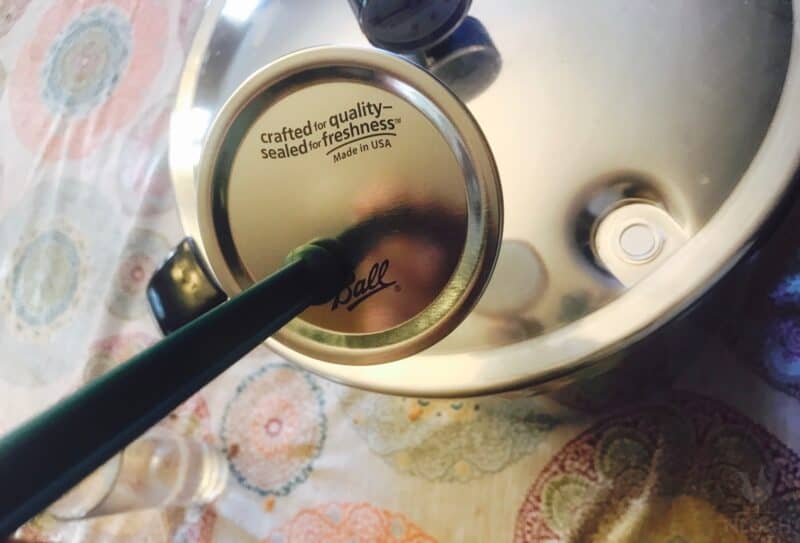
- Mason or Canning Jars. Mason jars, also called canning jars, are the glass jars that you will preserve and store your foods in. They come in a wide variety of sizes. Smaller jars are often used to preserve jellies, jams and sauces. Smaller jars are great to give as gifts, or to sell at farmers markets. Larger jars are great for pickles. The wide mouth jars are great for use in recipes calling for larger pieces of vegetables or fruit; the wider mouth makes it easier to pack them. Canning jars are reusable.
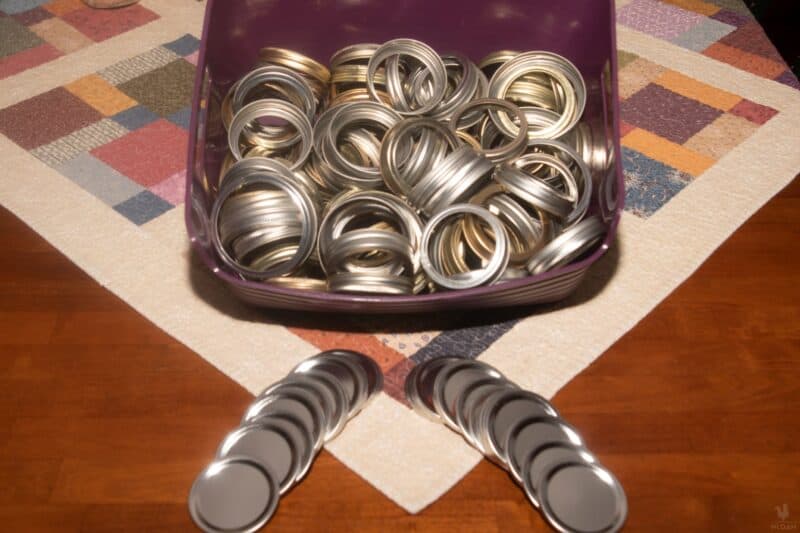
- Lids. Canning lids consist of tin plate steel, and have a channel coating on their undersides that is specially designed to help seal jars and preserve your foods. Lids are not reusable; discard them after you finish off a jar of your preserved food. These lids normally come with the jars when you buy them; alternatively, you can buy replacement packs of them as well.
- Screw Bands. Screw bands, or rings, are used to hold the lid in place during heat processing. Once you confirm that a jar of processed food has sealed, the screw band should be removed. Failing to do so can make opening the jar more difficult later on. Screw bands can be reused.
Canning Equipment
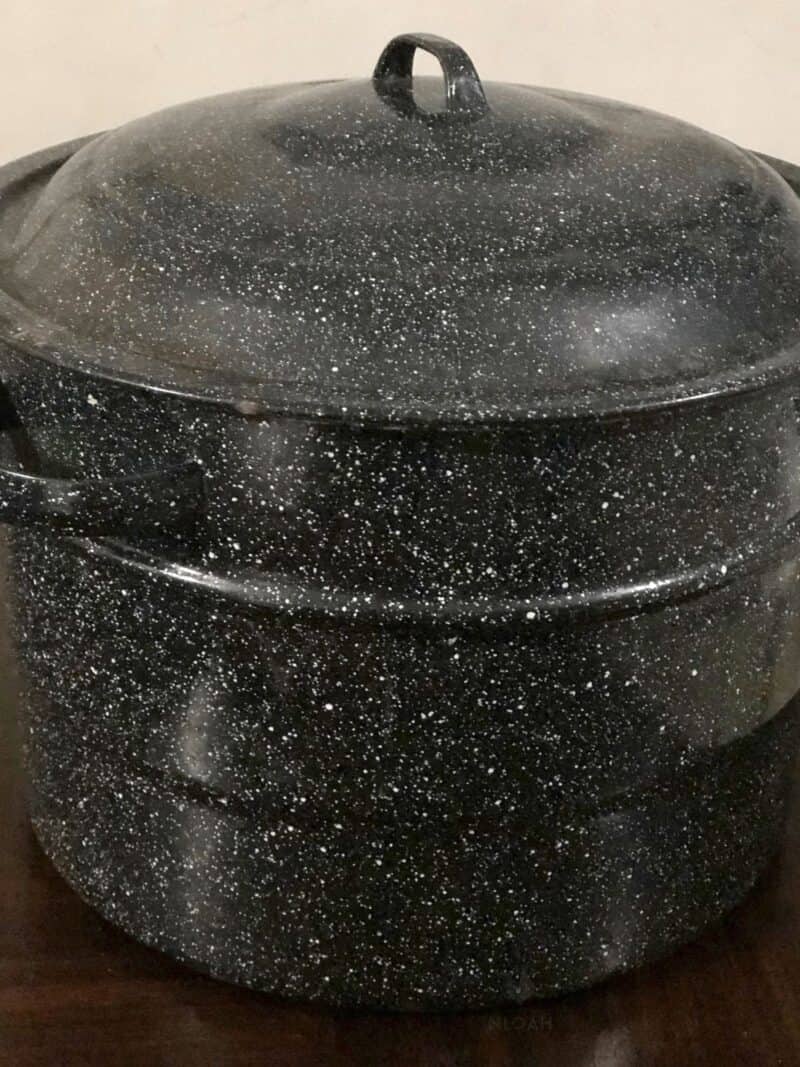
- Boiling Water-Canner. A boiling water-canner sounds fancy, but it’s just a pot large enough to fit canning jars in to heat process them. The pot should be large enough that all of your sealed jars can be submerged under at least one inch of water for heat processing. A boiling water-canner will need a fitted lid as well. You can buy an inexpensive pot designed for use as a boiling water at most home goods stores, or even online.
- Canning Rack. A canning rack is a thin metal frame which sits in your boiling water-canner. The rack serves two purposes. First it separate the jars from the direct high heat of the boiling water-canner’s bottom. Next, most racks have handles that allow you to secure your jars and rack to the sides of the pot. DO NOT use the canning rack to lift jars out of the boiling water-canner, especially if the water is hot.
- Jar Lifter. Jar lifters are mechanical tongs that are used to safely manipulate canning jars into and out of the boiling water-canner. Working with jars is difficult when you have to contend with scalding hot water; the jar lifters make it much easier and safer to get the jars where you need them to be.
Here is a short video showing a jar lifter in action:
- Nonmetallic spatulas are used to tightly pack canning jars, and eliminate air pockets and other wasted space. This is especially important when you are canning thicker foods, such as jams and relishes.
- Canning funnels are specially made for working with mason jars. Unlike standard funnels, canning funnels have wide opening, and rest easily atop mason jars. Canning funnels help make packing your jars a neater process; you’ll end up with less food wasted on the sides of your jar and your countertop if you use a canning funnel.
- Lid Wands. Magnetic lid wands consist of a plastic or wooden stick with a magnet affixed to one end. These wands are used to maneuver your lids around more easily, and help prevent you from contaminating them, or accidentally scratching their special coating.
- Stainless Steel Ladle. Sauces, relishes, jams, jellies, and other types of preserves will have to be transferred from the saucepan they are prepared in to the canning jars where you’ll preserve them. A good ladle will be necessary for this step. Purchase a stainless sttweel ladle for canning; they are easier to keep clean, and you’ll have less of a chance of transferring unwanted flavors to your preserved foods than you would if you use a plastic ladle.
- Cutting board. Many canning recipes call for fruits and vegetables to be sliced, chopped, cut or diced. You will need a good cutting board in order to prepare your foods for canning effectively. Consider getting an over the sink cutting board for this task. Many over the sink cutting boards have some sort of strainer attachment that make it easy to wash and sort the foods you are cutting, which will save you time on canning day.
This equipment, along with your jars, lids and screw bands, are all you need to try most basic water bath canning recipes. While you can buy all of these items separately, most home goods stores sell a basic kit consisting of most of these items for a very reasonable price; you can also find the kits online as well.
Pressure Canning
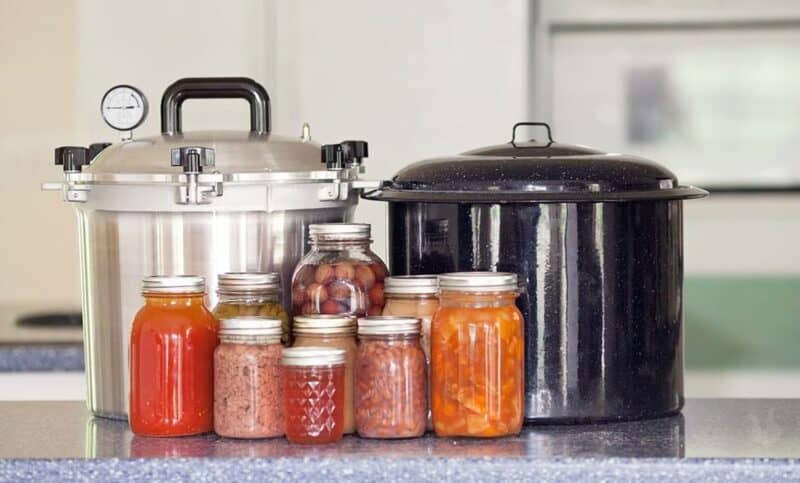
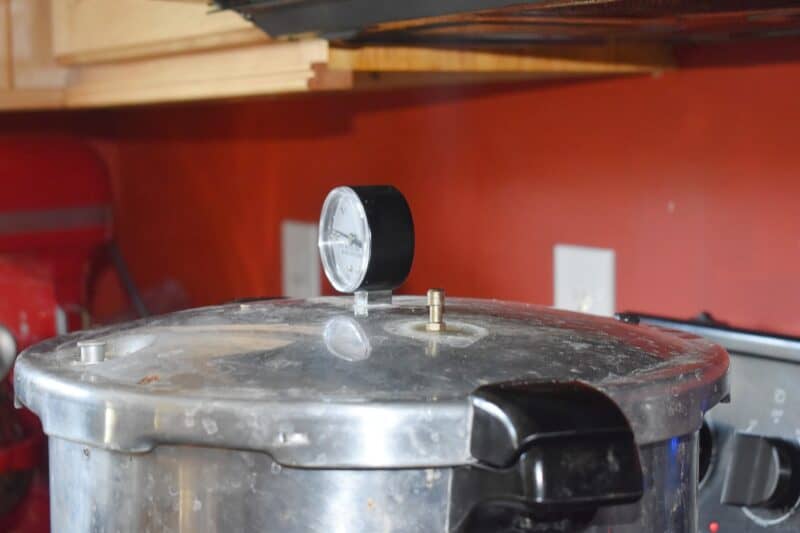
Photo: a standard pressure canner. This is a large one, capable of pressure canning several quart jars.
Low acid foods, like meat, poultry, seafood, and some types of fruits and vegetables, need to be heated to higher temperatures in order to kill any potentially harmful bacteria, and render the food safe to store for months at room temperature. The primary tool required to do this is called a pressure canner.
A pressure canner is a large pot with a locking lid. It is deep enough to allow you to place canning jars in to heat process them. The pressure canner’s size, with its capacity to seat several canning jars, is what differentiates it from a standard kitchen pressure cooker.
Pressure canners take advantage of the pressure of boiling water that builds up within them to create steam that reaches at least 240 degrees Fahrenheit of temperature.
The high temperature kills all potentially harmful bacterial spores in the low acid foods that you are canning, and makes it safe to store the preserved foods at room temperature.
If you are planning to preserve meats, poultry, seafood, or other things containing these types of ingredients, you must have a pressure canner to preserve these foods safely. It is a really good idea to work with an experienced person you trust to learn the basics of pressure canning before you start using this food preservation technique yourself.
Additional Canning Equipment
There are additional items you may not need for canning, but they can help make the process more efficient. Other items are needed for specific types of canning recipes. Let’s look at some of the more commonly used items.
- Cheesecloth is a thin mesh cloth that is commonly used in the kitchen. When canning, you’ll need cheesecloth to strain fruits for some juice or jelly recipes; you’ll also need it to build a spice bag when making certain kinds of pickles as well.
- Jelly Strainer Bags. Like cheesecloth, jelly strainer bags are useful for straining juices and purees. Most jelly strainer bags fit snuggly over jar lids or funnels; others come with their own metal stands to aid in straining. These handy little bags help you remove tiny seeds and fruits pulp from the juice you are working with. Jelly strainer bags, unsurprisingly, are essential when making many types of jelly. However, they are also useful whenever you are canning something that needs to be finely strained.
- There are times when you will want to know the precise temperatures of liquids or solids you are preparing to can; for example, when making maple syrup, you will want to know the exact temperature of the syrup, so you can determine when it is ready to pack into jars for preserving. A candy thermometer will come in real handy at this point. These thermometers come in both analog as well as digital models; many are programmable as well, and will sound an alarm when your food reaches a desired temperature
Here is a video showing how thermometers are used when boiling maple sap into syrup.
- Food Mill or Food Processor. Many canning recipes call for finely chopping or pureeing fruits and vegetables. If you plan on canning on a regular basis, or making large batches of canned goods, you should consider getting a food mill, or a food processor. Using a food processor can help speed up the process of preparing vegetables for canning; using a knife and cutting board to chop up several pounds of produce can be time consuming Most food processors come with different blades and attachments, so you can chop the fruits or vegetables you’re working with to any consistency you require. Many food mills are hand powered, and come with an assortment of blades and attachments as well. Canners often swear by their food mills, and they are an extremely useful tool for any homesteader who is canning foods off of the grid.
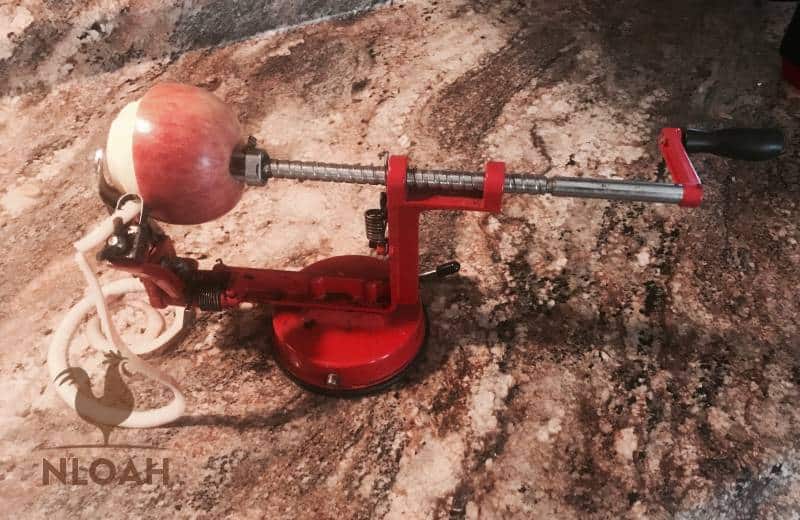
- Apple or Fruit Peeler. Apples, pears, and other similar fruits are commonly used to make sauces, butters, and other preserves. Most of the recipes for these harder fruits require them to be peeled and cored. This can be a very time consuming, laborious process, especially if you are preparing large batches of these fruits when they’re ripe and ready. An apple peeler can help speed up this chore, so you can focus more on cooking and canning your preserves. Many of these peelers can help core your fruit as well, an added benefit.
- Steam Juicer. If you plan on preserving jellies and juices on a regular basis, you should really invest in a steam juicer. A steam juicer uses steam to heat up berries or fruits or place in one chamber, and collects the juice in another chamber. This helps to speed up the process of extracting juice, and it is also more efficient than other methods as well. You’ll be grateful you purchased your steam juicer each time you go to make a batch of fruit jelly!
- Sauce Maker. If you frequently find yourself making sauces or purees, you may want to consider purchasing a sauce maker. These tools help grind down vegetables into a consistency that is perfect for sauces or purees. While other tools, such as a blender or food processor, can do this as well, sauce makers are ideally designed to do this task and can help you prepare sauces more efficiently. These handy kitchen tools come in electric as well as hand-powered
This video gives you an idea of how you can use one of these sauce makers to rapidly prepare foods like tomato sauce for canning:
- Plastic Storage Caps. After you open one of your jars and start using it, what do you do with the jar if there is still food left over? One option is to purchase and use plastic storage caps. These caps screw on and enclose your jars after you remove the metal canning lids. Remember, however, that once you unseal a jar of preserved food you must refrigerate it, whether it has one of these plastic lids or not.
- If you plan to can a great deal, or sell your canned items at farmers markets, you should consider labeling your jars. Labels will help you identify what is in each jar; this is extremely helpful when you have a pantry full of mason jars, since many jams and sauces look the same. More importantly, you’ll be able to place a date on each jar, so you will know how long it will be good for. There are dissolvable labels, which are easy to remove after use by immersing jars in water. If you want to print custom labels for selling your canned items, you can opt instead for label making printing paper as well.
Parting Thoughts
Canning is a critical homesteading skill, and one of the first things you should learn how to do once you start a homestead of your own. Once you’re ready to preserve the food you produce on your homestead, these canning supplies will help you get started. All you need are the basic supplies to start preserving the food you produce for later use. However, the optional equipment often saves time, and makes it easier to can large batches of food; consider buying these items as soon as you can afford them.
So what are you waiting for? Get the canning supplies you need, and start canning the food your gardens and fruit trees are producing right away!

When Tom Harkins is not busy doing emergency repairs to his 200 year-old New England home, he tries to send all of his time gardening, home brewing, foraging, and taking care of his ever-growing flock of chickens, turkey and geese.
I agree,the tattler lids cost more, but in the long run will save a lot of money on lids verses the single use lids. I love them. Never had a problem with the tattler lids.
For prepping purposes, you should do some math on how many jars you are likely to use in a year. If you have long winters, you will be eating more of your canned food than we in the south will. We have 12 people in our family/group. I figured 600 big jars a year for food and more for jelly. I now have that many jars stored away plus 3,000 lids to give me 5 years worth of canning. I read these prepper books where people scavenge canning jars and lids and they think they are lucky that they found 4 dozen jars. That isn’t going to put away enough food to last 2 months. I was astonished myself when my math added up to 600 jars a year.
the Tattler brand of poly re-usable canning jar lids have gained their share of the market & acceptability – deserves a mention ….