
Out of all the preserves you might make at home, there’s just something special about pear preserves. On toast, on a perfect English muffin, or even dolloped onto pancakes, there’s something almost indescribable about the flavor.
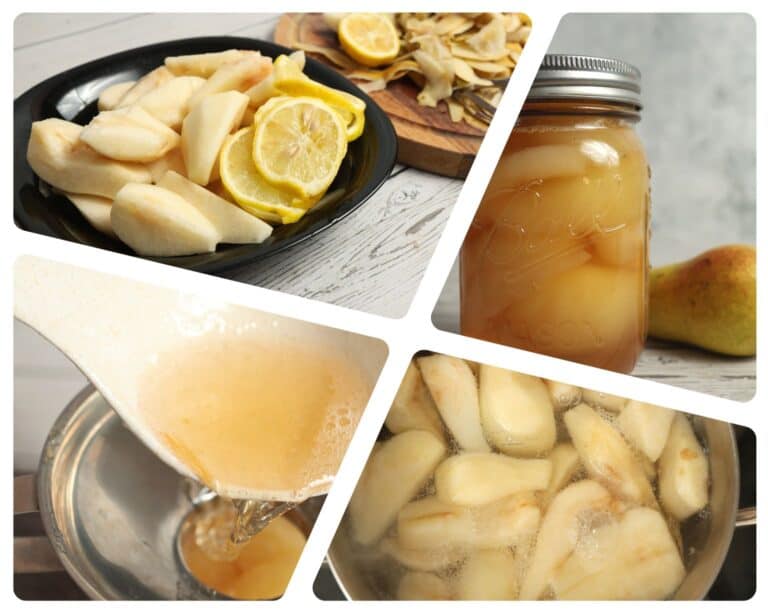
If you’ve never made your own batch of pear preserves, you’ve got to try it. I’m here to help with a tried and true recipe from NCHFP in the U.S. With just a little work and a little time you’ll soon have a batch of pear preserves that your family will love. Roll up your sleeves and let’s get going.
What You’ll Need
Ingredients
Pears: You’ll need two pounds worth, or about 6 medium pears, to make a load of two and a half pints total in half pint jars. Make sure any fruit you choose is ripe, hard and free of blemishes or bad spots.
Kiefer pears and other varieties that are firm when ripe work well for this recipe because they won’t turn mushy after being cooked. Ideally, you should avoid dessert pears or any that are soft or overripe. Also, definitely avoid any Asian pears – unless you can them properly.
Sugar: white, granulated sugar is fine. You’ll need a total of three cups for this recipe, divided into two portions of 1 and 1/2 cups.
Water: You’ll need two and a half cups.
Lemon: a single lemon, ripe, fresh and free of defects.
Ginger, preserved (optional): Ginger is a wonderful pairing with pear. Use preserved ginger for this recipe. You’ll need a small piece for each jar.
Tools and Supplies
Water Bath Canner: you should use a traditional stovetop water canner. Make sure it works, and more importantly, make sure you know how to use it before you get started.
Large Saucepan: one large saucepan is all you need to prepare both the syrup and the fruit for canning.
Jars, ½ Pint: this recipe specifies half pint jars for reliably safe canning. You’ll need five of them.
Lids and Bands: assuming your jars don’t have attached, reusable lids, you’ll need brand new disposable lids and the appropriate bands. Note that you should never, ever reuse disposable lids, no matter what grandma told you. You may reuse the bands as long as they don’t show any signs of rust or other damage.
Canning Funnel: helpful for packing fruit and syrup into jars without making a mess or getting either on the lids of the jars, which can lead to seal failure.
Ladle: comes in handy for filling the jars with both fruit and syrup.
Jar Lifter: you can use these tongs to safely and easily pick up, load and unload your jars.
Slotted Cooking Spoon: you’ll definitely want to use a slotted cooking spoon for this recipe because in one step we’ve got to load the fruit while leaving the liquid in the pan.
Cutting Board: self explanatory.
Knife: a good sharp kitchen or paring knife will let you prep the fruit in a flash.
Step by Step Instructions
Step 1: Sanitize cutting board, knife and saucepan. Start by ensuring your cutting board, knife and saucepan are absolutely clean. Wash everything in hot, soapy water and then give it a hot water rinse.
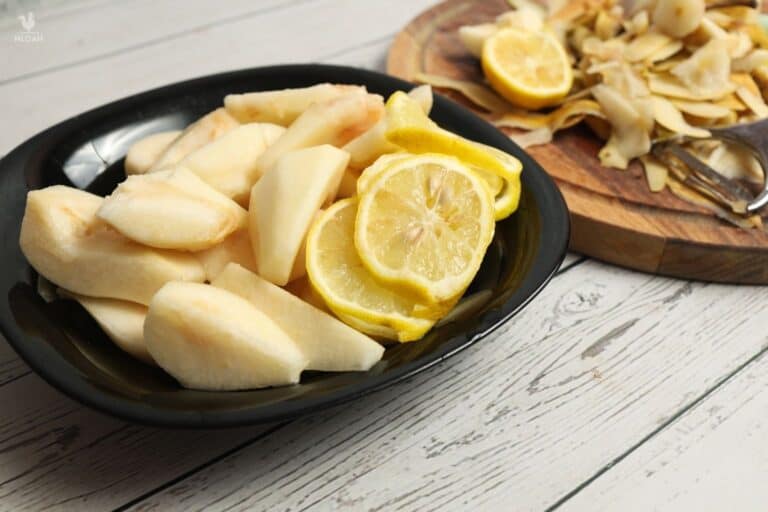
Step 2: Wash, stem and prepare fruit. Wash the pears and the lemon under cold water. Core and cut the pears into halves or quarters at your preference. Cut the lemon into thin slices.
Step 3: Boil water and sugar to create syrup. Pour the water into your saucepan and bring it to a boil. Add 1 and 1/2 cups of sugar and stir while cooking rapidly until completely dissolved, for about 2 minutes.
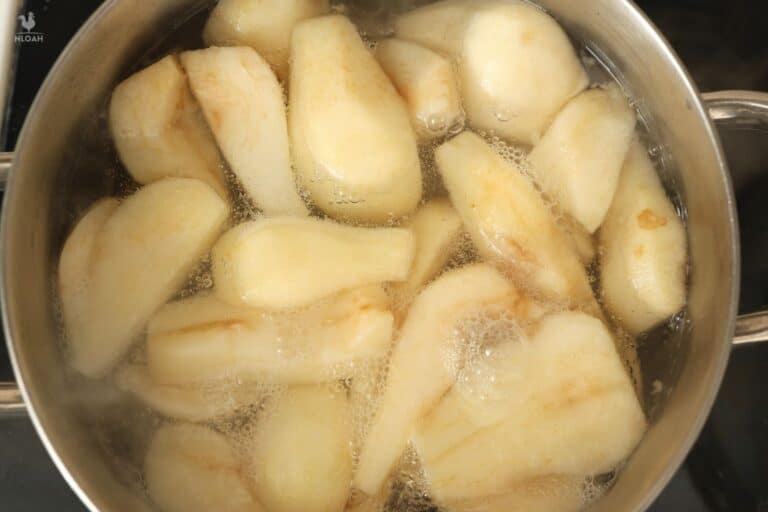
Step 4: Add pears, bring to gentle boil. Add your pears and bring the syrup back to a boil. Reduce heat and keep the pears at a gentle boil for 15 minutes.
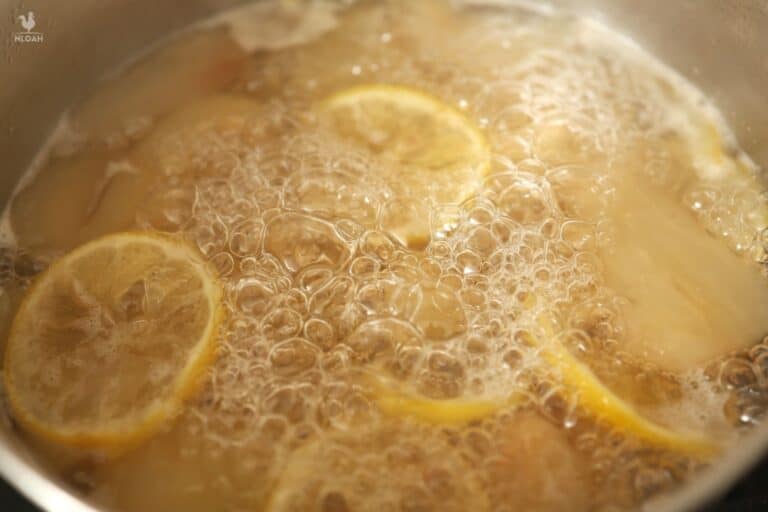
Step 5: Add remaining sugar and lemon, continue cooking. Toss in the lemon slices and add the remaining one and a half cups of sugar, stirring continuously until the sugar dissolves. Continue cooking until the pears turn clear, about 25 minutes.
Step 6: Remove pears from heat, cover and cool. Cut the heat, cover the pears and allow them to cool enough that they are safe to put in the refrigerator.
Step 7: Refrigerate pears for 12 to 24 hours. Keep the covered pears in your refrigerator until completely chilled, at least 12 hours and up to 24 hours.
Step 8: Sterilize and preheat jars, preheat canner. After the pears have completely cooled in the refrigerator for at least 12 hours, set up your canner, sterilize your jars and preheat both. Keep the jars hot while you go through the next steps.
Step 9: Boil pears again. Remove the pears and syrup from the refrigerator, put them back on the stove and heat them until boiling.
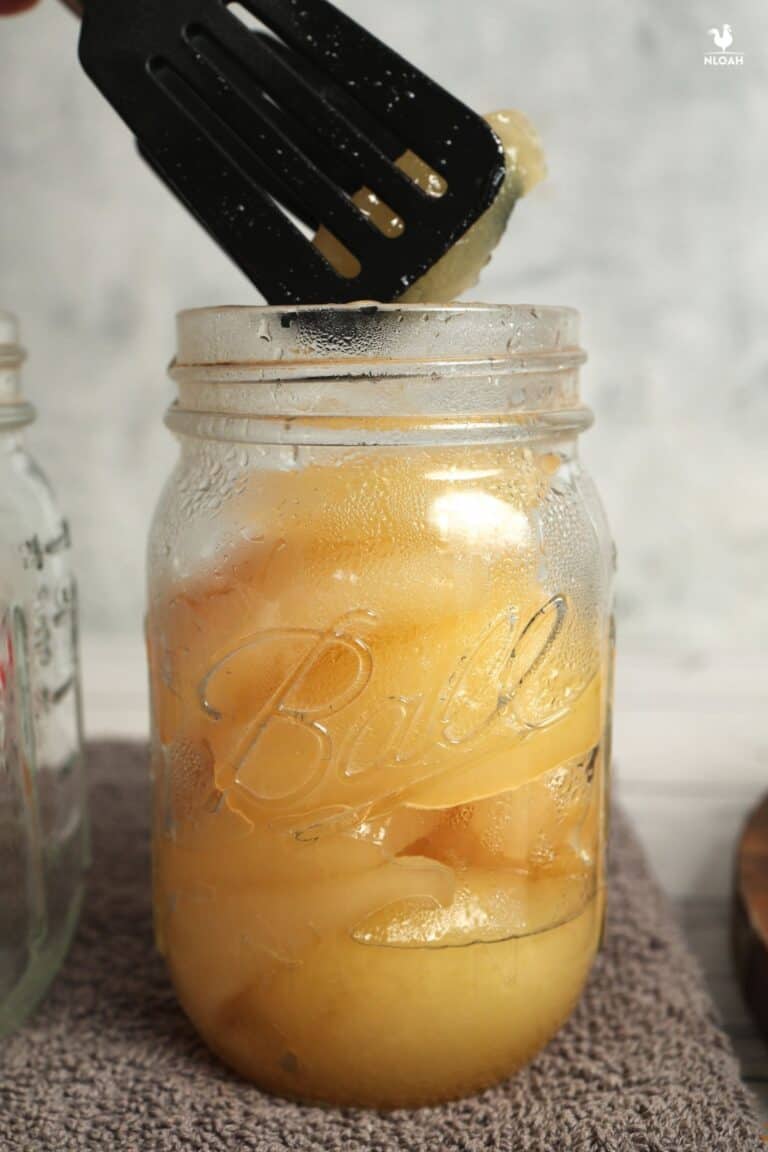
Step 10: Pack only fruit into jars, add ginger if using. Place your hot jars on the counter nearby. Using your spoon and canning funnel, pack an equal amount of fruit only (for now) into each jar, leaving a quarter inch of headspace. Place a single piece of preserved ginger in each jar if you are including it.
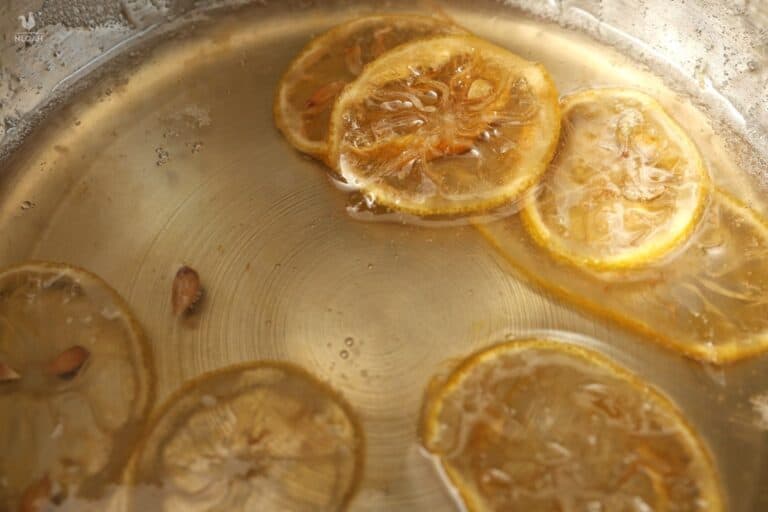
Step 11: Cook syrup, ladle into jars. Continue cooking the syrup for 3 to 5 minutes, or a little longer if it is still too thin – until it looks glossy:
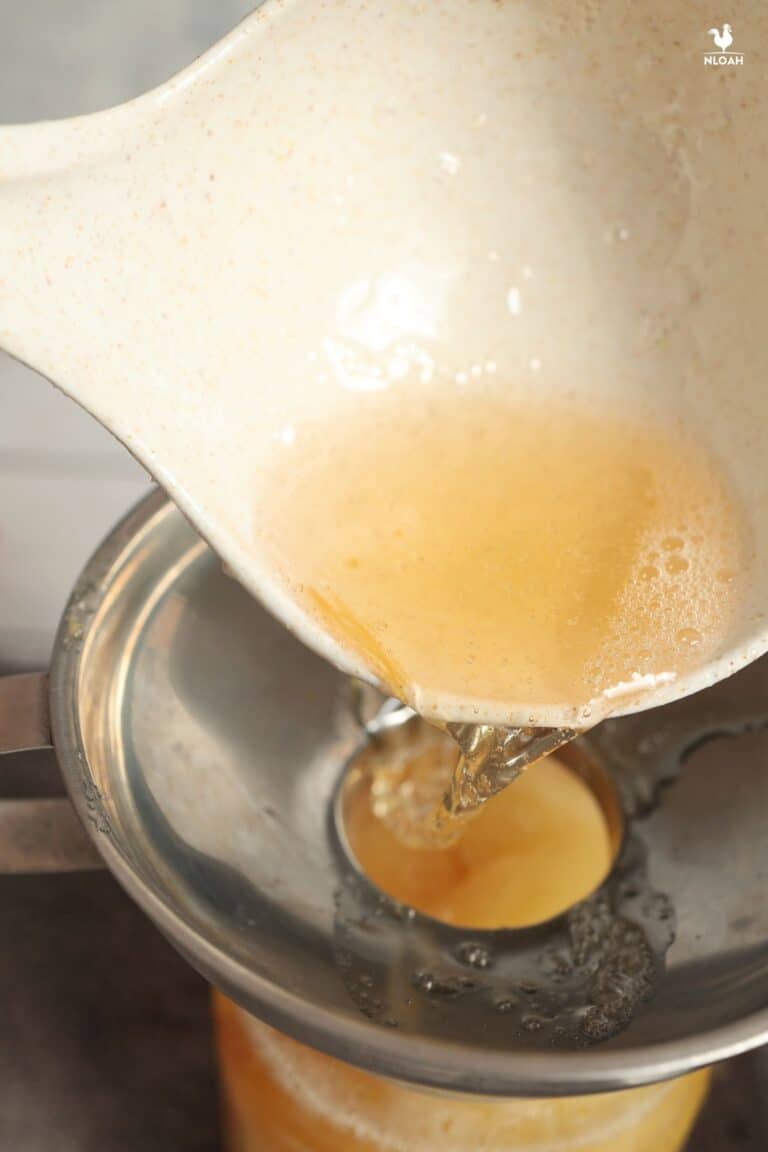
Use your ladle to pour the hot syrup over the fruit in each jar, making sure to leave a quarter inch of headspace:
Step 12: Remove bubbles. Wipe jar rims and cap. Using an air bubble tool (or a plastic knife, plastic spoon, wooden chopstick, etc.) remove any air bubbles inside the jar. Just wiggle the pears around but not too quickly.
Next, using a damp paper towel, quickly wipe off the rim of each jar, cap each with a lid and secure the lid by finger tightening a band.
Step 13: Load jars into canner and process. Being careful to keep the jars upright and level, use your jar lifter to load each jar into your canner. Take care to avoid sloshing the contents of the jar against the lid.
Turn up the heat on the canner to bring the water to a boil. Once it is boiling, start your timer and process your jars according to the guidelines below:
- If you are between sea level and 1,000 ft in elevation, process for 5 minutes.
- If between 1,001 and 6,000 ft in elevation, process for 10 minutes.
- If you live above 6,000 ft in elevation, process for 15 minutes.
Step 14: Cut heat, allow jars to rest. Once processing is completed, cut the heat to the canner but leave the jars in place. Allow them to rest for 5 minutes. Place them on a towel, never on a cold metal or stone countertop directly.
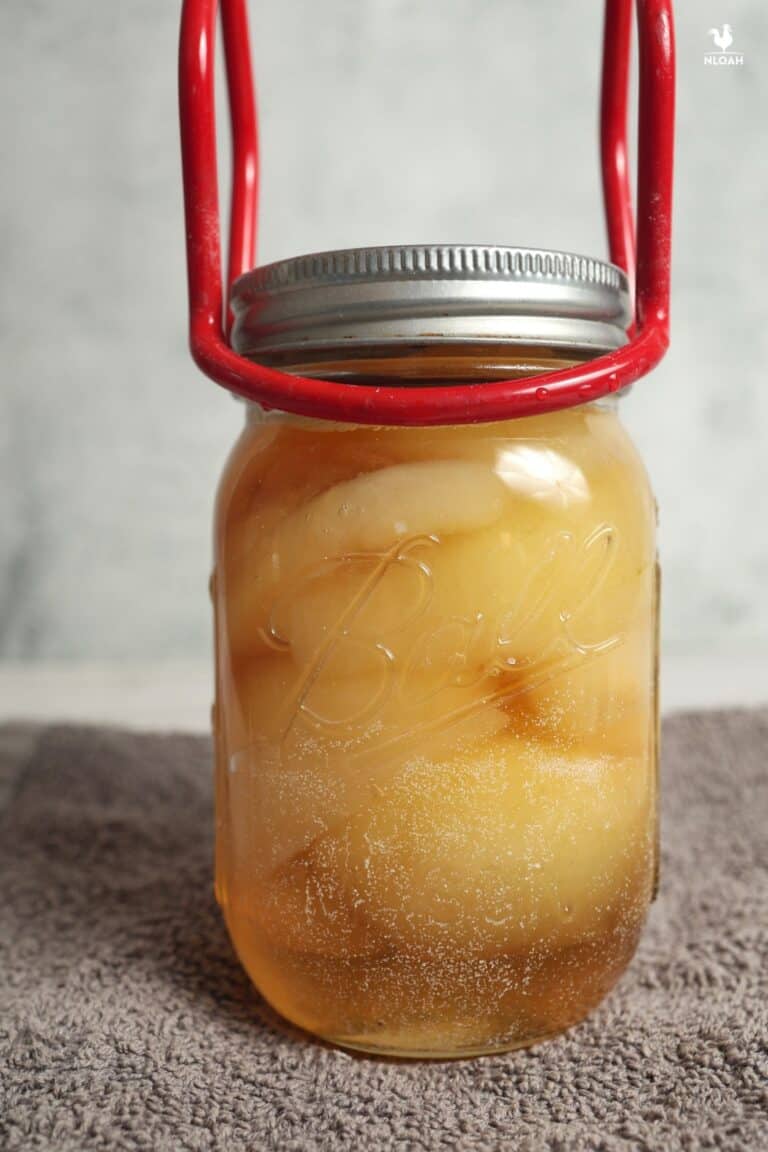
Step 15: Remove jars, allow to cool completely. Protect your countertop with towels or clean cutting boards. Carefully remove the hot jars from the canner, making sure to keep them level as before and avoid sloshing the contents. Set the jars aside to fully cool off, anywhere from 12 to 24 hours. Make sure you protect the cooling jars from cold drafts to avoid shattering.
Step 16: Test lids for seal. Once the jars have completely cooled, test the lids to ensure they have sealed. First, press on each lid with a fingertip. They should not move, slide or flex.
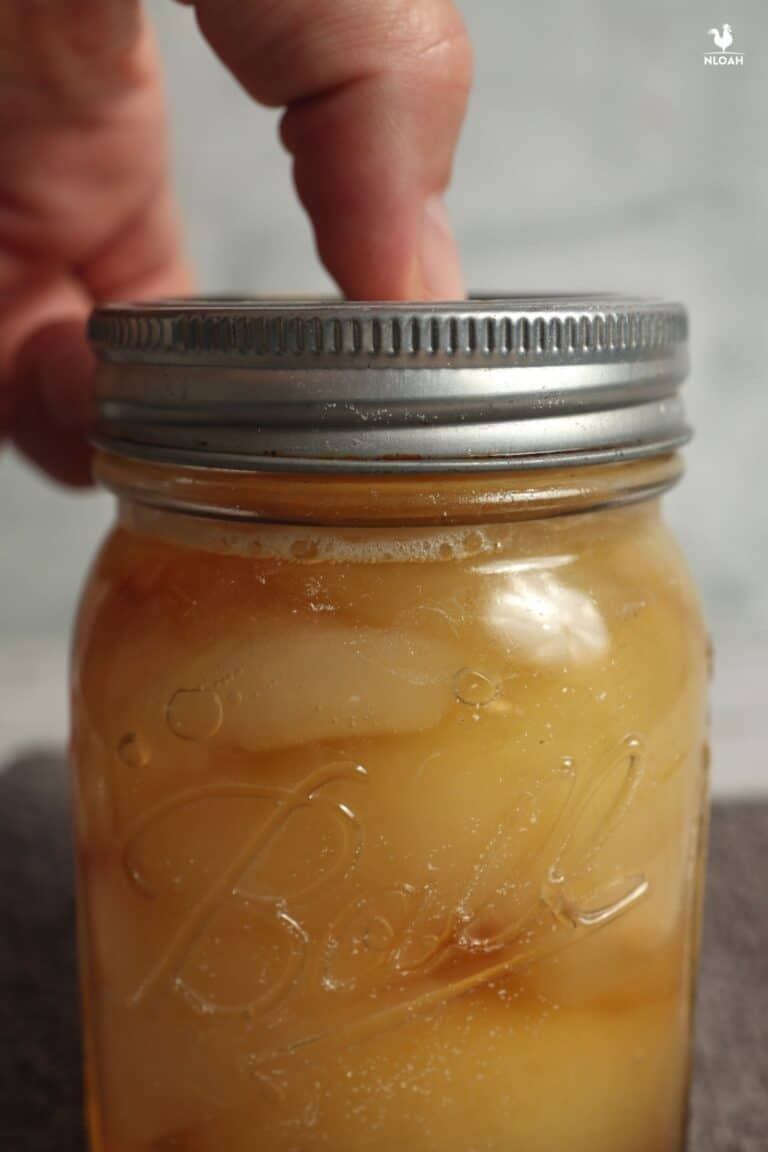
Test #2: tap gently on each lid with the underside of a metal spoon. They should make a high-pitched ding, not a dull sound.
And for the 3rd and last test, pick up each jar and look across the lid at eye level. The lid should appear depressed, sucked down, not completely flat or popped up.
Any jar that passes all of the above is good to go and ready to store. If any of your jars fail the test, see the next section.
Step 17: Store and done! Your preserves are finished. Store them in a cool, dark place that is protected from direct sunlight and significant temperature fluctuations. Your preserves, as most canned produce, should last for about least a year unopened – provided you keep it in a cool, dark place, and that the seal stays intact.
A Lid Test Failed. What Should You Do?
A failed lid test does not mean your preserves are inedible, only that the clock is ticking.
You’ve got a choice to make now: you can open your preserves and enjoy them as normal, but they won’t taste quite as good as they would if allowed to age for a few weeks. Alternatively, you can stick them in the refrigerator and enjoy them within a week.
But there is a 3rd way… If you figure out the failed jars within 24 hours after you first process them, you can reprocess them a second time.
But before you do that, you’ll need clean jars and new lids to do this, and you also need to empty the failed jars inside a saucepan and bring the produce to a boil before you ladle it back into new jars, remove any air bubbles, then reprocess. I’d say it’s worth it if you have to process several jars, not just one.

Get your gift and learn things like:
- how to make this really quick pest spray
- how to prevent egg waste
- two cheap automation devices that will make your life easier
Tom has lived and worked on farms and homesteads from the Carolinas to Kentucky and beyond. He is passionate about helping people prepare for tough times by embracing lifestyles of self-sufficiency.
Hi Kendra,
I love the idea of cooking the syrup a little longer. I’m going to try that today as I have a big pot of pears cooking right now!
I’ve been looking for a pear butter recipe. Have you ever tried to make it? I’ve tried the last two years and turned out much better this year than last. It’s not quite a smooth as apple butter but sure is good on a hot buttered biscuit! I’d like to compare recipes if you have one or know someone that does.
Thanks,
Margaret
Like everyone else I am trying to make my grandmother’s recipe, which she never wrote down. Yours look just like what I am trying for. I have tried two times in smaller batches to make sure they are what I want before I put in jars. Here is my problem, once cooled the juice hardens to a sticky mess that I can not pry out of the jar. It was very juicy, but thinkening, when I removed from heat. What am I doing wrong? Should I add water?
You are cooking them too long…test your syrup in a small dish in freezer…
To what temperatushould you cook the syrup?
These recipe is a keeper. I have been making preserves for over 30 years and this is the best recipe I have used. I also added a couple of extra cups of pears, since I am trying to cut down on sugar. I did not let my pears set overnight, instead just tossed the pears with the sugar and let them set until the sugar was dissolved.
Also, I cooked the pears until they were transparent and the syrup coated a metal spoon, then poured them up in jars and processed. I like a preserves on the soft side and the pear syrup….the consistency of syrup. All and all, this was the best recipe I have ever used and it is a keeper. Thank you again!!
Try adding a package of strawberry Jello to a quart of cooked preserves before putting in the jars. Make sure you mix while the pears are hot. I love the outcome.
Hi this is the one I’ve used for years. I don’t water bath mine. I leave my pears over night with no lemon juice they will turn brown which I love cook them a couple of hours or so jar them up in hot jars and lids turn them upside down away from draft for 8 hrs. Enjoy.
I like this. I’ve used this for many years and has worked for me. Turned out great.
can you use a crock pot
I’ve just found some pears growing in a nice lady’s back yard and she has agreed to share a few.. My mother used this recipe and her pear preserves were worth their weight in gold. I’m going to try to duplicate this recipe,I hope that I can come close to my mom’s. Reading your blog brought back memories of how mama produced this golden brown piece of heaven on a hot biscuit. For this I thank you.
Do you have to put them in the refrigerator to sit overnight?
Hello, I would like to try this recipe and was curious… My son brought home about 50 Apple leads. How would they work for this recipe?
This is a lot of work. I use my electric pressure cooker. When pears are extremely soft add the sugar and spices and allow to boil if needed add pectin and then can them.
apples are too soft, they will just fall apart in the cooking process.
Thanks for sharing your recipe for pear preserve. It was the one I was looking for, allowing the pears to massorate verses adding water. I will also be adding a few whole clove, and just the lemon juice added just to keep their color.
I will give it a shot today and let you know tomorrow?
Danielle how did the pear preserves come out. I thought my mother put cloves and lemon juices. My brother were trying to remember. The hard pears on the tree will be ready for I picking next week. Please let me know. Thanks
how much cloves and lemon juice? I would really like to use cloves.s
Hi, was wondering if these are chewy? My Aunt used to make some that were chewy and I didn’t get the recipe before she passed. My family loved them and I would like to try and make some. Thank You!
My mother and grandmother also made them chewy and we called them “toughies”. They were absolutely the best!
I let mine sit 12 hours on the counter before cooking, this gives them the chewy texture.
How long would you process 1/2 pints in a pressure cooker and at what pressure?
Pressure?
I would like to know also asap please!
Preserves are canned using the water bath method NOT pressure cooked.
Thank you for posting this recipe. I’ve been looking for one that sounded like my Grandmother’s and I believe this is it! I work a lot of hours & make time on weekends and some evenings to can during the season. I have quite a lot of pears my landlord brought with a request that I make him & his wife a few jars of preserves. I’ve never made pear preserves before, so all the posts are very promising. With my time constraint I will have to let them 24 hours in the refrigerator before cooking. Does that sound alright? Again thank you for posting this recipe and simple instructions. I’ll let you know how mine turned out.
I hope you get a response because I have the same question. I need to get my pears canned asap because they’re ripening. I’ve never canned before and I’m a teacher and I am at work all day. Evenings are the only time I have. Did you let yours sit for the 24hours? I’m curious to know how your preserves turned out.
Doris,
I think leaving them in the fridge for 24 hours will be okay. Let us know if you try it and how they turn out.
The preserves were perfect!! Leaving them in the refrigerator for a little more than 24 hours was just fine. They were just like my Grandmother’s too. Again, thank you for posting this recipe! It will be put in my family canning book for future family cooks!
I just saw this post. I let mine set in the refrigerator for 24 hours and it was not a problem. Sorry this post is 2 years too late, but I thought I would respond.
YUM! Have not made these for over 25 years, so when someone gave me a whole bunch of pears I searched online for a recipe. Yours is the only one anyone needs to use…..ever. it’s so good that when my neighbors tasted them, they gobbled them up then brought me more pears! Thank you for sharing.
Can you seal jars in water bath canner and if so how long
25 minutes. I kept my clean jars in another pot of water on low heat until ready to use. Then I put a kitchen towel in the bottom of a large pot, filled my jars per instructions, covered filled jars about 2 inches of water and “bathed” away for 25 min. Be sure to use a jar removal tool, jars are very hot. Then set them aside to cool. You’ll hear the lids “pop” and you will know everything is as it should be
I know its August 20, 2020, but your remark above really helped me today regarding the clean jars on low heat.
Hey,
This recipe sounds a lot like the one a very old friend of mine told me about. She says letting the pears soak is key.
One question, though. Why do you want the pears still green? I have a couple of old timey pear trees, probably Keiffers (hard, but soften and ripen after a couple of weeks in cool storage as my friend instructed me).
I’m going to try this with my ripened pears. Just wondered why you prefer green.
Thanks!
Charity
Ripe pears fall apart when you cook them. Green firm pears hold their shape!. They will still be sweet as they absorb the sugar. I like a little lemon in mine.
You might make pear butter with the ripe ones,
Looking at 6 jars of pear jam and 4 gorgeous jars of preserves this morning… I’m feeling a little Martha Stewart ish;-) Yes I did turn up the heat and as it was cooling down I stuck my emulsion blender in it and it thickened right up! Another cool tip I discovered was using my Pampered Chef plastic red mits I could reach in and just grab the hot jar and pull it out of the hot water.
Thank you for your help. Adding your website to my favorites today! I’ll be back soon.
Susan
Yay! Great job, Susan!
correction…8 cups sl pears
Since my preserves went so well thought I’d try some jam. Recipe calls for 8 qts. Sl pears w 4cups sugar, etc Simmer 1-1/2 hrs to thicken. Doubled recipe and going on 3 1/2 hrs no sign of thickening. Is there a way to save this batch? Seems like I have more juice/syrup than pears?
Susan,
You might turn the heat up a little, stirring often. Did you use pectin?
Are you supposed to use pectin in this recipe? I thought you needed to make it thicken and set?
thank you. I did use a dishcloth and it worked great. Going to pick more today and try pear jam. 9 quarts of cut up pears yielded 4 one quart jars perfectly. I did have a lot more juice at the finish. Hated to throw it out. Is there a use for this leftover syrup/juice?
Susan,
I actually can the syrup separate to use as a glaze for meat. You could probably freeze it as well, if you don’t have enough to make it worth canning. Glad it worked out for you!
Successfully made your delicious pear preserves!! Now I have the syrup. Do you have any recipes you recommend for using on meat?
I use leftover syrup to sweeten tea…delicious
Yes delicious syrup for pancakes
I found all of the comments very helpful and am canning pears (as we speak) for the first time. Have everything ready but don’t have the canning pan. Trying to find something to raise the jars off the bottom of pot. But all my smaller baking racks are square. Will the jars break if I just set them directly on the bottom?
Susan,
You can use a dishcloth in the bottom of the pot if you don’t have a rack. You don’t want to set the jars directly on the bottom of the pot, or they may crack.
My father in law used small mouth bands as the rack in the bottom of the canner and that worked great until we found the appropriate rack.
Genius!
Great idea!
We use a dish towel
It may not work in your cooker, but my pressure cooker really likes the metal pie pan from Mrs.Smith’ apple or cherry pies. I punched holes in it for a meat rack. Works great, easily recycled.
Your recipe is right on old time preserves, I always had friends who would sell me preserves. They have passed on and I was doing without and couldn’t find anywhere, after fixing I understand why. The older and darker they get the better they get, I’m in TN and cure hams, real tn country hams, pear preserves, hot biscuits and ham, it’s simple gourmet soul food. Three four year old pear preserves just kicks it more. I had no idea how to make but started checking and when saw your recipe that looked like what I had seen others do I tried, love you cause made the rest of my life really bright!:))
i use extra rings to line the bottom of a pot when i don’t have the right size rack. I just tie them together and place them upside down in the bottom and put the jars on top.
You might try folding a dish towel and put in bottom a nd place jars on it. If someone out there knows that would not work please post it.
Will this method work if I skip the sugar? My mother in law wants some in their own juice and I was hoping to just cut them and let them sit for 12 hours then cook and can. I wasn’t sure if the sugar help them to “weep” or not. But I have used your recipe like it is and with half the sugar (1cup for 2 quarts instead of 1 for 1). My favorite was the half sugar recipe.
Amber,
It sounds like what you want to do is more like canning pear slices instead of pear preserves. Check this out: https://www.newlifeonahomestead.com/how-to-can-pears/ 🙂
I made these yesterday with a batch of pears. I followed your recipe exactly. I cut the pears up with a knife and made them kind of chunky; I reduced the syrup per your instructions. I held my breath the whole time because I have messed up with some recipes in the past. These turned out PERFECT! In fact, my jars look exactly like yours in your picture. I had to sample a bite…they are absolutely delicious!!! Thank you so much for the simple recipe, sugar only and not too much…just right, and your clear instructions! Now to start my second batch, after that, a third batch! Thanks again!!
Hi! Just made these up today! They are wonderful! I added in a stick of cinnamon when reducing the liquid as I always feel the need to add something, bad habit. Anyway, they are sooo good! I think I made the same amount as you but I got less syrup, only one pint of syrup and about five pints of pears with syrup. I did add some apple juice to the syrup thinking I would have more that way, maybe I just didn’t use quite as much sugar, I know I used at least four cups but who knows. They are so good anyway! Thank you so much! I am now wondering if added brandy would be good with this recipe? Just a little for an added flavor. Can wait to make them again, and yes, they are a delicacy and I will only give them away to my favorite people!
Yay!! So glad you love them, Tina 🙂 I don’t think you will ever get the same exact amount every time, but you’ll get close. As for the brandy… I have no idea, really. Let me know if you try it though!
Made these today after soaking the pears in sugar for about 18 hours. I didn’t peel the pears which seemed to work out just fine. Sooooo soooo good! Beautiful consistency!
10 years later, but THANK YOU (so VERY much!) for sharing your success with not peeling!
Found your blog when looking for a photo of pear preserves that looked like the ones my late mother used to put up. I borrowed your photo and will post it later today. if I hear from you that you prefer I don’t use it, I will take it off my post. I have credited you and linked to your pear post and to About Kendra.
I enjoyed my quick sample of your words and images and will be back for more visits regardless of your decision about the photo usage.
Hi LC,
Thank you for linking back to me 🙂 I’m glad you found what you were looking for here!! Blessings!
Canning pears for the first time. Just needed to know an approximate boiling time on the syrup. Or maybe if using a jelly thermometer what temp I should be looking for. Thanks, I really like your recipes.
Judy,
It’s hard to say ’cause it just depends upon how much juice you have in the syrup. Give yourself plenty of time though to allow the liquid to reduce by about half. Good luck!!
Great recipe and sounds yummy! What would you think of adding a bit of dried lavender flower
Pam,
Personally, I wouldn’t change it 😉 BUT, if you do decide to experiment, I’d love to know how it turned out!!
Hi again,
One more question, do/have you used any ascorbic acid to keep the pears from turning brown? Last year, I canned pears without any and they turned so brown that my family has a hard time getting over the visual of it, lol. Just wondering. If you have used ascorbic acid, what amount per 2 quarts of pear slices would you suggest? Thanks again.
Edie
Edie,
That’s right, I got six pints total 🙂 For the preserves, you don’t have to worry about the pears turning brown. The preserves will take on a brownish color, but it isn’t unappealing in this state. For sliced pears, I treat them in water with lemon juice to maintain color.
I use 1 cup of lemon juice to one gallon of water.
How long did you soak the pears in water/lemon juice ? Then did you just drain them and proceed per instructions?
Soak them in lemon water after peeling and slicing and they won’t turn so brown.
Hi,
Will try this recipe – just wanted to confirm the yields you mention above: 6 qts of pears yielded you about 3 pints of preserves and 3 pints of glaze. In other words, you had a total of 6 pint size jars of pear-y goodness in one form or another?
Thanks!
Edie
I tried my pears today after checking for lid tightness. They all were tight. They are the right consistency and taste good but way to sweet for me. The pears were really sweet before cooking them. How can I adjust the recipe to remedy this?
Lyn,
You’ll just have to play around with how much sugar you add, to suit your own taste. 🙂
Quick question:
The recipe states”When all of the pears are prepared and the sugar added, put a lid over the pot and let them sit until the next day, about 12 hours”
Do you let the pot sit out on the counter top or do you refrigerate?
I just don’t want to ruin my yummy pears.
Thanks!
Marsha,
Good question 🙂 I’d put them in the fridge, just to be safe. Hope they turn out yummy for you!
Oh, whoops. I left them out! I’m still going to cook them into preserves!
I made the recipe as shown and I have some jars with the little circle in the middle where you can see and a couple where you can see the circle but it is not as defined as the others. I am worried that those did not seal correctly. After about 45 minutes I unscrewed the rims and wiped down the flat seal and them put the rims back on… Now i am afraid i have “damaged” all of the jars…. please advise
Hi Lyn,
If I understand you correctly, you’re afraid the lids aren’t sealing properly? It’s okay that you unscrewed the rings and then put them back on, so don’t worry about that 🙂 The jars need to cool completely before they will seal completely. Don’t test the seals until they have sat for 24 hours, after which you can unscrew the rings and try to pry the metal lid up with your fingers. If it doesn’t come off, your jars have sealed. If it does come off, then you can either put that jar in the fridge to be eaten soon, or (if you really want to save it for later) you can re-can the pears by heating them back up and starting with a new, hot clean jar and doing the process all over again. I hope that helps!!
We have done a version of this for years, but were always frustrated with all the extra syrup left over, AND the extreme amounts of sugar required in other versions. We want to try yours now since it seems like less sugar per pear amount. Please tell us the times and pressures for doing your process in a pressure canner with quart and pint jars, and half pints if you know it. We always pressure can since it is so much faster and safer due to the higher temps obtained, not to mention cheaper on the electricity used and less steam pumped into our hot house! Thanks for your information
Hi Kendra
this is the way my MOM made pear preseres but I wasn’t sure so I went on a search and found you.Thank you for reminding me my memory is still good.
Ginger
I made the first batch perfectly. then, I overcooked the second batch and it is too stiff. Can you reconstitute the preserves with some pear or apple juice to thin it?
Lana, I’m sure they still taste good, as long as they weren’t burnt. Definitely try watering them down slightly with some juice or something 🙂
TY for the recipes! tried this one yesterday and it is absolutely fabulous. Now i gotta find a few more pear trees- may have to go out ninja style in the middle of the night bwahhaha. Good year for pears around here-all the trees are loaded but being kinda shy i am embarassed to go asking ppl to “pick their pears”
Also i too ended up with alot(1.5qts) extra syrup, thinking of diluting it to use for jars of pear chunks scheduled for todays canning, or adding them to the jelly mix also scheduled for today. As a mom it makes me feel good to be providing some quality food for my family!
So glad you all are enjoying these pears! I just LOVE ’em 🙂
I have tried this recipe for the first time.Havent been much on canning but my family is always posting what they are canning.So I felt like I should give it a try.Well this recipe is so good.My son an I might not be able to put any in our jars.My Husband and Daughter may not ever know what a pear taste like.lol
Thank You for putting this recipe up.The catchy name caught my eye
Thanks again Karen J
I really like this recipe for the pear preserves and plan on making some this week. I would also like to make the pear glaze but I can’t find the recipe for it. Could you send me the recipe?
Thanks!
Lynn
Lynn,
Here’s an excerpt from Angie’s post on how to make the pear glaze:
There will be plenty of syrup left in the pot once the pears are spooned out. Ladle it into hot jars and process it along with the jars of preserves. This syrup will make the most amazing glaze for duck, goose and pork when slow roasted. Add some hot chilies and garlic and brush it over the meat in the last 15 minutes of roasting.
Hope that helps!
can this be made sugar free? with splenda or something…..or does it have to be made with sugar?
Dawn,
I’ve never tried using anything but sugar.
First time canning… I must have done something wrong. I didn’t get preserves, I got pear jolly ranchers LOL seriously, the syrup is hard as a rock. Did I cook them too hot, too long, or reduce the syrup too much? I have more pears so I’ll give it another go but any suggestions?
Oh no, Blake, lol!! Sounds like you definitely cooked the syrup too long 🙁 Be careful not to caramelize it, or it will definitely be rock hard when it cools, lol. Sorry to hear you had trouble!!!
You might try a little bit of water and a short spin in the microwave to soften up the over cooked preserves. I have tried this in the past and it usually works quite well…
On your pear preserves, do you not use sure jell?
I make them just as the recipe states 😉
We have 2 pear trees in our yard, have lived here for 8 years, and have never done anything with the pears except give them away. I am trying my hand at gardening as well as canning this year, so I thought “hmmmm….what can I do with these pears?”
I came upon your site, found this recipe, and am now simmering the syrup as I type this. I used my crock pot to cook the pairs in the juice, then poured the juice over into a sauce pan for the final thickening process. It smells delish! I can’t wait to try the finished product!
Thanks again for taking the time to do this blog! It is so important for us as a country to get back to working our own land and becoming more self-sufficient! 🙂
I hope you enjoy them, Rhonda!! Yes, definitely put those pears to use 🙂
So I just put pears and sugar in the pot right? No water ?
Right Nichole, no water 🙂
Hi Kendra I just made your pear preserves for a friend of mine who doesn’t can, the jars are pinging as we speak lolol !! I couldn’t keep my spoon out of the pan while they were simmering !! Then after they were in the thickened syrup I saved myself a few they are DIVINE !! thank you for sharing !!! it was so easy even I could do it !!! so will share with my friend she will have NO problem making thses herself !!! thank you again kelly 🙂
Yay, Kelly!! I’m happy to hear that 🙂 Thank you for sharing your thoughts with me!
What a cute story! Years ago my mom brought me a case of pear preserves she had prepared. She mentioned to me she had accidently over cooked the preserves. A week went by before I opened a jar of the preserves, like you said “pure ecstasy”. I told her anytime she over cooked a batch send them my way! She is gone now but your story brought a smile to my face and wonderful thoughts of my mom. Thanks you!
We have a couple pear trees and they make the best pears Bartlett I think. Anyway I took a couple hundred pounds to my office and left enough on the tree for me. This is my forth time putting up pears so I found your recipe and figured it was worth a shot. Picked a 5 gallon bucket today peeled tham and got them soaking in the post right now. Will post bak after I have them canned.
On a side note I was coreing them as said but found a much simpler way to get the core out. I cut them 1/2 then quater them long ways. This makes getting the core out so simple with less waste. Also makes cutting them up easier to.
Thanks for the post.
Joseoh
OMG! I just made some syrup from these pears…………
It really is divine, really difficult to describe the flavor—-rich and sweet.
I will now try to peel, slice and can them from the above recipe. Hope I can manage, as I am not the “canning” type.
Thanks for the great tips!
Diana,
You can do it!!! 🙂
I have a bowl of pears sitting in my fridge. I’m so glad I found your pear preserve recipe…this sounds like a winner! Can’t wait to try it…thanks for sharing 😉
um.. good question! lol The tree was here when we moved in.. They are green turning a little goldish/red…? lol
They were/ARE delish! I made this reciped and then we canned them and froze some, and then ate some hot with vanilla bean ice cream that night after the canning! My girls said there was NO way that I could cook those all day, with them smelling SO wonderful, and they weren’t going to eat some that night~ they even stayed up late to try them! lol
Thank you sooo much! I am sure they will make excellent gifts!
We are getting the rest of the pears out of the tree this weekend. We already gave the neighbors some to can(with a promise to receive some of them), and so I think I may try the Pear Honey recipe I saw…
Thanks again! Yummmmm !
Steph,
LOL, I’m so glad they turned out good for you. Whoever you give these to as gifts better know they must be pretty special to get something this delicious!! 🙂
ok.. i am trying this today.. they are simmering as we speak! I am excited.. I don’t ever can but with all these pears.. i had to do something~ lol So is the mixture really sweet while simmering?? I used my food processor to slice the pears really thin.. they looked like little pear chips. I thought the next time i slice them, i will bake them just like that.. they tasted good!Anyway.. we will see how my pears turn out today… I am REALLY hoping that they turn out as well as Kendra’s! ! I have to say that the pears that we spent all night peeling and coring and slicing… that almost filled a 5 gallon bucket.. today was about half the bucket and now almost a full stock pot full of liquid and pears…. Ok enough typing… time to stir the pears~ Thanks for the recipe…
Steph, Let me know how they turn out!!! What kind of pears are you using?
I also canned Kieffer pears from a random tree in a home that my sister was renting. After removing the skin, cutting them in half, and taking out the core…I put them in a pot of white grape juice with no sugar and cooked them till almost tender. Then packed them in hot jars and water bathed them. They are so tender and sweet!! And only made with natural sugars. We served them over pancakes and cornbread with the syrup in the jar. Kids think they are eating dessert!
So, are the pears hard when you make this or do you have to wait until they ripen and get soft?
Michelle,
The pears are hard. Don’t wait until they are soft, it will just end up too mushy.
Hi! I just wanted to let you know that I have given you the Versatile Blogging Award on my blog. A Versatile Blogger brings everything to the table: good writing, good stories, a little bit of this and a little bit of that. I hope you will accept my award by visiting my blog and “picking it up.” Then you can pass it on to your favorite bloggers, too. It’s a great way to find and share new blogs. Have a great day!
I am absolutely going to try this!
I have three pear trees. I’m already running out of ideas for using them.
Thanks so much for sharing. I wish I could give you some pears!
Laura
Happy at Home
Hi Kendra,
We were anxious to try the pear recipe.They sounded so good.So we started them last night…we did not have quite as many pears as I had hoped as we were using pears from my Grandmas tree next door.My oldest son had gone out to get them for me earlier in the day.Anyway,we went out to pick more at 8:00p.m and quickly changed our minds.You should have heard the coyotes howling.It sent shivers through me.We decided to just use what we had.:)We ended up with 2 pints and 1 half pint of sauce(it broke).:(Anyway….we tasted ours from our dish as well and you are so right.Thanks for sharing.You give really good instructions.:)What we have tasted is so yummy.I might see what I can get off our pear tree although our tree is not nearly as nice as Grandmas so we will see.Sorry I seem to ramble on and on.~Nikki
Nikki,
I’m so proud of you for trying!! At least you got something, right? You tried a new recipe, and got a couple of jars, so that’s wonderful. I hope you are able to get more pears. I don’t blame you for not getting them in the night… coyotes… no thanks!
Are you pregnant or something? LOL! That’s how I act over Taco Bell when I’m expecting! I am definately going to try this recipe. My grandma’s neighbor has a pear tree and rather than waste all that fruit might as well get it canned. I love to see all this food on our shelves. Reminds me of my great grandma who canned ALL their food for 13 children. And I mean everything, nothing was ever wasted. At the time, they were the main tomato supplier for Hunt’s. My grandpa said by the time summer was over he couldn’t stand to even look at tomatoes! Oh what simpler times! Thanks for the great blog you are very inspiring.
Jenn, LOL!! Not that I know of 🙂