
I love just about every kind of jam and preserves there are. On toast, on English muffins, stirred into oatmeal, or even topping a tasty pork chop, it’s just one of life’s simple but great pleasures. But you know what kind of jam I hadn’t tried until recently? Pine cone jam!

I know it might sound crazy and even gross, but trust me: try this stuff once and you will be hooked. It is sweet, piney, a little resinous, and totally sophisticated. It’s good on all kinds of stuff, and it makes the perfect winter treat to keep your spirits and your health up. That’s because it’s packed with vitamins and helpful antioxidants.
Best of all, this stuff is super easy to make. Keep reading, and I’ll give you a step-by-step walkthrough below.
Pine Cone Jam is Really More of a Syrup
One thing, real quick: pine cone jam, as a finished product, is actually closer to a thick syrup than a traditional jelly. Don’t let that put you off, because it’s still super tasty and very versatile as a topping and as an ingredient.
Important: Pick the Youngest Green Cones Only from Safe Trees
Obviously, you aren’t going to have pine cone jam without any pine cones, so unless you want to spend big bucks on ordering what you need off the internet, you’ll need to forage for your own. That’s okay, because this can be a fun seasonal pastime for you and your family if you ever go hiking in the woods or just rummage around on your own property.
The trick here is that you do not want the typical pine cones you probably imagine when you hear the word: pokey, brown, and hard. Fine for decorations but completely unsuitable as an ingredient!
What we need instead are young, immature cones. Ideally, they will be picked when they are just formed. Depending on the species, they will range in size from about the size of a fingernail to 2 inches long, or a little longer.
Here’s how you’ll know you’ve got good ones no matter the species: The young cones should be tight and fully formed but soft, with a pliable, yielding texture. They will also be distinctly sticky because they are full of sap and resin! Once you know what to look for they aren’t hard to find or pick.
One more thing: true pine tree cones are the most traditional and common ingredient for this recipe, but you can take cones from any safe variety of evergreen tree, like true fir and spruce trees, too. Under no circumstances take any part from any yew, cypress, or cedar tree!
Ingredients List
Pine Cones, about 10 cups (approximately 4 pounds): very young, very green, and in good shape. Never use any pine cones that seem to be diseased or deformed. Around 4 pounds of pine cones will yield about 5 pint jars’ worth of pine cone jam. Reduce all ingredients accordingly if you want to make a smaller batch.
Water, 8 cups (½ gallon): self-explanatory.
Sugar, Turbinado or Brown (preferable, white sugar will do, too), 12 to 14 cups (around 6 ½ pounds): pine cone jam is traditionally made with darker sugars that contain more molasses, like turbinado or brown. Use these if you have them, but if you don’t or just prefer a lighter product, white granulated sugar still works just fine.
Needed Equipment
Strainer/Colander: very helpful for thoroughly washing your gathered young pine cones. Whatever you pick, make sure it has very small holes or other openings so they can’t slip through.
Large Pot: a large stock pot suitable for making soup or stew works perfectly here.
Cooking Spoon: any kind of cooking spoon you want to use is fine as long as it can withstand high heat and lots of stirring.
Mason Jars with Lids: the very best way I have found to store pine cone jam is in mason jars. No surprise there. Any type with any kind of lid is fine as long as they are completely clean and the lid seals are in good shape.
Canning Funnel (optional): very helpful for pouring the finished and scalding-hot jam into the jars.
Food Prep Gloves: one unexpected annoyance you will run into with this recipe is just how sticky and aggravating pine resin can be. It will be seeping out of the cones the entire time, and the stuff doesn’t wash off easily! Food prep gloves can help keep your hands clean until you get everything in the pot.
Rubbing Alcohol: works wonderfully for getting that sticky resin off your hands and other surfaces.
Step-by-Step Instructions
Take a moment to read through these instructions in their entirety before you begin. That way, you’ll have a better understanding of the scope and time investment required for this recipe. It’s not hard, but you’ll have to go through several rounds of boiling and cooling the jam mixture to finish it, and that can take a little while.
Step 1: Sterilize jars and utensils. The very first and most important step. If you do not thoroughly wash and sterilize your jars, cookware, and all of your utensils, you can potentially contaminate your pine cone jam and speed up spoilage.
You can sterilize your jars immediately prior to use by running them through a hot cycle in the dishwasher or giving them a good hand washing before immersing them in a separate pot of boiling water.
Step 2: Thoroughly wash pine cones. Take all of the cones, dump them into your strainer or colander, and then give them a thorough wash under running water, turning them with your hands over and over again to flush away dirt, debris, and loose bits. Take your time and do a good job, then let them drain for a few minutes in the sink.
Step 3: Fill pot with water, add sugar. Add one-half gallon of water to your pot. That’s eight cups. Then add anywhere from 12 to 14 cups of sugar. Use less if you want a less sweet jam that lets more of the forest notes shine through, or more if you want it sweeter.
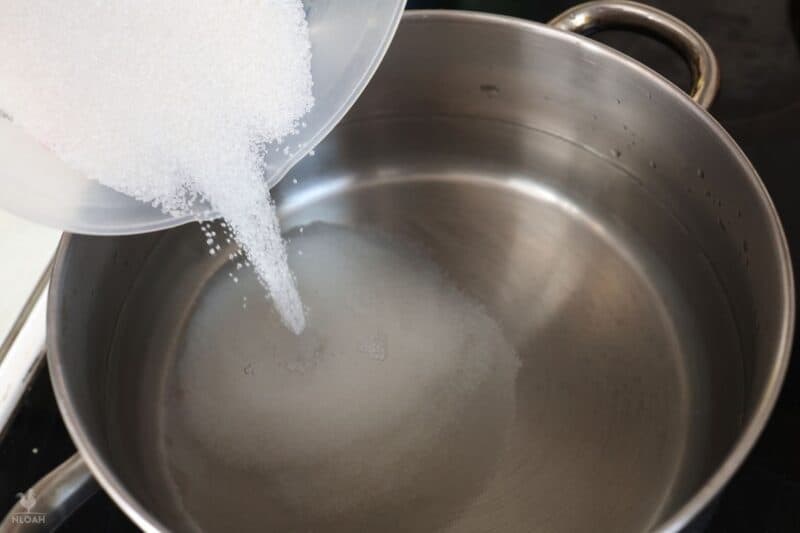
Step 4: Bring to a gentle boil, stirring continuously. Place the pot on a stovetop burner, then turn up the heat to high, aiming for a medium boil. Using your spoon, stir the sugar until it is completely dissolved in the water.
Step 5: Add pine cones, gently boil for 20 minutes. Working carefully so you don’t get burned, drop all of your cones into the boiling water. Let it come back up to a gentle boil, then set a timer for 20 minutes, stirring the pine cones regularly.
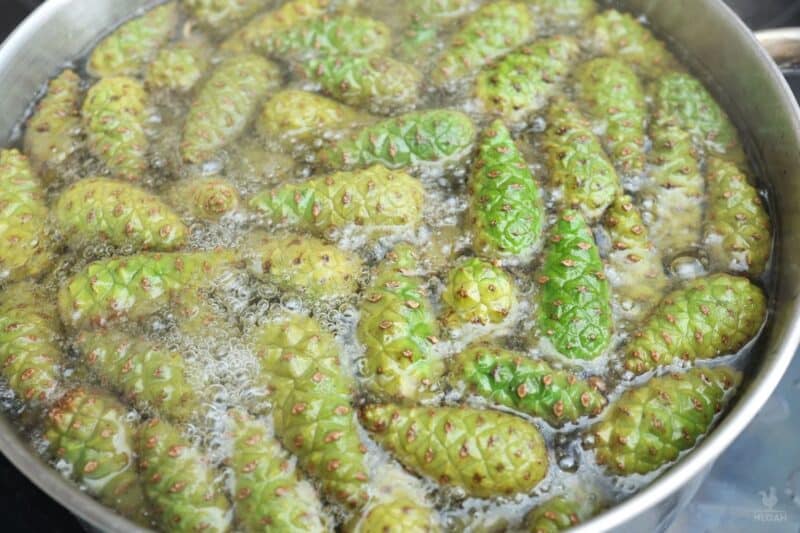
Step 6: Remove pot from heat, rest until cool. Once the timer goes off, cut the heat and remove the pot, setting it aside on a cool burner or trivet. Let it cool all the way down. Note that the cones will start to lose their green color and darken during this time, and the liquid will start to thicken slightly.
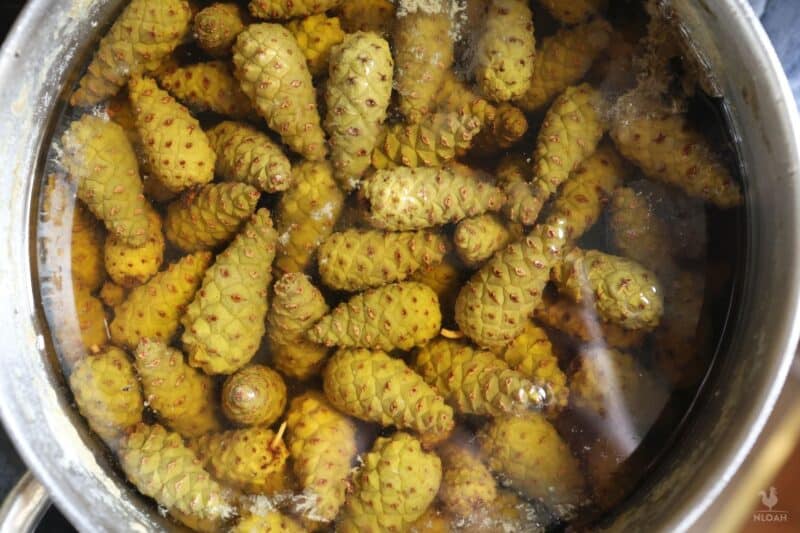
Step 7: Return to heat, boil mixture for 30 minutes. Once the cones have cooled down completely, put them back on the heat, bring them back up to a medium boil, and give them another 30 minutes. Stir periodically.
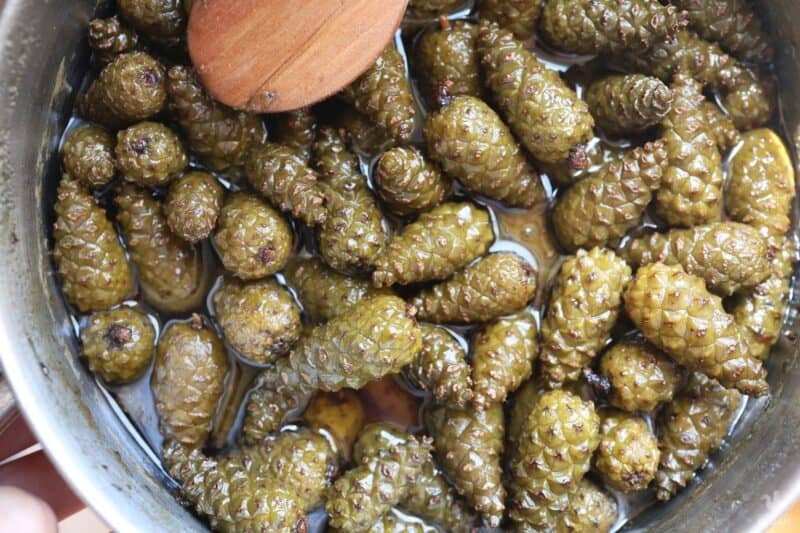
Step 8: Remove from heat and cool again. Once 30 minutes have passed, cut the heat, remove the pot from the burner, and let it cool again. The pine cones should look much darker, a reddish-brown color, and the liquid should be even thicker but still thin and runny.
Step 9: Return to heat, boil until desired thickness is attained. One more time! You know what to do: put the pot on the heat, bring it up to a medium boil, and give the jam at least another half an hour.
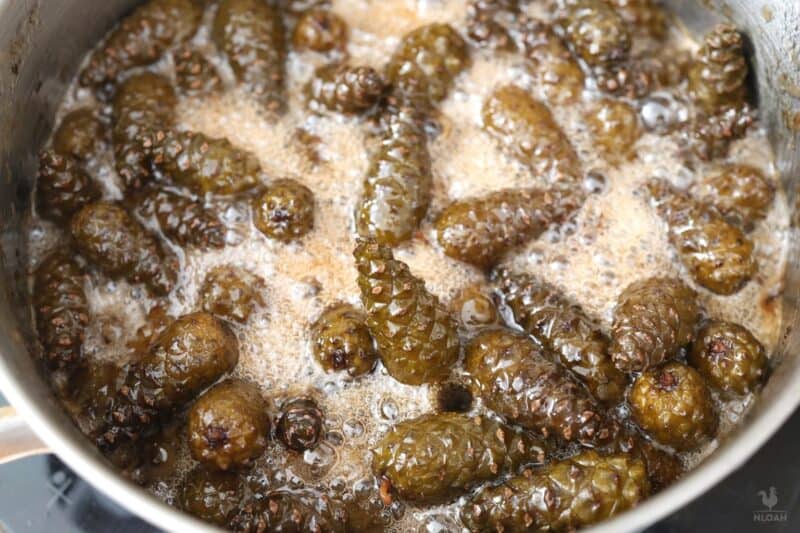
Pay close attention this time and watch as the cones darken even more and the liquid thickens. You can boil as long as you want here to thicken the syrup even more.
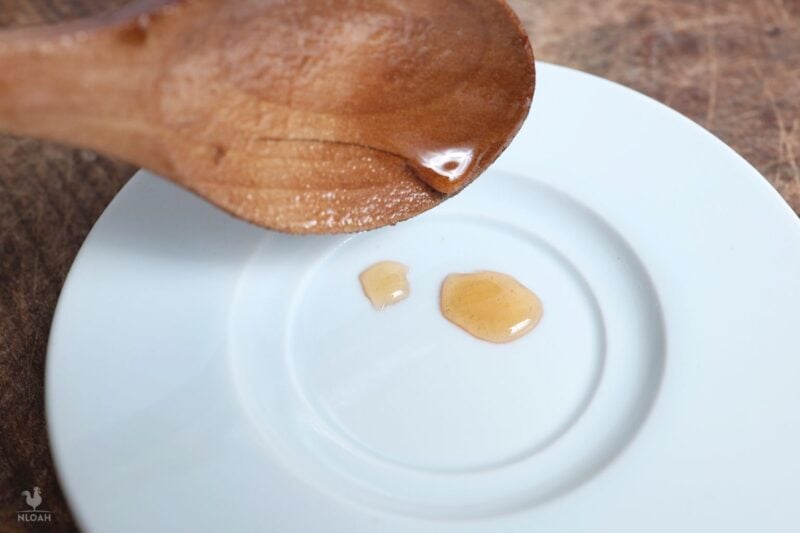
Step 10: Test jam for desired consistency. Before you finish, grab a spoon and drizzle a little bit of the jam on a chilled plate or other flat, cold surface. If it maintains a round shape, like a droplet, it should be good. If it’s still very runny and “breaks,” you need to boil it longer.
Step 11: Pour hot jam into jars. Use your canning funnel and, if needed, a ladle to carefully fill each of your jars. Cap immediately and allow to cool completely.

Step 12: Refrigerate finished jars. Don’t stick them in the pantry. Your pine cone jam must be refrigerated to last.
Step 13: Done! That’s all there is to it. You are ready to enjoy your pine cone jam on baked goods, as a marinade for meat, in cocktails, and in lots of other recipes.

Storage Life
Expect your pine cone jam to last anywhere from 1 to 3 months in the refrigerator.

Get your gift and learn things like:
- how to make this really quick pest spray
- how to prevent egg waste
- two cheap automation devices that will make your life easier
Tom has lived and worked on farms and homesteads from the Carolinas to Kentucky and beyond. He is passionate about helping people prepare for tough times by embracing lifestyles of self-sufficiency.