
Chickens are omnivores, and as omnivores, they eat a wide variety of foods. Lots of plant matter, yes, but also animal protein. One favorite food that all chooks love is insects, and among insects, there is nothing that will get your birds excited like a juicy, wriggling mealworm.

They’re an amazing source of protein, packed with healthy fats and loaded with vitamins and minerals that will benefit your birds in countless ways.
But there are just a couple of problems: mealworms are expensive, and commercially farmed ones could have been fed all kinds of questionable things that you don’t want getting into your birds.
It’s enough to make anybody pause, but luckily you can raise your own mealworms with very little space and hardly any effort. Keep reading, and I’ll take you through it step by step in this guide.
What’s a Mealworm, Anyway?
When I mentioned insects up above, I also mentioned mealworms as the very favorite of most chickens. Aren’t mealworms, well, worms? No, they are not!
Mealworms aren’t actually real worms at all, not like the regulars that pop up on the ground after a good hard rain.

They’re actually a type of beetle larvae, specifically the second stage in the life cycle of the yellow darkling beetle. But of course, they look a lot like worms, complete with a pale tan segmented body.
We could get into a big deep dive on the biology and its taxonomy of mealworms and the beetles they turn into, but for now, all you need to know is that your chickens love them, and you’ll love the health benefits that they can provide your flock.
Benefits of Feeding Mealworms to Chickens
And before you go thinking that mealworms are just another type of critter that your chickens will eat, think again. Mealworms are one of the very best things that your birds can eat!
They are loaded with protein, healthy fats, and tons of micronutrients that can do wonders for your flock.
Anytime they need a boost of protein and calories to help them get through egg-laying season, molting, healing, recovery from sickness, heat stress, or anything else like that, mealworms are perfect and easily digestible.
You could feed mealworms as treats or as supplements, or mix them in with other foods that you usually give to your flock to make a nice variety dish.
How Old Do Chickens Have to Be to Eat Them?
OK, so a good rule of thumb is to wait until your chicks are anywhere from 2 – 4 weeks old before letting them try mealworms for the first time along with other solid foods. They can be a choking hazard for tiny chicks!
How Many Mealworms Should Your Chickens Eat, and How Often?
I’ve said a lot of great things about mealworms, so this should be the primary thing that your birds eat, right?
No! As good as they are, mealworms are not a mainstay in any chicken’s diet. They have too many calories and too much fat for that, and can easily lead to obesity and other nutritional imbalances.
Your birds can have just a few mealworms a day each as a little treat or supplement, or slightly larger quantities mixed in with other food a couple of times a week, but no more than that.
Mealworm Reproduction, Step by Step
Raising your own mealworms requires a working understanding of their lifecycle. Don’t worry, this is grade school level stuff, but it’s helpful so you know what to expect regarding timetables: when you have mealworms larva, if you wait too long, you’ll have adult beetles and no worms!
Each female yellow darkling beetle can lay several hundred eggs during her reproductive life, and she can lay them in a very short period of time. Those eggs hatch into mealworms, and then mature into adults, which will then begin to mate and repeat the cycle.
You can do some rough math in your head and easily see that starting even with a handful of adult beetles, or just a couple of dozen mealworms, will soon see you swimming in countless thousands of tasty, nutritious mealworms that your birds will love.
Check out the step by step process to their evolution below: Although this isn’t the order you’d see in a school textbook, this is the practical morphology that your mealworms will go through, starting from the very beginning.
Larval Stage
And starting at the beginning, we have our own mealworms, wild-caught ones, or ones we have procured from a supplier or pet shop.
There are lots of good sources out there, but you have to get some that haven’t been fed any questionable growth hormones or anything like that. These modified mealworms usually cannot reproduce, meaning we cannot grow our herd, as it were!
Pupa Stage
Anyway, once your mealworms have eaten enough, they’ll begin to molt, growing bigger. They will go through a couple of molts and then enter the pupal stage, turning into a lumpy, pale creature that will remain very still and partially or fully buried in the substrate.
Don’t sweat it, they aren’t dead (as long as you’ve been taking care of them), and conditions are still amicable.
You want to carefully, gently remove the pupae at this point and put them into their own separate container with fresh, clean substrate on the bottom. They’ll stay in this state for at least two weeks and, at longest, closer to a month.
Adult Stage
Before too long you will see the pupas split open sort of like a pouch and then a fully formed beetle will crawl out.
This is the adult form of the yellow darkling beetle. Adult beetles must be removed from the pupa enclosure and put into their own container at once: they are cannibalistic and will eat other pupae!
The adult will take a few days to fully mature, a process where their carapace will harden and turn a glossy black, brown, or grayish color, and then set out looking for mates all on their own volition. You can leave them in the containers that they form in so they can mingle.
Egg Laying, Cycle Repeats
Once they’re done mating, the females will shortly thereafter lay eggs and in great numbers. It’s helpful to provide them nooks and crannies to lay in by using old egg cartons and similar dividers. They like to lay in out-of-the-way places instinctively.
Once you spot those little bitty eggs we talked about, it’s time to remove the adult beetles and then keep the container of eggs separate, waiting for the next generation of mealworms to hatch.
From here, once they emerge from the eggs and molt once or twice, they’ll be sizable enough to be fed to your chickens, and you can let some of them keep maturing back into their pupal form to continue the process as described here.
Caring for Them
Keeping mealworms alive is actually super simple. They need a clean, disinfected container to live in. A plastic tub with four or five-inch sides and a ventilated top works fine.
Fill it with 2 inches of loose substrate to crawl through and eat. They won’t need water: they can get all of the water they need from supplemental foods that we’ll talk about in a bit.
It’s also important to maintain their enclosure so that mold does not form. Mold is devastating to mealworms and can wipe out entire generations.
Other than that, keep the thermometer at “warm room temperature”, around 78° F (25° C), and maintain a humidity level between 65% and 70%. This is all the eggs require in order to hatch, and the same conditions work just fine for the mealworms themselves.
However, once they’ve managed to hatched the mealworms are considerably hardier, and can endure temperatures that go as low as 55° F (12° C) or as high as 90° F (32° C) and correspondingly lower or higher humidity, although you don’t want the humidity to go above 75%.
Maintaining the right conditions is easily done using common room heaters, humidifiers, terrarium heaters, fans, and so forth. Taking care of mealworms is a whole lot easier than taking care of most reptiles and amphibians.
Another option for housing is a mealworm tower, basically a stack of containers that nest together, each serving as a separate compartment for larva, pupas, adults and eggs.
For mass production, some even have differently- sized mesh floors that allow you to quickly sort larva based on size; smaller worms will fall to the lower “floors.” You can make your own mealworm tower or buy ready-made models or kits online.
Where Can You Buy Live Mealworms?
If you want to buy thees larvae to start with, or just skip raising them yourself, you should seek out online suppliers or suppliers in your community. Mealworm ranchers are pretty common, as are those who sell them for feeding to birds, reptiles, amphibians, and other animals.
You should have no shortage of dealers, but it is critical that you take the time to do your due diligence before you buy!
Any breeder of mealworms must be ethical and not feed these critters any growth hormones, artificial stimulants, or strange food like styrofoam or other indigestible stuff because it will eventually end up in your chickens and can have all sorts of bad effects.
Ask around, and get referrals!
How to Store Them
Remember when I said up above about how mealworms will continue to grow and eventually turn into beetles? It’s true; they do not stay in that larval form forever!
When your mealworms are big enough to feed your chickens, usually after the first or second molt, if you aren’t going to dispatch them and serve them to your flock dead, you’ve got to slow their growth process.
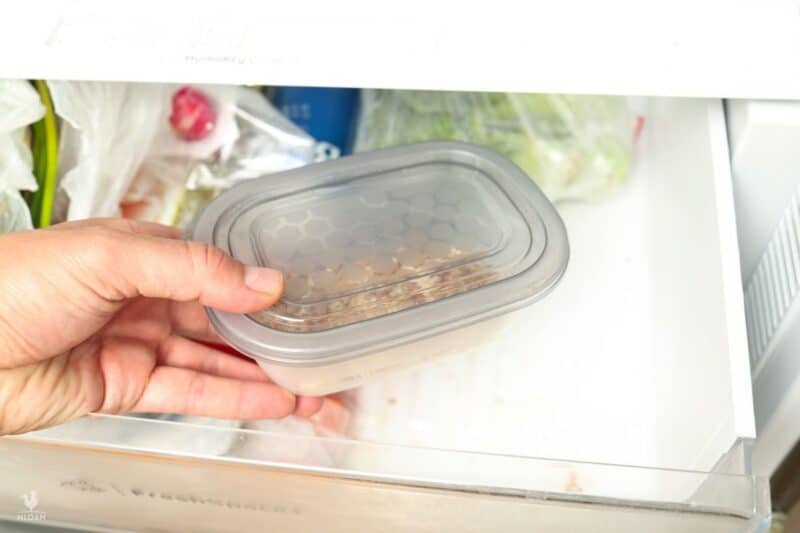
This can be done by popping them in the refrigerator. When mealworms get chilly, but not so cold that they die, this will keep them fresh, living, and also keep them in their larval form for much, much longer.
Any refrigerator set to medium is adequate. Really cold, freezing temperatures will kill the mealworms, although they’ll still be preserved and fresh once they thaw.
And as you might expect, most folks like to use a dedicated fridge, garage fridge, or a small dorm room refrigerator for the purpose. I wouldn’t want wriggling worms next to my ham, either!
What Do Mealworms Eat? What Should You Feed Them?
Basically, mealworms eat their bedding and a few supplemental foods.
Good substrates to keep them in include wheat bran and oats, both of which provide plenty of nutrition for these quickly growing critters and both are highly cost-effective. If you don’t have it or just prefer something else, cornmeal and wheat germ also work well.
Concerning supplemental foods, small chunks of fresh potatoes, sweet potatoes, bananas, pears, apples, and the like will do the trick and also supply them with all the water they need.
Prepping Food for Your Mealworms
Depending on how many mealworms you have in a container, it might be is best to cut a couple of pieces of fruit or veggies and spread them out in the tub, because mealworms will crawl all over them and cover them up while they eat, preventing others from getting to them.
And that’s really all they need. But remember to keep an eye out for mold, especially when you’re putting moist veggies in with the dry substrate.
At the first sign of the substrate getting mushy or too contaminated, you should take it out and give them fresh. You can use a sieve board to filter out the substrate while keeping the mealworms from falling through, making substrate changes easy and quick.
Troubleshooting Common Problems When Breeding
One of the biggest problems that I’ve seen occur with raising mealworms is persistent mold, fungus, and other microorganisms that can decimate your crop, or herd, whatever you want to call them. I don’t really know what a group of mealworms is called.
But in seriousness, when you change out their substrate as described above, you must take the time to disinfect the container with a good washing and scrubbing.
I like to have multiple clean containers on hand that I can put them into directly and then clean the used, dirty ones in a batch. This keeps the mealworms in a comfortable and temperature-controlled container for as long as possible and that leads to better gains and faster growth.
Also, take it easy on the little worms. I see people dumping them and throwing them around like they’re rocks, and it’s easy for them to get injured and die.
When they get injured, they will leak bodily fluids which will facilitate contamination and outbreaks of disease. When they die, likewise, they will rot and that will make things worse for the other mealworms.
Handle them like the living creatures that they are, and you shouldn’t have any trouble keeping them alive.
Dried Mealworms for Chickens: Good or Bad?
If you don’t want to keep your mealworms fresh, it’s possible to dry them out. This prevents them from maturing into adult beetles, of course, but are dried mealworms okay for chickens?
Don’t worry, dried mealworms are just fine for your birds although they tend to lose some vitamins and minerals when they are dried out and chickens don’t find them quite as appetizing compared to when they are alive and wriggling.
If you prefer dried mealworms for convenience or assurance, go right ahead.
How Can You Dry Your Own Mealworms?
Mealworms are easy to dry out using an oven set to very low. This is actually the hardest part of the process because most home ovens don’t go this low. You’ll need an oven, dehydrator, or other appliance that can be set between 120° F and 150° F (50ºC to 65ºC).
Put the mealworms in there on a tray and leave them for a couple of hours. They will dry right out. You can store them as is, once finished, in any airtight container for many months. Just make sure to protect them from moisture.
What Should You Do with Adult Mealworm Beetles?
As mentioned, adult mealworm beetles must be separated from pupae ASAP so they don’t eat them. And once they’ve mated and laid eggs, you have no more use for them.
Resist the urge to release them into the wild: mealworms are grain pests, and you don’t want to cause the population to skyrocket and decimate crops in your area.
The best way to get rid of them, assuming you don’t want to just crush them, is to put them all in a container and then put that in your freezer for a couple of hours. That will kill them, and then you can just throw them out.
How to Make Your Own Mealworm Feeder
Chickens are more than happy to eat mealworms right off of the ground or mixed in with other food, but if you would like to feed mealworms to songbirds in your yard you can easily make a mealworm feeder with a few scrap items and a few minute’s time.
All you’ll need is:
- an empty, clean, tuna can
- 18 to 20 gauge wire
- A drill w/ 1/8” or 3/16” bit.
- Pliers
- Diagonal cutters or wire snips.
Step 1: Make sure the tuna can is washed out and completely clean, and then simply drill three evenly spaced holes around the perimeter of the rim.
Step 2: Thread the wire through the first hole, then weave it through the next hole and then through the last one. Make sure you have 10 to 12 inches of standing wire left at the beginning once you’ve run it all the way through.
Step 3: Wrap the working end of the wire around the standing part a couple of turns to secure it and then cut it off with the diags or wire snippers.
Step 4: You can now use the standing part of the wire to make a loop, hook or wrap around a branch, pole, or hanger for placement. Fill with live or dead mealworms and the birds will show up soon enough!
Don’t forget to clean out and dry your mealworm feeder periodically.
Wait, is it Illegal to Feed Mealworms to Chickens!?
No, or at least it isn’t in the United States. It’s a common misconception, and that’s because it is illegal to feed chickens and any other livestock animals in the UK and throughout the EU.
This is a very long story in the telling, but basically, it’s because there are almost no controls on commercially raised mealworms and what they eat, and mealworms that have been fed other animal proteins could then be vectors for all sorts of diseases to livestock that are intended for human consumption.
So if you live in Europe, no mealworms for poultry of any kind, or other livestock. If you live in the US, go right ahead.
Frequently Asked Questions
Okay, back to the business of worm ranching. Where do mealworms come from, anyway? Mealworms come from eggs, and those eggs are laid by beetles, specifically the yellow darkling beetle. Just like your chickens all hatch from eggs, these adult beetles hatch from eggs, only they start out as mealworms before they pupate into adults later.
Mealworms get their water from moist food in the form of fruits and vegetables as I mentioned. They do not need a separate water dish, which is simply a drowning hazard for them.
Mealworms grow up and turn into beetles, specifically the yellow darkling beetle.
About 16 weeks, from hatching into a larva, progressing into a pupa and eventually an adult beetle.
About 8 to 12 weeks in normal conditions. After that, they turn into a pupa and then progress into an adult beetle as mentioned.
No, you don’t. Refrigeration is not mandatory, but it does keep your mealworms, well, worms for longer.
It depends on the market and other factors, but you can usually find live mealworms for anywhere from $3.50 to $5 a pound.
You don’t. Instead, you do the opposite; take the adults away from the eggs and leave the eggs where they are.
As mentioned above, oats, wheat germ, and other fine cereals are perfect for them. And yes, they live in it and eat it.
Yes, they will, unless you kill them ahead of time or feed them to your birds live. You can slow the process by putting them in the fridge, but that’s all.
Mealworm eggs are absolutely tiny, and you’ve got to look close to spot them: they’re little ivory packets that look like a miniature grain of rice, 1mm or 2mm in length overall, but no bigger. They’re easy to spot as long as they are on a contrasting colored background, something that seasoned mealworm ranchers accomplish by using a darker brown substrate and other materials inside their holding container.


Get your gift and learn things like:
- how to make this really quick pest spray
- how to prevent egg waste
- two cheap automation devices that will make your life easier
Tom has lived and worked on farms and homesteads from the Carolinas to Kentucky and beyond. He is passionate about helping people prepare for tough times by embracing lifestyles of self-sufficiency.