Garlic is a superstar in your garden, and pickled garlic is one of the best ways to enjoy this tasty vegetable. More and more people are growing garlic on their homesteads.
It’s also easy to get your hands on garlic, even in bulk, at nearly any grocery store. However, most people use garlic solely to add a little zest to a sauté, or season a pasta sauce. But what else can you do with garlic?
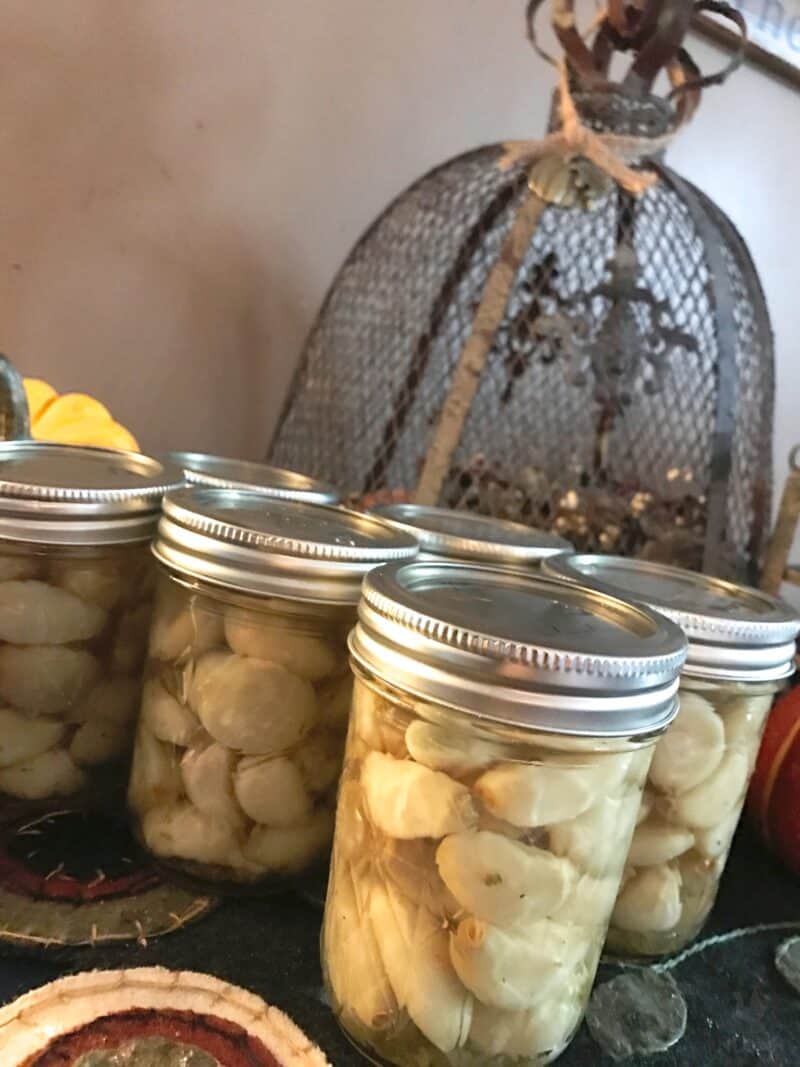
If you grow garlic or can get your hands on it cheaply, you’re in luck. Garlic is very easy to pickle and preserve, so you can enjoy a unique snack all winter long. And you can add pickled garlic to many dishes to transform them into something special, too.
So, are you ready to get your give your canning gear a workout? Let’s look at how easy it is to make your own batch of pickled garlic in your own kitchen.
Gathering The Equipment
When you make pickled garlic, you will also preserve it in canning jars. Before you do any canning, ensure that you have all of the necessary equipment on hand, and ready to use. There is nothing worse than getting ready for a day of canning, and then finding out that you’re missing something.
Equipment For Canning Pickled Garlic
Disclosure: if you visit an external link in this post and make a purchase, I may earn a commission. Read my full earnings disclosure here.
Here are the items that you’ll need to make this pickled garlic recipe:
- Boiling Water Canner This is the large pot that you will use to sterilize your jars, and then heat process and preserve your pickled garlic.
- Canner Rack. A canner rack sits inside your water canner. It helps you easily insert and remove your canning jars when you are processing them.
- Five To Six 8-ounce Canning Jars, With Lids And Rings. You’ll use these jars to preserve your pickled garlic for later use.
- Two large saucepans And One Small Pot. You will use one large saucepan to blanch your garlic to remove the peels. The second saucepan is for preparing your pickling juice and garlic. You will use the small pot to boil and sterilize your lids.
- Two Mixing Bowls. You will use one mixing bowl to soak the garlic in cold water; as we will discuss later, this will aid in skin removal. You will use the second bowl to store the garlic after the skin has been removed.
- One Colander Bowl. The colander will allow you to strain your blanched garlic cloves while you are working to remove the skin.
- Spatula And Funnel. You will use a small spatula and funnel to assist with packing the garlic and pickling juice into your canning jars.
- You will use a ladle to transfer the pickling juice from the saucepan to your jars.
- Large Spoon. The spoon will help stir your pickling mixture, and to transfer the garlic from the saucepan into the canning jars.
- Large Towel. After you process your canning jars, you will place them in a quiet, draft-free corner, and cover them for 24 hours with this towel.
- Small Towel. You’ll use a small towel to wipe off your jars and lids; this will help ensure you get a good vacuum seal, and will be able to store the pickled garlic at room temperature for up to a year.
- You will need something to help keep track of time (boiling times, canning processing times, etc.) while you make and preserve your pickled garlic.
Optional Canning Equipment
There are additional items you might want to have on hand as well. While they are not essential, they can help make the entire canning process easier.
- Magnetic Lid Wand. A magnetic lid wand helps you grab hot jar lids and move them where you want them, all without contaminating them with your hands.
- Jar Lifters. A jar lifter is basically a set of wide pincers that enable you to grab hot canning jars and move them into and out of places that are too hot to touch.
- Labels And Markers. If you can on a regular basis, you should definitely label your canning jars with the date they were processed on.
Assembling The Ingredients
This recipe makes about five 8-ounce jars of pickled garlic. Here’s what you’ll need to have pickled garlic 24 ready 24 hours from now:
- 12 Large Heads Of Garlic. Hopefully you’ll be using garlic from your own backyard for this recipe! If not, try to buy big healthy heads of organic garlic from your farmer’s market or local grocery.
- 5 Cups Of White Vinegar. Standard white vinegar that is sold in plastic gallong jugs will be fine for this recipe.
- 1 Cup Of Dry White Wine. The white cooking wine sold in the vinegar section f supermarkets works just fine. This helps add a little more flavor to the finished garlic.
- 1 Tablespoon Of Canning Salt.
- 1 Tablespoon Of Granulated Sugar
- 1 Tablespoon Of Dried Oregano
- 1 Tray of Ice And About 1 Quart Of Cold Water. The ice and cold water will help you remove skins from the garlic cloves more easily. We will discuss removing the skins a little later.
This is a very basic pickled garlic recipe. There are other more involved ones online. If you are a new or inexperienced canner, do not try to deviate from established canning recipes from reliable sources, since experimenting with additional ingredients might affect the food preservation process.
Step 1: Sterilizing
Fill your boiling canner with water. Then, place your canning jars on the canning rack, and lower them into your boiling canner. Make sure the jars are completely submerged in the canner, and then boil them for at least ten minutes. Place your canning lids in the small pot, cover them in water, and boil them for at least ten minutes as well.
Remove your jars from the canner once they’ve been sterilized, and set them aside to dry out. Use caution when removing the canning jars; do not let a jar with scalding hot water tip and spill on your foot. You can leave the lids in the pot until you’re ready to use them.
Step 2: Removing The Garlic Skins
Break your garlic heads apart into individual cloves. You will notice that each clove is covered in a papery skin; that skin must be removed prior to moving on to the next step. Removing the garlic cloves’ skins can be tricky and time consuming.
Many people avoid pickling garlic because of the difficulty removing the skins. However, this tried and true technique described here will make peeling the skins it a bit easier for you.
Place your ice and cold water into one of your mixing bowls. Set the empty mixing bowl beside it, and have your colander ready as well.
Bring a large pot of water to a rolling boil. Drop your separated garlic cloves into the water, and stir the garlic cloves around in it for 30 seconds. Then, dump the entire contents into the colander bowl to drain it, and place the garlic cloves into the bowl of water
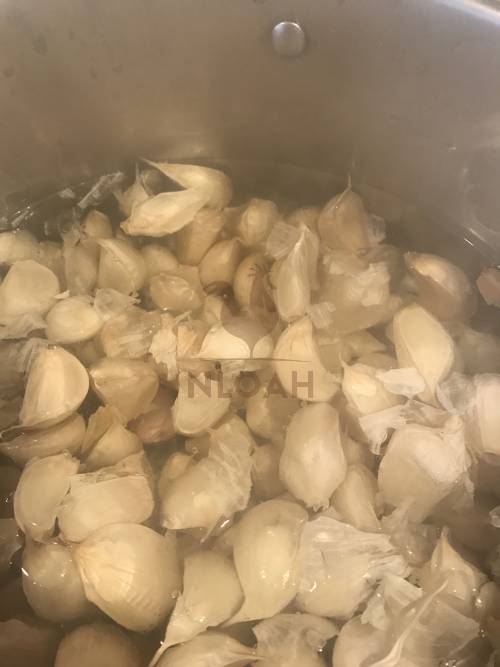
Photo: Boil your garlic cloves to help remove the skins more easily
The short exposure to boiling water helps to loosen the skins on your garlic cloves. Placing them in the cold water further degrades the skins, and also makes the cloves easier for you to handle.
Once the garlic cloves are in the cold water, pick up an individual clove, and pinch it gently; the skin should slide right off easily. Place the skinned clove into your empty mixing bowl, and repeat until all of the cloves have been skinned.
While this technique does make peeling the skins easier, it is still a somewhat tedious process. If you are looking at getting the whole homestead involved in food preservation, this is the best step to do it! Two or three extra sets of hands can get all of the garlic cloves in this recipe skinned in ten minutes or so.
If you search online, you’ll find there are other techniques people also use to remove the skins from garlic.
Step 3: Preparing The Pickling Mix
Once you have skinned the garlic cloves, you will need to prepare your pickling juice. Take your second saucepan. In it, place the vinegar, wine, pickling salt, sugar, and oregano. Set the mixture on high heat, and bring it all to a boil. Stir your mixture vigorously, until all of the salt and sugar is completely dissolved, and the liquid is clear.
Once the mixture is clear, reduce the heat until it is at a slight boil, and let it simmer for an additional minute. Then, add your peeled garlic, and let it cook in the pickling mixture for one minute more. Once the time is up, go ahead and remove the saucepan from the heat. You are ready to move on to the next step.
Step 4: Packing The Jars
Move the saucepan with your garlic and pickling mixture, along with your canning jars, to a place where you have enough space to work with both of them. A large table or counter area will definitely suffice.
Line up your jars neatly, so they are easy to work with. Place your canning funnel on the first jar. Then, using your spoon, remove your garlic from the mixture, allowing as much liquid as possible to drain back into the saucepan. Pack the jar with garlic, up until approximately ½ inch (1cm) from the jar’s opening. Repeat with each successive jar, until all of your jars are filled.
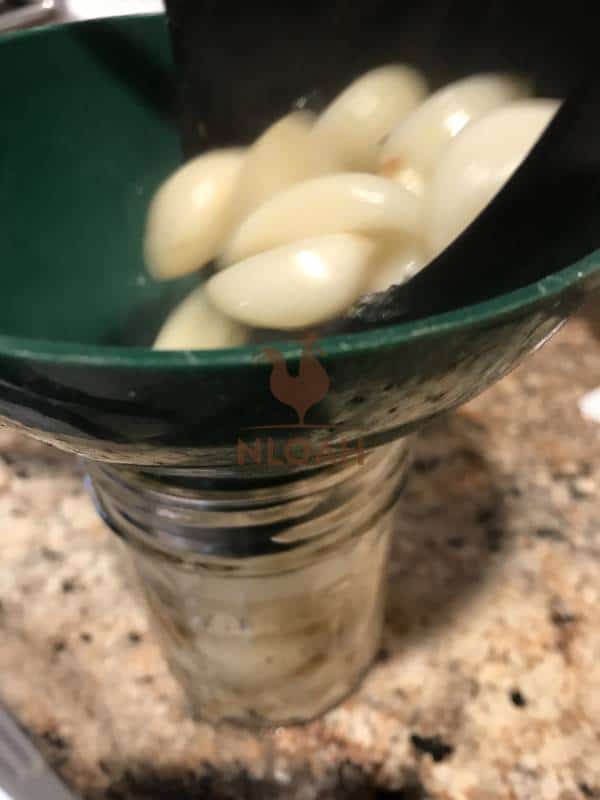
Photo: Carefully pack the garlic cloves into your 8-ounce jars
Once all of your jars are packed with garlic, place the funnel back on the first jar. Using your ladle, transfer the pickling juice carefully into the first jar, until it is filled to within ½ inch of the top of the jar. Repeat this process with each jar, until they are all filled.
You may wind up with more or less than five 8-ounce jars, depending on the size of your garlic cloves. However, only move on to the next step with jars that are completely filled with garlic and pickling juice. If you have any remaining juice or garlic that cannot fill an entire jar, refrigerate it and eat it like any other perishable vegetable.
Once all of your jars are filled, use your small towel to wipe off the rims of your canning jars; ensure you remove any water, juice or other materials, since they can affect the sealing process later on. Use your magnetic wand to grab a sterilized lid, and place it center of mass on the top of our first jar. Grab a ring and screw it on carefully, until you meet a slight resistance.
Make sure one last time that the lid is aligned properly on the top of the jar, and then screw the lid with your hands until it is “finger tight.” Repeat with each jar until all of them have lids.
Here is a video demonstrating how to place the lids on canning jars:
Step 5: Processing the Jars
Once you have placed all of the lids on your filled jars, it is time to process them. Heat processing is a method of preserving otherwise perishable foods, so that you can consume them at a later date.
There are two components to this when it comes to canning, both of which are accomplished by boiling glass jars: first, the boiling destroys any harmful microorganisms in the jars; next, boiling the jars, with their metal lids, help creates an airtight seal. After successful processing, your pickled garlic can be stored in your cupboard or pantry for up to one year.
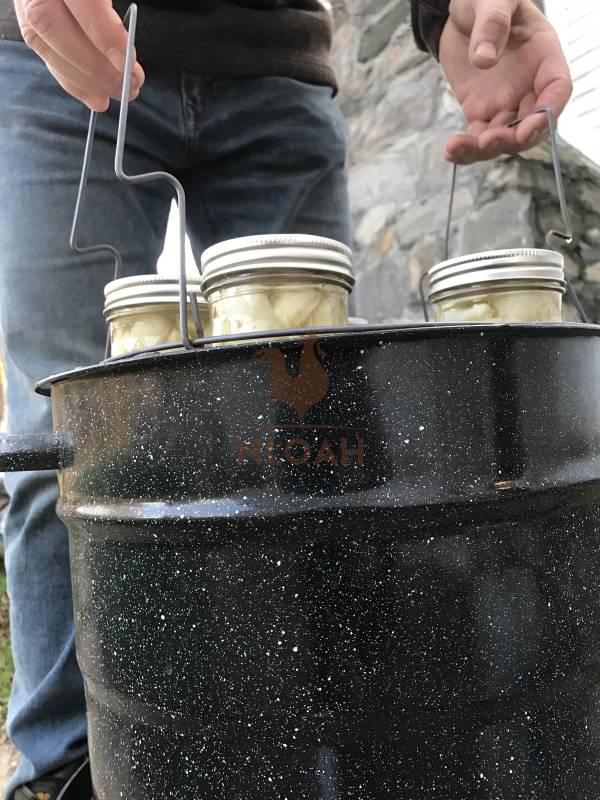
Photo: Carefully lower your canning jars into your canner
To process your jars, place all of them on your canner rack. Then, carefully place the rack back into your boiling water canner. Be careful, the water may still be very hot. Make sure that jars are upright; use your spatula or jar lifter to set any jars straight that inadvertently tip over. Also, ensure that there is at least one inch of water covering all of the jars’ lids inside the canner; add additional water if there is not enough.
Once your canner is filled, set the heat to high. Bring the water inside to a rolling boil, and let it boil covered for ten minutes. After ten minutes, turn off the heat, remove the lid from the canner, and let everything sit for at least five minutes to cool down.
Step 6: Cooling and Inspecting the Jars
After five minutes, carefully remove the canning rack with the jars from the boiler. Using your jar lifter or small towel, move each jar to a cool dry place, away from any drafts. Place all of your jars together, and then cover with the large towel. Let the jars sit like this for at least twenty-four hours.
At this point, you will likely begin hearing loud “POPS” from some of the jars; this is a good sign, indicating that a lid has inverted downward and the jar has successfully sealed.
After twenty-four hours, remove the towel, and inspect each of the jars for a vacuum seal. A sealed lid will be concave (curving downward into the jar). To check further that each jar sealed, press lightly down on the center of the lid; it should have no “give” in it. Any jar that has not vacuum sealed effectively will allow you to press it down significantly, like the “Home” button on a smartphone.
If you find a jar that has not sealed successfully, you can attempt to repeat the processing techniques described in Step 5. However, it is likely that you have a defective lid; it may be better to just refrigerate this particular jar, and consume it immediately.
All of the jars that vacuum-sealed successfully can be stored at room temperature in a cupboard or pantry for up to a year. Keep in mind that once you break a seal and open a jar, it must either be consumed immediately or refrigerated. You cannot seal the jar back up and store it at room temperature once it’s been opened.
Enjoying Your Pickled Garlic
Pickled garlic is delicious. It will be hard not to just open jar after jar, scoop out the garlic, and gobble it all up! However, try to restrain yourself; pickled garlic is a great addition to many tasty dishes. Here are some tips to make the best of your pickled garlic.
Great Finger Food On A Pickle Plate
If you’ve been a diligent canner, you should have a pantry full of different vegetable pickles by the time fall comes around. Those pickles make great finger foods at any party or get-together. Go ahead and make a plate that includes your other pickled vegetables.
Try to get a wide range of colors and flavors by mixing your pickled garlic with orange pickled carrots, red onions, and yellow peppers. All your friends will thank you.
A Memorable Appetizer With Bread And Olive Oil
Before your dinner arrives, try serving a plate of pickled garlic alongside artisanal Italian bread, hard cheese, and olive oil. Pair it with a dry white wine, like pinot grigio, and this appetizer may outshine the main course.
Add Flavor To Salads
If you want to zest up a salad, don’t forget to add your home made pickled garlic. This tasty addition is great in Italian-style salads that include fancy meats, cheeses, and spicier peppers.
Spice Up A Bland Sauté
If you are sautéing a rather bland meat or vegetable dish, consider throwing a clove or two of your pickled garlic in as you are finishing it off. The addition of pickled garlic can add a little bit of punch to a food that may otherwise be a bitt too ordinary, or bland.
A Tasty Addition to Chili and Bean Dishes
Pickled garlic is great to add while you are cooking your favorite chili con carne recipe. A few of those cloves added to a pot of chili will add a mellow, slightly acidic flavor to the chili that is truly unique. You can also add pickled garlic to white chili recipes, or any casseroles you make from black beans as well.
Don’t Forget The Brine!
After you use up your pickled garlic, don’t let the brine in your jars go to waste. Add a little of it to home made salad dressings for added flavor. You can also use it to season meats, stews and other dishes that you are going to prepare in a slow cooker. Finally, the brine is a great addition to many vegetable purees as well.
Go Ahead And Gobble ‘Em Up!
It takes a little bit of work to make pickled garlic. And let’s face it, they are truly delicious on their own. Every once in awhile, you should grab a jar of them out of your pantry, pop off the lid, and just enjoy them a handful at a time. That’s what being a homesteader is all about!
Closing Thoughts
Pickled garlic is a delicious snack. It’s great on its own, and adding it to the mix makes snacks, appetizers, and main dishes even better. Pickling and preserving garlic is also a unique way to enjoy it all year long. So what are you waiting for? Get a few heads of garlic, assemble your canning equipment, and start pickling some tasty garlic cloves today!
When Tom Harkins is not busy doing emergency repairs to his 200 year-old New England home, he tries to send all of his time gardening, home brewing, foraging, and taking care of his ever-growing flock of chickens, turkey and geese.
Pickled Garlic is awesome with your recipe, but turned it up a Notch, and added Jalapeno peppers slivers and they were nice.. another one I added Stevia sugar sub.. and made sweet ones for my wife as she’s diabetic was that ever nice
the good part is we eat them right out of the jar and sure keeps the colds away,, and doesn’t smell or after breathe..
Wow! This is an an awesome detailed post!
I’m going to try to grow some garlic to make this. I saw on a canning site that you can sterilize jars by baking them at 200 F for 30 minutes.
Do you think this would work instead of doing the hot water bath?
I make pickled Garlic but instead of buying or trying to grow garlic I save the time and go to my local Sam’s Club and buy 3 pounds of pealed garlic cloves, when I do use whole garlic I have these little rubber tubes that you place a couple of cloves in and roll on the counter under the palm of your hand, they remove skins easily, it saves so much time, I don’t use sugar just salt and vinegar, I place my cleaned raw garlic in a light brine made of just salt with some fresh rosemary and let them soak at least 4 to 6 hours or overnight, then drain and place in jars with red pepper flakes and sprigs of fresh rosemary, I then add a brine of white vinegar and salt, I make this to taste, adding salt to the hot vinegar to taste, then proceed just as your canning instructions say