On our homestead we make a lot of beef jerky. The guys like to have it to snack on while they’re out in the fields or in the barn and it’s a quick easy pick me up if someone gets too busy to come in for lunch. So we try to keep some on hand at all times.
It’s easy to store and easy to pack in a lunch. I also find that the kids love to take some with their lunch or if they have after school sports or drama events. I have even been known to take some with me if I have to go to town and nibble on it while I’m doing the errands.
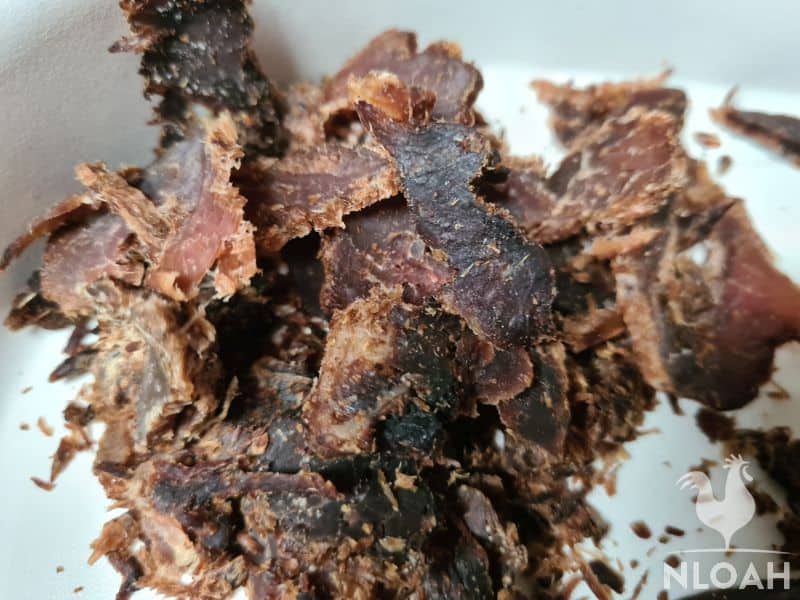
However, it always goes fast. It’s always in demand. I’m glad that it’s an excellent source of protein and it’s delicious. So we make it about every four or five months on our homestead.
If we’ve recently butchered we’ll always use fresh beef for our jerky. If you don’t have fresh meat, you can go to your local butcher and ask them for some fresh ground beef or whatever cut of meat you are planning to make your jerky with.
My local butcher can often tell me when someone else is getting ready to butcher and sometimes I can make a deal for some freshly butchered meat. If all else fails you can purchase your meat at the local grocer, but remember, you don’t really know where that meat came from or just how fresh it really is.
Preparing Your Dehydrator
Disclosure: if you visit an external link in this post and make a purchase, I may earn a commission. Read my full earnings disclosure here.
Jerky can be made in a smoker, in an oven, or even in a dehydrator. On our homestead we make a lot of jerky. I’ve made it in both a smoker and in the dehydrator. It works well in both but for this article, I’m using my Excalibur dehydrator.
I also have a Nesco dehydrator that I use as well, but the Excalibur is the one that I’ve been using recently and it’s handy and I won’t be making more than the five trays of jerky so I’m focusing on that particular model for this article.
Always start with clean trays for your dehydrator. My Nesco trays fit right into my kitchen sink which makes them easy to clean up. Unfortunately, my Excalibur trays won’t fit into my sink, not even side ways, so I use the bathtub to wash these.
To wash my trays, I first clean the bathtub well and then rinse it well. After this, I shake the trays outside (if there is any bits of food from a previous dehydrating project on them) and then bring them in and soak them in some warm soapy water.
I allow them to soak for about half an hour and then I rinse them well and allow them to air dry. It’s important to remove all bits of previously dehydrated food from your dehydrator trays to ensure that your jerky isn’t contaminated. Jerky is very susceptible to bacteria so never omit this very important step.
I also take this time to wipe out the inside of my dehydrator. While the trays are all out I wipe the inside down with vinegar and water and I make sure that there isn’t any bits of food in their either. It may be tempting to omit this step, but it’s well worth the effort to have your family healthy so I always take the time to do this before I make my beef jerky.
Beef Jerky Marinade Recipes
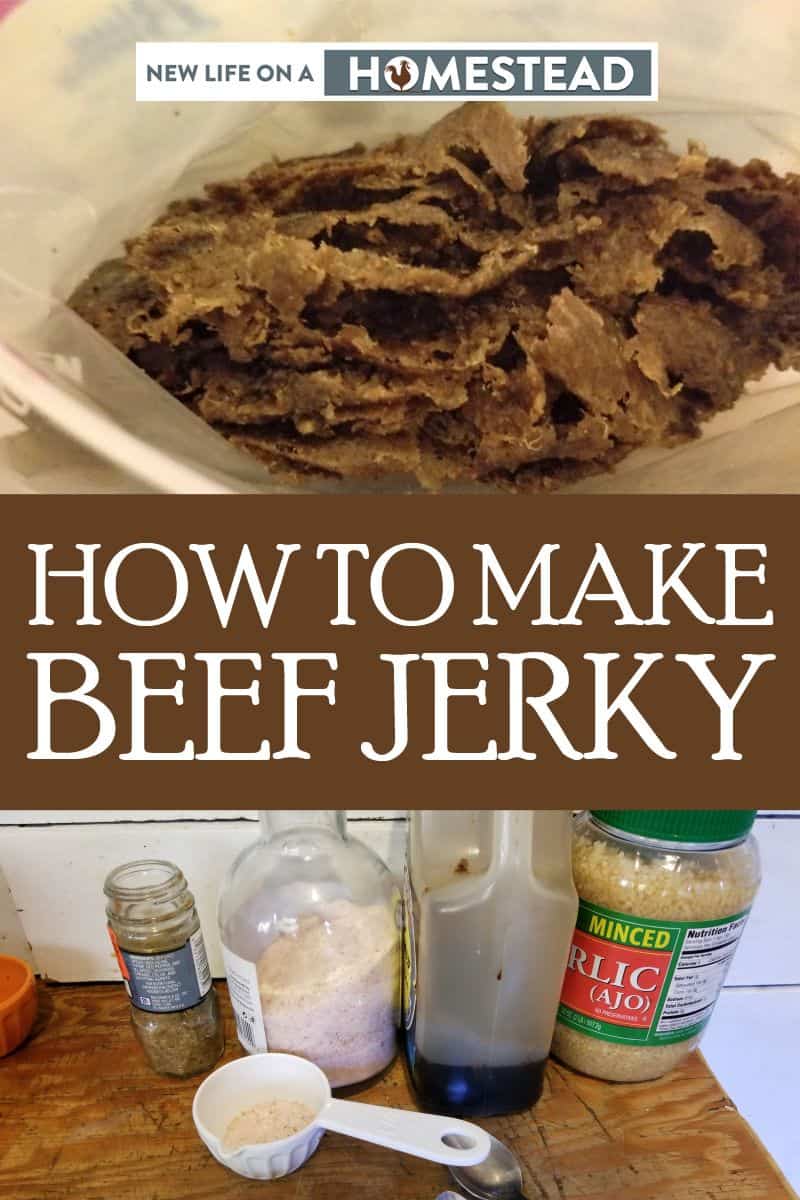
My family doesn’t like any type of sugar in their jerky. They think it makes it too sweet, so we’ve omitted the sugar in all of our jerky recipes. Here is the adapted recipe we’re using today:
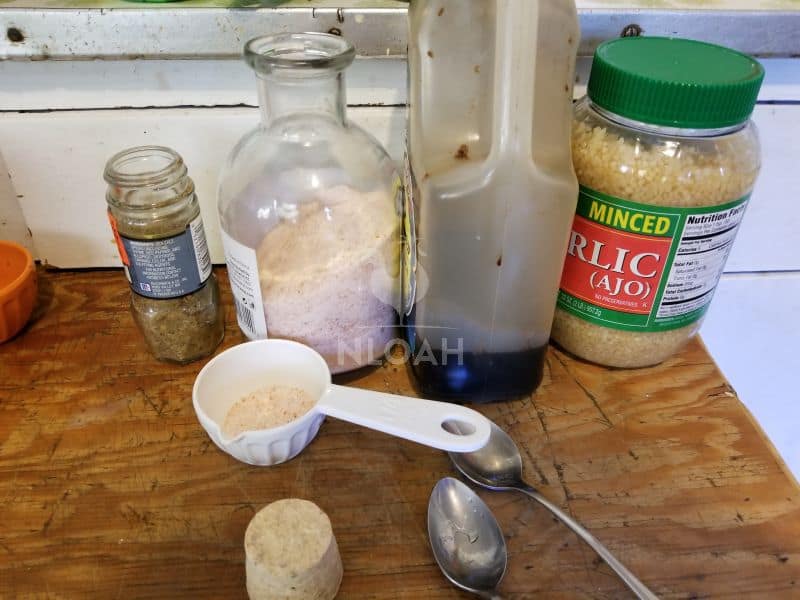
1 pound lean ground beef (we use fresh from our butcher during butchering season)
- ½ cup soy sauce
- 1 teaspoon of liquid smoke
- ½ teaspoon of onion powder
- 1 teaspoon minced garlic
- 1 scant teaspoon of pink Himalayan sea salt
- 1 Tablespoon of jerk seasoning (we used McCormick)
After our first batch of jerky we discovered that it was a bit too salty for our tastes so we went to a “scant’ teaspoon of the pink Himalayan sea salt.
Next time we may also consider reduced sodium soy sauce but we didn’t have any of that on hand so we just reduced the pink salt. It worked very well to alleviate the over saltiness. Sometimes you have to adjust the recipes as you go along so don’t hesitate to do this to your family’s liking.
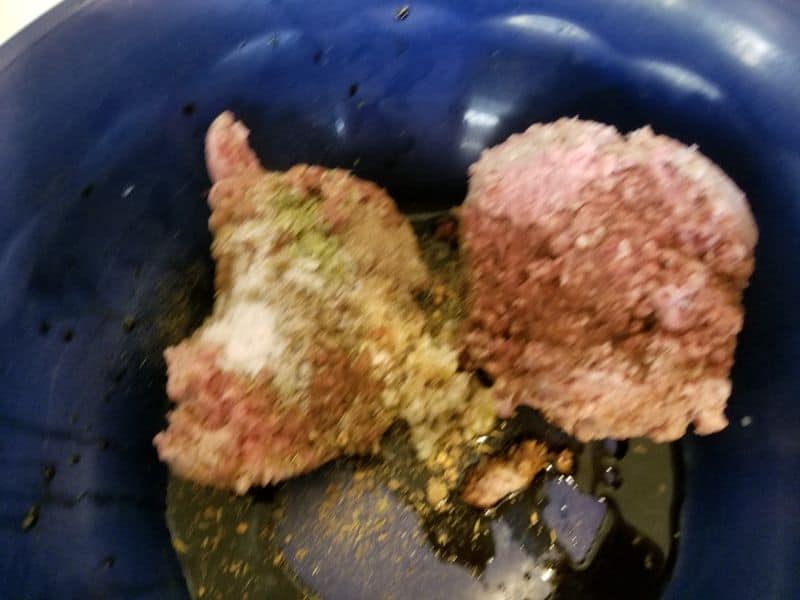
I worked all of the above ingredients into the meat and then I mixed it into a large plastic Ziploc bag so that my meat could soak in this brine overnight. You can allow it to marinate longer if desired but I usually only go about 24 hours before I make the jerky. I didn’t worry about putting it through a jerky gun yet, I was just marinating it.
If you have a jerky gun you will want to prepare it by washing the parts before you first use it. If you don’t have a jerky gun you can also use a cookie press for your jerky. Since my jerky gun seems to be missing in action on our homestead, we’re using a cookie press today to make our jerky. I just put a flat slitted opening on the end of it to press the jerky through. It worked very well.
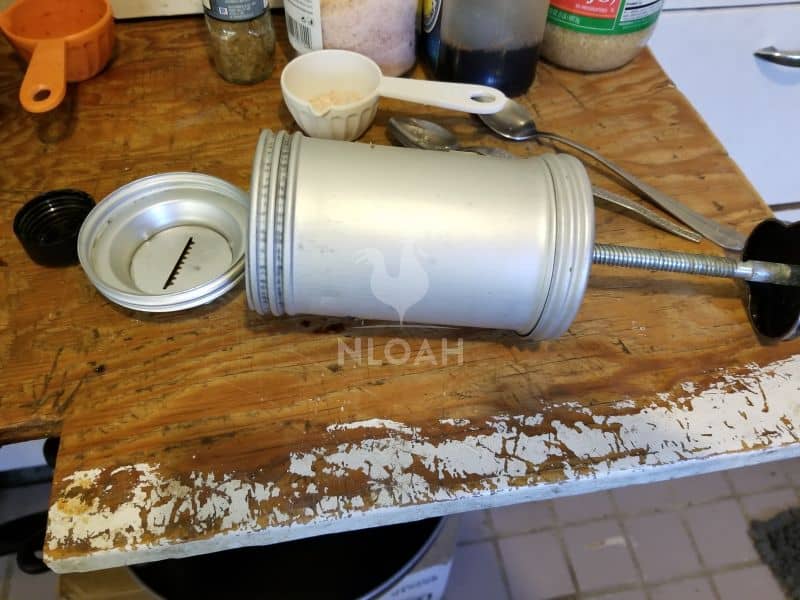
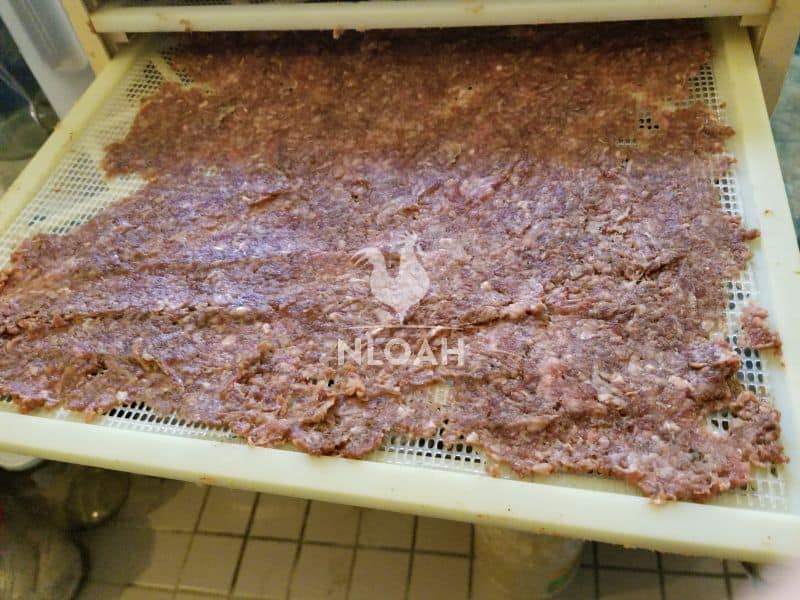
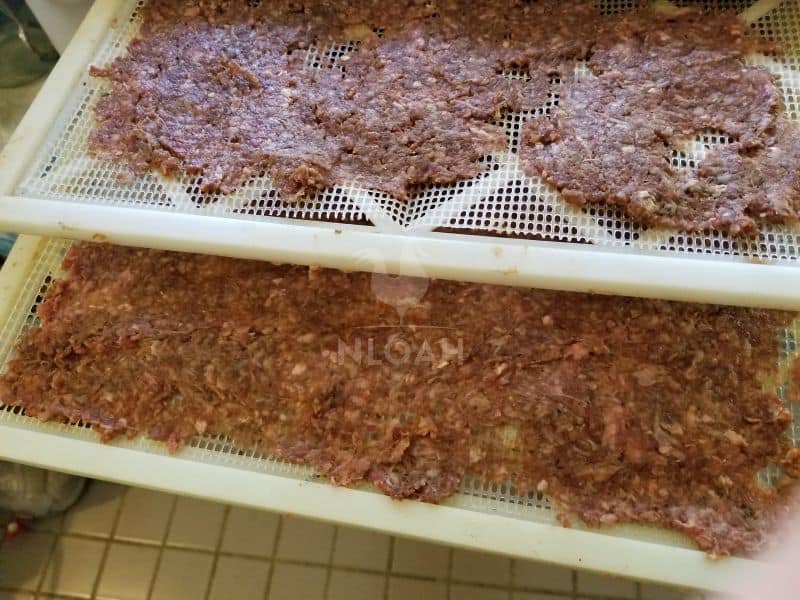
I filled the cookie press with the ground meat mixture and put the lid on the cookie press. I then used the knob to turn it and voila out came my jerky. I put it in strips alongside one another on my dehydrator trays. I broke them apart here and there so that I could turn them while I was dehydrating them.
If you don’t have a jerky gun or a cookie press, you can still make jerky. Simply lay your jerky out on some wax paper and put another piece of wax paper on the top of it. Roll this out to about ¼ inch thick. Peel the top layer off of the meat and carefully slice it with a butter knife. Gently place it on your dehydrator trays and continue as below.
Always make sure to leave plenty of space between the pieces of jerky on the dehydrator tray so that you can easily flip them over when you’re moving your trays around. This also allows for plenty of air flow which will help to dry the jerky faster. It’s better to make two batches than to place it too close together on the trays and risk not getting it all completely dried.
If you’re making peppered jerky you can put some cracked pepper on your jerky before you put it into the dehydrator. This will leave a bit more of the flavor on the pieces of jerky when they’re done. You can also sprinkle other seasonings on the jerky after you place it on the dehydrator trays to add a boost or burst of a specific flavor.
Kids love to mix and match and sometimes, they come up with really cool ideas. I have one son that loves “lemon pepper” and he will sprinkle lemon pepper on his own tray of jerky before I put it into the dehydrator.
Dehydrating Your Jerky
Once I’ve filled a dehydrator tray I then place it into the dehydrator and turn it on. For my Excalibur it states to turn it to 145 to 165 degrees Fahrenheit. On my Nesco it’s approximately the same setting and on the smoker there is an electronic read out that tells me what the temperature is and I follow the same temperature guidelines.
If you still have your owner’s manual for your dehydrator or smoker you can read the guidelines there for making jerky. However, if you’re anything like most of us, you’ve misplaced that manual and you’ll have to find it online or in a good cookbook.
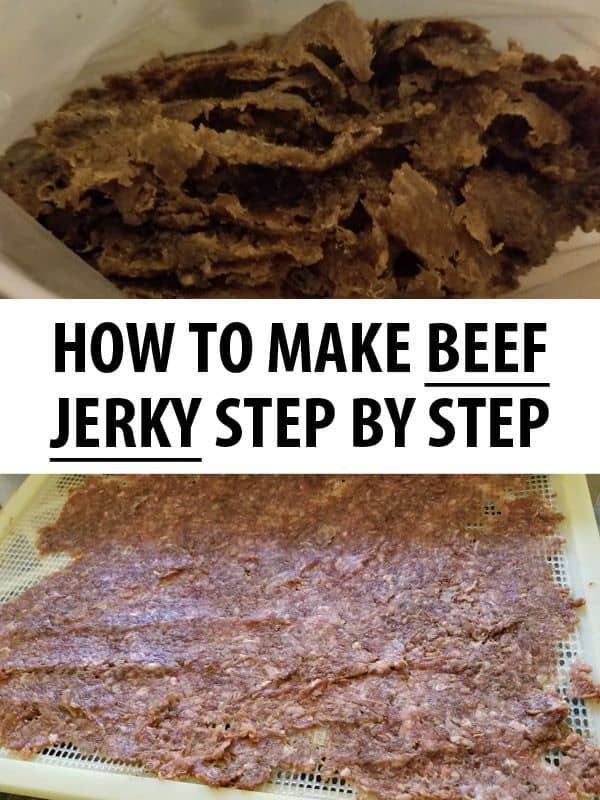
I continue filling my dehydrator trays in this fashion placing them into my dehydrator. At this point in time, when I’ve placed the last tray into the dehydrator, I note the time. Beef jerky that is made from ground beef will take approximately four to six hours to turn into jerky.
I will rotate my trays in the Excalibur every half hour to hour to ensure that my jerky is cooking evenly. I also tend to flip my jerky over once it’s stable enough to do so. This helps it to cook evenly and get done faster.
The Jerky is done when it’s pliable but cooked through. Many people, for safety reasons, will place it into an oven that is preheated to 200 degrees Fahrenheit for 20 minutes after they think it’s done to ensure that there isn’t any raw meat.
In our household, we don’t do this, because it’s typically gone quickly and I wear gloves while making it to reduce the risk of any bacteria getting into the meat. We also opt on the side of caution and tend to leave our jerky in the dehydrator for about six hours (although sometimes it is obvious it’s done within four hours).

Options
When it comes to beef jerky, everyone seems to have their own favorite recipe. There are many great recipes out there. You can make jerky with ground beef, with venison, with buffalo, and just about any type of meat that you happen to have on hand.
You can add in more of one spice and omit another spice entirely. You can use low salt soy sauce or even Worcestershire sauce for your jerky. It’s all up to you and what your family likes. Many recipes call for 1 to 3 teaspoons of brown sugar but as I stated above, my family doesn’t care for this so we leave it out entirely.
Here are some typical ingredients that we’ve tried or seen used in jerky. You can design your own favorite recipe by mixing and matching these ingredients:
- Sea salt or pink sea salt
- Onion salt or onion powder (Note: if using onion salt you may wish to omit part of the sea salt)
- Garlic salt or fresh garlic (Note: if using garlic salt you may wish to omit part of the sea salt)
- Cayenne
- Nutmeg
- Coriander
- Cilantro
- Basil
- Oregano
- Italian Seasoning
- Chili Powder
- Fresh Cracked Pepper
- Dry Mustard
- Powdered Ranch Dressing Mix
- Honey
- Cumin
- Vinegar
- Red Wine Vinegar
- Apple Cider Vinegar
- Olive Oil (I have never tried this although many swear by it, I’m usually trying to reduce the fat so I’ve never tried it).
As you can see, you can make just about anything into jerky. It’s all up to you. You may wish to follow a basic recipe and adjust the seasonings until you reach a flavor that your family loves. Make it your own signature jerky recipe and you’re sure to have a happy family.
You can also purchase readymade jerky seasoning at many hunting and fishing stores, sporting goods stores, online, and in big box stores. We haven’t personally tried any of these, but my friend swears by them and says that she doesn’t have to worry about using up her own seasonings. I personally like knowing exactly what is in my food so I make my own as mentioned above.
Using Other Meats
There are many other meats that can be used to make jerky. A favorite of our family is skirt steak. You can also use a roast that is thinly sliced, a London broil thinly sliced, or just about any other cut of meat that you desire.
I have a friend that can’t eat beef and she’s asked me if I could make ground turkey jerky. I’ll have to try it and see how that turns out for her. You can also use venison, buffalo, and just about any other animal that you hunt during hunting season. Jerky is easy to make and delicious and when you know exactly what is in it it’s even more delicious.
Tips for Successful Jerky
Always trim the fat off of your meat before you slice it for jerky. If you’re using a ground beef make sure that it’s very lean. The best jerky has almost no fat on it.
Meat that is semi-frozen will slice much easier for jerky. I usually place my meat in the freezer for an hour or more before I slice it. It just helps it to slice easier and it’s also thinner when you do this. Once I’ve sliced it, I will marinate it for 24 to 48 hours depending on the amount of time that I happen to have.
If you find that you’re suddenly and unexpectedly busy you can allow the meat to marinate longer if you need to. However, keep in mind that too long in the refrigerator and your meat is going to go bad so I wouldn’t let it go longer than 3 days at the most in the refrigerator marinating.
If using pork be sure to cook it thoroughly in the dehydrator, smoker, or oven to ensure health safety standards.
Important Considerations When Making Beef Jerky
Jerky is best made in small sized batches to ensure quality. I have, on occasion, used both of my dehydrators and made a huge batch that took most of the day to make. However, when doing this, I tend to make up smaller sized batches and then continue in that fashion instead of doubling or tripling recipes. It just seems easier to keep the ratios low and fill the dehydrators one at a time.
Always make sure that all of the equipment being used when making jerky is clean and sterilized. This is an important safety step when preparing meats.
Jerky can be stored in a dry quart jar with a lid, in plastic zippered bags, or in plastic containers with lids. Jerky can be stored out on the kitchen counter for up to 2 weeks as long as it’s properly sealed. Jerky will store well in the freezer for up to one year and in the refrigerator for up to six months.
If your jerky seems to be too wet, even though it’s done, after removing it from your dehydrator, you can place it into a paper lunch sack and close it up. Within one to two days your jerky should be plenty dry. Be sure to check it a few times per day.
You can also place your jerky on a towel or paper toweling and gently remove some of the moisture. Meat that has more fat on it is much more likely to do this than meat that has had the fat completely removed.
Benefits of Beef Jerky
Many people worry that beef jerky is bad for you. When you buy commercially made beef jerky this may be true as it’s often full of preservatives and sugars. When you make it at home you’re in control of the ingredients and you can pick and choose what goes into your jerky.
You won’t have to add any preservatives at home and you’re in full control of the sugar and the amount of salt that goes into your jerky.
Beef jerky is high in protein and if made without sugar it’s an excellent food for diabetics as it won’t be full of sugar that can change their insulin levels. This can make it much healthier.
Protein can give a person more energy and help them to make it through a tough busy day on the homestead. We keep plenty of jerky on hand for a quick pick me up when we’re busy separating cows or some other project that may take longer than anticipated.
Beef jerky is also rich in iron and zinc which will help your body to stay healthy.
Beef jerky is an excellent food for those who are trying to lose weight. Full of protein it’s only about 100 calories per one ounce serving. It is fulfilling and won’t add a lot of excess calories to your diet.
Beef jerky is one of the most convenient snack foods and by and far one of the healthiest when it comes to snack foods. If your family has been snacking on chips and junk foods, give them some of this and watch how quickly they change their snack habits.
If you’re nervous to make your own beef jerky, take heart, we were fairly nervous in the beginning as well. However, we tried it on a whim one day when we had a very large oversized steak that we knew we couldn’t all eat.
It turned out delicious and we were well on our way to making our own jerky on our homestead. We started with a steak and slicing it thin, and learned as we went along.
I’d never considered making beef jerky with ground beef until one of my kids walked in munching on some jerky that a neighbor had made. He handed me a piece and said, “Try this mom”. I tried it and loved it. I was sold. Ground beef makes a tenderer jerky as the fibers have already been broken up during the grinding process.
If you have dental issues, or elderly people who prefer softer foods, this may be the route to go for you. While it may sound odd at first, I assure you, it’s delicious and just as good as the jerky that is made from steaks and other larger cuts of meat.
I wouldn’t have ever considered making ground beef jerky had my son not handed me a piece and told me to try it. When you look at beef jerky that is made from ground beef, you can’t tell it wasn’t a slice of steak.
It looks, tastes, smells and feels just like the other kinds of jerky. It’s really easy to make and now, it’s one of our favorite ways to make beef jerky.

Hi, I’m Linda. I’m a mom, grandmother, homesteader. I love simple living and enjoy my life on a homestead where I garden, raise a variety of animals and strive for a life more like my grandparents lived.
My goal is to enrich life by living it as simply as possible and focusing on the way my grandparents did things. Life is so much more fun when it’s lived simply.
I use a similar method for my jerky using lean ground beef.
But, I use a cookie scoop to make “meatballs” and then I
flatten it using parchment paper, two chop sticks and a rolling pin
and make “jerky cookies”. They are great snack size and dry very well.
Great idea Dave! Thank you! 🙂