Do you love foraging for wild mushrooms? This is quite an enjoyable pastime that is practiced by budding mycologists – people who are passionate about mushrooms – all over the world.
There are millions of species of mushrooms growing in the world today. While some are both edible and delicious, sporting myriad health benefits, others can be extremely poisonous and can not only make you sick, but can kill you.
Instead of risking your health by assuming you have picked and eaten a look-alike mushroom, why not safely grow your own mushrooms at home?
You won’t have to rely on the local farmer’s market or food co-op to provide you with delicious organic mushrooms, nor will you be putting your safety in jeopardy.
Table of Contents:
Selecting Your Growing Method
Before you can begin to gather your supplies and start growing your own mushrooms, you need to decide which method you’d like to use in order to do so.
As a first-time mushroom grower, you have two options. You can:
- Purchase an inclusive grow kit
- Grow your mushrooms from scratch (using purchased spawn)
While this article will walk you through the steps needed to grow your own mushrooms, growing with a grow kit is somewhat simpler, as all of the instructions will be included.
Besides that, your steps will be broken down as follows:
- Purchasing your supplies
- Determining your ideal mushroom type
- Determining your ideal substrate type
- Drilling and inoculating
- Log/Substrate Arrangement
- Fruiting
- Harvesting
Supplies Needed to Grow Mushrooms
You don’t need a lot to grow mushrooms – besides the ideal location, of course, which we’ll cover in a moment.
To grow mushrooms, you will need the following:
- Mushroom plugs or spawn
- Substrate of choice (a wooden log or stump is most common, cut to about three feet in length)
- A drill and 5/16th steel drill bit
- A rubber mallet
- Some soy wax
- A small paintbrush (ideally foam)
When you are purchasing your mushrooms for home cultivation, you essentially have three choices. Most people purchase mushroom spawn in the form of plugs, but you can also make your own or buy a home cultivation kit.
A home mushroom cultivation kit can be very helpful if you are a beginner, as it will give you an idea of all the steps and procedures involved in growing your own mushrooms.
Other people choose to buy mushroom spawn locally or from an online dealer. This will allow you to inoculate your own substrate, like wood or, in rarer cases, straw.
You can also make your own mushroom spawn. This is quite difficult to do, as you need to provide a sterile environment to work and cultivate in at all times.
Best Species of Mushrooms to Grow at Home
The first step you should take in growing your own mushrooms is to find a company that sells the species of mushroom you would like to grow.
You can purchase mushrooms as spawns or plugs, but you will want to purchase either from a reputable vendor.
Here are some of the most popular mushroom species, along with their chosen wood and other substrate types:
- Shiitake: prefers ash, chestnut, oak, or beech as well as hardwood sawdust
- Oyster: prefers beech, birch, maple, oak, elm, or poplar as well as straw or hardwood sawdust
- Reishi: prefers elm, maple, or oak as well as hardwood sawdust
- Chicken of the woods: prefers beech, maple, oak, or poplar
- Turkey tail: can grow on any type of wood
- Lion’s mane: prefers elm, maple, oak, or chestnut as well as hardwood sawdust
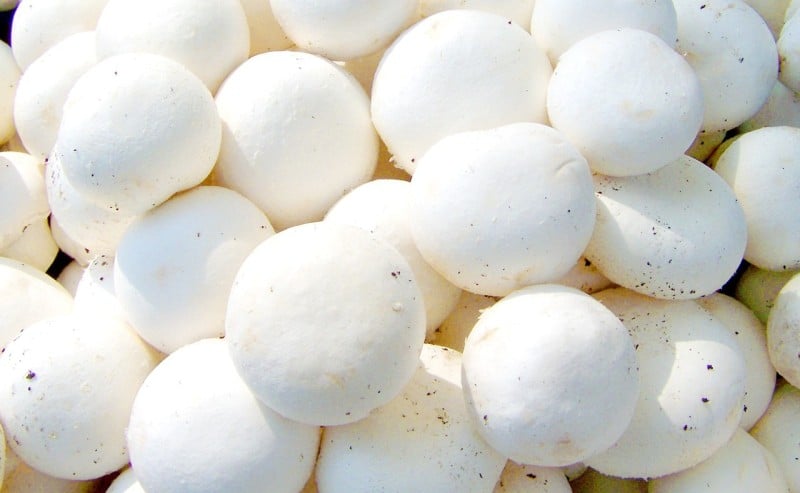
- Button mushrooms: best grown in compost
If you’re a beginner, one of the best kinds of mushrooms you can grow is the oyster mushroom. This is one of the most common home-cultivated mushroom species and is quite easy to produce in your own backyard.
Mushroom Substrates
Growing mushrooms is quite different from growing plants. Unlike plants, which are cultivated in soil, mushrooms use a substrate material that will be used for nutrition and energy.
Substrates are used to help the mushroom fruit. When the right conditions are present, the mushroom mycelium will begin to grow and will decompose the organic matter as they “colonize” it.
The mushrooms fruit once the substrate s fully colonized by the mycelium.
Most people use wood to inoculate their mushrooms, but you have other choices, too. Here are some options:
- Straw – Straw is a popular choice for people who are growing oyster mushrooms because it is both inexpensive and effective.
- Hardwood sawdust – Use sawdust from trees like beech, oak, or maple.
- Soy hulls – If you have access to soy hulls, mix them with hardwood sawdust to grow mushrooms such as oyster mushrooms.
- Manure – You can grow button mushrooms, one of the most common kinds of mushrooms, on composted manure, but you’ll have to engage in extra sterilization procedures to make sure the mushrooms are safe for consumption.
- Vermiculite and coco coir – Coco coir is essentially just ground up coconut shells and husks. Mix it with some vermiculite, and you’ve got yourself a super-effective substrate.
- Coffee grounds and other kitchen waste – You can grow mushrooms on a variety of waste products, like coffee grounds, banana leaves, and other products.
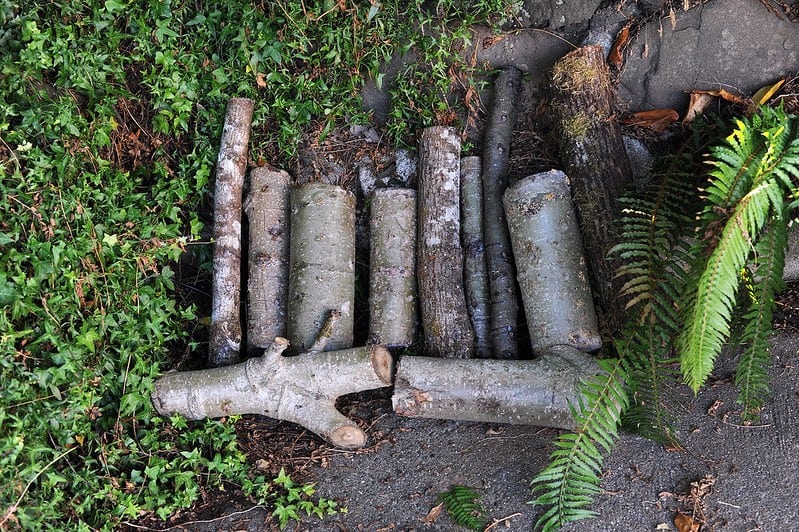
If you choose to use wood to inoculate your mushrooms – one of the most common growing mediums – you need to be finicky about the wood. In nature, mushrooms can grow on just about any – but not all – types of wood.
The best type of wood for your chosen mushroom cultivar will vary depending on the mushroom species.
Some mushrooms like hardwoods, like maple, elm, and oak, while others prefer softwoods like fir, spruce, or pine.
Make sure you research the type of mushroom you want to grow and what type of wood the mushroom prefers. It’s very important that you find the type of wood that fits your mushroom best – otherwise, you won’t get very far.
You also need to select wood that is healthy and has not begun to rot or deteriorate in any way. If you have just cut your logs, let the wood sit for about two weeks.
This will allow it to age. Don’t wait too long, however, because logs that are older than six months are likely to have fungi or other organisms already inhabiting them.
Steps to Grow Your Own Mushrooms
The exact steps you will take to grow your own mushrooms will vary depending on both the type of mushroom you have selected as well as your growing substrate of choice.
However, since most beginners will choose to grow either oyster or shiitake mushrooms, which are best and easiest cultivated by purchasing spawn in plugs and then inoculating wooden logs or stumps, the steps detailed below are those that you would follow if you are interested in inoculating wooden logs or stumps with shiitake or oyster mushrooms.
If you are interested in growing mushrooms in straw, in compost, or another type of material, be sure to check out the links I’ve included.
You can also check out these videos, which will give you a step-by-step idea of how to grow mushrooms in each type of substrate.
Growing mushrooms on straw:
Growing mushrooms on compost:
Growing mushrooms on sawdust:
Soy Hulls:
Vermiculite and Coco Coir:
Coffee Grounds/Kitchen Waste:
These are the steps you will need to take to cultivate your own mushrooms at home. Again, the procedures will vary a bit for other types of mushrooms, but this is a great place to get started.
Drilling
The first step in growing your own mushrooms, besides gathering your supplies, of course, is drilling holes in the wood. If you have a newly cut stump, take your drill to press holes into the top and sides of the stump.
The holes need to be about 1 ¼ inch deep. This will provide you with enough space to insert your plugs. You can drill about fifty plugs per stump, but try not to drill any more than this.
If you are using logs, you can place holes along the length of the logs. Try to keep the logs in a straight line, with each hole roughly one inch apart. Again, about fifty plugs will fit in one line.
Here’s a quick video showing you exactly how to do it:
Inoculate the Logs
Next, you’ll need to grab your package of mushroom plugs. Open the bag.
The mushrooms will look differently depending on what kind you have chosen, as well as how old they are. Sometimes, they will appear to be fuzzy.
This isn’t anything to worry about – it simply means that the mycelium is growing and beginning to colonize the dowels. They’re ready to go!
Using your mallet, tap the tip of a plug into one of the holes. Get the entire plug in the hole. These are soft, so they might feel squishy.
Don’t worry – you’re not breaking anything by pressing the dowel into the hole. Repeat this process until you have inserted all of the plugs into the holes.
If you’re still not sure how to choose the right log for inoculation – or how to go about the process of inoculating your log.
Here is a video that details how to inoculate a mushroom log with mushroom spawn:
Seal the Plugs
The next thing you will need to do is to cover up the holes with wax. This will protect the mushroom plugs from any damage, the elements, and contamination.
To seal the plugs, you should heat up your soy wax. This can be done either on the stovetop or in the microwave. Be careful – it will be quite hot. Use your paintbrush to spread the wax over the holes.
Arrange Your Logs
The next thing you will need to do is stack the logs. You can either prop them against something or stack them together, but make sure they are properly ventilated.
They need to be able to absorb moisture, but also need to be allowed to breathe a bit. Place your logs in a spot that is partially shaded. This will prevent them from becoming dried out too quickly.
Consider placing your stack of logs underneath a tree that has ample foliage throughout the year, like an evergreen tree.
This will provide them with plenty of shade and ventilation, but will also allow them to get wet from time to time.
Caring for Your Mushrooms
When you first set out your logs and while the mushroom spawn is colonizing the logs, you need to make sure you provide ample amounts of moisture. The logs and stumps need to be watered during the first few weeks, as this will allow the wood to absorb moisture.
After the first couple of weeks, you can allow the logs to simply absorb moisture from the natural precipitation.
If you live in a very dry, hot climate, you may need to continue watering – at least once a week – but otherwise you should be fine.
The same rule applies to northern locations during the summer. While you won’t need to water during the rest of the year, the summer is the exception – you will want to water once a week if you aren’t receiving heavy amounts of rainfall.
Once little mushrooms, also known as primoidia, first begin to appear in a process known as pinning, you will need to place the substrate (your wood, straw, or other medium) in the environment we mentioned above.
Make sure all conditions are controlled to the ideal specifications for your chosen mushroom, including the temperature, humidity, light, and air flow.
Do I Need to Pasteurize or Sterilize My Substrate?
Mushroom substrates are moist and full of nutrients that your mushrooms need to grow.
If you are using wood, you usually don’t need to pasteurize or sterilize your substrate. However, other growing mediums will need to be processed to remove mold and bacteria.
To do this, you will need to heat the substrate up to 150-180 degrees F (65 to 82 C) for at least two hours.
While this won’t remove all contaminants, it will get rid of a vast majority so that your mushroom species don’t have to compete with other outside influences.
Most substrates can be pasteurized by either subjecting the straw to steam injection or soaking it in a hot water bath. This process will moisten the straw and be used for mushroom inoculation once it has cooled.
If you’re using a substrate like hardwood sawdust, you will want to heat it up under pressure for at least two and a half hours.
When Will My Mushrooms Be Ready for Harvest?
As a rule, mushrooms grow slowly. You need to have a lot of patience! Depending on the cultivar you have chosen, your mushrooms can take as few as six months or as much as two years to grow.
That being said, mushroom colonies last for a long time – years, if they’re healthy.
Therefore, growing mushrooms is really an investment, as you’ll have an ample supply of mushrooms whenever you want and need them growing in your own backyard.
Fruiting
While the fruiting process is more complicated for mushrooms grown indoors or in alternative types of substrates, it is relatively straightforward for those grown in hardwood logs – again, the most common method of growing mushrooms.
If you inoculate your logs every year, you will have to wait about one year in order for a fruiting to occur. Mushrooms are produced in response to stress, like a change in temperature or an increase in moisture.
Therefore, fruiting usually happens when seasons change – typically after cool fall or spring rains.
Most logs will fruit naturally. You just need to make sure they don’t dry out during warm, dry weather by giving them a good deep soaking every now and then.
Natural fruiting will occur in the spring and fall (you will usually get two to three fruitings per year) with little to no fruiting happening in summer or winter.
You can tell a log is about to fruit when you notice white splotches of mycelium on the ends of the logs. There’s not much you need to do to encourage this, as temperatures and humidity will be optimal during these seasons.
That being said, you can engage in what is known as forced fruiting. This is typically done by commercial mushroom producers who want a more regular crop of mushrooms.
To do this, immerse the logs in cool water for 24 hours to mimic the fruiting conditions produced in the spring and fall. In a few days, buds will appear and begin to develop into mature mushrooms.
If you are growing mushrooms for mass production, you will want to soak a stack every week, or a few logs each day.
You might need a space that is relatively temperature-controlled, like a basement or greenhouse, if you are interested in year-round mushroom production.
Mycelium will stop processing the wood when temperatures drop below 50 degrees.
Harvesting Mushrooms
If you decide to purchase a home cultivation kit – again, the best option for beginners – you will note that the instructions will give you a time frame for harvesting your mushrooms.
This is just a basic idea, as growing conditions will play a strong role in when your mushrooms are ready to pick.
Don’t wait to harvest your mushrooms until they are massive. Size is not a good indicator of readiness for harvest.
Instead, you should wait until the mushroom caps move from a downward-turned position to one that is facing upward.
Generally, oyster mushrooms can be harvested about five days after the first mushrooms have formed. The cap of the largest mushroom you see should be turned upward and flattened out at the edges.
Shiitake mushrooms, usually grown on logs, won’t be ready to harvest for about six months. Again, the signs that your shitake mushrooms are ready for harvest will be similar to the signs presented by oyster mushrooms.
When you harvest the mushrooms, you can either pull them by hand or cut them. You do not need to wait for the mushrooms to drop spores.
If you see white dust, also known as t eh spores, your mushrooms are definitely ready for harvest (although you can harvest them before this time).
However, once you see the spores dropping, harvest immediately -this indicates that your mushrooms are mature.
Should I Grow My Own Mushrooms?
Growing your own mushrooms definitely is not easy – it requires a different set of skills than growing your own vegetables. However, once you’ve had some practice, mushrooms are a great “set-and-forget” crop that will produce yields for you many years down the road.
If your family consumes a lot of mushrooms, this is a staple you might want to consider adding to your homestead pantry.

Rebekah is a high-school English teacher n New York, where she lives on a 22 acre homestead. She raises and grows chickens, bees, and veggies such as zucchini (among other things).