Protein is one of the most difficult foods to put up in volume. They are expensive when purchased commercially, don’t last as long as other prepper foods such as grains, and the selection is often limited.
There are several options to rack and stack your protein. First, you can purchase cans of pork, beef, and chicken. Alternatively, you can add freeze-dried if you are willing to pay the premium. Finally, you can freeze it, and hope the electricity doesn’t go out.
One thing we often fail to consider is canning up pork ourselves. Pound for pound, pork can be one of the least expensive, and most versatile meats to preserve.
See the note about the “fat cap” below
Pressure canning, as required for pork, is versatile, the final product lasts for years, renders the pork tender, and it compliments so many dishes!
Time to fire up the canner and look at canning pork step by step… here’s your complete guide.
Table of Contents:
Why Can Pork, Anyway?
So, why put yourself and your pressure canner to work on a few jars of pork?
First, preserved meats are expensive. Canned chicken online is currently running at about $0.30 per ounce, compared to about $0.12 per ounce for boneless and skinless chicken. Converting to calories, this is your cost for about 50 calories.
Pork, yes, the other white meat, is even more expensive. At $0.41 per ounce canned, putting away enough for a good meal verges on prohibitively expensive.
Again, you’re paying that $0.41 per ounce for about 39 calories. At a sale price of $1.50 per pound for raw pork loin, I can add pork to my freezer at $0.24 per ounce.
Freeze-dried (chicken) is even more costly, at $0.75 per 39 calorie serving. That equates to about $12.50 for 500 calories in a meal.
I usually purchase pork on sale at, or below $1.50 per pound. Specifically, pick up pork loin. The monster hogs they grow these days will yield a 10+ pound loin. With little fat, no gristle, a loin is almost pure pantry fare with no waste.
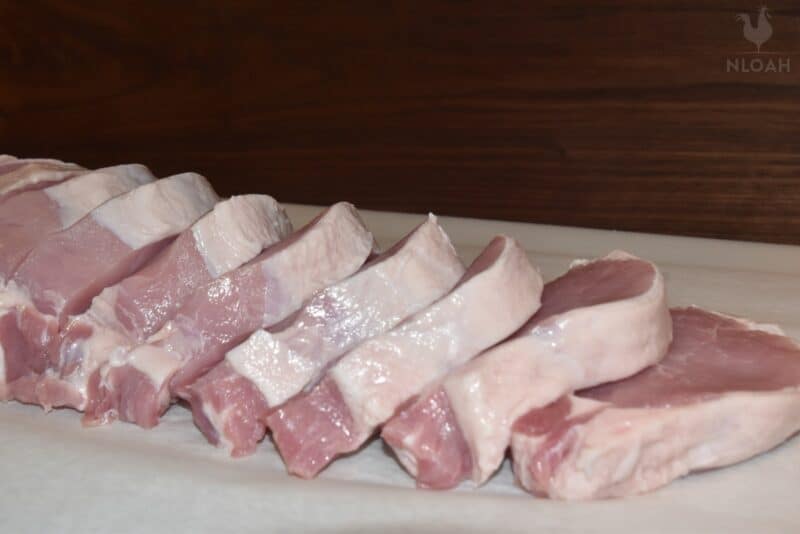
A pork loin sliced with no waste
Finally, when you purchase commercially, you have little choice over the flavorings. For example, if you buy canned pulled pork, you better like the sauce.
Canning is a simple way to preserve your protein flavored as you like. Or, as we do, can it plain, and build a dish around it later.
Pressure Canning
Pressure canning is required for low-acid foods. When the pH of a food is less than 4.6, it’s time to put away the water-bath canner and break out the pressure canner.
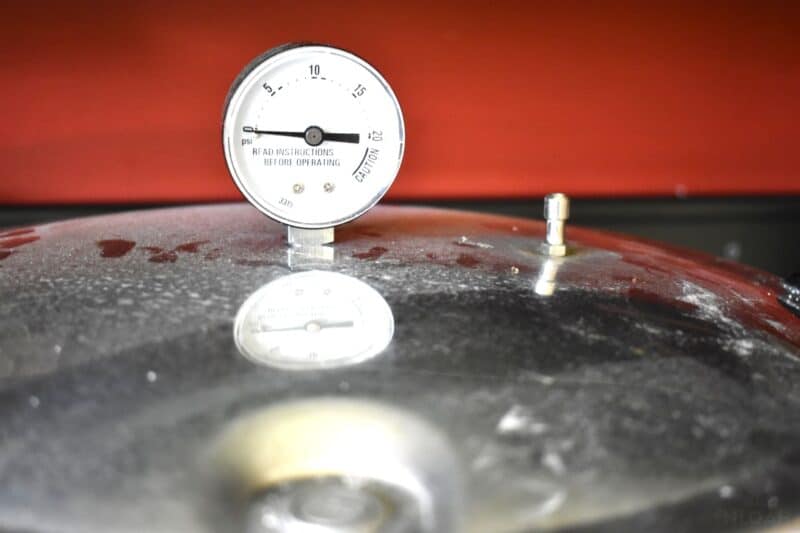
Pressure canners use a weight or dial gauge to increase the pressure. This results in an increase in the canner’s temperature.
When 212 degrees Fahrenheit (100 Celsius) does not kill pathogens in food, pressure canners raise the temp to about 245 degrees (120 Celsius). This increased temp plus longer canning times suffices to make most other foods safe to preserve.
A lot of the equipment required for pressure canning is the same as that for water-bath. Let’s look at the items you’ll need.
Canning Tools and Equipment
Pressure canners are not water-bath canners. You will need to invest in a quality canner. You don’t need to break the bank, just purchase one from a quality manufacturer.
Pressure canners rely on increased pressure to jack up the internal temp needed to sanitize low-acid foods. The tales of pressure canners exploding are mostly the realm of your grandparents. Modern canners have multiple safety systems that thwart explosive results.
Disclosure: if you visit an external link in this post and make a purchase, I may earn a commission. Read my full earnings disclosure here.
That being said, it’s still possible to get one to pop! Always follow your manufacturer’s instructions. I would also save your pennies and purchase one new, rather than hitting up Good Will or the Salvation Army for a used one. At least until you know what you are looking at.
The first thing you will notice is that your pressure canner is beefier than its thin-metal water-bath cousins. Next, you’ll notice a weight or a gauge (or both). You must become familiar with their operation if you want to avoid foodborne illness.
I’ll leave the specifics of your canner to the user manual. Read it. Then read it again. Then maybe watch a few YouTube videos. Just to make sure you know what you’re doing.
Interestingly enough, several manufacturers also produce electric pressure canners. These are pretty exceptional in a “set it and forget it” kind of way.
The biggest advantage is that they do all the work for you. One disadvantage is that they don’t can everything a regular pressure canner handles. Therefore, read the manual to make sure yours will can meats.
Another advantage of these is that they can small batches. This makes it easy for you to make a little extra soup or stew, pop the extra in the canner, and by morning your pantry is a few quarts deeper!
As for other equipment, I recommend a jar lifter and a lid lifter. Both make the job of handling hot jars and lids easier.
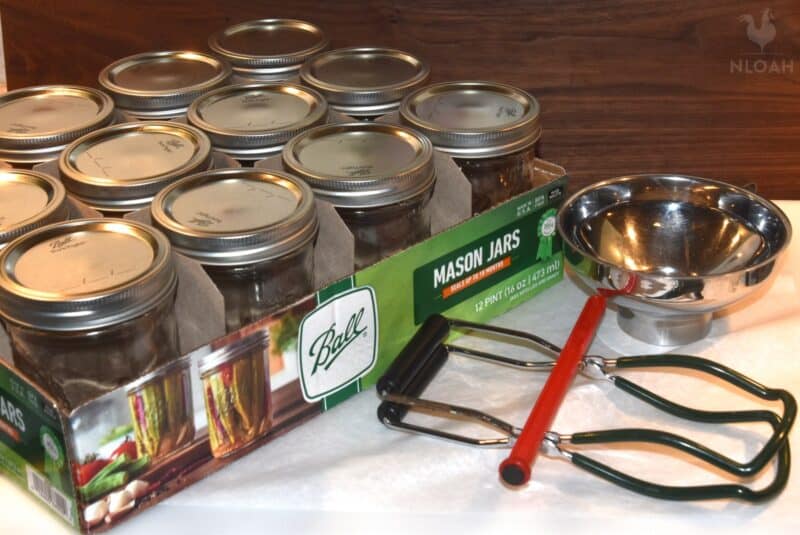
Next on the list are jars, lids, and rings. You will need both. If you are purchasing new, make sure to get canning jars. Decorative jars will not handle the temperatures and pressures of this process.
Note: at the time of this writing, jars are extremely expensive. Shop around and you will find them at normal prices. Better yet, get some hand-me-downs!
Second Note: Lids aren’t reusable. Once you open the jar, toss them.
Most of my jars are on their 2nd or 3rd generation of use! I routinely, and lovingly, use my grandmother’s canning jars. Not only do they work just fine, but it’s also a great bond and reflection for me. As long as they are free of nicks and cracks, they are good to use.
The last part of the equation are rings. New jars come with rings. You can use these over and over. As long as they are rust-free, they are good.
If you are a novice canner, then be aware there are two different sizes. Regular and wide mouth. I prefer wide-mouth for canning meats, as it’s easier to remove the meat from the jar after canning. Just make sure that your rings, lids, and jars all match.
Pressure Canning Cautions
There aren’t a lot of risks with modern canning. Here are a few of the most common cautions to look out for…
Always read your manual. You may need to adjust weights or pressure based on your elevation. If you live over 1000 feet above sea level, be prepared to make adjustments.
Next are your jars, new or old, check for cracks when you wash them up. Run the edges to see if there are any chips, and check the glass for cracks.
Pay attention to temperature differences! This recipe is a raw-pack variation. You will pack raw and cold pork into your jars. This means you will place them in a canner with cool water.
If you put them in hot or steaming water you risk cracking the jars. The same goes for hot pack recipes. These go into a heated canner.
Ingredients
There are few things easier to can than pork, specifically, canned pork requires two ingredients: pork and salt. Doesn’t get easier than that.
For pork, I use pork loin. Especially when it’s on sale. To be specific, I mean the whole loin and not the tenderloin. The tenderloin, while good, is too small and expensive to put up in bulk.
A whole pork loin will be between 5 and 10 pounds (between 2.2 and 4.5 kilograms) . When well-trimmed, they have little fat. Even if there is a fat cap, that’s fine. It just adds calories!
Compared to other cuts, like the shoulder or the leg, the loin has no bones. The bones are wasted weight and don’t contribute to your canned goods. You will also spend extra time trimming them out.
Pork loins have between 2 and 3 muscles depending on where they are cut. Most center-cut loins contain only one. This makes butchering quick and easy.
The second ingredient is salt. Canning salt is similar to normal table salt. The primary difference is canning salt does not have anti-caking agents. The anti-caking agents contribute to cloudy canning liquid. It’s not critical, just an aesthetic thing.
Butchering Pork For Canning
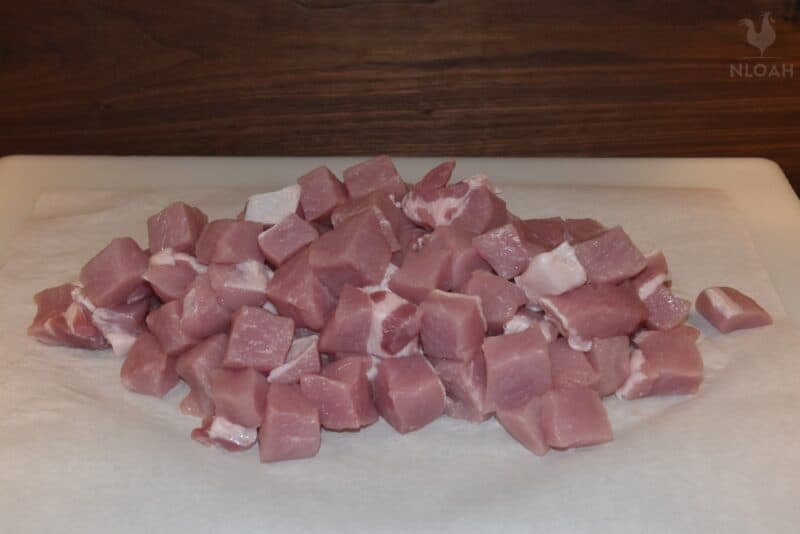
Cutting up a pork loin couldn’t be easier. The only rule is the pieces should not be thicker than ¾”. Thicker than ¾” and the times and temperature will be insufficient to reach the center of the cubes. This makes for unsafe canning and the potential for illness.
When processing a loin, first slab it out. I cut the entire loin into ¾ inch rounds. Each slice then gets cut into ¾” cubes. That’s it for butchering
You can plan on approximately 2 pounds of pork per quart. If you choose to can in pint jars, then each one will hold approximately 1 pound of pork.
Raw Canning
There are two primary meat canning methods: raw pack and hot pack.
Raw pack is exactly like it sounds. You cut the raw pork into cubes and pack it into the jars, then pop the sealed jars into the canner.
Hot pack requires you to cut and cook the pork before canning. Hot pack has two advantages…
First, you can flavor the meat before canning. Many hot pack recipes require you to boil the meat in plain or flavored liquid. More flavor, more fun!
Second, while cooking, the meat shrinks, so you can fit more in a jar. You will top it off with the cooking liquid but you will get more finished product per jar. The disadvantage here is that hot pack canning takes more time and effort.
If you prefer the easy path, I recommend raw packing. Raw pack shrinks while it cooks and makes its own juice. I especially love raw packed chicken! The resulting juice is the best stock you’ll ever have.
Safety
There are two major safety considerations. The first is the longevity of your canned pork. The USDA states that commercially canned goods are OK to eat as long as the can has no rust, isn’t bulging, and the seal is intact. Home-canned goods, on the other hand, shouldn’t be eaten after 1 year.
That being said, I may have a few jars that have been on the shelf longer than a year. For any jar that is over one year old, I follow the canning safety rules.
First, I look at the color of the liquid in the jar. Is it clear? Is it a “normal” color? If either answer is false, then I dump the jar.
Second, I check the lid. Is it dimpled? Is it tight to the jar? Is there a “hiss” when I open it? Again, if anything is false, then the contents get dumped.
Third, I open the jar and smell and look. Does it smell right? Does it look right? If not, then toss.
Spoilage is nothing to mess with. Trust your senses, trust your gut. If you have any doubts, dump the contents and wash the jar.
I have probably canned hundreds of jars. Out of all those, I’ve lost less than 10. And the ones that contained meat were obviously bad. If the mold growth didn’t scare us away, the smell would have. The bad cans were found during our annual review and re-organization.
Time to start canning!

Canned Pork Recipe
Ingredients
- 16 pounds pork loin
- 4 teaspoons canning / pickling salt
- 1 teaspoon black pepper optional
- 1 teaspoon garlic optional
Instructions
- Add rings and lids to a pot, cover with water and bring to a boil.
- Fill your canner with cool water according to the directions.
- Cut the pork loin into ¾” cubes.
- Pack each quart jar with approximately 2 pounds of cubed pork. For us, this is a moderate pack – don’t cram them in. Don’t worry about any air gaps, these will fill in with the broth the pork makes as it cooks. Leave 1” of headspace.
- Add ½ teaspoon of canning salt to each jar.
- Clean off the rim with a paper towel dampened with vinegar.
- Add lids and rings. Center the lids on the jars. Finger tighten the rings – don’t crank down on them.
- Add jars to the canner.
- Place the lid on the canner and tighten according to the instructions.
- Turn the heat on high.
- Allow the canner to heat up.
- (All American canner-specific) Wait for steam to come out of the vent, it should be strong and consistent. Allow the canner to vent for 10 minutes. Add the weight to the vent.
- Once the weight starts to jiggle, adjust the heat until it jiggles 4-10 times per minute – All American specific. The temperature should come up to 240-245 degrees F (115 to 118 Celsius).
- Allow the canner to process for 90 minutes – 75 minutes for pint jars at 11 pounds of pressure.
- After processing, turn off the heat.
- Allow the canner temperature to come back to 200 degrees F (93 Celsius).
- Remove the weight and let the canner vent for 10 minutes.
- Remove the canner lid and then remove the jars.
- Allow the jars to cool and come to room temperature. Listen for the “ping” of the lids sealing.
- Test the lids to make sure they have dimpled and no longer flex.
- Once cooled, remove the rings and give the jars a quick rinse.
- Label and date each jar.
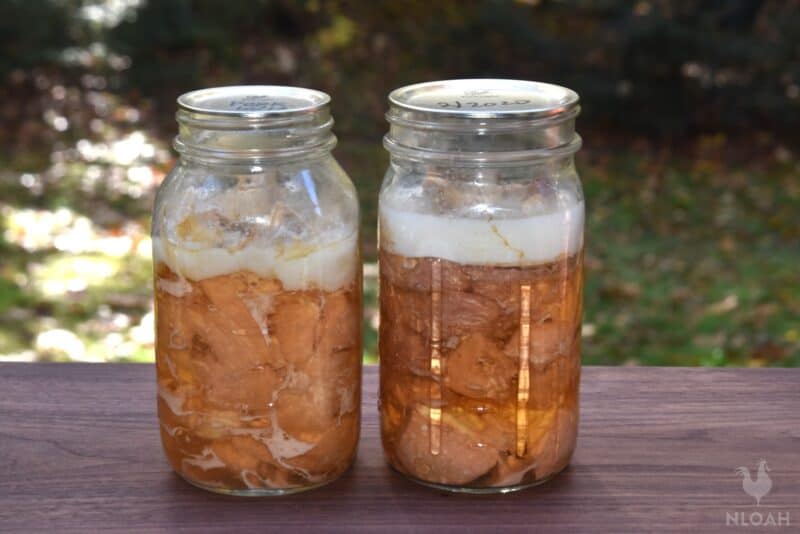
A Note About That Beautiful Fat Cap
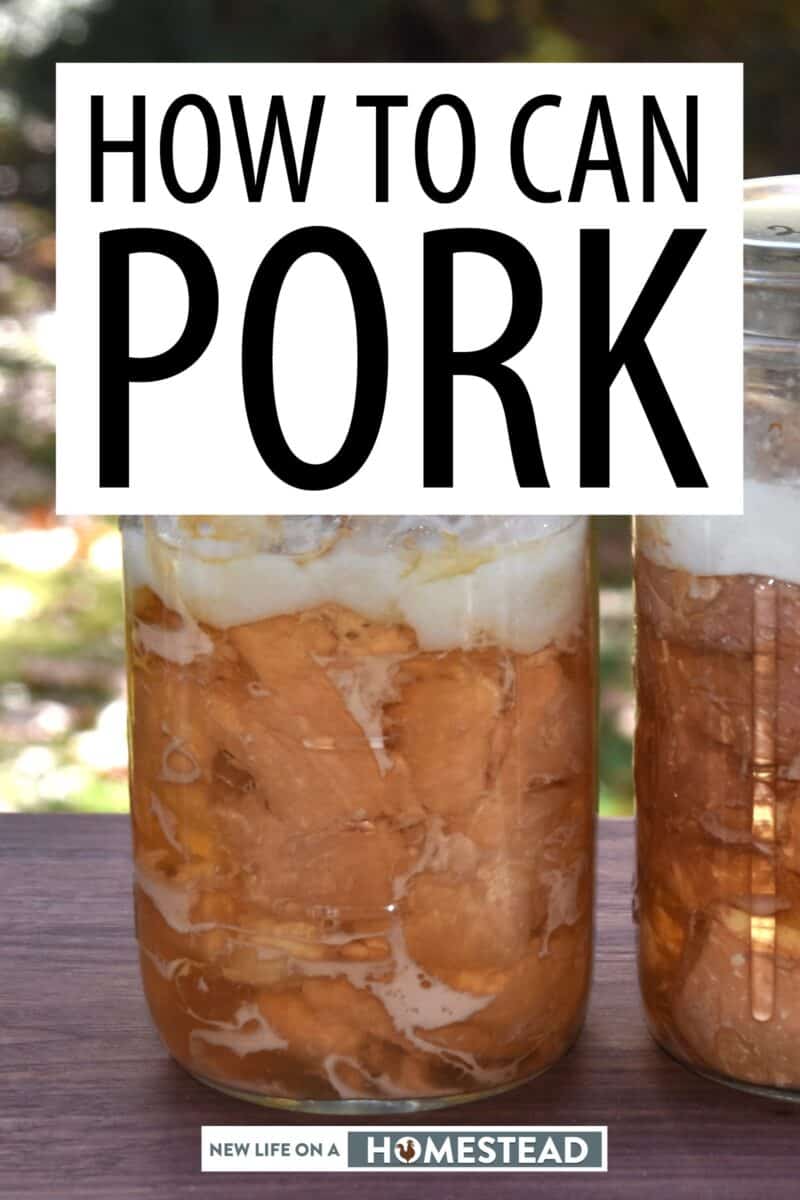
During the cooking process, most of the fat within the pork renders out. While the jar is still hot, in fact, it will still be bubbling when you take it out of the canner, the fat floats to the top.
Once the jar cools, especially if you are storing it in a basement below 70 degrees F (21 Celsius), the fat will cool and turn white (see the leading picture in the article). This happens for all meats during pressure canning. With chicken breasts, it’s not as noticeable, as they are particularly lean.
With our corned beef, the fat cap is a prized possession. That flavorful fat is used to cook and crisp up potatoes for corned beef hash.
Back to pork. The fat is not only perfectly fine to cook with; it is also a tremendous source of calories.
Even if you are making a dish that you prefer lean, save it to flavor leaner meats such as venison. The fat will be relatively hard, especially if cold. Just scrape it off, and use it where appropriate.
Storing Your Canned Pork
Treat your canned goods better than your children. Keep them in a cool and dry place, and they’ll never disappoint you.
All kidding aside, the age-old recommendations still hold. Keep canned food away from temperature swings. Specifically, cooler is better. Light is the other enemy of nutrients and food quality. If you don’t have a dark room, then store your jars in boxes.
Finally, keep them dry. Moisture will attack the seals and the metal lids. It doesn’t take long for a pin-prick of rust to violate the seal of a jar.
Inspect your jars often (at least at the change of seasons) for any signs of spoilage. Always double-check them upon opening.
- A voided seal–the key sign of this is a bulging or non-dimpled lid
- The lid should not pop down when you press it
- Rusty lid
- Foods that have changed colors unexpectedly
- Canning liquid that has turned cloudy
- Trust your nose when opening a jar–no off smells
When in doubt, pitch it. No need to get a severe case of food poisoning!
Kept in the right environment, canned pork will last a minimum of 1 year. Canning experts all recommend 1 year as the maximum storage life of home-canned goods. And I won’t recommend anything beyond this.
However… I’ve eaten canned meats, stews, and soups up to 5 years after I first jarred them up. I try really hard to rotate them out, but I have set a few aside for “scientific purposes”. No ill effects so far, as long as we observed the above rules and guidelines.
Cooking up Canned Pork
That’s a bit of a misnomer. You’ve already cooked your pork as a part of the canning process. I’ve eaten a bit right out of the can. I prefer canned chicken as it doesn’t have the fat content of pork. But it is perfectly healthy.
That being said, there are a bunch of uses for your newly canned pork. In our house, we’re suckers for Mexican food. With that in mind, we usually add our pork to Tex-Mex styled dishes.
The first dish we cook most often is tacos. Pop a jar, and scrape the fat (if it’s cool enough to have hardened) into a pan. Once melted, toss in chopped onions, chili powder, paprika, and oregano. Saute until fragrant, then add the pork and turn up the heat.
Fry until warmed through and browning. Season with Goya Adobo and adjust your other spices. Serve with your normal taco fixings.
Next on the Tex-Mex list is quick enchiladas. Simply drain the canned pork and mix with a jar of cream of chicken soup and a cup or two of shredded cheese. Wrap a few heaping tablespoons of the mixture in a tortilla and lay them in a greased baking dish. Top with enchilada sauce and more cheese.
Bake until bubbly and the cheese browns. Serve with some fresh cilantro and way too much sour cream.
As pork has a mild flavor, you can add it to soups, stews, and even chili to up the protein in the dish. It’s delicious on top of a sweet potato or some plain noodles! Of course, it’s also great for pork sandwiches. That goes without saying!
When I’m recovering from an off stomach I’ll cook up a batch of rice porridge, also called Congee. Boil 1 cup of rice in 10-12 cups of water, replacing some of the water with the pork’s canning liquid. If recovering from an illness, reserve the pork fat for another use.
Simmer on low for about 2 hours, stirring every 15 minutes, until the rice grains burst and the Congee is creamy.
Add a cup of canned pork in the last 15 minutes and cook until warmed through. There’s nothing better to soothe a sour stomach or just to warm you on a cold and damp day.
Home Canning Pork is Easier Than You Might Think!
Protein is vital to our long-term survival. Ask anyone on a restrictive diet. It must be a part of your daily intake. Second, protein is expensive. Purchasing it preserved can destroy your budget.
Preserving protein as a part of a self-sufficiency lifestyle is surprisingly easy and exceptionally rewarding. It’s worth the first steps! I could not have stacked up the jars of soups, stews, chicken, and pork that we have without those first steps.
While canning pork takes an initial investment of specialized equipment, that cost will pay you back tenfold in one or two seasons of canning. Not only will it pay you back, but the recipes you can make with the final product will please you above and beyond anything store-bought.
It’s worth dipping your toes into canning. Give it a try, and I’ll guarantee you that you’ll be reaping the rewards of a well-stocked pantry in no time!

M. I. Grey is an expert in food processing and preservation (including canning), but also an avid forager. He’s also passionate about anything preparedness, and used to work as a security expert.
I am hoping to can some pork; my mother used to make what she called head cheese but it was ground pork which had been processed in the pressure cooker. I am wondering about seasoning. Is the meat cubed and cooked and then ground, then jarred? Your article is great. I would appreciate any help or suggestions you might have.
Maybe I missed something, but would LOVE to have recipes using the actual canned pork
I’m wondering how to can my homemade spam. Since it is a solid block of meat should I leave space on the sides? Some suggest a hole down the middle. Have you any thoughts?
Don’t do it, if you can’t cube it.
What if you don’t put enough salt?
How long to you cook canned pork in a regular enamel canner??? Not a pressure canner???
If I understand correctly, you are referring to a water bath canner and not a true pressure canner. Water bath canners work well for canning some things such as tomatoes and most jams and jellies, but they do not raise the internal temperature high enough as does a pressure canner. This difference is what makes pressure canning a safe process for storing pork product.
You don’t.
When using chicken broth base , which is a little salty , do you still add canning salt or not to can up pork n veggies
In the “butchering pork for canning” section of this article there is a discrepancy on the size of the cuts. Just thought you might want to check that out.
Double WOW!! Now that’s a great article. Thank you.
Chuck- Thanks!!