Confession: this year is the first year I’ve grown enough peppers to preserve. Usually, our peppers end up being stringy, tough, and bitter – something that I have learned is the side effect of too little fertilizer, poor soil, and cold weather that doesn’t allow the plants to mature properly.
However, this year I remedied all those issues with a few easy gardening hacks, and I’m happy to report that I have harvested several pounds of delicious bell peppers.
That’s the good news – the bad news is that once I harvested them and made my fair share of stuffed peppers, spaghetti sauce, and other delicious concoctions (I also ate quite a few of them raw!) I had no idea what to do with them.
Can You Actually Can Peppers?
Yes, you can definitely can peppers of any kind, including bell peppers or hot peppers. Hot or sweet, pickled or plain, there is a lot you can do to your own peppers.
In this article, I will walk you through how to traditional bell peppers (also referred to as sweet peppers). There is no pickling involved in this procedure, so you’ll want to have a pressure canner on hand – peppers are too low in acid to be safely canned in a water bath.
Other than that, the equipment is the same as what you would use for water bath canning. Once you have your peppers gathered and your equipment ready to go, you can follow the handy guide below.
What Kinds of Peppers Work Best for Canning?
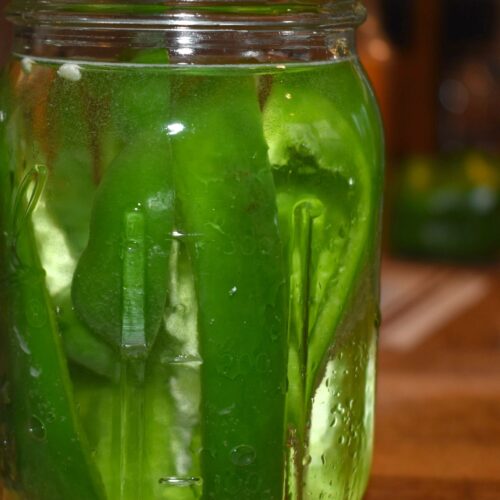
Make sure you select the freshest peppers that are bright green in color, like these.
When you are selecting peppers to be canned, only choose those that have ripe, unblemished fruit and skin. Ideally, the skins should be thick and difficult to pierce, as this will help to indicate the quality of the vegetable within.
Otherwise, any kind of pepper will do! There is no one type of pepper that is best suited for home processing. If you plan on pickling peppers (which is something that this recipe doesn’t call for, though the steps are similar), you might choose peppers like yellow wax, sweet banana, Cubanelle, or sweet bell peppers.
Standard canned peppers (the non-pickled variety) can be made out of any kind of pepper, including spicy ones like poblano, jalapeno, serrano, and ancho chile. You can also make canned peppers out of red, green, or yellow sweet peppers. Even banana peppers can be canned!
Adding Other Ingredients
Keep in mind that if you add other ingredients, like onions or tomatoes, to your canned peppers, you may need to alter your canning times and pressures.
Always look for a recipe that matches your intended canning plan exactly – you don’t want to stray from a recipe because these are tried-and-true plans to help preserve your food in a safe way. Don’t make yourself sick by trying to be creative!
Ingredients
- 1 lb raw peppers per pint jar (18 lbs if you are double stacking)
- Water
- Salt (optional)
- Vinegar (optional)
Instructions
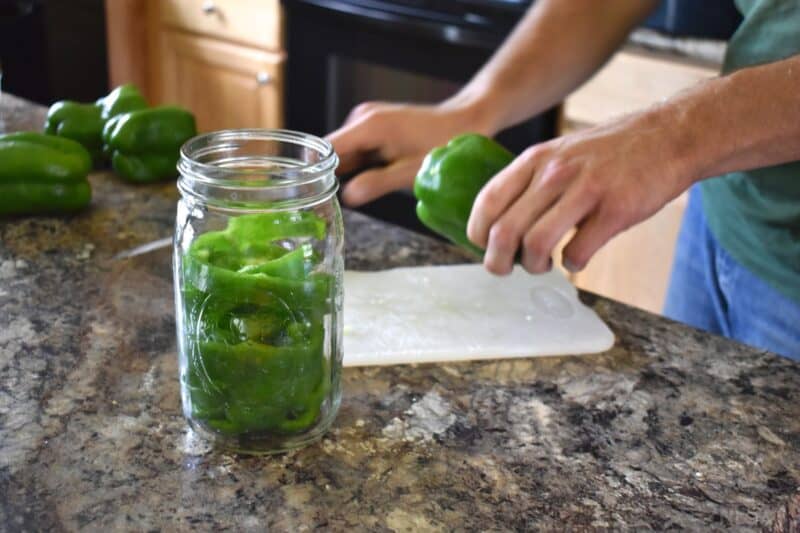
Step 1. Cut Up Your Peppers
Before you do anything at all, you need to go through your peppers and select the ones that will work best for canning. Look for individuals that are unblemished and have nice, waxy skins. Try to avoid those that have become wrinkly or old.
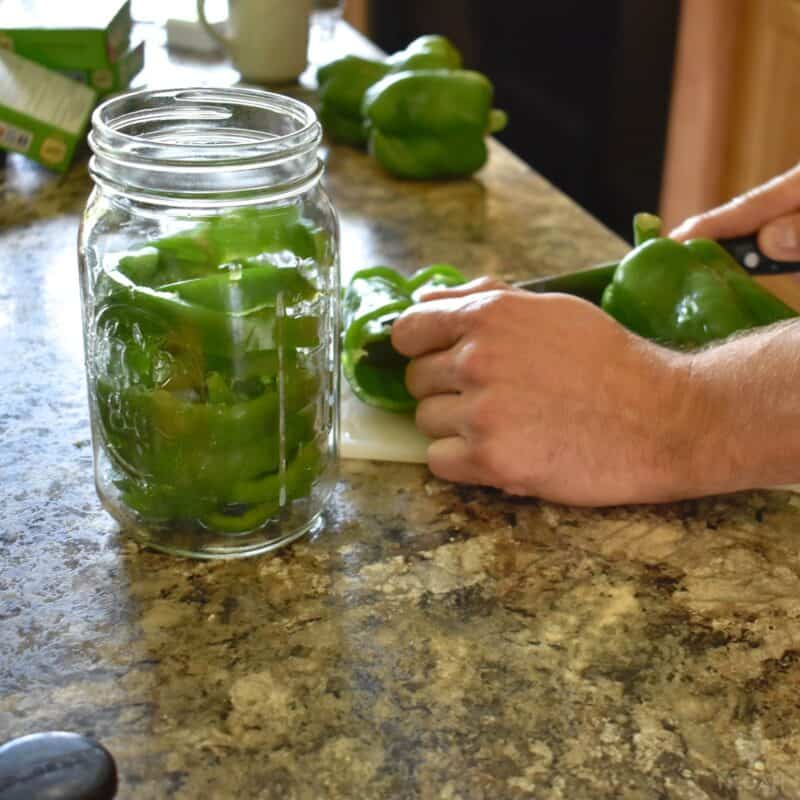
Wash your peppers carefully, taking extra caution to remove any built-up dirt, insects, or other unwanted debris. Once your peppers are clean, cut them on a clean cutting board. You can cut your peppers into small pieces, rings, or slices.
I personally recommend cutting your peppers into large pieces. The reason for this is that when you cook your peppers in a pressure canner, they will soften quite a bit. If you make the pieces too small, you may find that they turn into a mushy mess.
If you’re canning bell peppers, you can quarter them. Both Ball and Bernardin, two major canning authorities, along with the USDA, recommend not dicing or mincing your peppers, as I mentioned.
However, if you are canning chilis or another kind of small hot pepper, you can easily can them whole (slicing them into large pieces is also fine). You should pack large chilis loosely to prevent any issues.
As I mentioned, this recipe will deal solely with the process of pressure canning bell peppers. You can also pressure can hot peppers, or you can pickle either type and then process them in a water bath.
If you are processing in a water bath, you can cut up your peppers however you’d like – the pickling will help preserve some of the crunch in the smaller pieces of peppers.
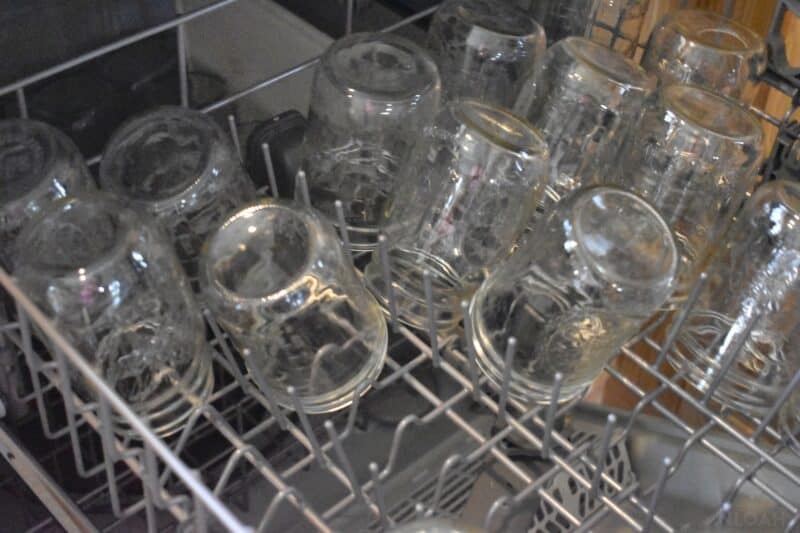
Step 2. Clean and Heat Your Jars
While you are washing and chopping your peppers, you can have your other equipment getting ready at the same time.
You will need to put a large pot of water on to boil – this will be the pot you use to blanch your peppers. In another pot, you should heat additional water to boil – this will be the pot you use to sterilize your lids.
There is a lot of debate over whether you actually need to sterilize your lids or not. The jury is still out on whether it does anything or not – I always sterilize my lids because I store them in the basement all winter long.
Although you should never reuse lids – it’s perfectly fine to reuse bands and jars – I buy my lids in bulk after the canning season has ended so that I can save some cash in the off-season. As a result, I like to sterilize my lids to make sure there is nothing to contaminate my hard work.
The old train of thought was that the process of heating the lids helped them seal better, but this is no longer the case. Now, heating your lids won’t necessarily hurt the food you are canning, but it will take some extra time. Therefore, it’s your choice.
You do, however, need to heat and sterilize your jars. Cold jars placed in a hot canner are more likely to break – this is a huge pan that you aren’t going to want to deal with. Run your jars and bands through the sterilization cycle on the dishwasher (or heat them in the oven) before beginning.
Step 3. Prepare the Pressure Canner
You should also prepare your canner. You need to get the canner going with about four inches of water. Put it on low heat until your peppers are ready to go, and make sure it’s nice and clean, too.
Step 4. Boil the Peppers in Hot Water First
Before packing them in jars, first boil your peppers in hot water for about three minutes. This will help them retain their green color during the process…
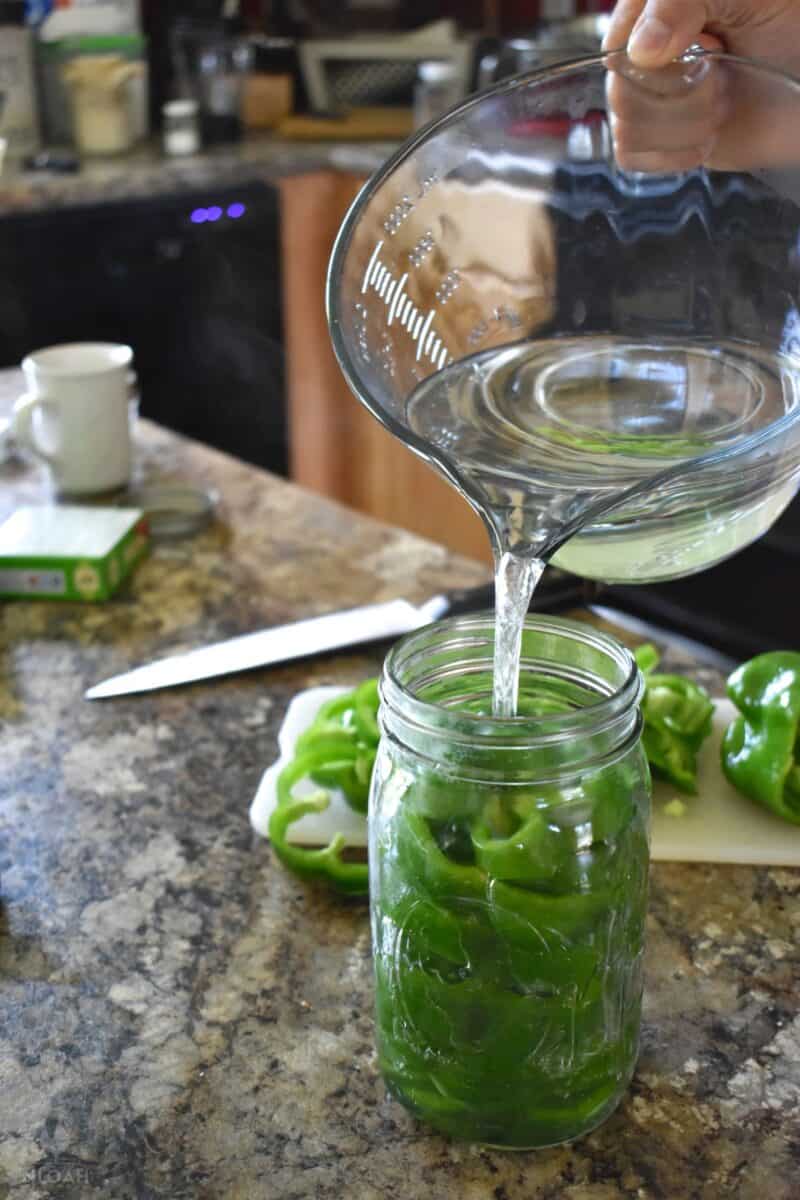
Step 5. Put the Peppers Inside
Got your jars ready to go? Now it’s time to load them with the peppers…
Once the three minutes have elapsed, you can pack your pint or quart jars full. You should be able to fill about 18 pint jars full of peppers if you have a pressure canner that will allow you to double-stack, or five-quart jars.
Some pressure canning recipes will tell you that your canner can fit seven quart jars, and this is true. However, make sure you use uniform regular or wide-mouth jars to allow them to fit nicely – otherwise, you’re going to have to worry about jar breakage.
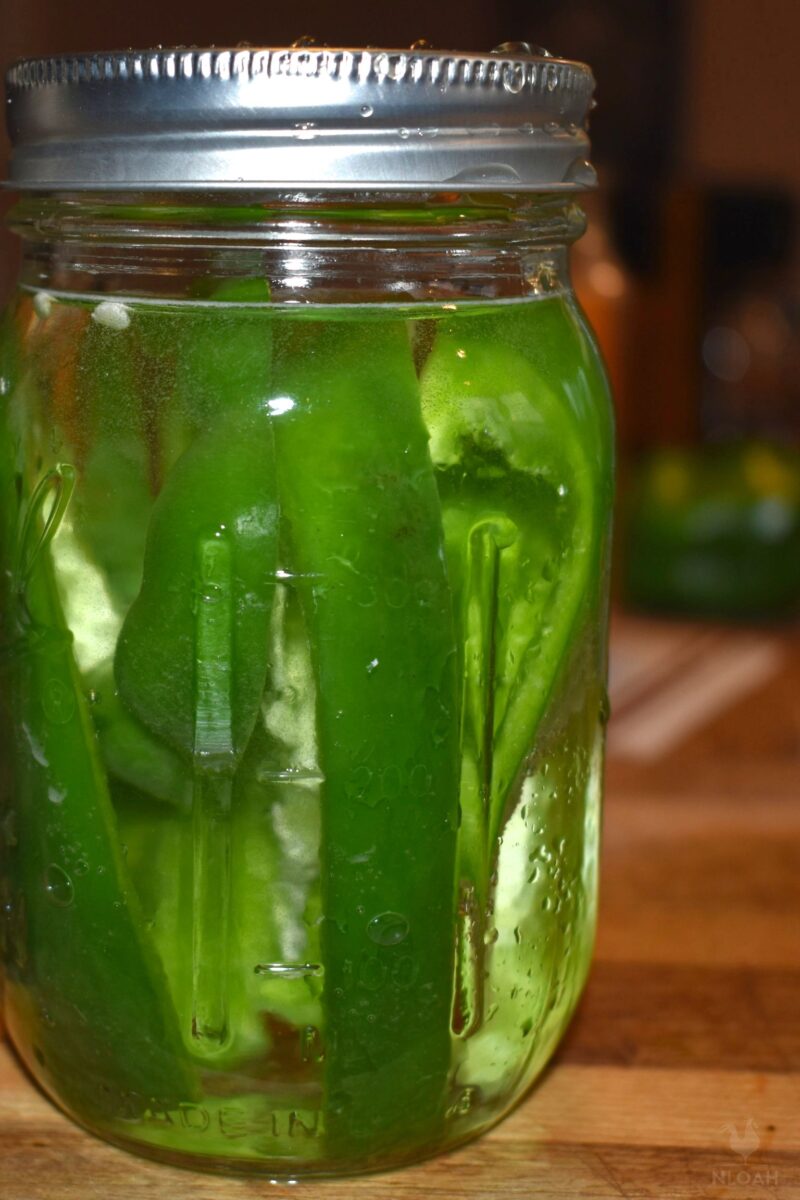
Leave about 1″ of headspace when you pack them…
(Optional) In each one US pint jar add one tablespoon of vinegar, and 1/2 teaspoon of salt (also per pint jar). Divide these by 2 if using half pint jars.
Step 6: Top up Each Jar With Boiling Water…
…leaving 1 inch of headspace.
Top up each canning jar with clean boiling water and remove any air bubbles:
You can use a ladle if that’s easier for you.
You should use a bubble remover tool made of plastic or wood to do this – don’t use metal, as it can etch the glass. Add more water if needed, then wipe the rims to remove any food particles with a clean damp cloth.
Step 7: Place the Bands and Lids
Once your jars are clean and filled with peppers, you can put the lids on and screw on the bands. Don’t overtighten the bands – this can cause a sealing failure. Tighten just enough so that there is a little bit of resistance.
Step 8. Fill Your Canner
Your next step is to slowly and carefully put each jar into your canner. The water should cover your jars but this is not required if you are double-stacking.
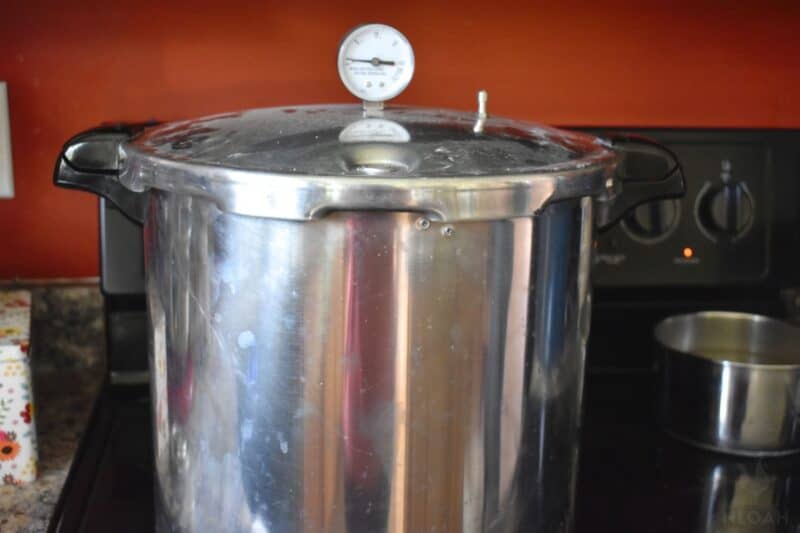
Step 9. Vent the Pressure Canner
The next step is to allow your pressure canner to vent. Make sure your canner lid is nice and tight and twist it into place. Continue heating it with the vent open (or the gauge off).
Let the canner vent steam for ten minutes – this will purge the extra airspace inside the canner. Keep your stove’s heat on high while you are doing this.
Step 10. Process Your Jars
After you have finished venting the canner, you can reattach the weight or close the vent (this depends on whether you have a dial-gauge or weighted-gauge canner – make sure you read your instructions carefully). Then, allow it to build pressure.
You will need to can peppers at a processing pressure of 10 lbs for a canner with a weighted gauge, or 11 lbs for a dial gauge (remember to adjust this if you live at a higher altitude).
| Altitude (feet) | Altitude (meters) | Weighed Gauge (lbs) | Weighed Gauge (lbs) |
|---|---|---|---|
| 0 – 1,000 | 0 – 305 | 10 | 11 |
| 1,001 – 2,000 | 306 – 609 | 15 | 11 |
| 2,001 – 4,000 | 610 – 914 | 15 | 12 |
| 4,001 – 6,000 | 915 – 1,828 | 15 | 13 |
| 6,001 – 8,000 | 1,829 – 2,438 | 15 | 14 |
| 8,001 – 10,000 | 2,439 – 3,048 | 15 | 15 |
The processing time is 35 minutes…
Keep a close eye on the pressure and start timing once you hit 10 or 11 lbs (depending on your canner type). Once it hits your goal pressure, you will want to monitor the heat to make sure it doesn’t drop or rise.
If your temperature is too high, you will want to throttle down the heat every so slightly. If it drops too low, you will need to turn the timer off and start the process all over once you are back at the goal pressure.
Because of this, it’s important that you keep a close eye on the pressure canner while it’s building pressure. Now is not the time to pop out for groceries or even to head into the adjoining room to watch some television! You need to make sure your pressure is remaining stable during the canning process.
Not only can inadequate pressure alter your canning results (making your food either overprocessed or unsafe to eat, or both) but it can also be dangerous. Don’t risk it! Just be vigilant.
Step 11. Let the Jars Cool Inside the Canner
Turn the heat off on your burner. Do not move your canner off onto another burner, because you need to avoid jostling the jars.
Avoid the temptation to instantly lift the canner lid. A couple of bad things can happen here…
Your canner can release all of its steam and pressure as you open the lid – directly in your face, causing severe injury – or it will cause the liquid in your jars to rapidly dissipate.
Don’t try to hasten the cooling. You need to wait until the pressure has returned to zero before you can open it. Let your jars remain in the canner until the pressure has dissipated.
Step 12. Remove the Jars
Once the canner’s pressure reads zero, you can then remove the lid and take the jars out to cool.
Place your jars directly on a clean towel. These should be left to cool out of an area of a direct draft, and you should not leave them on a bare countertop.
This is recommended for several reasons – first, jars can damage a countertop when left unprotected, and second, the cold temperatures of a counter can crack a scalding hot jar.
Step 14: Check the Seals
Allow your jars to cool for roughly twelve to twenty-four hours. Once they have cooled down, check the seals. Press the top of your lids and if they don’t flex or pop, you’re good to go.
Step 14. Storing Your Finished Produce
If a seal has not formed, you should put the food in the fridge and use it as soon as possible – the canning process failed and your food is not safe for long-term storage.
Otherwise, your canned jars can be stored for quite some time in a cool, dry place like a basement, root cellar, or pantry. Rotate your jars and use up the old ones first, keeping a good eye out for signs of spoilage.
Canned Bell Peppers Recipe
Equipment
- 1 Pressure canner
- Canning jars recipe is for pint jars
- Jar lifter
- canning lids
- canning rims
- bands
Ingredients
- 1 lb raw peppers per pint jar 18 lbs if you are double stacking
- Water
- 1/2 teaspoon Salt per US pint jar optional
- 1 tablespoon Vinegar per 1 US pint jar optional
Instructions
- Cut up your peppers into large pieces, taking extra caution to remove any built-up dirt, insects, or other unwanted debris. Look for individuals that are unblemished and have nice, waxy skins.
- Run your jars and bands through the sterilization cycle on the dishwasher (or heat them in the oven) before beginning.
- Prepare your canner. Get it going with about four inches of water. Put it on a low heat until your peppers are ready to go, making sure it’s clean.
- Boil the peppers in hot water for about three minutes.
- Load the peppers into the jars. Add the salt and vinegar if you opted for them.
- Top up each canning jar with clean boiling water and remove any bubbles. Leave about one inch headspace when you pack your jars.
- Once your jars are clean and filled with peppers, you can put the lids on and screw on the bands. Don’t over-tighten the bands – this can cause a sealing failure.
- Fill the canner with jars. The water should cover your jars but this is not required if you are double-stacking. Make sure your canner lid is nice and tight and twist it into place.
- Continue heating the canner with the vent open (or the gauge off). Let the canner vent steam for ten minutes. Keep your stove’s heat on high while you are doing this.
- Can the peppers for 35 minutes at a processing pressure of 10 lbs for a weighted gauge canner, or 11 lbs for a dial gauge (remember to adjust this if you live at a higher altitude).
- Turn the heat off on your burner. Wait until the pressure has returned to zero before you can open the canner.
- Remove the jars from the canner using a jar lifter. Place your jars on a clean towel., not directly on the countertop.
- After cooling, check each jar's seal. Press the top of your lids and if they don’t flex or pop, you’re good to go.
- Store in a cool, dark place for later use.
Other Tips
- This recipe will yield roughly 18 pints – enough for one or two canner loads full, depending on how you choose to stack your jars. Some pressure canners can accommodate two layers of pint jars, but you may need to add a rack in between. Be sure to check the specific make and model of your pressure canner before attempting this. The jury is still out as to whether it’s safe to can peppers in quart jars. I have only ever canned peppers in pints, so to be safe, you may want to stick to the smaller jars, too.
- These canned peppers are quite good for you. One can has just 78 calories and zero sodium if you forego the added salt. It’s also packed with fiber and natural sugars.
- If you can spicy peppers like jalapenos, you might want to prepare them in a separate batch to prevent the cross-contamination of capsaicin. In addition, it’s smart to wear gloves! Jalapenos can dry out your hands and cause them to burn. Even if you think you can tough it out, don’t risk it – it will be really hard to operate a pressure canner when you feel like your hands are on fire!
- You don’t have to add salt if you don’t want to. This is for flavor alone. Some recipes also call for vinegar, but since this isn’t required for the canning process and is merely for taste, that decision is up to you.
- Canning at a higher altitude? This recipe is for people who are at altitudes below 1,000 feet. If you are using a dial-gauge canner between 2001-4000 feet, can at 12 lbs. For 4001-6000 feet, can at 13 lbs. For altitudes up to 8000 feet, can at 14 lbs. If you are using a weighted-gauge pressure canner, you will need to process at a pressure of 15 lbs for any altitude above 1000 feet.
- Finally, some recipes call for peeling your peppers first. This is usually done for cleanliness, but if you wash your peppers thoroughly, you should have all your bases covered.
How to Use Canned Peppers
Canned peppers are quite versatile. Canned jalapenos can be used atop nachos or in jalapeno poppers, while banana peppers make a great garnish a salad or sandwich. Sweet bell peppers, on the other hand, are quite convenient when they are already canned.
You can use them in soups, stir fries, and sauces, giving you an endless supply of peppers to be used at a moment’s notice – no dicing or cooking required.

Rebekah is a high-school English teacher n New York, where she lives on a 22 acre homestead. She raises and grows chickens, bees, and veggies such as zucchini (among other things).
Does adding vinegar make the peppers pickled? Thank you.
Do I have to cook the peppers in hot water for 3 minutes before putting them in the jars? Or can I just put them raw in the jars and continue with the process of canning
Can you do water bath canning with green peppers without putting anything in it so that you have it for like chili and stuff?
I have read a few other recipes that say to blister the peppers in the oven first and remove the skin. Two of them actually use the word nasty to describe what happens when you leave the skin on the peppers. Does anyone have any input on this? I’ll stick to dehydrating until I get this figured out. I’d rather not blister them to further cook them and possibly make the pepper itself mushy in the canning process.
Can you put a canning crisper in with the green peppers to keep them crisp ? also how many peppers do I need for 6 pts? thank you
According to new USDA guidelines there is no need to sterilize your jars if you will be pressure canning or water bath canning your food for more than 10 minutes .
Can I simply put raw peppers into jars, fill with boiling water can bake them? Or what will happen? I likey peppers super crispy otherwise fresh but have an abundance of sweet peppers this year
Can you can bell peppers in half pint jars or jelly jars? I’m a widow and only cook for myself. Small jars would be better for me. If so, how long should you process them?
Enjoyed your post. Thanks.
I too have found that peppers are too erratic to have enough to can. Now I just freeze them as they come in, and when I have enough for fajitas, I dehydrate the rest for soups, stews, and canning spaghetti sauce and salsas. Thank you for the info about tough and bitter peppers!
I water bath my jars and lids 15 minutes first and 15 minutes after all of my food is stored where the lid will seal.
Hey. I just wanted to add that I’ve never used a pressure cooker for canning. Just so that people that don’t have one knows…I put my jars in a water bath after putting the lid on, let it stay in water bath for 15 minutes or so. You can see the lid starting to basically suck in to the jar. I cut the burn off after that and let them sit. They will seal a little while after that. Alot of people don’t have the money for a pressure cooker so they don’t thing they can can their stuff because of that. Thank you for the recipe on bell peppers! I definitely am about to try it. I’ve never canned any simply because I thought they would be too mushy. But I have an abundance and don’t want them to waste this year.
Water bath canning is unsafe for low acid produce, so it is only safe for fruits and tomatoes, and even then, tomatoes need lemon added to increase acidity to a safe level for boiling water bath. Please check with your local county extension office for proper canning instructions for produce grown in your area. Vegetables need to be canned under pressure or pickled to be safe for food storage.
How long should it be processed?
Sorry about that. Processing time is 35 mins.