If you possess at least moderate construction skills and have some “junk” lying around you homestead, you too can build an enormous wood playhouse really cheaply.
I could no longer stand all of the grandkiddos’ toys and ride-on vehicles cluttering around the shelter house. The cost of cheaply-made plastic playhouses that barely leave children room to turn around typically range from $200 to $450 dollars!
I was not going that route to give the kids a fun place to play and those structures surely would not have held even a fraction of their outdoor playthings.
Wood playhouse kits, regardless of their dimensions, are also ridiculously priced – so I was definitely not going that route either. I spent a little bit of time on Pinterest gathering some inspiration pieces and then raided my husband’s pole barn and “treasures” piles to do an inventory of prospective supplies.
Just like I had figured, there was ample scrap wood, left over rolled roofing, some railroad ties, and random sheets of plywood and some particle board concrete frames that would just about give me everything I needed to make a castle-themed playhouse. Of course, I was also going to help myself to nails, screws, and other hardware from the hubby’s workshop to decrease the construction costs further.
There was a rowboat on a trailer included in the many cool things that came with our property. The son and nephew of a man who is buying our last rental home on land contract sometimes come out and do some work on the homestead, and had been eyeing the boat and trailer for several months.
The trailer tires are rotted and needed replaced and some light welding needs to be done on the boat before it can be placed in one of the state park lakes in our county, but the guys are very handy and can do the work themselves. So, I worked out a barter for the building of the playhouse and we all got to work.
Both the theme and the design for the playhouse evolved throughout the three week construction process – we all worked on the project after getting our paid work day in and on the weekends…it was around 100 degrees most days so that may have slowed down our hammering speed somewhat.
Everyone had a hand in the designing and building, even the youngest grandchildren who will be playing inside. My favorite part of the castle playhouse project was not the decorative touches and making the curtains out of bandanas, but using the project as a self-reliance skills builder for not just the kids, but members of our tribe that are not necessarily “tool-inclined”.
How long it takes to make a similar playhouse structure and how much it costs will depend on how much spare time you have, skill level, available materials, and how large you want the play area to be.
I chose to make a raised playhouse because I wanted one half of the bottom to be used as a “garage” for the bikes and ride-on toys. The other half of the underneath of the playhouse will become a sandbox.
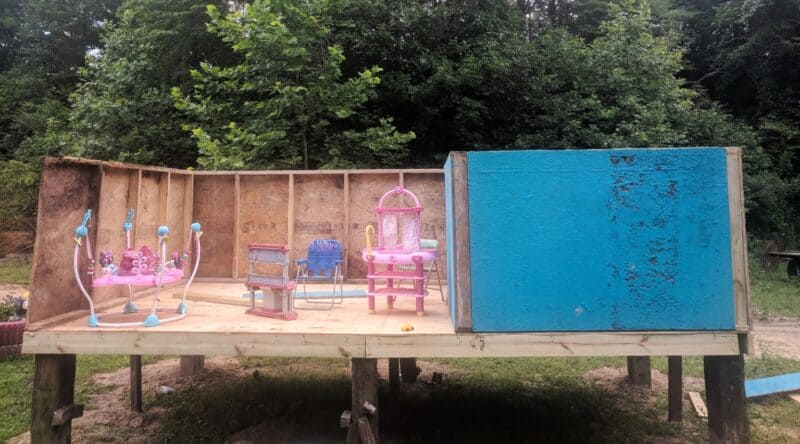
There are two playhouses on the platform, one for boys that has blue interior and red accents, and one for girls that boasts pink interior with purple accents. We have four grandchildren that will be playing in the castle playhouse, so I wanted there to be ample room for them, their cousins, and the grandkids or kids of friends who frequently visit our homestead, as well.
Here is an overview of how we used the salvaged materials and new boards to create the castle playhouse.
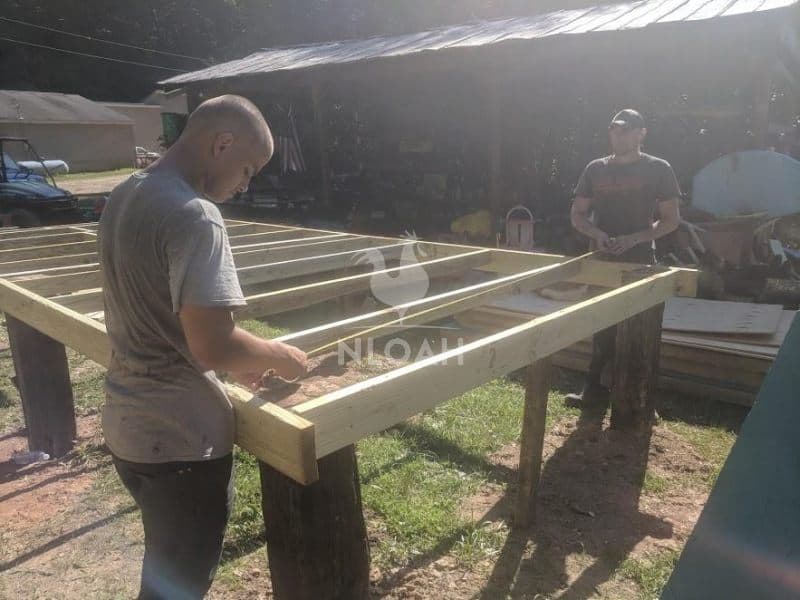
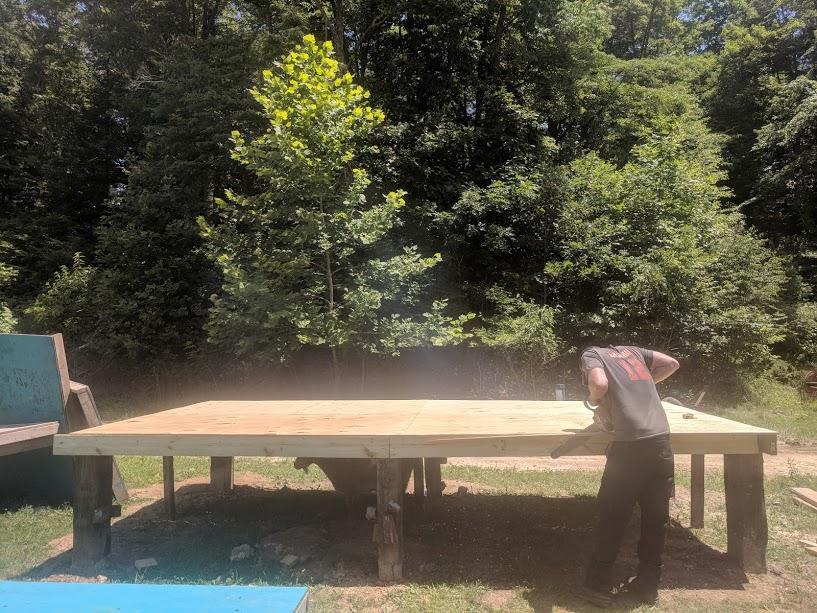
First, my Bobby used his tractor to pull the railroad ties were out of the ground by the old corral where they had been used as fence posts. He already had some tucked away in his pole barn, but we decided that we needed more to support the ends and sides of the large raised playhouse.
We also used some thick 4X6 posts also scavenged from the old corral, as supports down the middle of the playhouse floor. The treated plywood was given a coat of sealer to help prevent the underneath portion from drawing moisture because it was elevated from the ground.
Purchased 8-inch wide boards were used to make a frame for the playhouse structure after the railroad ties and corral boars were placed in holes in excess of 3-feet deep.
Next, the 4 by 6 boards were nailed inside to the frame to be a part of the joist structure that was necessary to hold the sheets of plywood and sustain the weight of the particle board concrete forms being used for walls and the roof.
The frame and boards were checked with a level each step of the way to ensure the structure would be both level and square.
Always measure twice and cut once if you do not want to waste materials and cause a lot of frustration while adding time to a project to correct mistakes:
Another great self-reliance teachable moment. Colt learned how to use a level and must have checked each board in the frame and the joists about five times:
Construction projects like this one, or perhaps giving that unused space in your garage a new look, maybe even turning it into a bedroom, make great homeschooling activities because they not only teach a skill, but can be used as both exercises to increase comprehension and multi-step direction following skills.
Sure, woodworking activities aren’t exactly the easiest for kids, but with you beside them, they can do a fine job. Need I remind you that we ourselves took part in these when we were young?
Once the cross section boards were level and securely in place, it was time to cut pieces for joist connectors. Brea had absolutely no idea how a floor or foundation was put together or how wood was braced to create a sturdy frame.
After watching and ultimately helping with the joist cross section boards, she too got on Pinterest looking at plans and decided to embark on a closet building project in their tiny house cabin – only asking for help with using a saw to cut the boards she had chosen and measured.
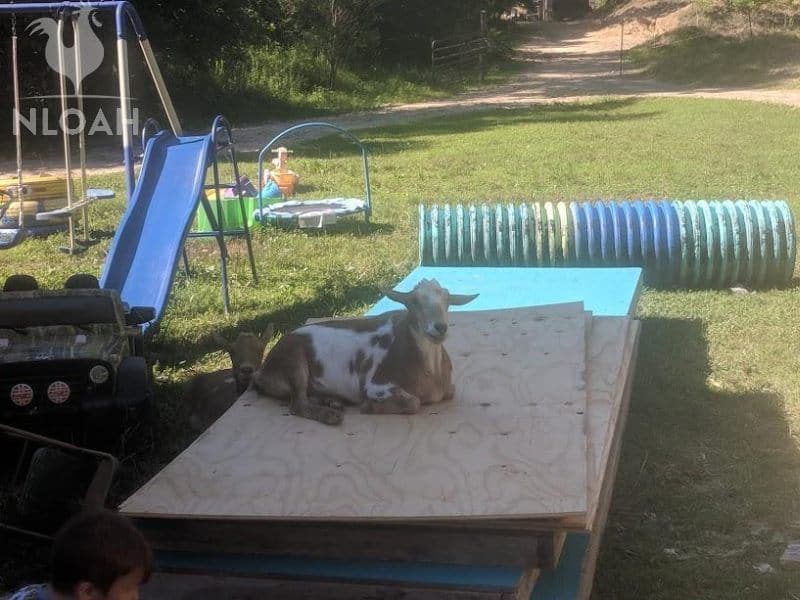
We had the occasional work stoppage when a random goat would decide to sun itself on our cut pieces of concrete forms that we slated for painting and installation.
Since it was easily 95 degrees in the shade on most days and even evenings when we worked, no one complained about waiting for a goat to move along before lifting and packing heavy could resume.
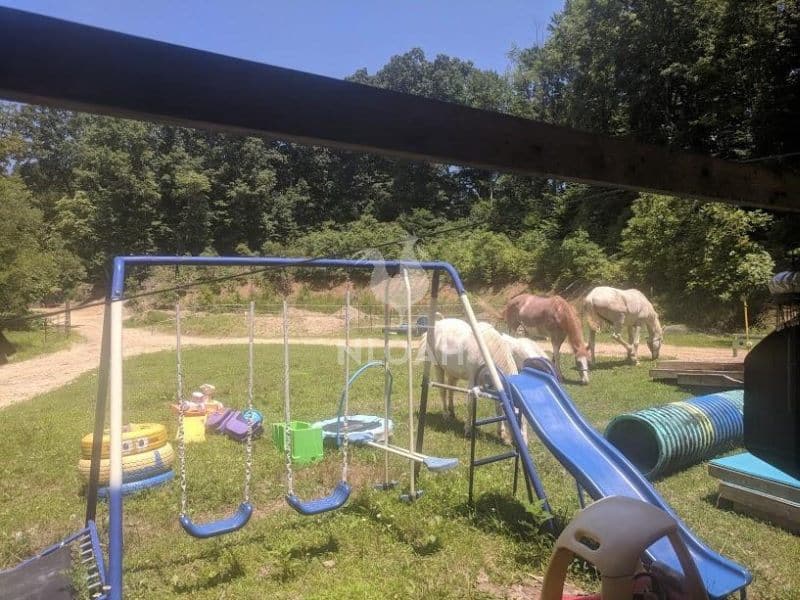
Some nosy members of the herd also wandered down to the shelter house area to see what was going on. Since we free-range all of our animals, we no longer have to cut the grass or weed eat around the shelter house or our home and garages.
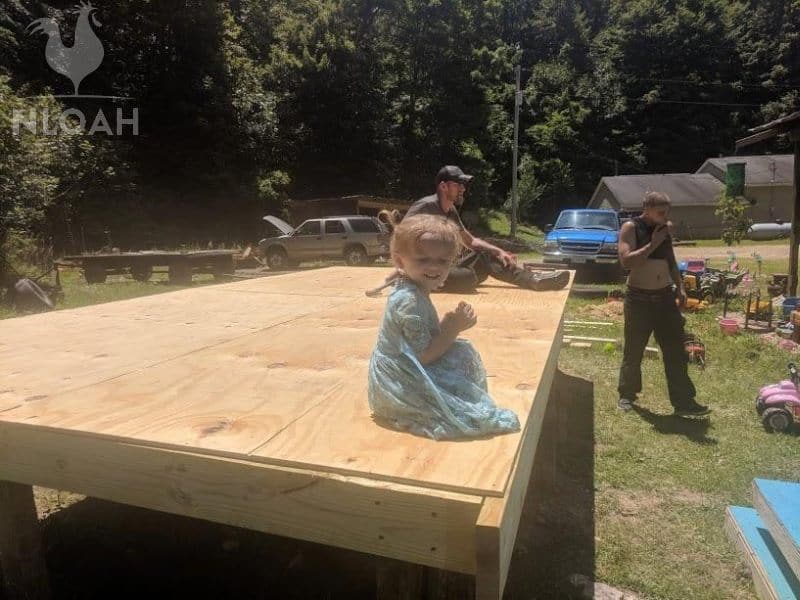
The platform deck for the playhouse was looked over carefully for rough edges where the boards met and a little sanding was done in spots, and the levelness of the structure checked again. There was a tiny bit of an overhang on the front, most likely created by the settling of the old railroad that we cut to fit my desired 3 and a half foot platform height.
Adam, in quite dainty fashion, considering he was using a chainsaw, shaved off the overhang. When you are working with salvaged materials, everything is not going to work flawlessly or be without some blemishes…but the kids won’t mind the slight imperfections at all. As long as the castle playhouse structure is safe and sturdy, I am good with the less-than-perfect nature of used materials.
Yep, that is a goat hanging out underneath of the playhouse platform. Lagertha did not mind the roar of the nearby chainsaw at all. She had found some shade and was going to stand her ground.
Auddie was placed in charge of the final platform stability test. She was tasked with running and jumping on every conceivable spot to determine if the joist were working as expected and the boards were nailed firmly in place and would not give or bow even slightly with typical child romping.
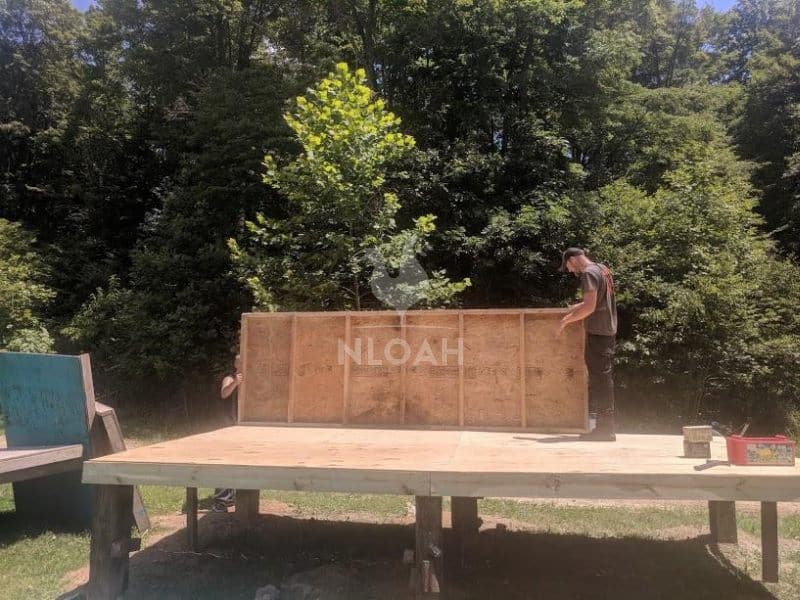
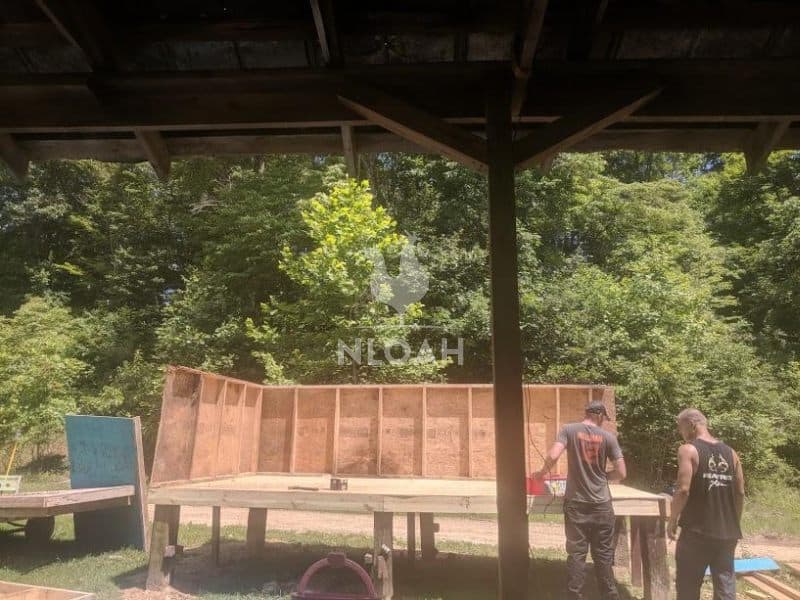
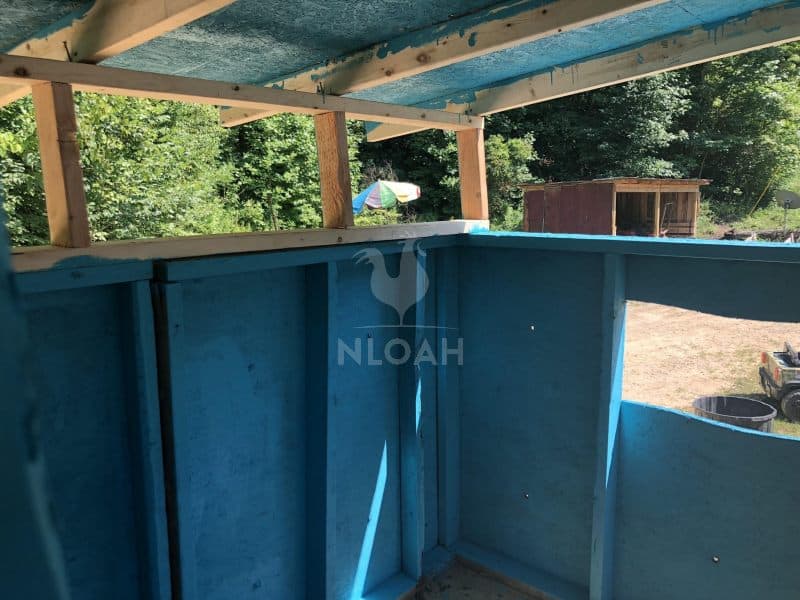
Next the first painted concrete form section was hefted up onto the platform to create a playhouse wall. This was no easy feat, those things are substantially heavy.
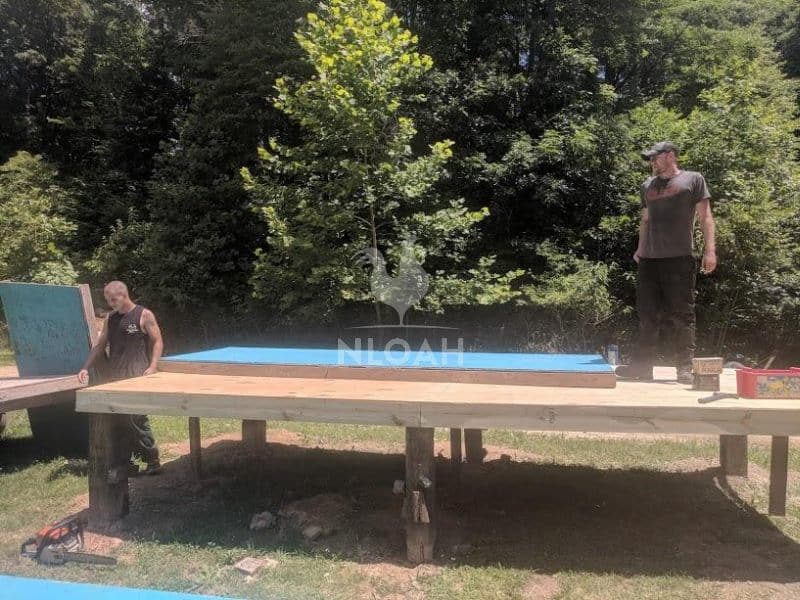
Once the wall was up, it was nailed into place on the platform. The concrete forms were already framed out with joist type divider and top and bottom boards. Having these laying around saved us a ton of money.
The two playhouses on the platform are connected by a hallway, or porch, as the kids call it. Running a solid wall down the back of the playhouse platform not only reduced cutting work, but helped make the walls more stable.
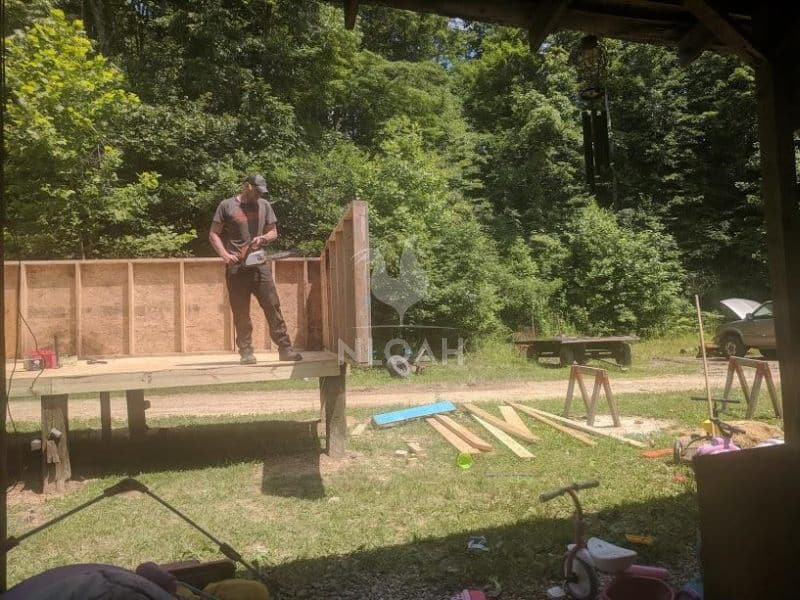
Excess portions of the walls were removed via our trusty chainsaw.
More walls going up. Even though they were heavy, getting the walls secured into place and cut to fit was far quicker than the digging of the holes to set the platform posts and the joist nailing and leveling:
While the guys were working on the walls, Brea, the grandkiddos, and I were busy upcycling some yard sale bargains to furnish the playhouse.
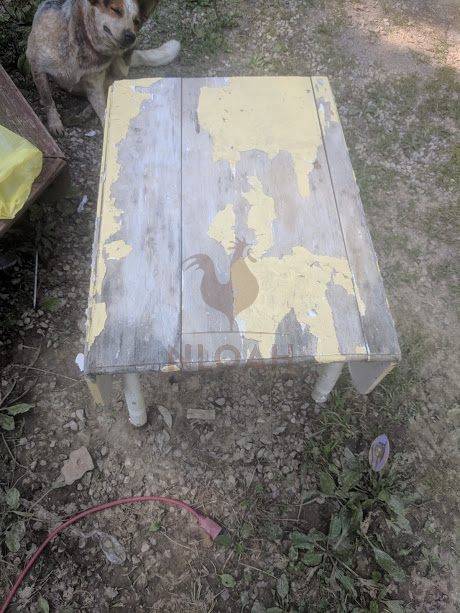
I scored this table at a yard sale for $5. I had to remove the flaps unfortunately, because they were incredibly warped and would surely have pinched little fingers:
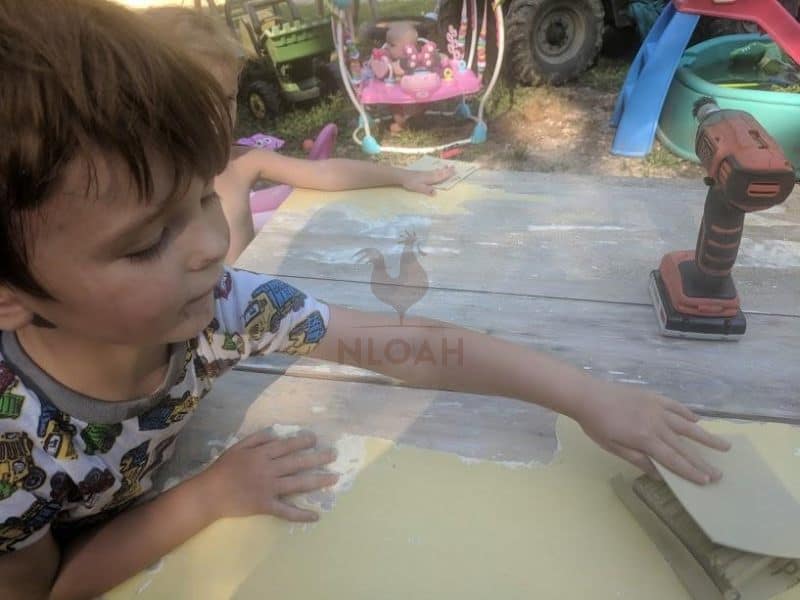
I gave Colt and Audie sanding blocks and showed them how to use them to remove the massively thick layers of old paint:
I also bought a wood play kitchen, the type you used to see in kindergarten classrooms for $5, and a handmade wood doll cradle for $3 to use in the playhouse. They were painted in pink and lavender to match the girls’ side of the playhouse:
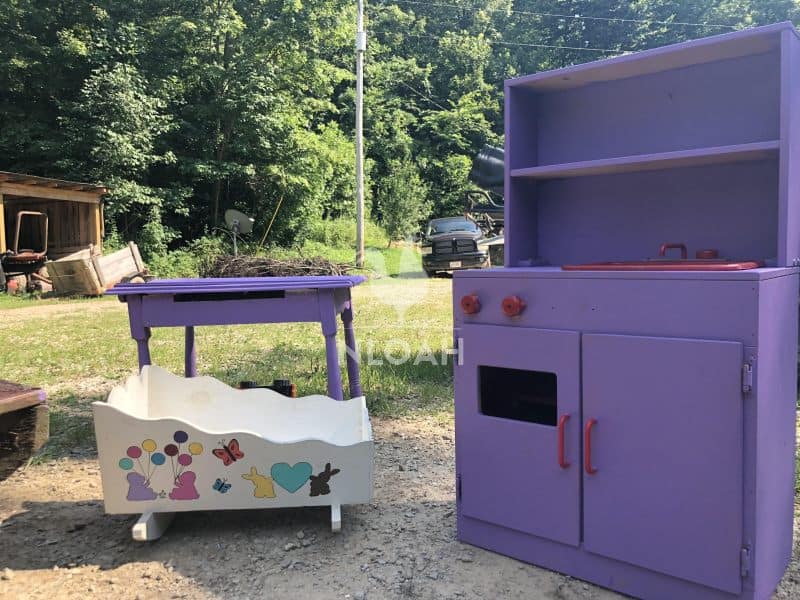
The cradle is not yet painted in the photo, but when it was done I sewed a pillow, mat, and blanket out of pink and lavender fabric (scraps of course) to place inside. The 1950s and 1960s era hard plastic baby dolls I got at the same awesome yard sale for $2 and $3 each, will live in the pink playhouse room.
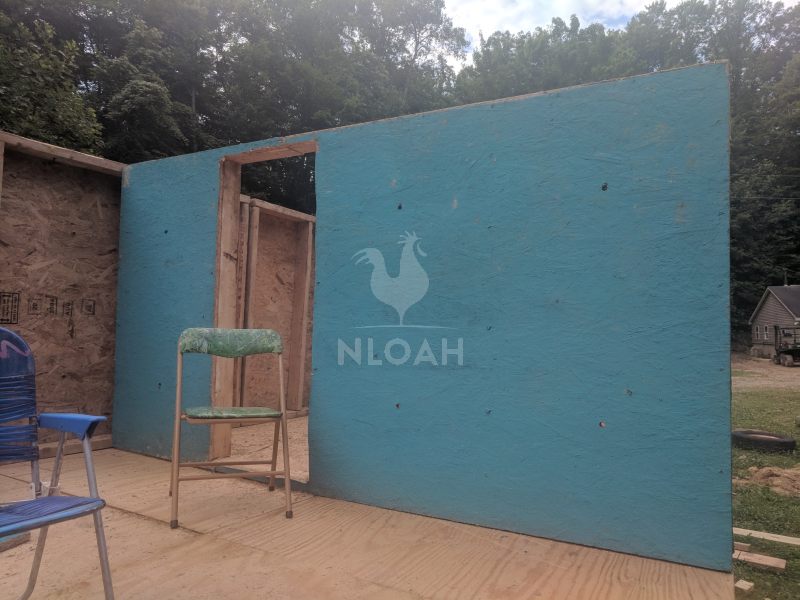
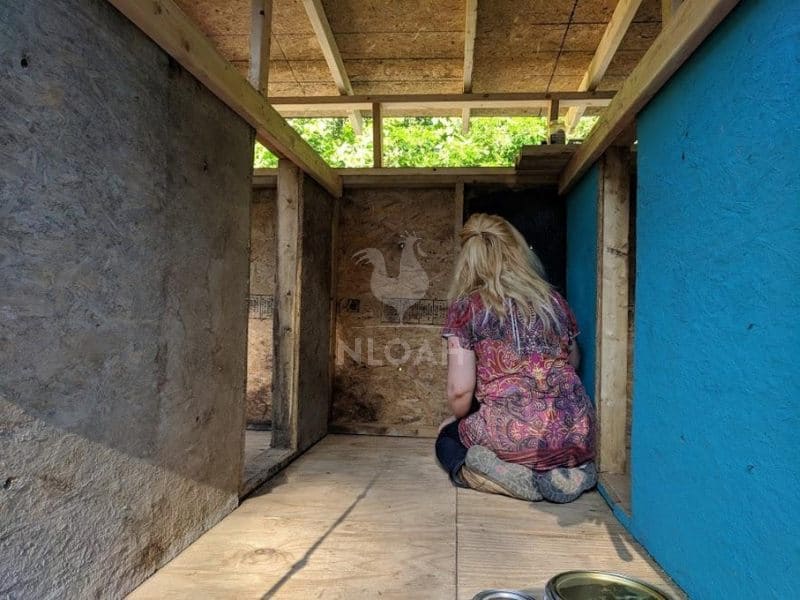
One side of the playhouse is shown here all framed up. I am eagerly waiting for the glow in the dark stars and moon to arrive to stick to the interior of the roof of the playhouse:
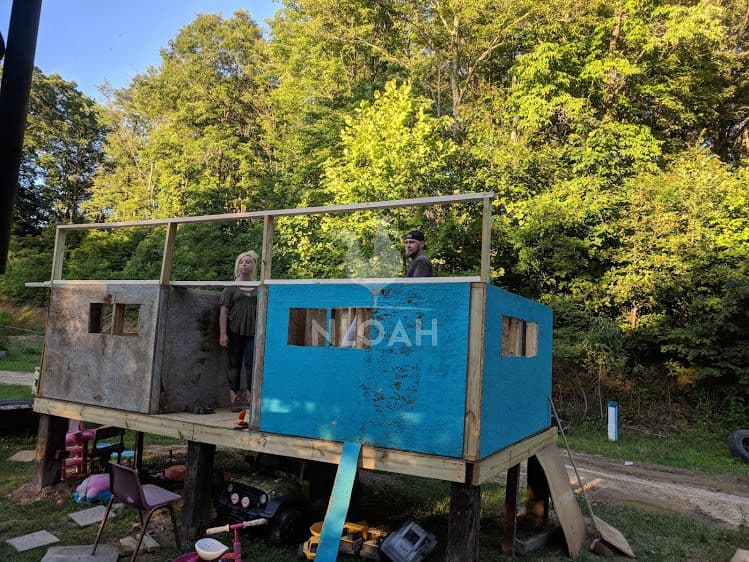
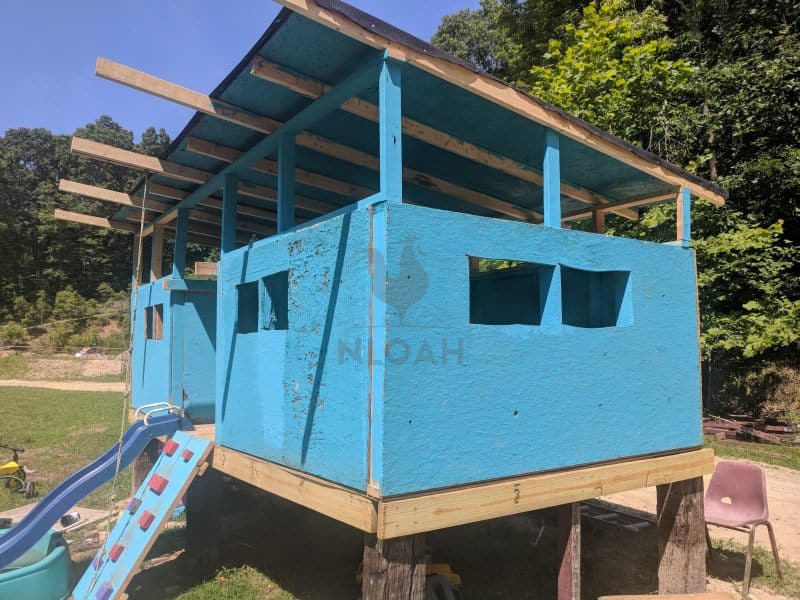
The grandkiddos attempted to move into the “big house” way too early. The dimensions of the entire structure are 16 feet long by 8 feet wide.
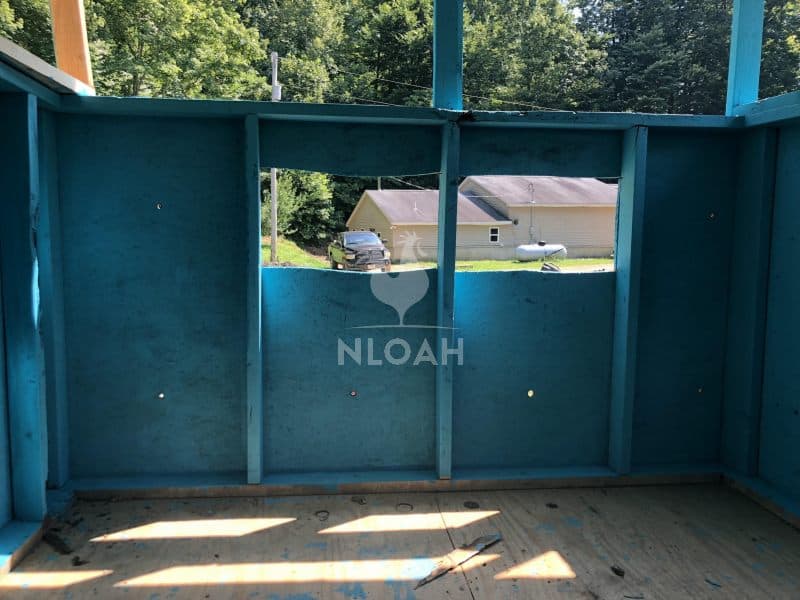
A chainsaw was used to cut a door into the first section completed, and then later cut another door and some windows. A piece of plywood painted in accent colors for each playhouse section will be used to make doors. I bought sturdy hinges and a 2-step lock to keep out unwanted little predators (and goats).
The windows will be screened in to keep bugs and predators out, and to prevent the children from leaning out too far and falling. A frame was built on top of the wall with 4×8 boards to further secure the walls together before the roof was built. The open area will also be screened to create as much ventilation as possible – wood playhouses can turn into saunas rather quickly.
Another reason to add the screen was fiscal. We had ample extra screening from our back porch at our old house, so making use of it on this project saved money and time – stapling screen into place is a lot simpler project than cutting more boards to fit.
Interior of the boys side of the playhouse after it was painted:
A farm theme play mat rug with roadways will be placed on the floor to give the kids something soft to sit on and enjoy playing with. I amy paint a fireplace onto the part of one wall to play up the castle theme.
I used solar landscaping lights and some medieval looking candle sconces a fellow homesteading friend had long ago been gifted by a relative, to create “torches” at the entrance of the playhouse. Some more medieval themed wall plaques courtesy of the same friend, are going to be attached to the walls inside the boy playhouse:

You will get to see all the homemade and upcycled decorations in the final video at the bottom:
I can stand up inside the playhouse without ducking at the narrowest point, I am about 5 foot 3 (maybe) so even older children will be able to enjoy the playhouse. The roof was slanted so rain and snow would run off and not drift inside or pool on top of the rolled roofing that covers the sealed sheets.
Brea is using up some chalkboard paint left over from another project to make a chalkboard wall on the back of the playhouse covered porch area that divides the two playhouses:
Finished chalkboard wall. I think it turned out really well, especially since the base was merely particle board:

Original plan was to have both a set of stairs and a climbing wall, but before either were constructed, I changed my mind. Since a sliding board that I found in the old barn was the right height, I decided I wanted to skip the stairs and go with only a climbing wall and the slide.
I had to repaint one of the foot holds on the wall because I was not supervising the nailing of them and leaving such a task to a man caused a the color design pattern to be off – in my expert female opinion – of course:
A tow rope was used to add some more interest and challenged to the entrance of the playhouse. It was tied around one roof support beam, and then another board was nailed to it.
The slide can be lifted out to remove the pool after summer, or I could just leave it there and add some sand into it or just leave it empty to have a mud-free landing spot.
Even the almost three and almost four year old grandkiddos have no problem climbing up and down the wall safely:
We are going to add a safety gate made out of some scrap plywood to not only serve as another barrier for critters both wild and domestic, but to keep the under two set safe when playing inside.
Because the playhouse is located right next to our shelter house, mommies can hopefully sit and relax a little bit during social gatherings instead of constantly chasing their toddlers around.
One of the best parts of starting any project is a successful conclusion and then using or enjoying what you constructed or fixed.
But, I think the best of the castle playhouse project just might be all the memories our family and friends created when sweating, spilling a tiny amount of blood, and cursing every once in a while putting it all together.


Tara lives on a 56 acres farm in the Appalachian Mountains, where she faces homesteading and farming challenges every single day, raising chickens, goats, horses, and tons of vegetables. She’s an expert in all sorts of homesteading skills such as hide tanning, doll making, tree tapping, and many more.
Awesome job! Where’s the video with the finishing touches?? I can’t seem to find it and I’m super excited to see how it turned out! ?
I will make it myself this week I think. Just got instructions from woodprix and I’m ready to do it 😀