Hay baling is hard work, but engaging in traditional farm chores will vastly cut down on animal feed costs while ensuring meat, milk, and recreational livestock.
Typically, a hay field can be cut twice each year – but depending upon the weather and location of the agricultural land, it could be cut three times per year.
The first cut of the season is commonly some time in late May to early June and the second cut occurs before the end of August.
If the weather is with you or if your survival homesteading retreat is located in a warm climate, it may be possible to get a third hay cutting in July or September.
Is it Cheaper to Bale Your Own Hay?
A question that many contemplate when considering this resource is whether it’s cheaper to bale your own hay or purchase it.
When determining the most economical option, there are numerous factors to consider such as time spent managing and harvesting hay, cost of machinery needed to do so and even storage resources available.
It’s also important to take into account the availability of hay in one’s area and what type of hay is common – knowing how much each type costs from both sources will help make an educated decision.
Where I live, a single round bale of hay will cost around $40 and that will only last around eight to ten days for a single cow. You can see how those costs would add up if you have lots of animals!
So again, you really need to weigh the costs and time involved to decide whether it’s going to be cheaper for you to buy your hay or grow and bale your own…
If you already have the machinery (or access to cheap machinery) and a lot of animals, it will probably be cheaper to bake your own. Otherwise, you will save time and money by buying it from someone else instead.
Types of Hay Bales
The the of hay baler you choose is dictated by basically four factors:
- How much you have to spend.
- How many acres will be baled.
- What type of livestock will be eating the hay.
- Will the bales be lifted by hand or a tractor when being stored and during feedings.
Round Hay Bales
Round bales usually weigh between 800 and 1,500 pounds each. Obviously, these bales will need to be lifted by a fork attachment on a tractor, or rolled from their storage spot to a feeding spot by two adults or strong teenagers.
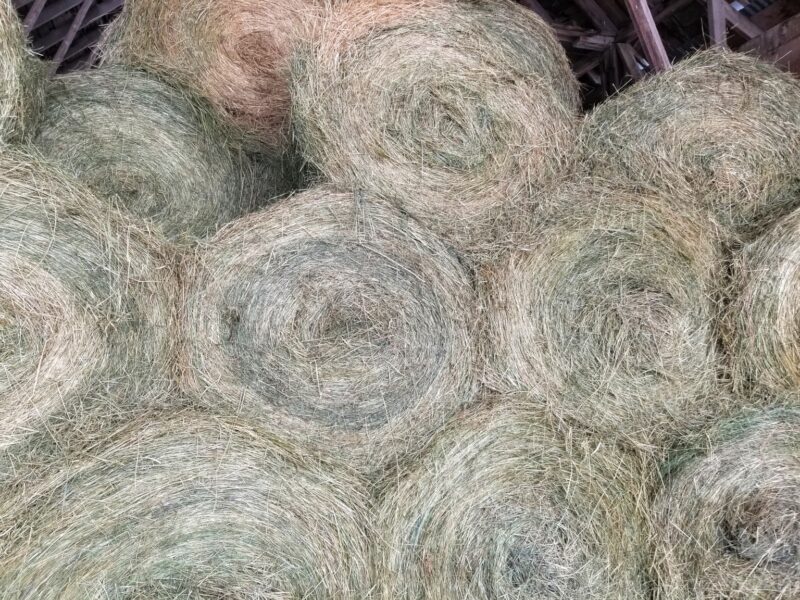
Round bales are great for cattle, horses, and buffaloes. These large animals eat a lot of hay in a short amount of time.
A round bale is lifted into a hay ring in a field by a tractor, and provides feed for several days or longer depending upon the type and number of livestock.
These types of hay bales can be stored outdoors without much concern about them drawing moisture which would make them unsafe to eat by horses.
Cattle, and other ruminant animals can consume a certain amount of moist or slightly mildewed hay that would cause a horse to become potentially deadly ill.
Round bales are more densely packed than square bales, which allows the hay to naturally ferment, helping prevent the mold and rot that can grow during storage.
In just the past several years, mini round balers were introduced to the market.
These bales generally weigh about the same as a standard square bale or are slightly smaller. They can be pulled by compact tractors or even via an attachment to an ATV vehicle.
While round bales are the balers of choice for harvesting hay from large acreage, the mini round balers are best suited for folks who are only baling a few acres, and need winter feed for small to medium livestock, and do not have access to large farming equipment.
Square Hay Bales
Square bales are actually rectangular in shape unless you are harvesting what is commonly referred to as “large square bales.”
The rectangular hay bales commonly weigh between 40 to 55 pounds, depending on how tightly they are packed.
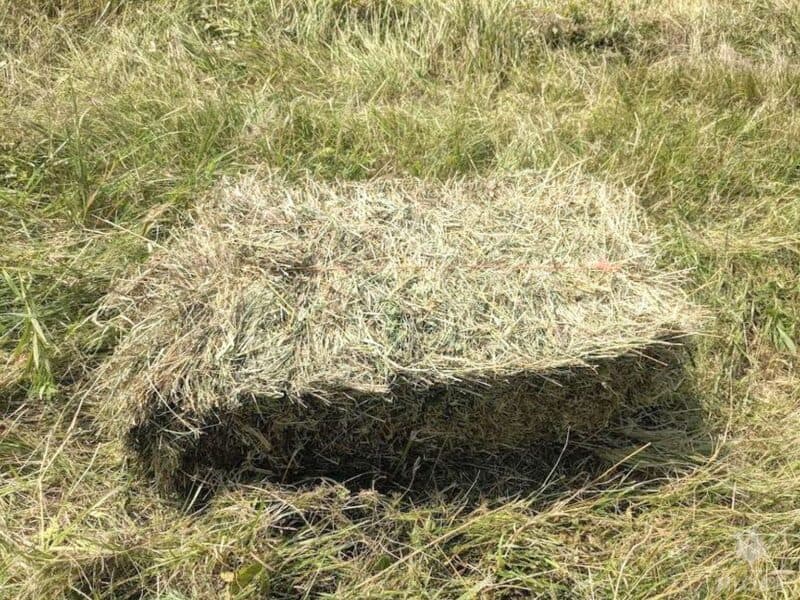
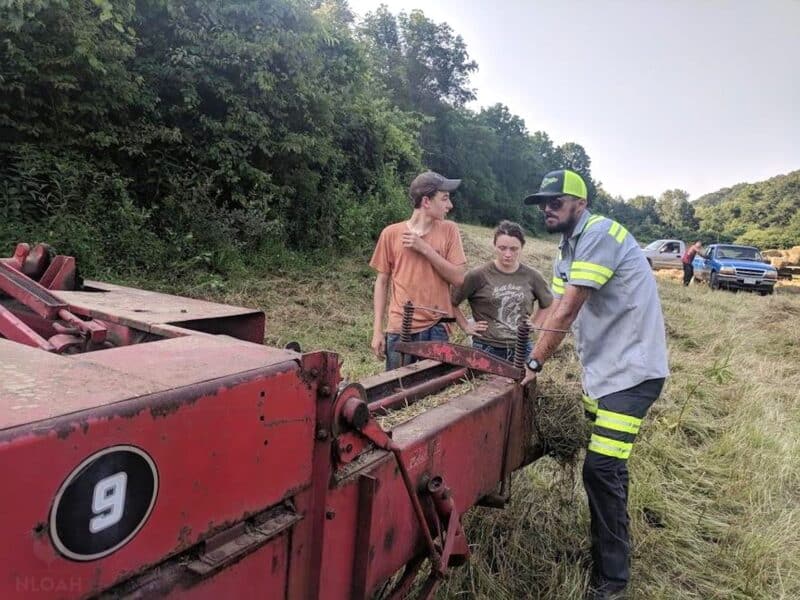
Did you notice this square hay bale above has only one string? Yep, there should be two. A problem with the knotter inside the hay chute caused only one string to attach. This is definitely not a problem you want when in the middle of baling and racing the weather.
The bales that came out like this were a definite 2-person carry to and from the hay wagon. The bales that fell apart were dumped into a hay bin made out of 2X4 boards and hardware cloth, to feed or small livestock.
True square bales weigh between 70 and 80 pounds (around 30 – 35 kilograms).
Hay Square Baler At Work:
While it is more labor intensive to bale square and not round bales due to the typical need to give them some help getting out of the shoot and the manual labor required to hoist them up onto a wagon for transport, they are still favored by homesteaders and farmers who possess medium to large amounts of acreage and are feeding horses and smaller livestock.
Square hay bales do not require a tractor or more than one person to either lift to store or to feed – unless they weigh close to 70 pounds or more.
If your tractor goes down, a young teen to a healthy 60 year old can still manage to lift a square bale and tote it to a feeder.
Goats, sheep, and other medium livestock will not consume as much hay as cows or horses during the same time frame. So, many folks believe there is less hay waste when round bales are baled and fed to the animals.
Square bales are also far more portable, extremely important if you keep horses and go trail riding off your own property, or if you need to pack up the homesteading retreat quickly and take feed for the livestock with you in an evacuation.
Hay Baling and Moisture Tips
Hay bales can spontaneously combust. Ironically, it’s the bales that contain too high of a moisture content that typically go up in flames, and not the sun-baked dry bales.
The high moisture causes a chemical reaction that increases heat build-up. If such a situation is going to occur, it generally happens within six weeks of stacking the baled hay.
If the hay has in excess of a 22% moisture when it is stacked into the barn or closely together in rows outdoors, it will lose some of its forage quality – while increasing the chances of spontaneous combustion.
Always attempt to bale hay when the moisture in the air is neither too low nor too high. Doing so can result in both nutrient loss and the fraying of leaves.
Ideally, the moisture count should not be any higher than 15 to 22% for square bales and mini round bales, and less than 18% for large round bales.
Ideally, you should make hay on a day that is sunny and mostly dry.
How Do You Check Moisture in Hay Before Baling?
To get an accurate estimate of hay moisture levels, farmers must use a hay probe – a device designed to measure the moisture content of large round bales or small square bales.
To do so, the probe needs to be inserted into the core of either type of bale at least 8 inches deep and withdraw five or six samples from various areas across each bale and record the readings. The average value taken from all these readings will provide an accurate assessment for moisture levels in the bale.
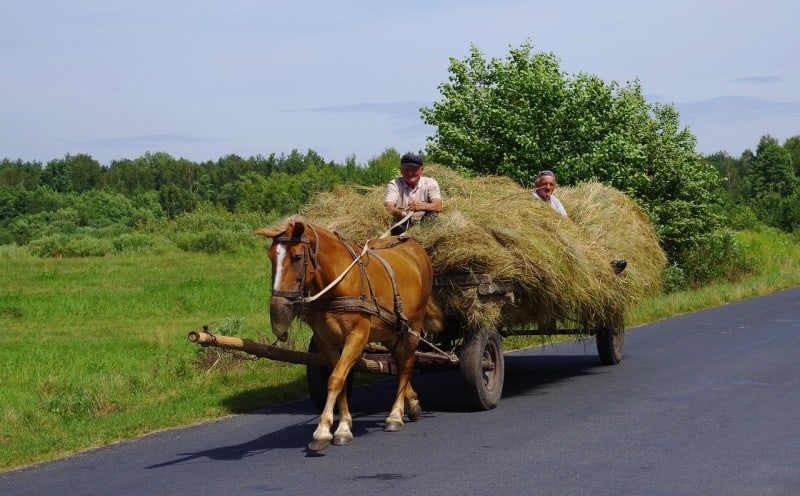
Making and Storing Loose Hay
In this article, I’ll tell you about the primary methods of baling and storing hay that are used in the United States.
There are very few folks here now that store loose hay, although it would be a good option if you don’t have enough to make a bale or to use as a last resort.
To do this, you will want to make sure you have a tarp that can be laid over the hay, which should be spread out on a concrete pad or pallets so it’s not touching the ground. Pile the hay until the stack is tall and then flatten it down if you can.
Most people don’t deal with loose hay for several reasons. Not only is it more sensitive to light and moisture, making you more at risk of fire, but it also can mold more quickly.
You also have to worry about waste and storage space. Loose hay takes up a lot more space than baled hay, and it’s easier to waste it as it spills everywhere.
You’ll also need a reliable method of transporting the hay from field to barn. Most people do this by chopping the hay with simple tools like scythes and hand rakes to collect it from the fields. The hay would be loaded onto a cart or even into a tractor bucket, if you have that kind of technology.
Again, this would not be the way to go if you had several acres to harvest hay from, but could work well if you only had a small plot and a few animals to feed.
Hay Baling Equipment
In addition to the actual hay baler, you will also need several other types of farm implements that attach to the tractor to get the job done.
No matter what kind of equipment you have, make sure you look over it thoroughly and get it in good working order about a month before you plan to start haying.
You may need to get parts for broken equipment, which could delay your harvest if you’re not proactive.
Don’t forget that some hay species, like clover and alfalfa, need to be harvested earlier, too, and factor that into your timeline.
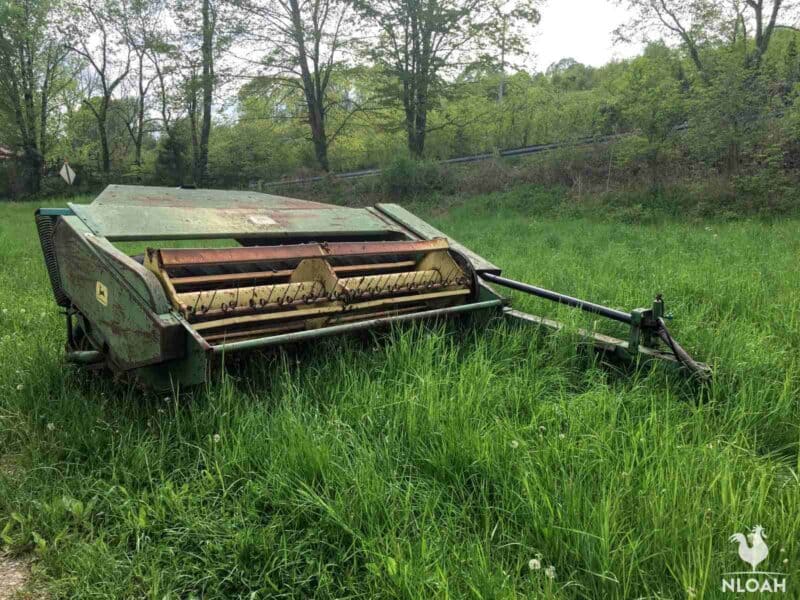
Hay Mower
A sickle bar mower is the most common type of hay mower. They are readily available in a variety of different sizes.
Large sickle bar mowers are also commonly referred to as “conditioners.” They are great for baling especially when doing round bales or working large acre tracts.
Conditioners are exceptionally large and heavy, and usually exceed what a typical farm tractor can handle pulling.
Drum Mower
A drum mower is not powered via blades like a sickle bar mower, but by a gearbox. These types of mowers generally possess two drums and a large disc, with up to 4 free-moving blades attached to each disc.
Disc Mowers
This is a more advanced type of sickle bar mower. The blades on this piece of farm machinery are mounted on many small discs that swing both back and forth along the cutting bar. They are powered by either shafts or gears.
The cutting bar can be adjusted to different heights and moves along slightly above the ground. Typically, disc mowers work well when cutting thick hay – especially if it is clumpy because it is a little too damp.
Brush Hog
A brush hog (also called a bush hog) tractor attachment is definitely not designed to be a hay mower, but can accomplish the same task reasonably well.
Hay Tedder
This farm implement is used to aerate the hay after it has been cut and before it is raked into windrows for baling.
A hay tedder may be considered an optional part of the process, but is highly beneficial because it can help dry the hay completely, and reduce the chances of mildew growing in the bales once they are densely packed and stacked for storage.
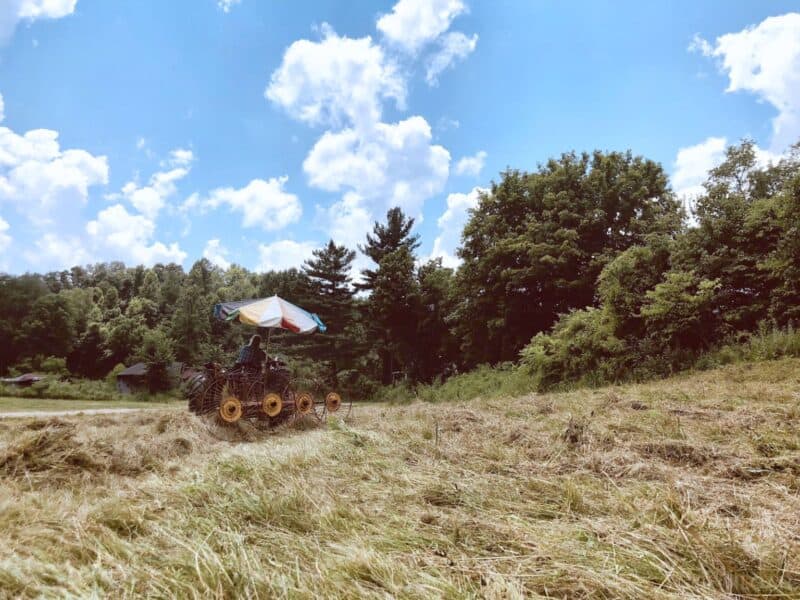
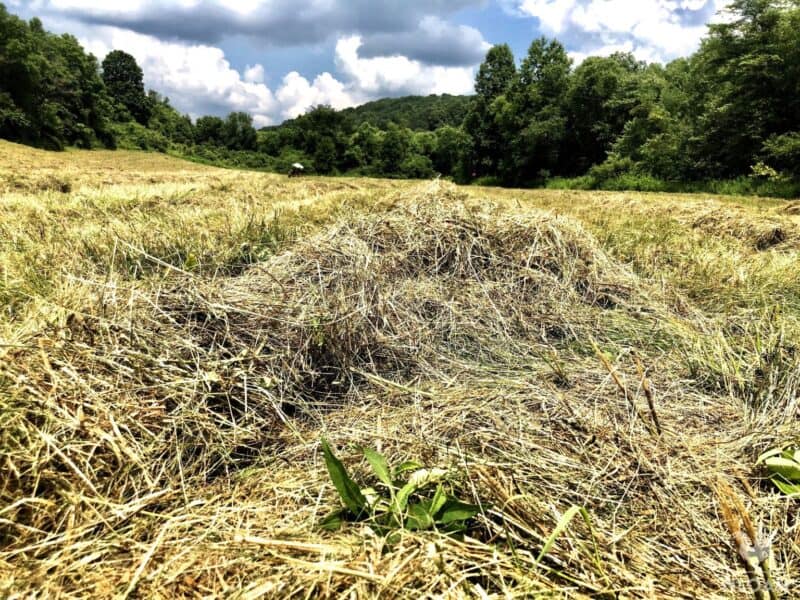
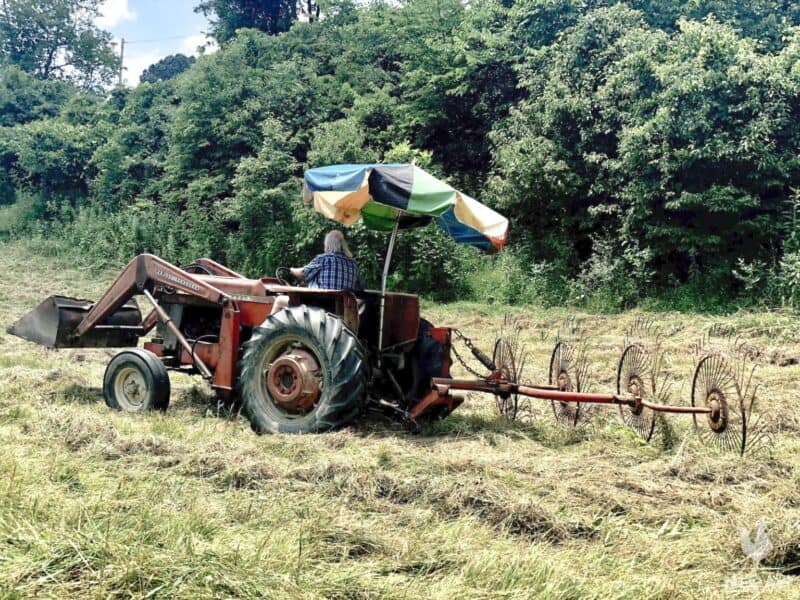
Hay Rakes
A rake is used not only to help dry the hay by a lift and sift process, but also helps loosely pile the hay into windrows to prepare it for baling.
The piles should not be large or tight, but baling cannot occur when the hay is spread out around the field like tossed leaves, either.
The windrows of hay should be raked at least twice, but preferably three times before it is baled to ensure the hay is thoroughly dried.
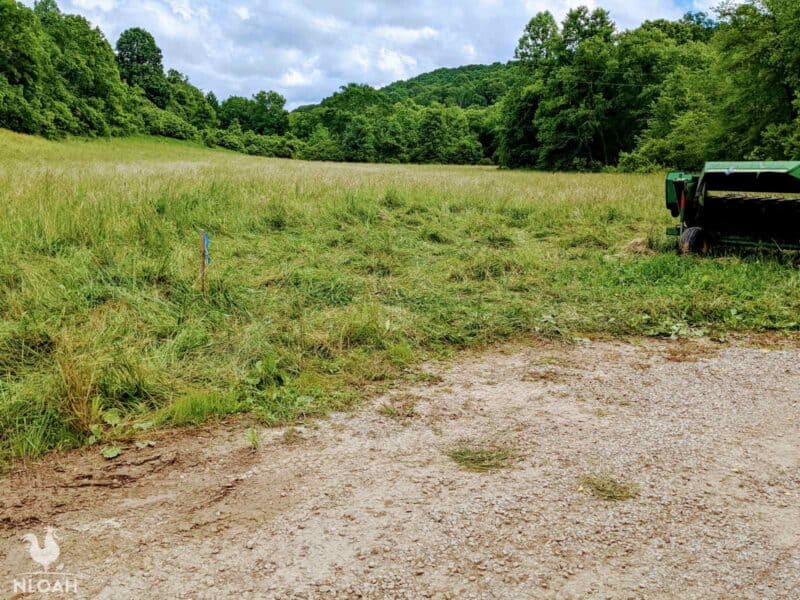
Properly raked windrows should look something like this:
They are thick enough for a baler to easily pick up without missing hay, but not so thick they will easily clog the machine.
Typically, it takes three days to cut and rake the hay properly before baling can occur. Watching the weather and crossing your fingers is a homesteading act that began in ancient times and continues to this day.
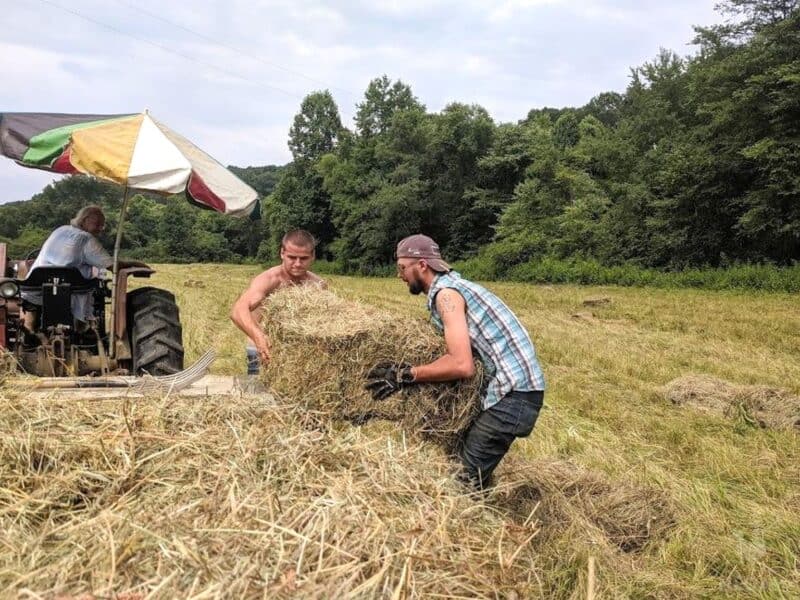
It helps to have as many hands as possible around when baling hay – this is definitely not a one or two person job if you want to get the hay cut, raked, baled, loaded, and stored before the weather changes.
On our survival homesteading retreat, both men and women from teens to folks in their mid-60s work together to get the hay in during the two annual cuttings. Without fail, at least one person will wipe their sweaty brow when it is all over and say, “That is the toughest workout I have had since high school or leaving the military.”
There are several different type of commonly available hay rakes:
Rotary Rakes – They rake in a motion which more or less fluffs up the hay and tends to work well with thick or damp hay.
Wheel Rakes – This type of hay rake is perhaps the most popular on both small and medium farms. The simple machines are relatively easy to repair when it is necessary and are known to be incredible.
If your land is rocky, a wheel rake might cut too close to the ground and toss some gravel or small rocks into the windrows, as well.
Belt Rakes – This style of rake also tends to work well on thick and damp cut hay, without cutting too close to the ground gravel or dirt can be tossed inside the windrows.
They are lighter weight than a wheel rake and most models are designed to rake larger than the common 10-foot-wide area.
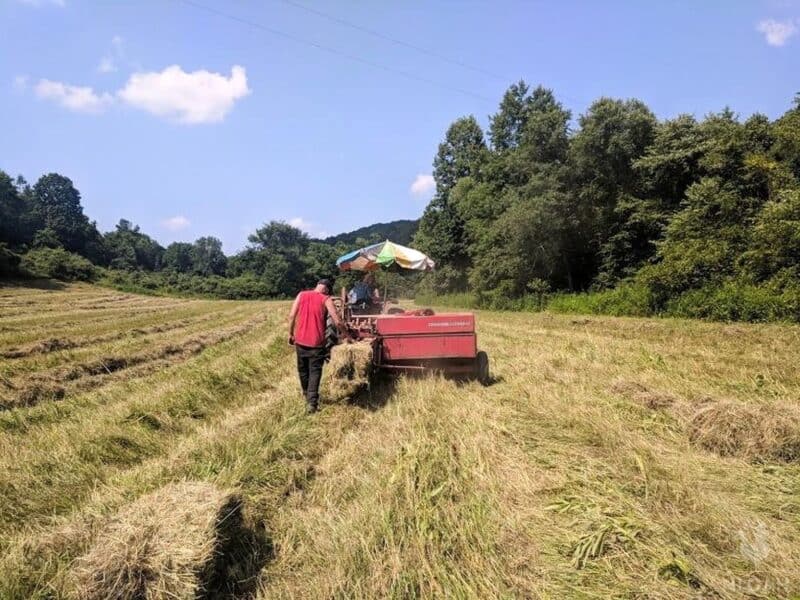
On a square baler, one bale of hay comes out of the shoot after a mechanical mechanism cuts the string and immediately begins binding the baling string around the next bale.
In a perfect world, no one would have to walk behind the baler to make sure the completed bale falls out as they should, but unfortunately, we don’t, so we’re often using aging or new-to-us equipment that demands some human attention while in action.
Each tractor and hay baler work basically the same way, but not all balers are suited for all tractors:
You do not necessarily have to use the same brand of hay baling equipment as your tractor, but the type of hitch, load maximums, and hydraulic requirements will dictate what farm implements will attach AND function properly with your tractor.
How to Bale Hay With Equipment
1. Check the weather forecast and plan the process when at least three days of no rain and low humidity is forecast.
You will want to wait to hay until the leaves are fully developed but the seed heads are not. This is when the hay will be the most nutritious.
2. Cut the hay after double checking humidity levels. Match the height of the deck of the cutter to the ground’s contour – this may mean making adjustments if the hay field is not level throughout.
It’s not difficult to cut hay in a rolling pasture, but the setting on the hay mower must be adjusted accordingly every time the terrain changes.
3. The day after the hay is cut it is time to start raking. It typically takes two passes around the hay field to fully sift the hay cuttings and loosely pile them. This is why raking three times (weather permitting) is recommended.
4. After the hay has been cut, you’ll want to start tedding within a day. This will aerate the hay and spread it out so that the sunlight and warmth of the sun can dry the hay. Turn the hay one to three times over the course of three days.
5. Now the real work begins, baling the hay. This is long, hot, and hard work – even if you are using a tractor to pick up each round and put it on a wagon for hauling.
It always makes the baling and loading process go more quickly if the hay wagon can be pulled nearly alongside the tractor pulling the hay baler so the completed bales can be tossed up for transport as soon as they are ready.
Keep the hay baling chamber on the machine as full as possible – but not overly stuffed. When the baler receives too much hay too quickly, jams will occur. When you get a jam, shut down the tractor as quickly as possible and remove the hay – which may be either too thick or too damp…or both.
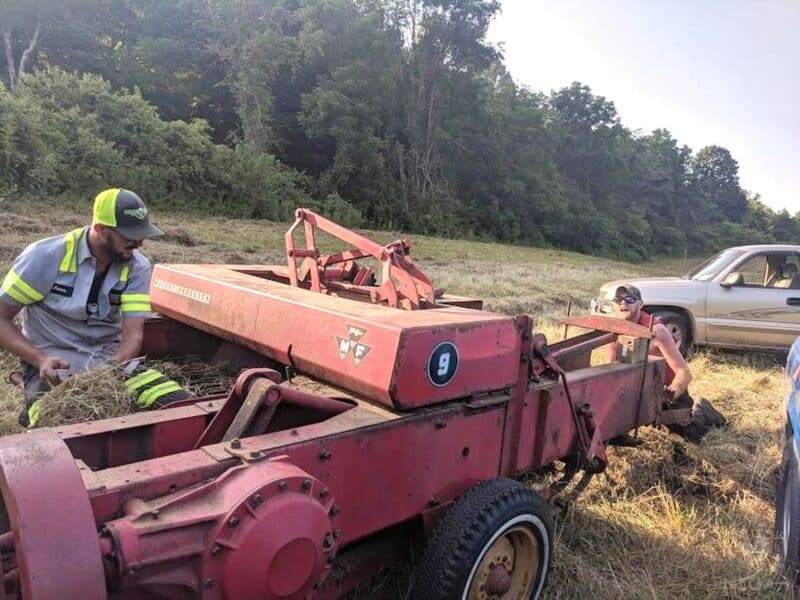
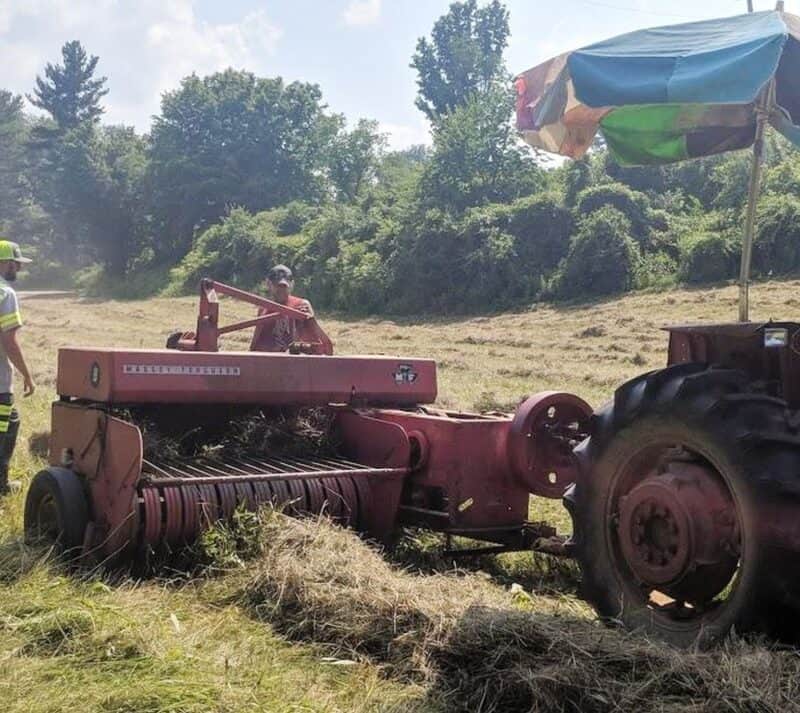
Reaching in with your hand and pulling out excess hay might clear the jam, but more often than not, having one person climb into the front end and perhaps even another inside the chute, will be required to remove the jam.
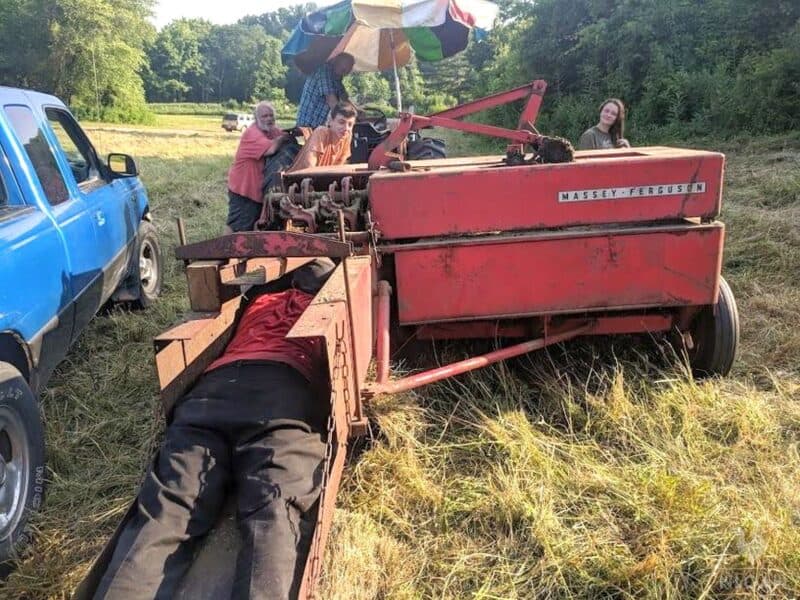
Both Adam (shown in the hay chute) and James (hidden from view inside the hay collection area) are working their way to the opening between the two parts of the square hay baler to remove clogged hay that stopped the bale formation process.
Hay Baler Jam Clearing Video – Frustrated and Overheated Men at Work:
Even a seemingly small hay clog can take about 30 minutes to remove, delaying the hay baling process while daylight burns away or storm clouds are moving in – another reason why raking a third time to prevent damp or clumpy hay is so very important.
When you bale your hay, position the baler pick-up tines about an inch above the ground. That way, you’ll gather less dirt in the process.
And remember, after you’ve done one or two “test” bales, check your baler. Make sure the hay is the width and density you want it baled at.
Hay Baling Tips
If you get overly anxious and cut your hay too early, when it is just barely tall enough to cut, the bale yield can be substantially decreased.
If you wait too long to cut or attempt to get in a third cut that is not quite ready, you can wind up with hay that is devoid of the beneficial nutrients the livestock will need to remain strong and healthy during the winter.
Cutting hay past the recommended season, which may mean even early September through October, can cause you to not only end up with bales that contain far too much moisture, but will not dry thoroughly and cause mildew to grow – and possibly cause frequent clogging and baler damage in the process.
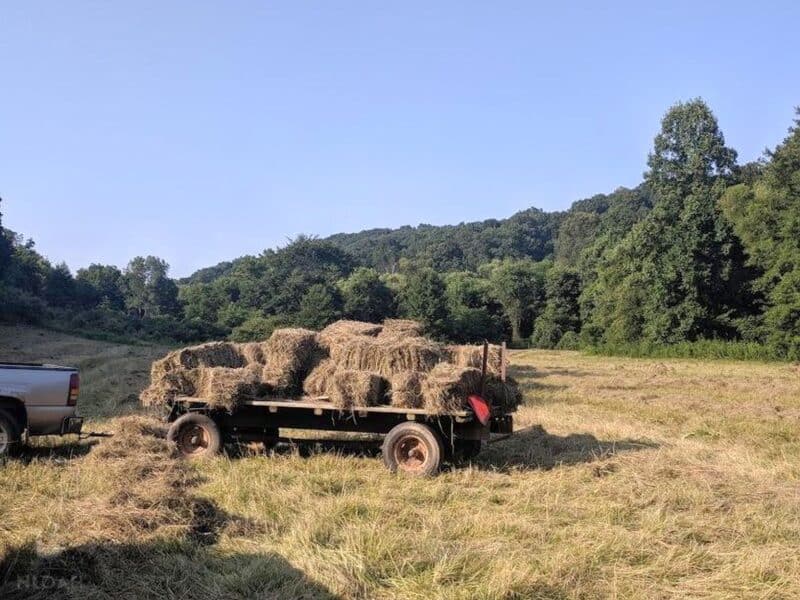
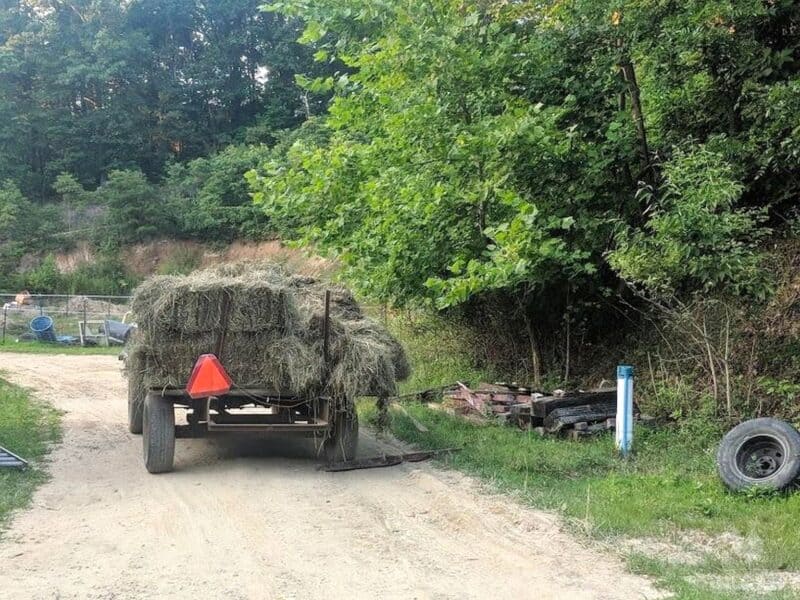
Once the hay is baled, it must be transported either onto a hay wagon or truck to reach its storage area. The further it has to be driven the rougher the terrain, the more wear and tear there will be on the bales. Loose bales often fall apart during transport, or while being unloaded from the wagon for storage.
When the last wagonload of hay is making its way to the barn, your exhausted work crew will usually hoot and holler with excitement in spite of being tired, dirty, and very sweaty.
Best hay baling tip I can offer – have food and cold drinks waiting for the hay baling crew so they come back again the next time your fields are ready!
How to Bale Hay By Hand
Say what you will about modern technology, but there’s something to be said for the old-fashioned way of doing things—especially if you happen to be a farmer. If you don’t have access to the latest farming equipment and are wondering how to bale hay by hand, then read on! You can bale hay by hand – but be prepared to break a sweat.
Gather Your Supplies
Before you can start baling, there are a few supplies you’ll need to gather first. You’ll need some type of rake or pitchfork and a scythe or sickle for cutting your hay.
Other helpful tools include gloves and a wheelbarrow or wagon in order to transport your cut hay. Once you have all the necessary supplies, it’s time to roll up your sleeves and get to work!
Cutting Your Hay
The first step is cutting your hay, which should be done when it is still young and green. Use your scythe or sickle to cut the hay close enough that it will dry quickly without losing too much moisture. Work slowly and carefully as this part of the process is crucial for ensuring good quality bales later on.
Make sure not to cut more than two-thirds of any one plant at once as this can damage the grass roots and make harvesting difficult. Once your field has been sufficiently mowed, use your rake or pitchfork to turn over each piece so that it dries evenly on both sides.
Baling Your Hay
Now comes the fun part! It’s time for balin’! Start by gathering together several pieces of dried hay into small piles around 4 feet long by 1 foot wide. When gathering these piles, take care not to compress them too tightly; rather, try leaving some space between each piece so that air can circulate freely while they are drying out further.
After each pile has been formed, use twine or rope (or even an old belt!) to bind them together firmly into individual bales before moving onto the next pile until all your hay has been properly bundled up.
Hay Storage
If you’re storing hay, remember again that it needs to be kept mostly free from ground moisture and runoff. Keep it up off the ground to protect it from the dampness.
In most cases, square bales should be stored indoors. They need to be kept somewhere that is not susceptible to leaks or runoff. This is why most people store their hay in a loft.
Don’t stack them all the way to the ceiling. Not only can this block circulation, but it can cause them to come into contact with a light – a fire hazard for sure.
When storing square bales, make sure you do it so that the bottom layer is on its side with the strings facing sideways, not up. This will allow for better air circulation.
You can stack the second layer with the strings facing up and perpendicular to the first layer. The third layer should be perpendicular and so on. This will make it more stable and easier to manage.
Round bales can be stored a bit differently. You will want to, again, protect your bales from runoff by placing them on something like an old tire or a pallet.
Make sure they are covered with a waterproof layer, ideally a tarp. You can also wrap your round bales, if you have the technology to do that, which will help prevent moisture and mold.
Be careful about stacking round bales. This can pose the risk of moisture being trapped and will also make it more difficult for the bales to dry out. You’re going to be at an increased risk of fire.
No matter what kind of hay you are storing, make sure it’s kept dry. Check it often to make sure it’s not too hot. Don’t panic if you see some “sweating” in the first few weeks.
A bit more heat during this time is normal as bales will go through the typical heat cycle that’s associated with fermentation.
You should also avoid storing hay in the same building as your animals. No matter how safe you are, storing hay always presents the risk of fire.
You can test the moisture of your hay by using an electronic moisture meter. Check all hay (or at least a wide sampling of bales) to look for “slugs” – or bales that have oddly high moisture readings.
Usually, the temperatures in most bales will stabilize within a few days or weeks. However, it’s important to keep monitoring to make sure conditions are ideal.
If you want to test without a thermometer, all you need to do is insert a one-inch metal rod into the hay. Leave it there for about ten minutes.
If you are able to hold the rod in your hand when you remove it, the temperature is safely below 130 degrees.
If it’s hot to the touch, it’s too hot and a fire is imminent. You need to call the fire department and get away from the bale. Don’t try to move it – it will expose it to oxygen and worsen your situation.
And if your metal rod is uncomfortable to hold, you should start taking steps to cool down the bale.
Finally, remember that the quality of hay does decline over time. Try to feed older bales first before moving on to the next year’s crop. The longer it sits, the less tasty – and less nutritious! – it will be for your animals.
Bale Haling FAQ
Yes, but don’t let the hay dry out too much. Cut early in the morning and bale right away as soon as the dew has dried off but don’t wait too long or your hay will lose its moisture content and be hard to handle.
This depends on a variety of factors, including soil quality, climate conditions, and more. A 50 acre field should produce anywhere from 1-2 tons per acre of hay depending on those factors mentioned above.
This varies based on climate conditions but typically one can harvest between two and four times per year depending on where you are geographically located. In regions with warmer weather, farmers can usually get up to four harvests per year.
Yes – if your hay gets too dry before baling then it could lead to over drying which could cause problems during storage such as mold growth and even spontaneous combustion.
No – raking is generally only necessary if you are trying to spread fertilizer or break up clumps before baling since it helps even out the ground prior to harvesting.

Tara lives on a 56 acres farm in the Appalachian Mountains, where she faces homesteading and farming challenges every single day, raising chickens, goats, horses, and tons of vegetables. She’s an expert in all sorts of homesteading skills such as hide tanning, doll making, tree tapping, and many more.
You didn’t mention wrapping round bales. I cannot fully express what a difference this makes. I’d rather have one roll wrapped thats 3 years old than 3 roles of unwrapped hay that’s one year old. The quality is really that much better. Also relevant is the size of rolls. The same amounts of water absorbton will had regardless,about a foot or so, but on a 6×6 thats so like 15%, on a 5×5 it can 35-45 percent that’s been affected.
As to a crew, if you piss off your dad JUUUST right you can get the full Monte. Truck, 40′ trailer, 500 bales of alfalfa, and your solitary ass to drive, throw em up, crawl up and stack, repeat. 103°F in West Tennessee, humidty so high you don’t sweat, it’s Osmosis. And better be under the barn at five pm. Not pleasent…
I grew up on a small dairy farm, we used a massy square baler like yours that my dad had bought new in the early 1960s, with a big crew helping he once baled 4,000 bales in one day. Then for several years it would not tie properly and we spent hours working on it, it might go 50 bales and then not tie a few bales, it was like the knifes where dull. Then one day we used a different brand of twine that coop sold and found the problem had been the cheaper twine that we had been using because from then on it tied perfect. It used a metric shear bolt, we drilled it out to a slightly larger size, other than that it was a good baler.
I’d like to add several points;
1. For a small investment, you should be able to get a chute extension that would allow you to pull a wagon behind the baler, and the bales to be deposited on the front of the wagon. Makes much easier stacking. Also, it only requires two to square bale; one to drive the tractor and one to stack the hay.
2. Busted bales (no string, broken knot, busted string) can be broken into flakes and the flakes distributed onto the windrows for rebaling.
3. When I bale, I stack from back to front of the wagon, 4 vertical rows that somewhat interlock, total of 20 bales, and then a cap row of 4 bales that hold the whole thing together.
Good article. Lots of good info. And you are right, baling hay was the hardest thing that I had to get used to when I moved from the city to the farm at age 52. I never worked so hard in my life.
Ray
RayK,
Thank you for sharing your expect tips! We just finished another weekend of working on hay while harvesting and preserving the garden, AND starting to put up firewood, my sore muscles are begging for summer to be over already, but my 95 degrees in the shade loving soul isn’t ready to let go of summer quite yet, lol!