How do you make a free playground area on your homestead? Well, go shopping in your husband’s junk piles, garage, and sheds…of course. Keeping your eye out for so-called junk on the side of the road is also a great idea. Sadly, far too many folks throw away outdoor recreational items simply because they are a tiny bit broken.
I have to sneak to organize or search inside the pole barn or any shed so that my beloved husband does not catch me. Bobby is extremely fearful that I will throw away some piece of precious junk that he might need later or mess up his “organizational system.”
On my wheeler trips back and forth to the barn members of the flock took turns taking rides on both the back and front of the wheeler. This happens on every homestead, right?
Truth be told, I think he is most afraid that I am going to go “shopping” in his pole barn unsupervised…again.
Which I did today while he was working for a few hours at his office in town. My homesteading girlfriends and I have been known to pilfer a thing or too from his barn and treasure piles located adjacent to it. Heaven forbid I snatch one his 10,000 Mason jars for a Pinterest project.
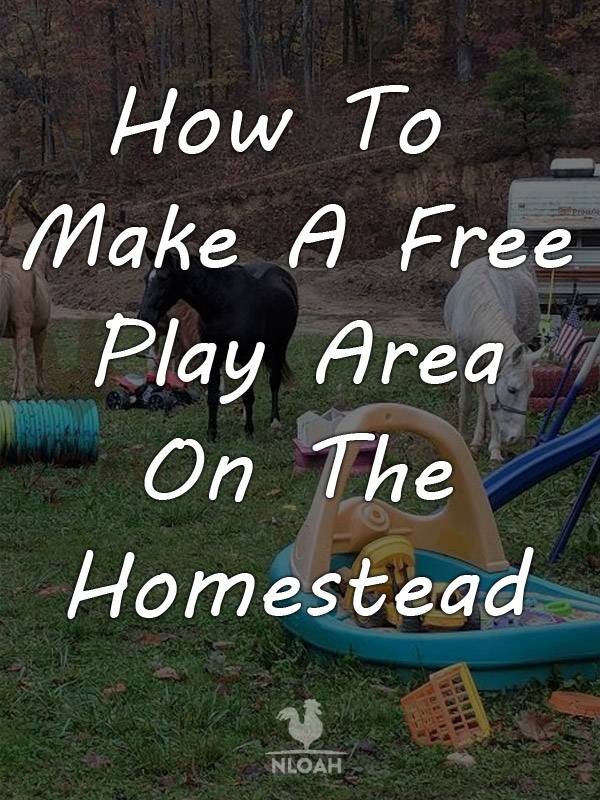
I wanted to make an outdoor play area next to the shelter house for our grandkiddos and the plethora of children who come visit with friends and relatives. When I announced my plans, my beloved immediately saw dollar signs.
I told my hubby I was going to create an awesome outdoor play space for less than $50 – I just didn’t elaborate on how I was going to do it. He was too busy shaking his head in disbelief to question me about the details.
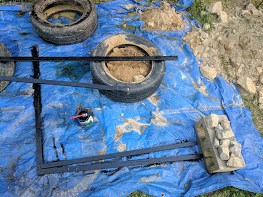
I had to use a trailer attached to the 4-wheeler to transport the materials I snagged from the pole barn and treasure piles to complete the project. It took a few trips to the barn and back, but eventually I relocated all of my cool finds to the shelter house play area.
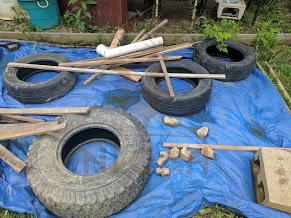
I used a large piece of plastic culvert pipe to make a tunnel – and spray painted it with a cool and colorful design. I took a bunch of thin wood slats that came with the property and created an outdoor race track for our grandsons. I painted them black, put road markings on them, and screwed them into tires to make the road.
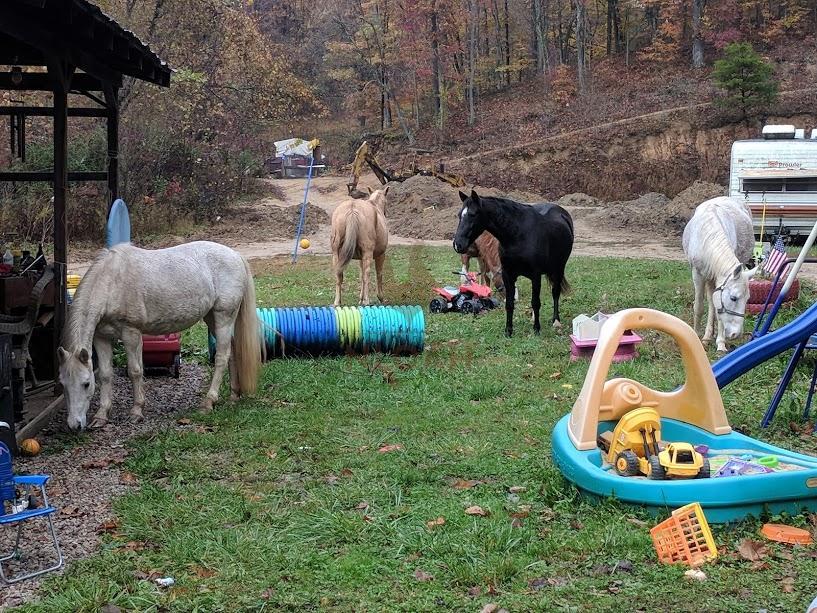
The horses, mini donkeys, and goats love when I let them into the shelter house area to munch in the typically forbidden spot. I love when they come down there to visit to – it means I don’t have to mow or weed eat the area. The painted culvert tunnel has bricks placed on each side so that it does not roll. But, in this photo and as often happens, some of the older kids move the brick so they can stand on top of it and have “log rolling” contests. In the front right of the photo is a Little Tikes plastic tugboat.
This was one of my side of the road finds. It has a crack about as big as my hand in the bottom. Unless you were using the boat as a kiddie pool, it was not ruined. I put some duct tape over the cracked plastic and then taped a plastic tote lid over it and turned it into a sandbox.
Bobby couldn’t figure out how I got it lifted and home by myself since it was too big to fit in the SUV and he had the pickup with him the day I discovered it. I simply called one of his buddies who had a truck and he met me on the road where I stood staking my claim over the “junk.” Things tend to disappear quickly from the side of the road around these parts.
One of the many incredible things about this property is the multitude of junk that came with it – kind of made my Bobby feel like a Kilcher. We worked about $17,000 of somewhat gently farm equipment into the purchase and got to keep all of the junk. Our parents thought we were nuts and would have to pay to have it all hauled away, but we kept every single little bit of it – and dig into the piles that I have tried to sort and inventory, frequently.
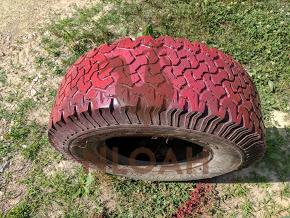
Yes, I stole the tires from the pole barn junk piles too. But Bobby wasn’t unhappy about that since they were useless to him and couldn’t be thrown onto the burn pile. Some were tractor tires, so I used the wench on the 4-wheeler to drag each of them (while driving backwards, I might add) the quarter mile from the barn to the shelter house.
Actually, I not only took all the junk tires, but knew a cousin had some in his garage as well and had him bring them over to me – when Bobby wasn’t home, of course.
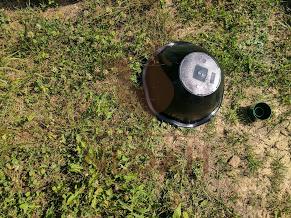
I used some of the tires to turn into cute planters where the kids could grow their own crops. This one was turned into a ladybug. I painted two tires red, stacked them on top of each other and then bought a plastic bowl from the Dollar Tree and painted it black and then drew a face on it. I also used stacked and decorated tires to make themed play spaces. A minion themed tire set was filled with dirt and became a place to play with the dinosaurs that inhabited the space. Another tire set housed farm animals and a plastic barn I picked up at a yard sale for $2 that I screwed into the tires.
Our grandchildren that also live on the homestead LOVE to play outside. They would never go indoors if it was up to them. But, some of the children who spend time here are tech kid and only venture outdoors to play sports. I wanted to encourage and inspire them to spent a whole lot more time being immersed in nature.
They all do nature exploration hikes, visit with the livestock and help tend to them, and go riding on horses, ponies, or the wheeler when they are here. But, when the grownups want to gather and relax in the shelter house, eating a nice meal from the smoker and charcoal grill and sipping on some adult beverages, the non-outdoorsy kids must be enticed to remain outdoors too and not sneak into the house and watch tv or hang out in the playroom.
I used some of the tires and other shopping finds from the pole barn to make an outdoor race track. I used some PVC pieces to make bridges, cinder block to make tunnels and track ramps, a part of an old wood headboard to make a garage – and elevated it all on the tires and screwed it into place.
My Bobby, being a sweetheart of a man, used his tractor to fill all of the tires with dirt and the new to us tugboat with sand. SInce one of our ponds remains in a constant state of progress, there was plenty of both that needed moved. When this pond is finished it will have an island in the center of it with a wood foot bridge leading out to it. The island will serve absolutely no homesteading purpose, Bobby just always wanted to possess his own private island and now we can cheaply make that dream come true.
I had a few small tires, not sure where they came from. I painted them and mounted a painted board on top of them with screws. I mounted a plastic train track and a train depot I got at a yard sale for $5 on one – it came with a cute little train that hangs off the side of the tire in a burlap sack I closed with Velcro. One the other small tire I mounted a painted board a small plastic dollhouse I got at a yard sale for $1 – the roof was missing from it. Some Happy Meal hard plastic dolls I scored at a yard sale for $1.75, hang in burlap sack along with some dollhouse furniture I got at the Dollar Tree.
I upcycled the ends of some plastic Coke and water bottles to make a squirt gun range are for the kids. I painted each plastic end and then screwed it into a pallet I had sunk into the ground with stakes. I keep food coloring in the shelter house so the kids can fill up the squirt guns with colored water and shoot at the target. The like no only seeing how all of the colors mix together, but competing against each other to determine who is the best shot.
You can see the squirt gun target at the back right of this photo. It is just behind the playhouse tent I made using a tablecloth, folding table, and scrap fabric and embellishments.
The tetherball set shown in the back left, was something our grandkiddos already had, so it did not come out of my $50 play area budget. If I had purchased it new, they generally run about $35 at Walmart.
The swingset in the play area looks like new, but it was a cast off as well. One of my husband’s friends cut his neighbor’s grass for her when her mower was broken. She asked him to tug the swingset to the back of her lot because the children don’t like to play outdoors on it and the slide was broken. He asked if he could haul it to a friend’s house instead and the lady was delighted to be rid of it.
How broken was the slide? Hardly at all. It only took Bobby about 15 minutes to weld a piece of bar onto the broken bar that connects the slide to the side of the swingset.
The swingset looks like it only came out of the box last week. I don’t know how old that it is, but only a couple of years I think. It even has a little trampoline attached to the side. When the goats come up to eat the grass, they love to bounce on the trampoline and all the kids, even the indoor techie, stand and giggle at them the entire time.
Not everyone is going to luck into a like new freebie swingset or sandbox, but you can make something similar yourself out of junk and scrap. Some old-fashioned wood and rope swings, a tire swing, and sandbox made out of scrap wood the kids can paint themselves, will bring just as much fun and joy as our cast off store bought stuff – and was the route I was going to take until I got the free stuff. No sense in making extra work for yourself if you don’t have to!
I also used a thin piece of wood and grabbed a half full quart of chalkboard paint left over from another project to make an outdoor chalkboard. It won’t last more than a season or two before I have to replace it, but since it cost me nothing to make, I don’t mind. I hung it on a shelter house post so the roof overhang will protect it somewhat. I hung a basketball backboard, well Bobby did, that came with the property but was positioned in a different spot and higher for older kids, on the other end of the shelter house. It was a little stained and weathered, so I painted it with some of the spray paint I had dug out of the garage and bought at a local discount store for $2 a can.
I also used some craft project scraps and junk from the gardening shed, along with a few soup cans, to make a miniature golf course. I went with a gnome and fairy theme, since that worked with the project left overs I had on hand. The kids set out the holes and barriers however they want and use the plastic golf clubs and balls that I purchased at the Dollar Tree to play.
Don’t be afraid to take indoor toys outside – or turn down a good flea market or yard sale bargain simply because there is no space in the house for it.
I use plastic totes as outdoor toy boxes and keep them inside the shelter house. We do not let a little rain stop us from relaxing and hanging out with friends. If the weather is not warm enough the kiddos have to hang out under the roof with us and need to be kept occupied.
A hand me down pool table now sits in the kid’s area of the shelter house. Even the middle school age children like to mess around on the pool table when they come to visit.
The play area is in the process of getting a major face lift.Like most things on a homestead, it has been a work in progres.
We are tearing down an old corral on the property and will have about 20 posts that can’t be used elsewhere. Due to the chemicals in these posts, I think they are old railroad ties, we don’t want to use them for firewood in the wood burner or to cook on outdoors.
They will be too short when the chainsaw hacks them out of the ground to be gate posts. So, I am going to use them to make an elevated wood playhouse. Now, that might sound expensive, but as long as you are not picking about materials, and I am not, it won’t be.
I am going to go on another pole barn shopping trip and take some particle board, T 1 11 board, and plywood sheet remnants, to make the playhouse frame and floor base. Some scrap metal will be used for the roof of the playhouse.
Since our daughter, son-in-law and their three children live in a tiny house cabin on our homestead, the new playhouse will really give them extra play and toy storage space. I am going to use a slide I found in one of our barns to come off the side of it, make a wall with a rope on another side and eventually, make a zipline coming off of one end. Planters will be added to the railings so the children’s garden area can also be expanded.
I also found another slide, a long twisty one that seems to have been from an inground swimming pool, in the barn. It is going to be mounted by the new pond so the kids – and probably a few adults to, can climb up the hillside and slide down into the water. In the photo on the right, you can see an outdoor toy box, It is a great way to keep older little toys that are hardly ever played with or Happy Meal toys.
I will use scrap fabric to make the curtains and already have a kiddie table and chairs I got a few years ago at a yardsale for $7, to put inside. All of the kids who will be playing in the new structure have been tasked with helping to build, paint, and decorate it – they are all super excited – yes, even the indoor tech kids. I think I am making headway with them and will be able to thwart the nature deficit syndrome they were suffering from!
Scrap wood and old windows, that were part of the junk left on the property, were used to make the growing boxes and cold frame seed starters in the play area garden. This children test the soil, plant, tend to, harvest, and eat or preserve what is grown there. I also created a portion of the box to be a solar dehydrator to use with the kids. A couple broken cinder box pieces, a metal rack that I found in the pole barn and an old screen sourced from the same junk-filled area, and one of the old windows, were turned into a simple but successful solar dehydrator. In the photos, the children are helping me to dehydrate some chamomile to make a medicinal tea. The kiddos have not really caught on yet that the play area doubles as an outdoor learning space, they just know that spending time there is great fun.
The old posts are going to be just tall enough for all of the bikes, battery-powered ride on toys, pedal tractors, etc. to be parked underneath like a garage. This might not sound like an exciting change, but we have amassed quite a collection of those things out by the shelter house since the grandchildren live on the land too and older grandchildren and friend’s children have passed some down.
How much money the playhouse will cost to assemble I do not yet know. Bobby’s screws, nuts, and bolts stash will be raided, so that saves me money on hardware. I may have to buy a few more pieces of plywood, but I think that will be about it.
Oh, my budget goal on the existing play area was $50, and I came in under that. By using scrap materials and shopping for some necessary items at the Dollar Tree and a discount dollar store, I spent only $27.53 cents in the play space – the memories being made there by the children are priceless!
When you look at a piece of junk, don’t label it based upon what it is, use your imagination and give is a label based upon what it can be repurposed into. Doing so is no only good for the environment, it will save you a lot of money and make completing projects far simpler.
Have you made play areas, outdoors toys, or swings for the children on your homestead? Please share you tips and questions in our comments section below.
Happy homesteading, y’all!

Tara lives on a 56 acres farm in the Appalachian Mountains, where she faces homesteading and farming challenges every single day, raising chickens, goats, horses, and tons of vegetables. She’s an expert in all sorts of homesteading skills such as hide tanning, doll making, tree tapping, and many more.
Hi Tara,
I enjoyed the story. Lots of ideas there. However, some pictures of each of the finished projects would have been helpful. I am going to start looking around for items I can use for my little ones. Unfortunately, I am not as imaginative as you are so I may not have as much success as you had. Good luck in your endeavors.