Worm castings, also known as vermicompost or worm manure, and sometimes erroneously called worm “casings”, are the organic waste produced by earthworms as they digest and break down organic matter.
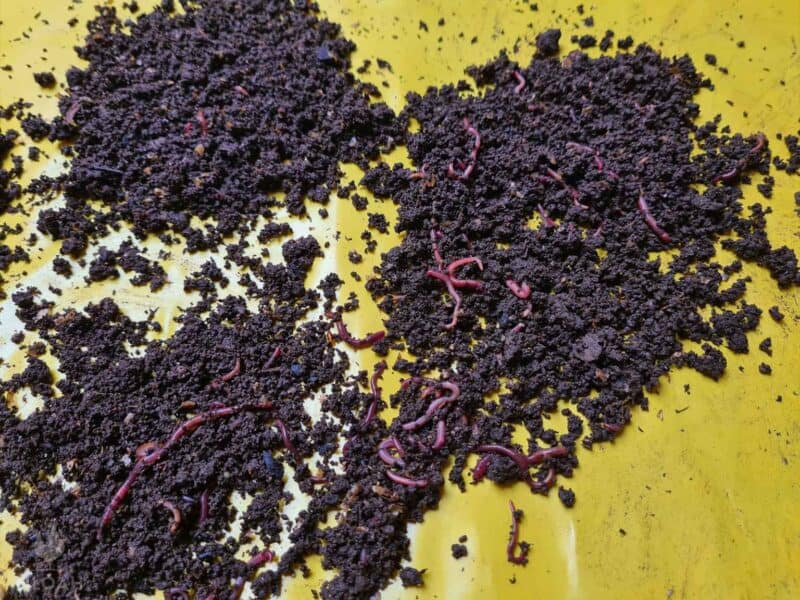
As worms consume their food in the form of decaying plant materials, bacteria, fungi, and other microorganisms, they convert them into a nutrient-rich poop.
This poop is the objective of the whole vermicomposting process, and collecting it is what we are talking about today.
These little pellet-shaped packets are packed with vital nutrients for plants in the form of minerals and helpful bacteria, and also enzymes that further promote health in all kinds of plants.
Castings are an all-natural, nearly odorless, and super eco-friendly fertilizer that will improve nearly every facet of your garden and other plantings; soil structure, growth, root development and more.
You’ll love what these potent little pellets can do for your garden, but you’ve got to know how to collect them while sparing your worms if you want your composting operation to go on.
Without the right techniques, it can take a lot of time, but I can spare you that monotony with 5 proven techniques that will speed up the process. Grab your gloves and let’s get to it.
How Do You Get Worm Castings?
To obtain worm castings, you’ll need earthworms. That’s it. The worms eat, and poop out the castings. Job’s done.
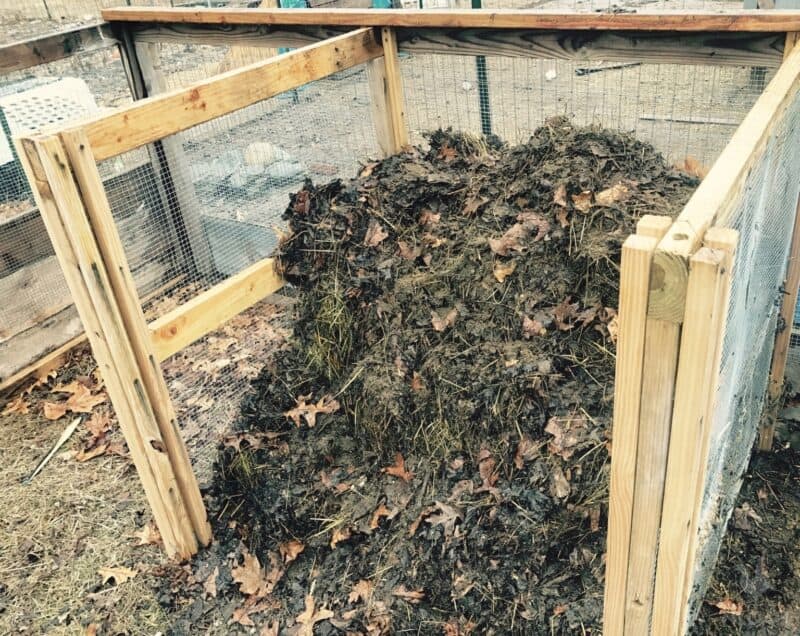
In seriousness, to collect worm castings in an organized way you will need to set up a worm “bin” or a more complicated vermicomposting system.
This involves creating a suitable environment for worms by providing them with soil material and a regular supply of organic waste, such as fruit and vegetable scraps, coffee grounds, and eggshells.
As the worms consume and break down the organic matter, and the bacteria attracted to and created by such matter, they poop out the castings.
Periodic and timely harvesting ensures a continuous supply of nutrient-rich compost for your garden.
Are Worm Castings Difficult to Harvest?
Harvesting worm castings is simple, but not easy if you don’t know a few tricks that I am about to show you.
Consider that you are trying to get the castings, little tiny pods that they are, separated from the worms themselves in the soil. You need those worms to go on living in your vermicompost bins to make more!
So you are either left with laboriously picking the worms out, or sacrificing at least some and probably most of the worms when you use the batch of compost, castings and all, in and around your garden and home.
So it isn’t that they are difficult to harvest, per se, but the logistics of keeping your operation going can be frustrating and time-consuming as I mentioned up above.
But not to worry: the following methods I am about to detail are tried, true and virtually foolproof.
Soon you’ll be able to keep your worms happy and alive, munching away, while you get down to business with their business- that “black gold” poop!
But that is enough of the preamble ramble: let’s get to work wrangling these worms.
5 Foolproof and Easy Ways to Harvest Your Worm Castings
The following methods are my favorite for easily sorting worms from their castings. Each has pros and cons, and each will be more or less attractive based on your budget and objectives.
1. DIY Sifter
Far and away my favorite method for harvesting worm castings is through the use of a DIY, homemade sifter.
In case you didn’t know, there are large, powered devices out there that are used at the commercial level too harvest worm castings from large volumes of vermicompost.
These powered, rotating drums are definitely fast and effective, but they are very, very hard on the worms themselves.
Not a problem if you’re able to buy worms in unlimited quantities, but for the rest of us we probably need to be a little more selective.
You can easily make a DIY, manually powered version at home using some pine furring strips or any other sturdy wood arranged into a frame a couple of inches deep and then lining one side with hardware cloth, mesh or anything else that will just let the worm castings drop through and keep all the other stuff, including the worms, up above.
Then all you’ve got to do is place a catchment tray or bucket, load a little compost and shake shake shake, just like the song says.
It won’t take long at all before you’ll have worm castings pattering to the container below.
Once they stop falling, you can replace the worms and the other matter back into one side of your compost bin or in a separate, temporary holding container.
Easily done, easy to use and easy (and cheap) to make with common materials you probably have lying around right now.
2. Bait the Worms Away
If you don’t care to take a little more time in relocating your worms, or you just don’t like the effort and exertion of using the sifter above, you can use my second favorite technique which is baiting the worms out of the compost so you can relocate them and then get straight to work with the compost, castings and all.
To do this, you just need to use a little bit of bait in the form of worms’ favorite foods.
Just like all living things, worms are highly motivated by food, and whether you’re using red wrigglers for your vermicompost production or some other species, you can depend on melons to get them moving. That’s really all there is to it.
Take a hunk of fresh, succulent melon like watermelon, honeydew, cantaloupe, sugar kiss or any other sweet melon, and then simply set it on the surface on one far end of the compost. What happens next, is borderline magical.
The worms will be drawn to the hunk of melon because it is going to start breeding bacteria and attracting other little tiny creatures that the worms can eat.
Worms are also drawn to moisture, and these moist hunks of melon will create a sticky, sugary ooze on the spot where you placed it that worms just can’t resist.
Worms aren’t too fast of course, and it will take them days or a little more than a week, perhaps two, to reach the hunk of melon depending on how big your compost bin is.
But a little checking will quickly show when they have all gathered.
Once that is done, you can scoop them out and place them in a secondary bin, or else scoop out the compost and use it as needed.
And use your head with this technique too: if you have a very large or long been, consider placing multiple bait stations in strategic areas so worms will always head towards the closest one away from the compost you want to scoop out, or vice versa. This can speed up the process.
Elegant, absolutely cheap, super effective. You’ll love it.
3. Use a Vertical Migration Composter
Vertical migration composters are a special type of vermicomposting bin consisting of tiered, stackable trays that have mesh bottoms, typically large enough to allow your worms to wriggle through them.
In essence, these migration composters form a deeper compost bin that allow worms to move up and down through the soil and to different levels or trays.
This exploits the bait principle we talked about above, and the idea is that you start the compost bin on the lowest tier, with only a little bit of fill, leaving the ones above empty or adding them later.
After the prescribed amount of time when your worms have been very busy cranking out that black gold, you will add more fill or add another tray, and allow the fill to completely fill up the space between the two.
Now, as you add more food to the upper level, the worms will naturally migrate upward to it, leaving the rich, casting-filled lower levels pretty much free of worms.
At this point, you detach the now occupied level and remove the one that is full of the castings to be collected separately or used immediately as needed.
This is another elegant solution for most of us, but one with very literally more moving parts.
Also, it can be difficult to ascertain whether or not the lower levels are still occupied: if the worms have not exhausted the food there, some or even most of them might stay behind rather than migrate upward.
In my experience these work best on a smaller scale. If you are making warm tea on the regular or just strategically using your castings, this is a great option.
4. Repel Worms with a Light Source
We can attract worms with bait, or repel them with light, and this is what this method is all about.
Worms retreat from light, both because it will dry them out from direct heating, and also because they know they are highly visible to predators that will eat them, such as birds and rodents.
This method is about as simple as it gets, and can be used two different ways.
The first way is by placing bright lights over your vermicomposting bin if it is a deeper one; feeling the heat, quite literally, the worms will burrow down for safety and moisture, letting you skim off the upper layer of compost.
Once that is done, you can add more fill and then turn the lights off. Note that for either method, you can also use sunlight.
The second method is to take your compost and then pour it out in a larger tray, leveling it out so it isn’t very deep at all. Keep your rich compost only on about 2/3 of this tray.
On the remaining third, bank up a deeper section of new fill or soil that is deep enough for the worms to escape into and leave the lights on as before. They will instinctively head towards it.
After a little while, collect the leftover, rich compost and then return the worms to your original bin.
When using this technique, it is critical that you use bright, daylight spectrum bulbs but ones that don’t put out too much heat because this can literally roast and kill your worms, especially using the second method.
If you don’t mind springing for them, daylight spectrum LEDs seem to work the very best because they put out relatively little heat but instinctively motivate the worms to head for the hills, or rather for the dirt.
5. Remove Worms by Hand
The last method on this list is my least favorite because it takes so gosh darn long, but it is still a viable, useful one especially if you don’t want to mess around with anything more intricate or if you just have a smaller compost bin.
All you need to do is start digging and sifting for worms before relocating them into a new bin or into a temporary holding container.
You’ll be digging and sifting, grabbing these wriggling little worms that are thrashing, and generally having a good time if you like being bored.
Me? I don’t, and my time is precious so I don’t rely on this method very much at all anymore.
That being said, if you have nothing better to do or rather spend your time actually getting hands-on with your garden chores, this method still totally works.
Just be careful to not harm your worms and make sure your hands are clean because they’re very sensitive to various chemicals that might be on our skin.
Tom has lived and worked on farms and homesteads from the Carolinas to Kentucky and beyond. He is passionate about helping people prepare for tough times by embracing lifestyles of self-sufficiency.